How to Configure and Azure Cloud Service (classic)
Important
Cloud Services (classic) is now deprecated for all customers as of September 1st, 2024. Any existing running deployments will be stopped and shut down by Microsoft and the data will be permanently lost starting October 2024. New deployments should use the new Azure Resource Manager based deployment model Azure Cloud Services (extended support).
You can configure the most commonly used settings for a cloud service in the Azure portal. Or, if you like to update your configuration files directly, download a service configuration file to update, and then upload the updated file and update the cloud service with the configuration changes. Either way, the configuration updates are pushed out to all role instances.
You can also manage the instances of your cloud service roles, or remote desktop into them.
Azure can only ensure 99.95 percent service availability during the configuration updates if you have at least two role instances for every role. That enables one virtual machine to process client requests while the other is being updated. For more information, see Service Level Agreements.
Change a cloud service
After opening the Azure portal, navigate to your cloud service. From here, you manage many aspects of it.
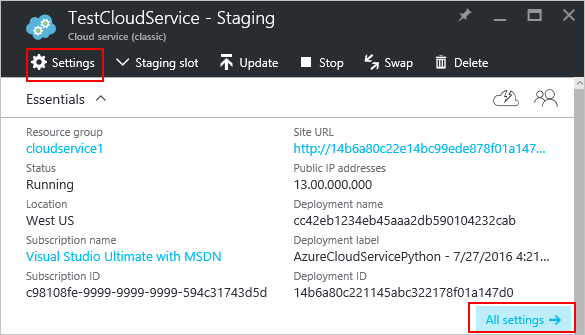
The Settings or All settings links open up Settings where you can change the Properties, change the Configuration, manage the Certificates, set up Alert rules, and manage the Users who have access to this cloud service.
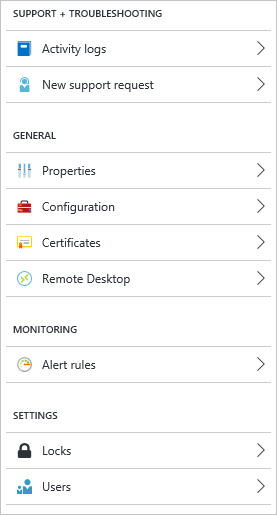
Manage Guest OS version
By default, Azure periodically updates your guest OS to the latest supported image within the OS family that you specified in your service configuration (.cscfg), such as Windows Server 2016.
If you need to target a specific OS version, you can set it in Configuration.

Important
Choosing a specific OS version disables automatic OS updates and makes patching your responsibility. You must ensure that your role instances are receiving updates or you may expose your application to security vulnerabilities.
Monitoring
You can add alerts to your cloud service. Select Settings > Alert Rules > Add alert.
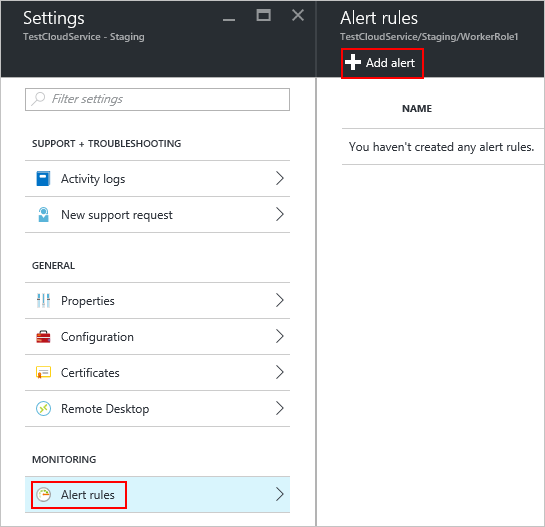
From here, you can set up an alert. With the Metric drop-down box, you can set up an alert for the following types of data.
- Disk read
- Disk write
- Network in
- Network out
- CPU percentage

Configure monitoring from a metric tile
Instead of using Settings > Alert Rules, you can select on one of the metric tiles in the Monitoring section of the cloud service.
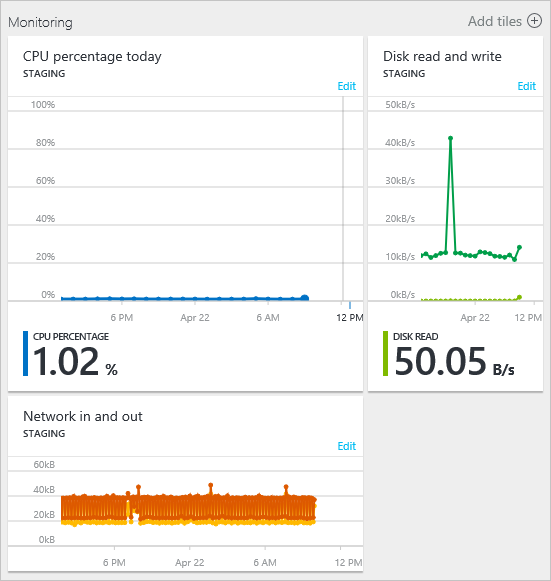
From here you can customize the chart used with the tile, or add an alert rule.
Reboot, reimage, or remote desktop
You can set up remote desktop through the Azure portal (set up remote desktop), PowerShell, or through Visual Studio.
To reboot, reimage, or remote into a Cloud Service, select the cloud service instance.
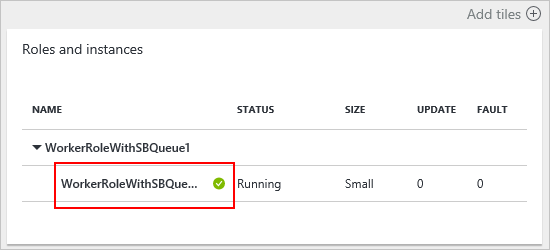
You can then initiate a remote desktop connection, remotely reboot the instance, or remotely reimage (start with a fresh image) the instance.
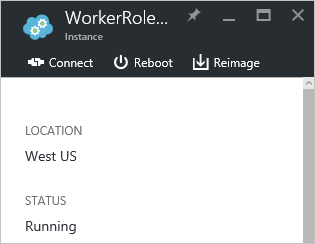
Reconfigure your .cscfg
You may need to reconfigure your cloud service through the service config (cscfg) file. First you need to download your .cscfg file, modify it, then upload it.
Select on the Settings icon or the All settings link to open up Settings.

Select on the Configuration item.

Select on the Download button.

After you update the service configuration file, upload and apply the configuration updates:

Select the .cscfg file and select OK.
Next steps
- Learn how to deploy a cloud service.
- Configure a custom domain name.
- Manage your cloud service.
- Configure TLS/SSL certificates.