Override HTTP behavior using the Azure CDN from Edgio Premium rules engine
Important
This is a feature of Azure CDN Premium from Edgio only, to configure rules on Azure CDN from Microsoft please use the Standard rules engine. Advanced rules are not available for Azure CDN from Akamai. For a full comparison of CDN features, see Azure CDN product features.
Overview
The Azure CDN rules engine allows you to customize how HTTP requests are handled. For example, blocking the delivery of certain content types, defining a caching policy, or modifying an HTTP header. This tutorial demonstrates how to create a rule that changes the caching behavior of CDN assets. For more information about the rules engine syntax, see Azure CDN rules engine reference.
Access
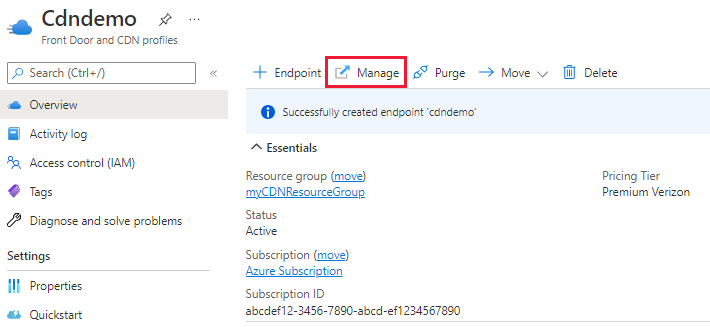
To access the rules engine, you must first select Manage from the top of the CDN profile page to access the Azure CDN management page. Depending on whether your endpoint is optimized for dynamic site acceleration (DSA), you then access the rules engine with the set of rules appropriate for your type of endpoint:
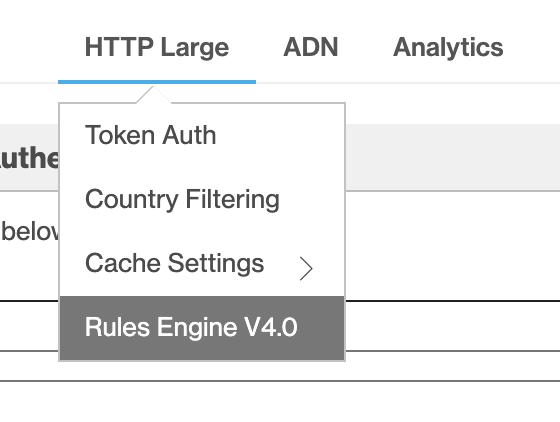
Endpoints optimized for general web delivery or other non-DSA optimization:
Select the HTTP Large tab, then select Rules Engine.
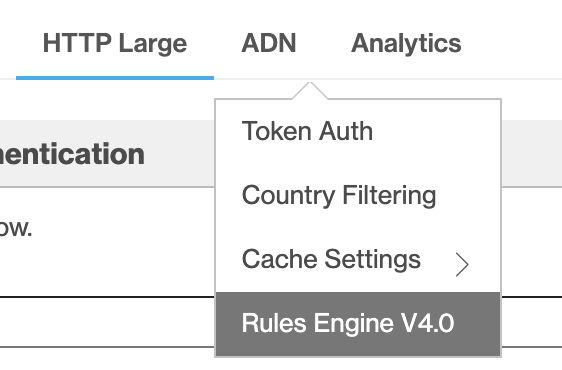
Endpoints optimized for DSA:
Select the ADN tab, then select Rules Engine.
ADN is a term used by Edgio to specify DSA content. Any rules you create here are ignored by any endpoints in your profile that are not optimized for DSA.
Tutorial
From the CDN profile page, select Manage to open the CDN management portal.
Select the HTTP Large tab, then select Rules Engine.
Select + New to create a new draft policy.
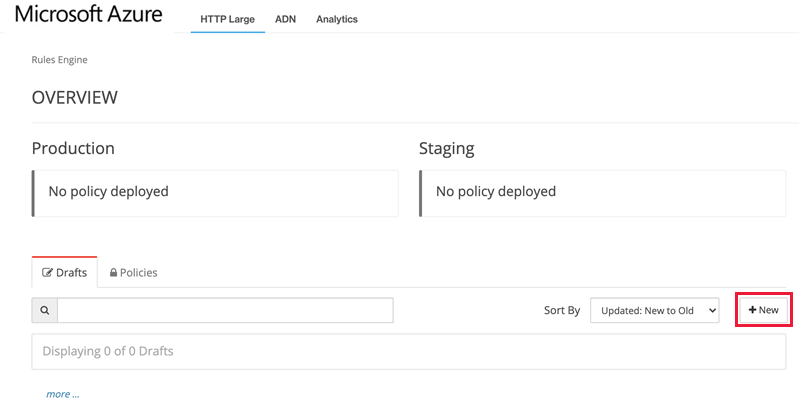
Give the policy a name. Select Continue, then select + Rule.

Important
The order in which multiple rules are listed affects how they are handled. A subsequent rule might override the actions specified by a previous rule. For example, if you have a rule that allows access to a resource based on a request property and a rule that denies access to all requests, the second rule overrides the first one. Rules will override earlier rules only if they interact with the same properties.
Enter a name in the Name / Description textbox.
Select the + button and then select Match or Select First Match for the match logic. The difference between the two is described in Request Identification.
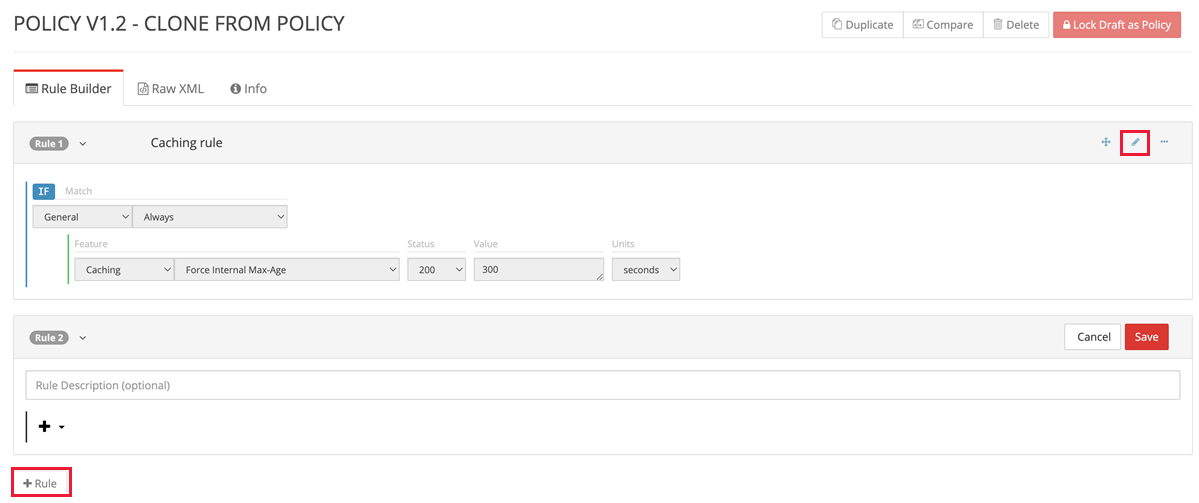
Identify the type of requests the rule applies to. Use the default match condition, Always.

Note
Multiple match conditions are available in the dropdown list. For information about the currently selected match condition, select the blue informational icon to its left.
For a detailed list of conditional expressions, see Rules engine conditional expressions.
For a detailed list of match conditions, see Rules engine match conditions.
To add a new feature, select the + button in the conditional statement.

From the category dropdown list, select Caching. Then from the feature dropdown list, select Force Internal Max-Age. In the text box enter the value 300. Leave the rest of the settings as default and select Save to complete the configuration of the rule.
Note
Multiple features are available in the dropdown list. For information about the currently selected feature, select the blue informational icon to its left.
For Force Internal Max-Age, the asset's
Cache-ControlandExpiresheaders are overridden to control when the CDN edge node refreshes the asset from the origin. In this example, the CDN edge node caches the asset for 300 seconds, or 5 minutes, before it refreshes the asset from its origin.For a detailed list of features, see Rules engine features.
Select Lock Draft as Policy. Once you lock the draft into a policy, you won't be able to add or update any rules within that policy.

Select Deploy Request.

If this CDN profile is new with no previous rules or production traffic, you can select the environment as Production in the dropdown list menu. Enter a description of the environment and then select Create Deploy Request.

Note
Once the policy has been deployed, it will take about 30 mins for it propagate. If you want to add or update more rules, you'll need to duplicate the current rule and deploy the new policy.
Add rules to an existing policy deployed in production
Select the policy that is deployed in production.
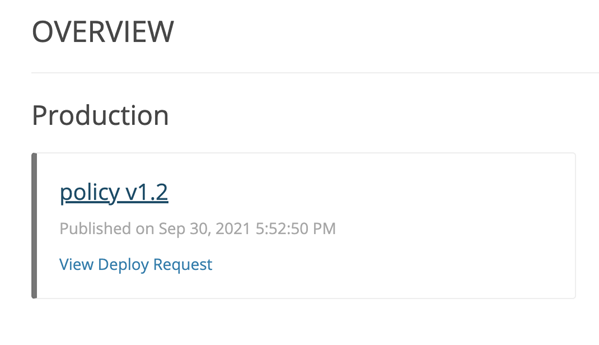
Select Duplicate to clone the existing policy in production.

Select the pencil icon to edit an existing rule or select + Rule to add a new rule to the policy.
Once you're happy with the updates, follow steps 10-12 in the last section to deploy the policy.
Rules Engine staging environment
The staging environment provides a sandbox where you can test the new CDN configuration end to end without affecting the production environment. This configuration allows you to replicate traffic flow through your staging network to an origin server.
The staging environment is designed for functional testing and is at a smaller scale than the production CDN environment. Therefore, you shouldn't use this environment for scale, high volume or throughput testing.
Traffic should be kept under 50 Mbps or 500 requests per second.
Changes made to the staging environment will not affect your live site environment.
Testing HTTPS traffic using the staging environment will result in a TLS certificate mismatch.
Testing mechanism:
After locking a draft into a policy, select Deploy Request. Select the environment as Staging and then select Create Deploy Request.
Edit your local host file to create an A record for your endpoint or custom domain.
Check the test asset for the custom domain in the browser and proceed without using HTTPS.
Note
Once a policy is deployed in the staging environment, it will take 15 minutes to propagate.
