Tutorials: Monitor alerts and metrics for your business continuity estate
This tutorial describes how Azure Business Continuity Center allows you to view alerts across Azure Backup and Azure Site Recovery, configure notifications, view metrics, and take appropriate action.
Monitor alerts
Azure Business Continuity Center allows you to monitor alerts that are raised for your critical events in your backup and disaster recovery events. You can view any built-in alerts that were fired by solutions, such as Azure Backup or Azure Site Recovery, and alerts fired based on custom alert rules on metrics.
To monitor the alerts, follow these steps:
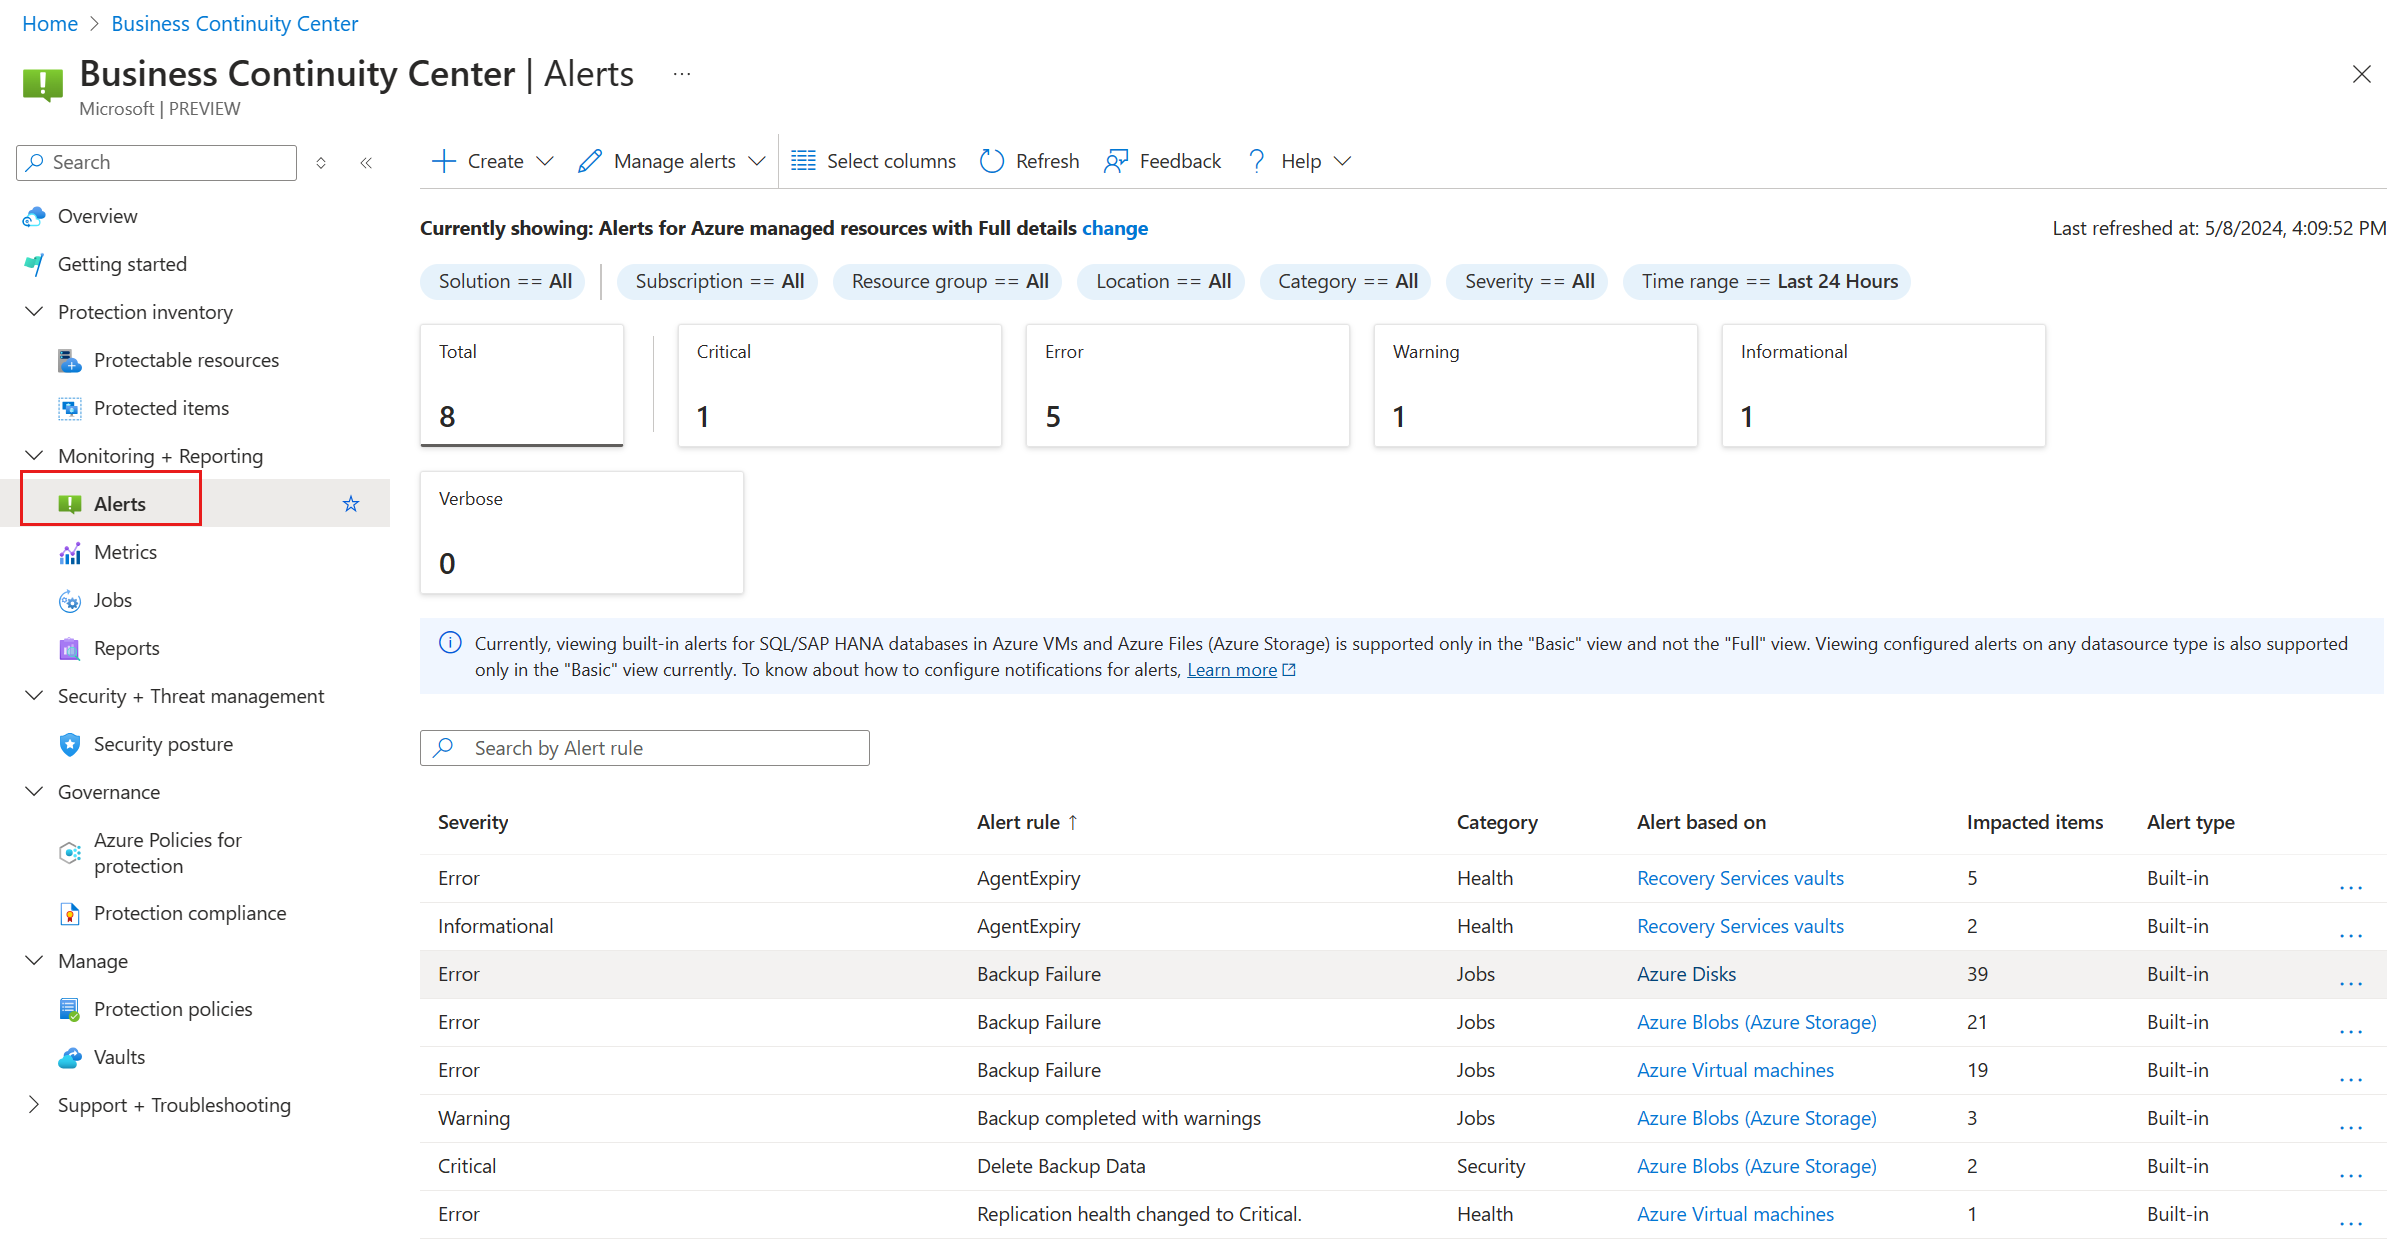
On Business Continuity Center, go to Monitoring + Reporting > Alerts.
The count of all alert rules appears that have at least one or more fired alerts in the selected time range.
On Alerts, filter the list by severity of alert, category of alert, time range (up to last 15 days), and other parameters.
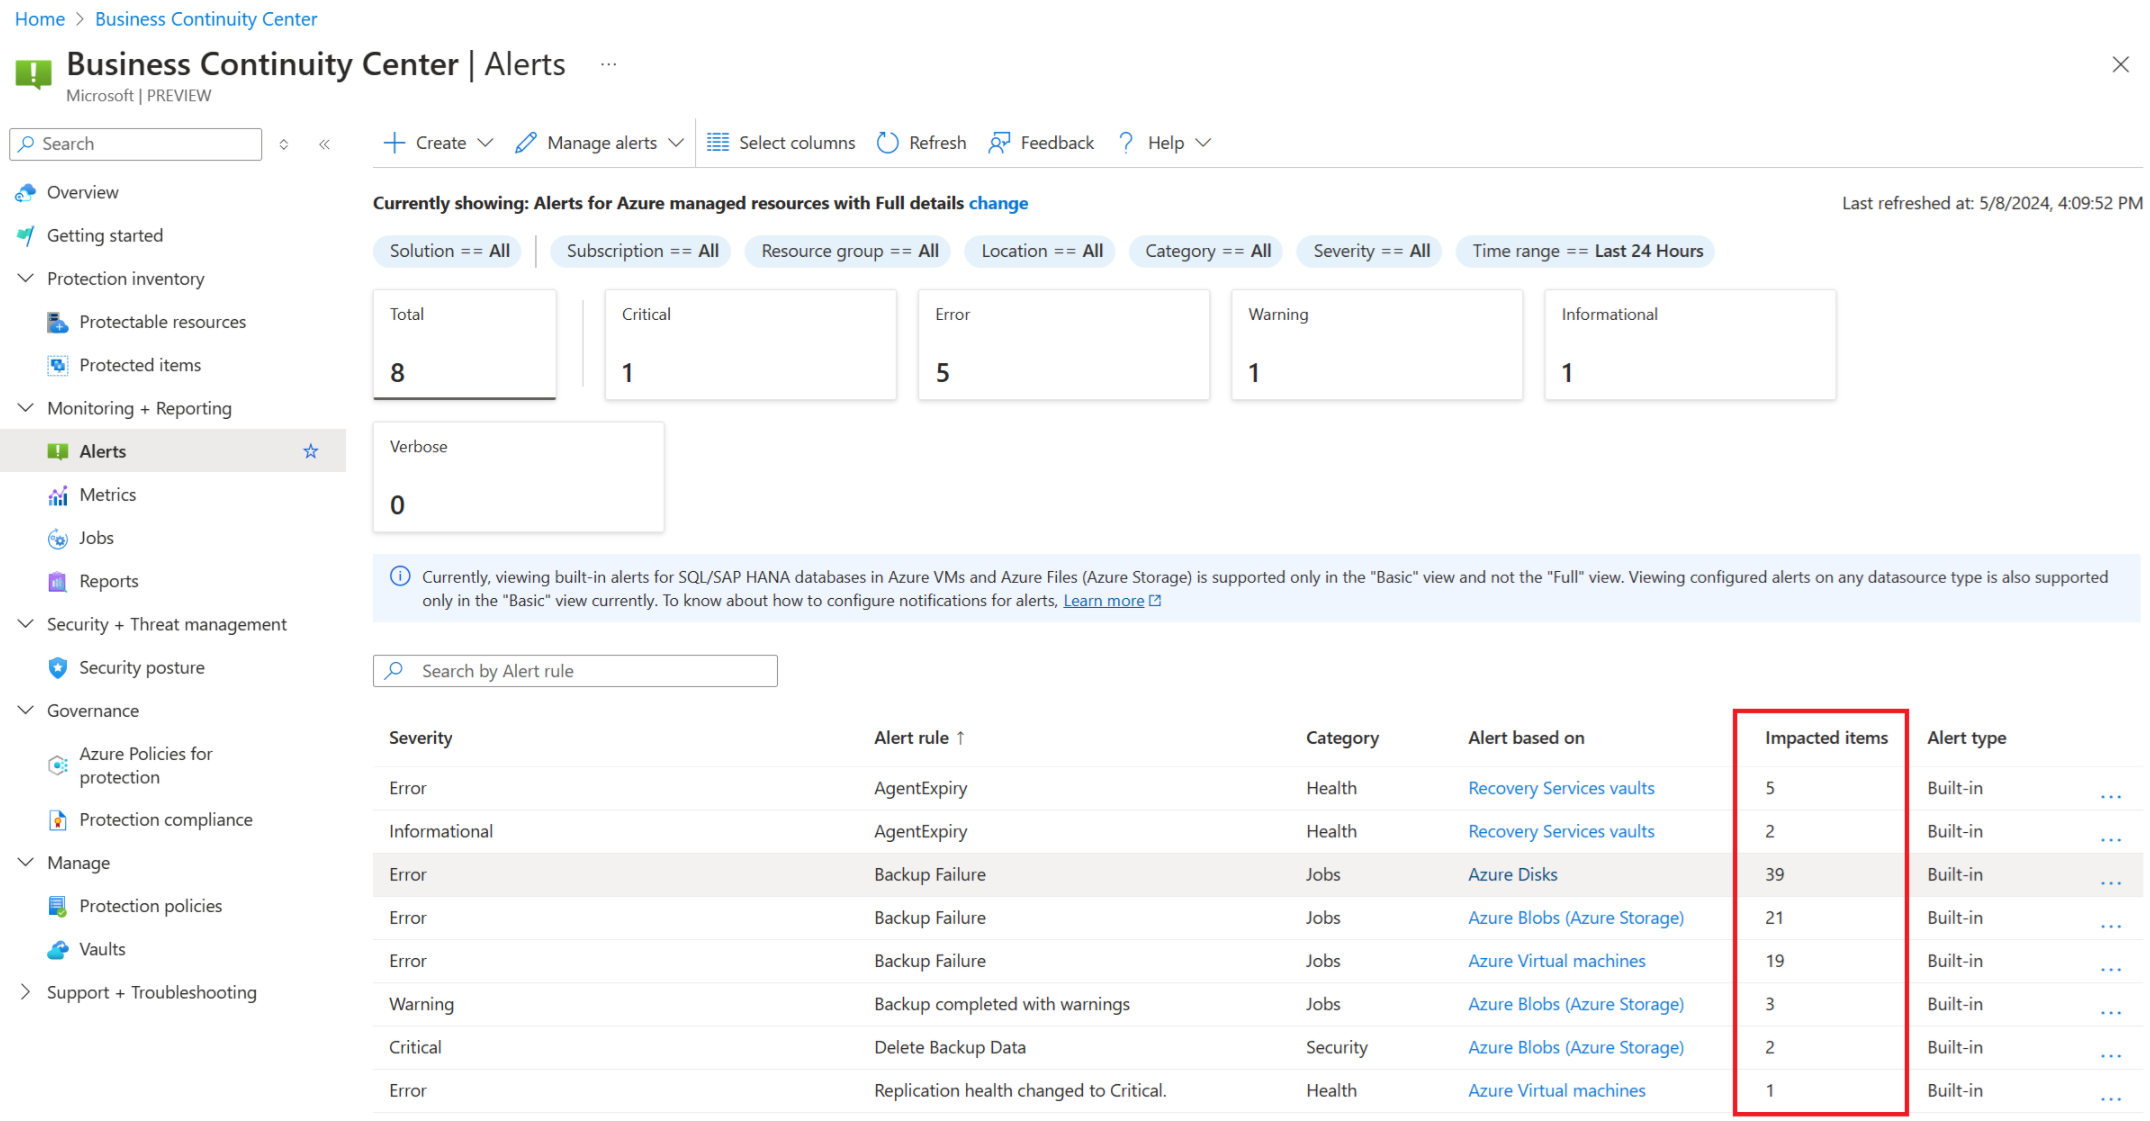
The Impacted Items count in the grid shows the number of resources on which an alert corresponding to that alert rule was fired. To view the impacted items, select View impacted items in the context menu to view all alerts that were triggered due to that alert rule.
You can then review each alert and take appropriate action.
Configure notifications
To route alerts to the notification channels, create an alert processing rule and an action group. An alert processing rule is a rule that specifies which alerts should be routed to a particular notification channel, and the action group represents the notification channel.
Note
Any action group supported by Azure Monitor (for example, email, webhooks, functions, logic apps, etc.) are supported for the backup and disaster recovery alerts also.
To configure email notifications for your alerts, follow these steps:
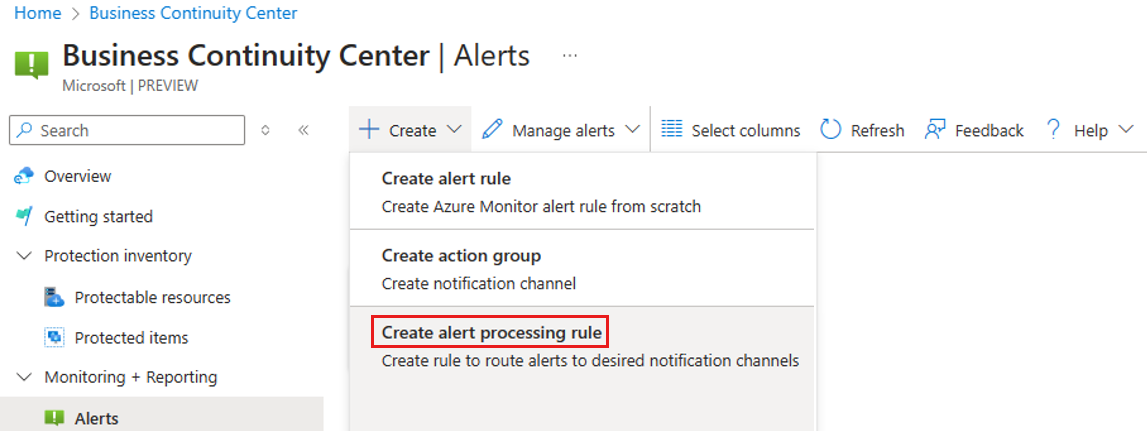
Go to Business Continuity Center > Monitoring + Reporting > Alerts > + Create, and then select Create Alert Processing Rule.
Under Scope, select scope of the alert processing rule, and then apply the rule for all the resources in a subscription.
You can make other customizations to the scope by applying filters. For example, generating notification for alert of a certain severity, generating notifications only for selected alert rules, etc.
On Rule settings, select Apply action group and Create action group (or use an existing one). It is the destination to which the notification for an alert should be sent. For example, an email address.
To create an action group, on the Basics tab, select the name of the action group, the subscription, and the resource group under which it must be created.
On the Notifications tab, select the destination of the notification as Email, SMS Message, or Push/ Voice, and then enter the recipient's email ID and other required details.
Select Review+Create > Create to deploy the action group. The creation of the action group leads you back to the alert processing rule creation. The created action group appears in the Rule settings page.
On the Scheduling tab, select Always.
On the Details tab, specify the subscription, resource group and name of the alert processing rule being created.
Add Tags if needed and select Review + Create > Create. The alert processing rule will be active in a few minutes.
View metrics
You can use Azure Business Continuity Center to view built-in metrics for business continuity scenarios, and enable alerts based on these metric values.
Note
Currently, only metrics for Azure Backup are supported (Backup Health Events and Restore Health Events). Learn more about the supported metrics and their definitions.
To view metrics, follow these steps:
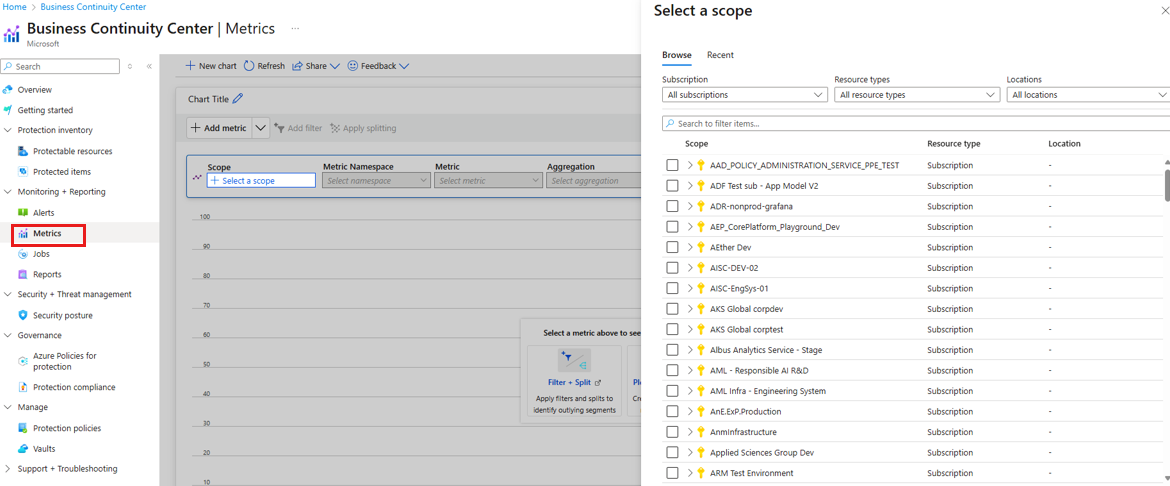
Go to Business Continuity Center > Monitoring + Reporting > Metrics to open the Azure Monitor metrics explorer.
On Metrics, select the resource(s) for which you want to see metrics. For example, in Azure Backup scenarios, you have to choose a vault (or a group of vaults in a subscription and region).
Select the metric you want to view, for example, Backup Health events.
Use the filters to further see the metric values at lower levels of granularity, for example, a particular protected item in the vault.
To create alert rules based on the value of the metric, select New Alert Rule at the top of the metrics chart, which leads you to the metric alert rules creation experience. Learn more about supported metric alert scenarios.


