Back up Azure Local virtual machines with Azure Backup Server
This article describes how to back up virtual machines running on Azure Local, versions 23 H2 and 22 H2, using Microsoft Azure Backup Server (MABS).
Supported scenarios
MABS can back up Azure Local virtual machines in the following scenarios:
Azure Local Host: Back up and recover System State/BMR of the Azure Local host. The MABS protection agent must be installed on the host.
Virtual machines in cluster with local or direct storage: Back up guest virtual machines in a cluster that has local or directly attached storage. For example, a hard drive, a storage area network (SAN) device, or a network attached storage (NAS) device.
Virtual machines in a cluster with CSV storage: Back up guest virtual machines hosted on an Azure Local instance with Cluster Shared Volume (CSV) storage. The MABS protection agent is installed on each cluster node.
VM Move within a cluster: When VMs are moved within a stretched/normal cluster, MABS continues to protect the virtual machines as long as the MABS protection agent is installed on the Azure Local host. The way in which MABS protects the virtual machines depends on the type of live migration involved. With a VM Move within a cluster, MABS detects the migration, and backs up the virtual machine from the new cluster node without any requirement for user intervention. Because the storage location hasn't changed, MABS continues with express full backups.
VM Move to a different stretched/normal cluster: VM Move to a different stretched/normal cluster is not supported.
Arc VMs: Arc VMs add fabric management capabilities in addition to Arc-enabled servers. These allow IT admins to create, modify, delete, and assign permissions and roles to app owners, thereby enabling self-service VM management. Recovery of Arc VMs is supported in a limited capacity in Azure Local.
The following table lists the various levels of backup and restore capabilities for Azure Arc VMs:
Protection level Recovery location Description Guest-level backups and recovery (which require an agent in the guest OS) Work as expected. Host-level backups Work as expected. Host-level recovery Recovery to the original VM instance Recovery to the original VMs works as expected. Alternate location recovery (ALR) Recovery to the ALR is supported in a limited way as the ALR recovers to a Hyper-V VM. Currently, conversion of Hyper-V VM to an Arc VM isn't supported.
Learn more about the supported scenarios for MABS V3 UR2 and later.
Host versus guest backup
MABS can do a host or guest-level backup of VMs on Azure Local. At the host level, the MABS protection agent is installed on the Azure Local host machine or cluster and protects the entire VMs and data files running on that host. At the guest level, the agent is installed on each virtual machine and protects the workload present on that machine.
Both methods have pros and cons:
Host-level backups are flexible because they work regardless of the type of OS running on the guest machines and don't require the installation of the MABS protection agent on each VM. If you deploy host level backup, you can recover an entire virtual machine, or files and folders (item-level recovery).
Guest-level backup is useful if you want to protect specific workloads running on a virtual machine. At host-level you can recover an entire VM or specific files, but it won't provide recovery in the context of a specific application. For example, to recover specific SharePoint items from a backed-up VM, you should do guest-level backup of that VM. Use guest-level backup if you want to protect data stored on passthrough disks. Passthrough allows the virtual machine to directly access the storage device and doesn't store virtual volume data in a VHD file.
Note
Passthrough disks aren't supported in Azure Local.
Backup prerequisites
These are the prerequisites for backing up virtual machines with MABS:
| Prerequisite | Details |
|---|---|
| MABS prerequisites |
|
| VM |
|
| Linux prerequisites |
|
Back up virtual machines
Set up your MABS server and your storage. When setting up your storage, use these storage capacity guidelines.
- Average virtual machine size - 100 GB
- Number of virtual machines per MABS server - 800
- Total size of 800 VMs - 80 TB
- Required space for backup storage - 80 TB
Set up the MABS protection agent on the server or each cluster node.
Note
If Azure Benefits is enabled on the Azure VM, disable the Firewall rule
AzsHci-ImdsAttestation-Block-TCP-Into allow the Agent WMI Queries. To disable the Firewall, run the following cmdlet from PowerShell prompt on each node of the cluster:Get-ClusterNode | % {$session = New-PsSession -ComputerName $_ ; Invoke-Command -Session $session -ScriptBlock {$env:COMPUTERNAME ; Disable-NetFirewallRule AzsHci-ImdsAttestation-Block-TCP-In }}To deploy the agent, choose one of the following methods:
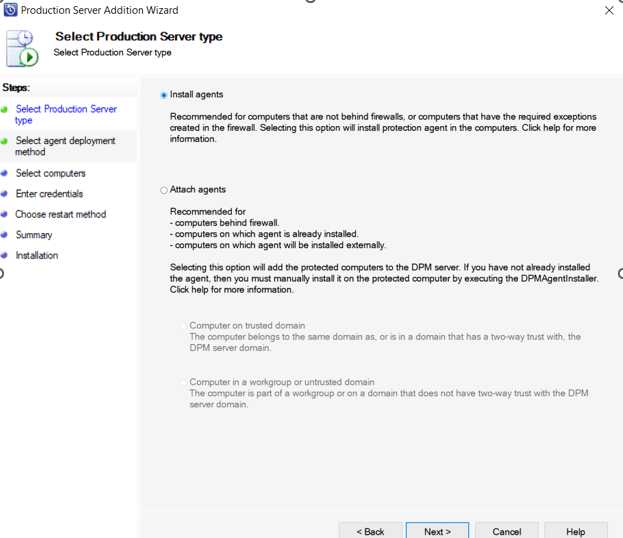
- Attach agents: Select an agent that's already installed.
- Install agent: If you don't have the agent installed:
On the MABS Administrator console, select Protection > Create protection group to open the Create New Protection Group wizard.
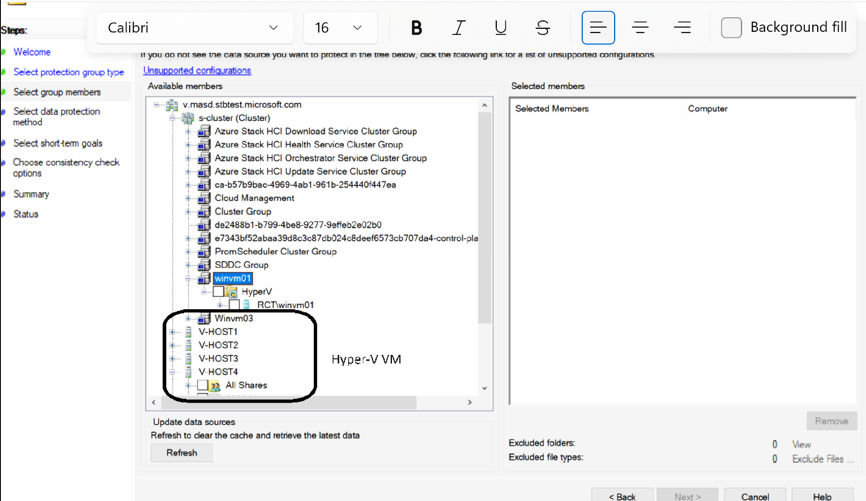
On the Select Group Members page, select the VMs you want to protect from the host servers on which they're located. We recommend that you put all VMs that will have the same protection policy into one protection group. To make efficient use of space, enable colocation. Colocation allows you to locate data from different protection groups on the same disk or tape storage, so that multiple data sources have a single replica and recovery point volume.
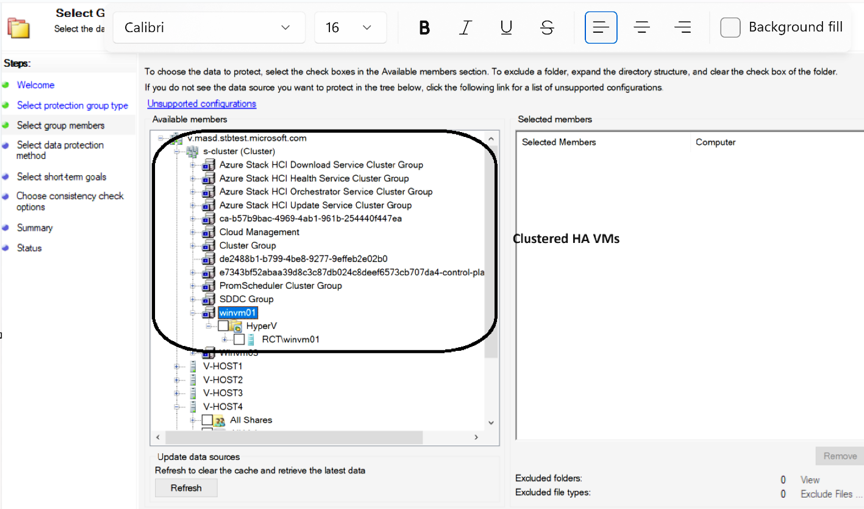
During VM selection, you can choose one of the following VM type:
On the Select Data Protection Method page, specify a protection group name. Select I want short-term protection using Disk and select I want online protection if you want to back up data to Azure using the Azure Backup service.
On Specify Short-Term Goals > Retention range, specify how long you want to retain disk data. In Synchronization frequency, specify how often incremental backups of the data should run. Alternatively, instead of selecting an interval for incremental backups you can enable Just before a recovery point. With this setting enabled, MABS will run an express full backup just before each scheduled recovery point.
Note
If you're protecting application workloads, recovery points are created in accordance with Synchronization frequency, provided the application supports incremental backups. If it doesn't, then MABS runs an express full backup, instead of an incremental backup, and creates recovery points in accordance with the express backup schedule.
The backup process doesn't back up the checkpoints associated with VMs.In the Review disk allocation page, review the storage pool disk space allocated for the protection group.
Total Data size is the size of the data you want to back up, and Disk space to be provisioned on MABS is the space that MABS recommends for the protection group. MABS chooses the ideal backup volume, based on the settings. However, you can edit the backup volume choices in the Disk allocation details. For the workloads, select the preferred storage in the dropdown menu. Your edits change the values for Total Storage and Free Storage in the Available Disk Storage pane. Underprovisioned space is the amount of storage MABS suggests you add to the volume, to continue with backups smoothly in the future.
On the Choose Replica Creation Method page, specify how the initial replication of data in the protection group will be performed. If you select to Automatically replicate over the network, we recommended you choose an off-peak time. For large amounts of data or less than optimal network conditions, consider selecting Manually, which requires replicating the data offline using removable media.
On the Consistency Check Options page, select how you want to automate consistency checks. You can enable a check to run only when replica data becomes inconsistent, or according to a schedule. If you don't want to configure automatic consistency checking, you can run a manual check at any time by right-clicking the protection group and selecting Perform Consistency Check.
After you create the protection group, initial replication of the data occurs in accordance with the method you selected. After initial replication, each backup takes place in line with the protection group settings. If you need to recover backed up data, note the following:
Back up replica virtual machines
If MABS is running on Windows Server 2012 R2 or later, then you can back up replica virtual machines. This is useful for several reasons:
Reduces the impact of backups on the running workload - Taking a backup of a virtual machine incurs some overhead as a snapshot is created. When you offload the backup process to a secondary remote site, the running workload is no longer affected by the backup operation. This is applicable only to deployments where the backup copy is stored on a remote site. For example, you might take daily backups and store data locally to ensure quick restore times, but take monthly or quarterly backups from replica virtual machines stored remotely for long-term retention.
Saves bandwidth - In a typical remote branch office/headquarters deployment you need an appropriate amount of provisioned bandwidth to transfer backup data between sites. If you create a replication and failover strategy, in addition to your data backup strategy, you can reduce the amount of redundant data sent over the network. By backing up the replica virtual machine data rather than the primary, you save the overhead of sending the backed-up data over the network.
Enables hoster backup - You can use a hosted datacenter as a replica site, with no need for a secondary datacenter. In this case, the hoster SLA requires consistent backup of replica virtual machines.
A replica virtual machine is turned off until a failover is initiated, and VSS can't guarantee an application-consistent backup for a replica virtual machine. So the backup of a replica virtual machine will be crash-consistent only. If crash-consistency can't be guaranteed, then the backup will fail and this might occur in a number of conditions:
The replica virtual machine isn't healthy and is in a critical state.
The replica virtual machine is resynchronizing (in the Resynchronization in Progress or Resynchronization Required state).
Initial replication between the primary and secondary site is in progress or pending for the virtual machine.
.hrl logs are being applied to the replica virtual machine, or a previous action to apply the .hrl logs on the virtual disk failed, or was canceled or interrupted.
Migration or failover of the replica virtual machine is in progress.
Recover backed up virtual machines
When you can recover a backed up virtual machine, you use the Recovery wizard to select the virtual machine and the specific recovery point. To open the Recovery Wizard and recover a virtual machine:
In the MABS Administrator console, type the name of the VM, or expand the list of protected items, navigate to All Protected HyperV Data, and select the VM you want to recover.
Note
- All the Clustered HA VMs are recovered by selecting these Virtual machines under the cluster.
- Both Hyper-V and Clustered VMs are restored as Hyper-V Virtual Machines.
In the Recovery points for pane, on the calendar, select any date to see the recovery points available. Then in the Path pane, select the recovery point you want to use in the Recovery wizard.
From the Actions menu, select Recover to open the Recovery Wizard.
The VM and recovery point you selected appear in the Review Recovery Selection screen. Select Next.
In the Select Recovery Type screen, select where you want to restore the data and then select Next.
Recover to original instance: When you recover to the original instance, the original VHD and all associated checkpoints are deleted. MABS recovers the VHD and other configuration files to the original location using Hyper-V VSS writer. At the end of the recovery process, virtual machines are still highly available. The resource group must be present for recovery. If it isn't available, recover to an alternate location and then make the virtual machine highly available.
Recover as virtual machine to any host: MABS supports alternate location recovery (ALR), which provides a seamless recovery of a protected Azure Local virtual machine to a different host within the same cluster, independent of processor architecture. Azure Local virtual machines that are recovered to a cluster node won't be highly available. If you choose this option, the Recovery Wizard presents you with an additional screen for identifying the destination and destination path.
Note
- There's limited support for Alternate location recovery (ALR) for Arc VMs. The VM is recovered as a Hyper-V VM, instead of an Arc VM. Currently, conversion of Hyper-V VMs to Arc VMs isn't supported once you create them.
- If you select the original host, the behavior is the same as Recover to original instance. The original VHD and all associated checkpoints will be deleted.
Copy to a network folder: MABS supports item-level recovery (ILR), which allows you to do item-level recovery of files, folders, volumes, and virtual hard disks (VHDs) from a host-level backup of Azure Local virtual machines to a network share or a volume on a MABS protected server. The MABS protection agent doesn't have to be installed inside the guest to perform item-level recovery. If you choose this option, the Recovery Wizard presents you with an additional screen for identifying the destination and destination path.
In Specify Recovery Options, configure the recovery options and select Next:
- If you are recovering a VM over low bandwidth, select Modify to enable Network bandwidth usage throttling. After turning on the throttling option, you can specify the amount of bandwidth you want to make available and the time when that bandwidth is available.
- Select Enable SAN based recovery using hardware snapshots if you've configured your network.
- Select Send an e-mail when the recovery completes and then provide the email addresses, if you want email notifications sent once the recovery process completes.
In the Summary screen, make sure all details are correct. If the details aren't correct, or you want to make a change, select Back. If you're satisfied with the settings, select Recover to start the recovery process.
The Recovery Status screen provides information about the recovery job.


