Add hosts to a multiple-host SAP HANA system using application volume group for SAP HANA
Building a multiple-host SAP HANA database always starts with creating a volume group for the first host. To begin, you must create the first host in an SAP HANA multiple-host setup (see Deploy the first SAP HANA host). After that, you can add additional HANA hosts by following steps in this article.
Important
SAP recommends that you size the HANA shared volume to 1 x RAM of a HANA host for every four SAP HANA hosts of a multiple-host SAP HANA database. You might need to adjust the size for the shared volume you created with the initial host to adapt for the required capacity.
Steps
From your NetApp account, select Application volume groups, and select +Add Group. In Deployment Type, select SAP HANA then Next.
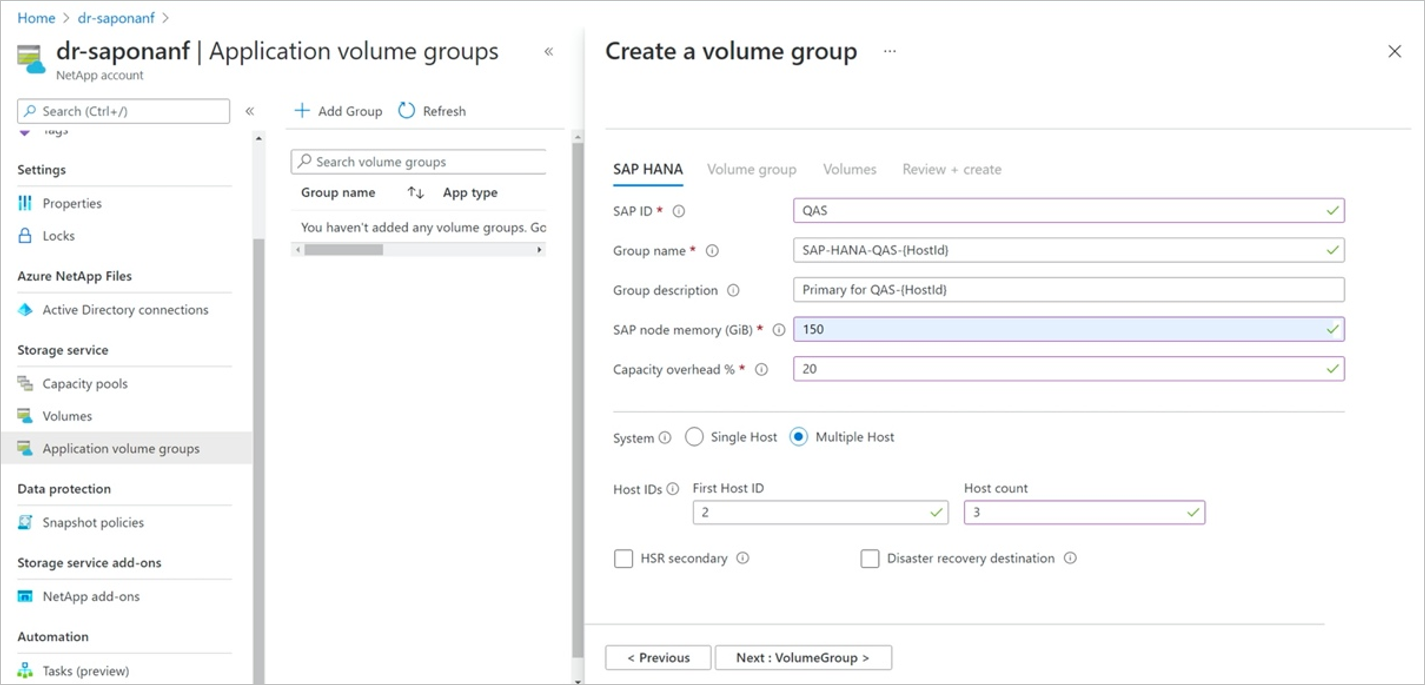
In the SAP HANA tab for adding a volume group, specify the following information:
- SAP ID (SID):
The three alphanumeric-character SAP HANA system identifier. - Group name:
The volume group name. For a multiple-host SAP HANA, each host creates its own group.
In the example screenshot below, the group nameSAP-HANA-SH9-{HostId}is a generic name. The corresponding numeric host ID for each host you add replaces{HostId}. Also, the numeric host ID for the volume group description replaces{HostId}. If{HostId}isn't specified, it's appended to the end for both the group name and description. - SAP node memory:
This value defines the size of the SAP HANA database on the host and used to calculate the required volume size and throughput. - Capacity overhead (%):
When you use snapshots for data protection, you need to plan for extra capacity. This field adds a size (%) for the data volume.
You can estimate this value by using"change rate per day" X "number of days retention". - Multiple-host:
Select this option to add more hosts to a multiple-host HANA. - First host ID:
Specify the number of the first host you want to add. This value is typically "2" if you're adding hosts for the first time. - Host count:
Specify the number of hosts you want to add to the multiple-host setup.
Select Next: Volume Group.
- SAP ID (SID):
In the Volume group tab, provide identical input as you did when you created the first HANA host.
Select Next and continue through the Protocol and Tags sections, providing the same input as the first HANA host. (See Step 4 through Step 6 in Deploy the first SAP HANA host.)
Important
The options for this procedure differ if you've registered for the Application volume group for SAP HANA extension 1 preview. Select the correct tab for your configuration. To take advantage of the feature, you must register for extension 1.
Select Next: Volumes when you reach the end of the sections.
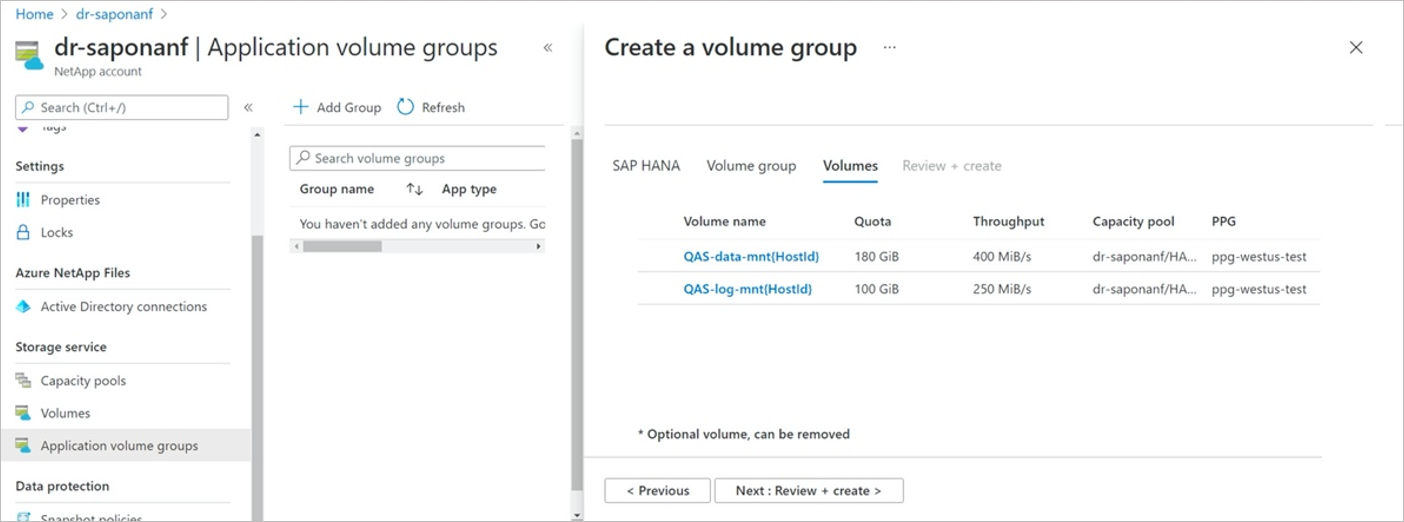
For hosts that you add, only the data and the log volumes are created. The Volumes page displays the two volumes in a generic form, using the
{HostId}as a placeholder. This process simplifies the workflow, because changes are made only once for the data and log volumes for all the hosts that are being created.Note
SAP HANA allows you to add different compute volume types to a multiple-host setup. If you use this setup, you should add only one host for the same compute type at one time.
Select Next: Review + Create.
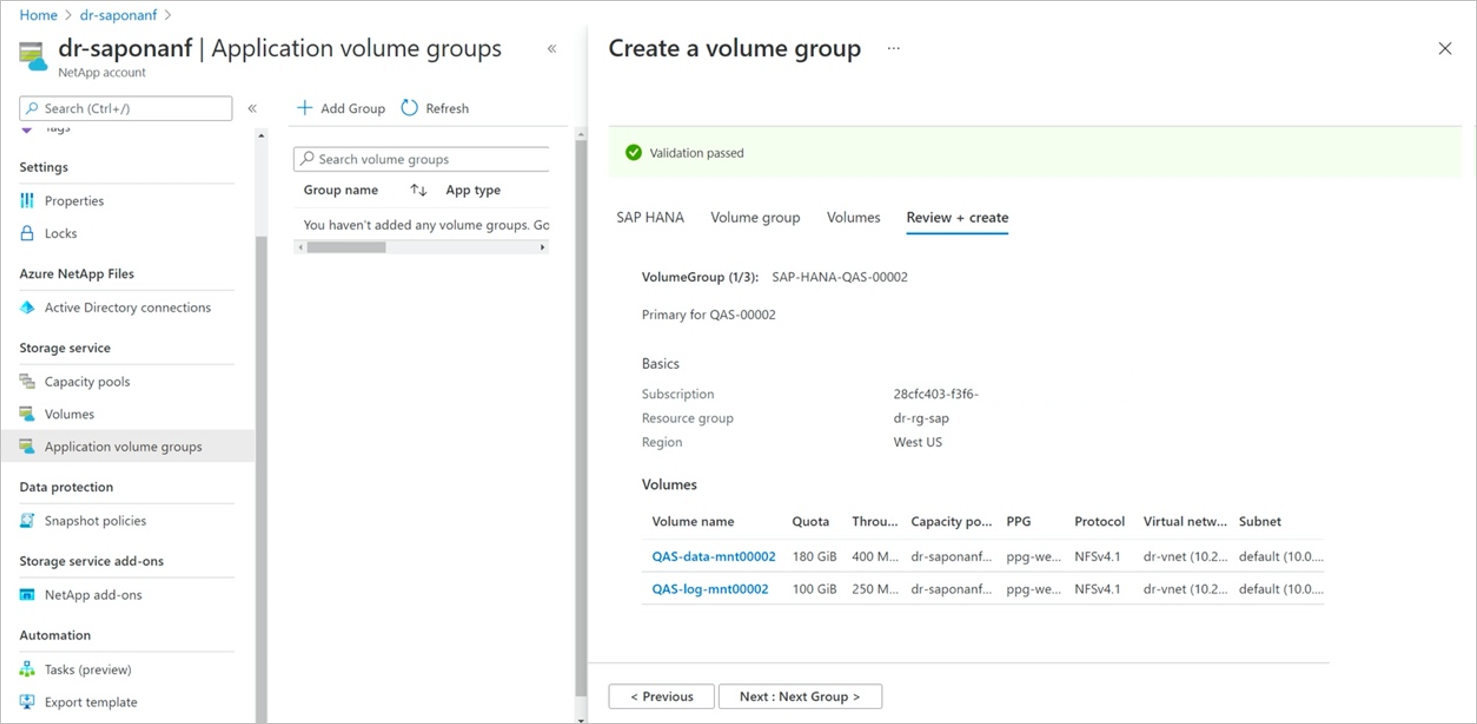
In the Review + Create tab, the
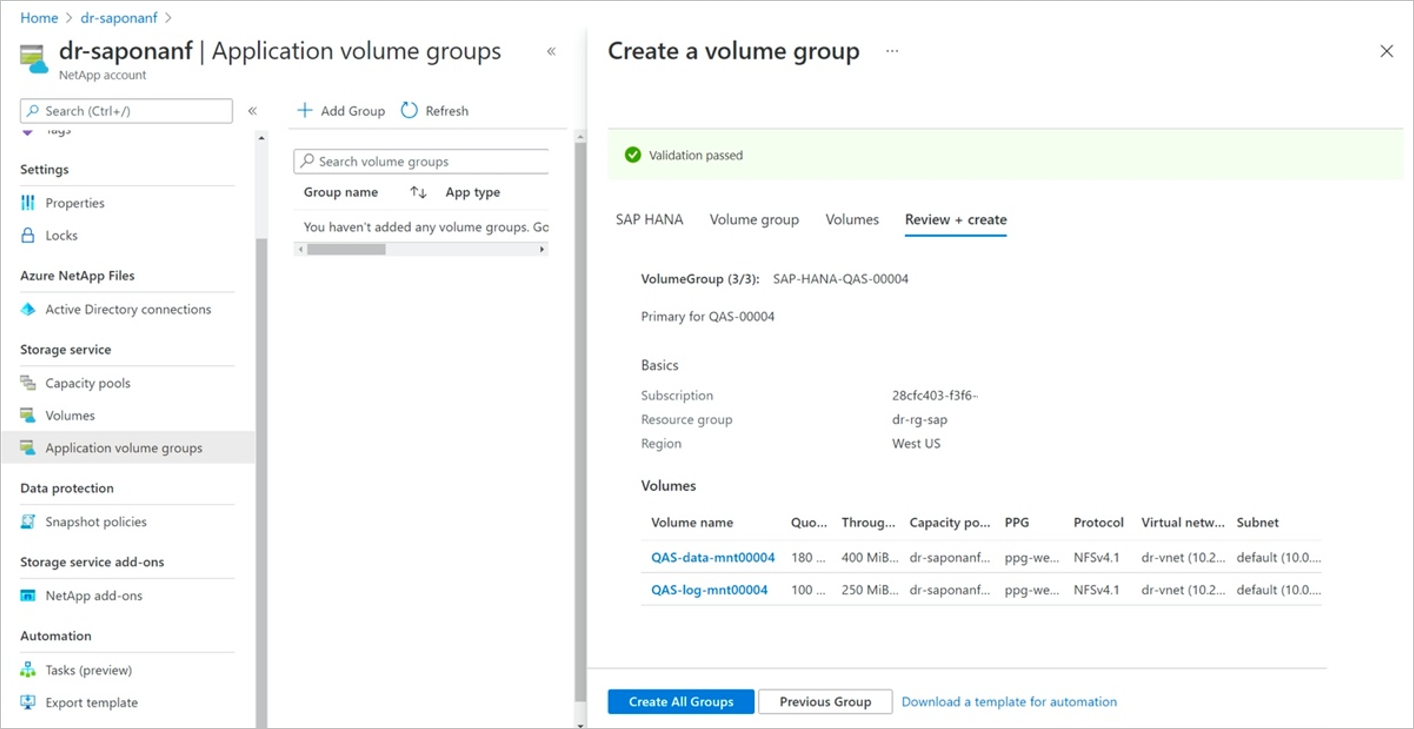
{HostId}placeholder is replaced with the individual numbers for each of the volume groups that will be created.You can select Next Group to navigate through all volume groups that are being created (one for each host). You can also select a particular volume to view its details.
After you navigate through the volume groups, select Create All Groups to create all the volumes for the HANA hosts you're adding.
The Create Volume Group page shows the added volume groups with the "Creating" status.
Next steps
- Understand Azure NetApp Files application volume group for SAP HANA
- Requirements and considerations for application volume group for SAP HANA
- Deploy the first SAP HANA host using application volume group for SAP HANA
- Add volumes for an SAP HANA system as a secondary database in HSR
- Add volumes for an SAP HANA system as a DR system using cross-region replication
- Manage volumes in an application volume group
- Delete an application volume group
- Application volume group FAQs
- Troubleshoot application volume group errors


