Ubuntu RDP in Azure
Many times, I get a question on how do you RDP into a Linux machine created in Azure. So, instead of having the same conversation over and over, I'll blog about it and point folks here . And going one step further, I figured now was a good time to also test out OpenSSH-Win32. In addition, this will show you how to do this via the new Azure Portal (vs the Classic Azure portal); managing endpoints is slightly different between the two UIs.
First, if you are on a Windows box, grab OpenSSH-Win32 here. Note that this is still a preview feature as Microsoft continues to port the OpenSSH client to the Windows world, through PoweShell. If you missed this pretty wild announcement, check the announcement here.
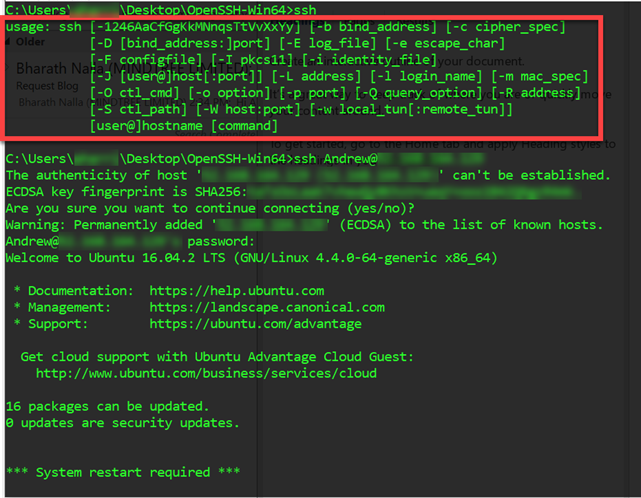
Traverse to where you extracted the files, and connect to the IP address of your Ubuntu server in Azure. As you will see, this is real OpenSSH:

Figure 1: OpenSSH-Win32
Cool! Now we got SSH on Windows and we are connected to our system.
Ubuntu Configurations
Now, let's get two things installed:
- xubuntu-desktop (xrdp does not support gnome desktop for Ubuntu in versions 12.04LTS or higher).
- xrdp (rdp server)
Easy…

Figure 2: sudo apt-get install xubuntu-desktop
And…

Figure 3: sudo apt-get install xrdp
All that is left is starting the xrdp server (in theory this should start with Ubuntu by default but I like the "trust no one" philosophy… worst case it will yell and tell me the service is already starting!):

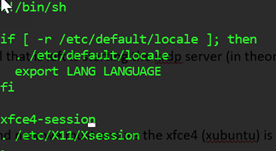
And now we must ensure the xfce4 (xubuntu) is enabled.

Figure 4: xfce4-session > ~/.xsession; Note, if you are enabling this for another user, add the user then do this for their home profile instead
Next, edit the /etc/xrdp/startwm.sh script, via:
"sudo vi /etc/xrdp/startwm.sh"
The file should look something like this when you are done (insert the "xfce4-session" line before the ". /etc/x11/xsession" line).

Then we just need to restart xrdp 
We now have what we need installed and configured on Ubuntu.
Azure Configurations
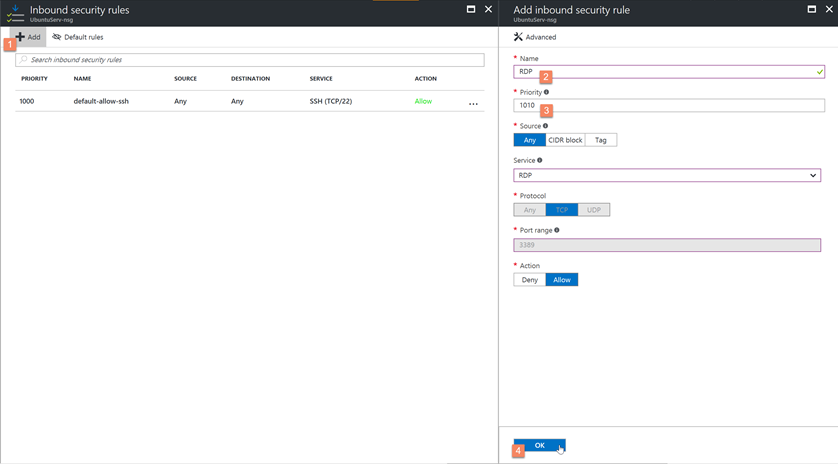
Now we need to add the Endpoint to Azure on this machine. Without modifying this, we wouldn't have the right NSG rules on the Azure side to allow the RDP traffic to the VM. Go to the associated Network Security Group (NSG) for this VM, which should be created by default when configuring the VM. From the NSG blade for this resource, we can then add the endpoint. We could also do this via PowerShell if we so choose.
Click the add button to the inbound rules, and go ahead and configure this:

We now have two endpoints on this system, again which is managed via the NSG for the VM:

Make the RDP Connection
Notice that when we configured RDP it had to be port 3389. That deserves a separate blog at a different time, including what can be done via Azure Security Center and detecting threats on this port.
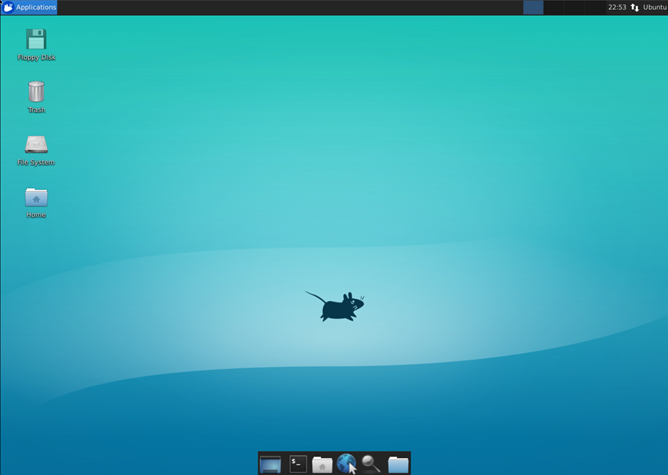
We can now use our handy dandy RDP Connection Manager and make the RDP session.

Now, time to make this a vulnerable web application and show the power of Azure Security Center (ASC)… which shall be another blog post for another day.
Andrew