Linting JavaScript i Visual Studio
Linting JavaScript och TypeScript i Visual Studio drivs av ESLint. Om du inte har använt ESLint tidigare kan du börja med att kontrollera deras dokumentation.
Aktivera stöd för lintning
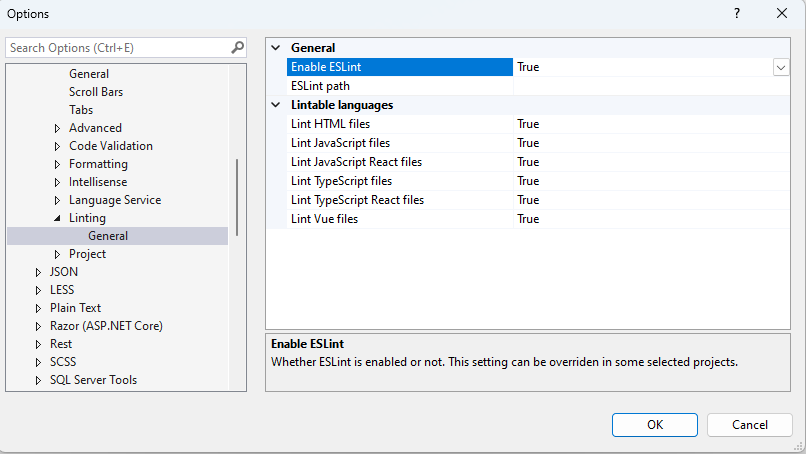
Om du vill aktivera stöd för linting i Visual Studio 2022 eller senare aktiverar du inställningen Aktivera ESLint i Tools > Options > Text Editor > JavaScript/TypeScript > Linting.

På alternativsidan kan du också ändra den uppsättning filer som du vill markera. Som standard kommer alla filnamnstillägg som kan linteras (.js, .jsx, .ts, .tsx, .vue, .html) att markeras. Den HTML LSP-baserade redigeraren måste vara aktiverad för linting av Vue- och HTML-filer. Respektive inställning finns i Tools > Options > Environment > Preview Features>HTML LSP-baserad redigerare.
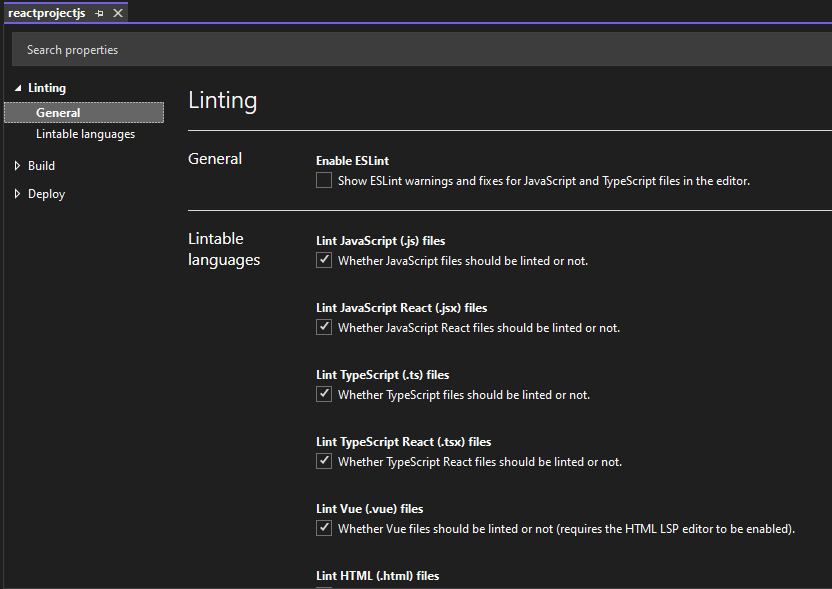
Du kan åsidosätta dessa alternativ i vissa projekttyper, till exempel fristående React-projektmallar. I dessa projekt kan du åsidosätta inställningarna från sidan Verktyg > Alternativ med hjälp av projektegenskaper:

Installera ESLint-beroenden
När lintning har aktiverats måste nödvändiga beroenden installeras. Beroenden omfattar ESLint-npm paket och andra plugin-program som gäller för projektet. Det här paketet kan installeras lokalt i varje projekt där du vill aktivera lintning, eller så kan du installera det globalt med hjälp av npm install -g eslint. En global installation rekommenderas dock inte eftersom plugin-program och delningsbara konfigurationer alltid måste installeras lokalt.
Från och med Visual Studio 2022 version 17.7 Preview 2 kan du också använda inställningen ESLint Path i Tools > Options > Text Editor > JavaScript/TypeScript > Linting för att ange en katalog som ESLint ska läsas in från. Den här inställningen är användbar när ESLint installeras globalt, där du kan ange motsvarande sökväg till C:\Program Files\nodejs\node_modules.
Beroende på vilka filer du vill linta kan andra ESLint-plugin-program behövas. Du kan till exempel behöva TypeScript ESLint, som gör att ESLint kan köras med TypeScript-kod och innehåller regler som är specifika för extra typinformation.
När ESLint är aktiverat men ESLint-npm paketet inte hittas visas en guldlist. Med det här meddelandet kan du installera ESLint som ett lokalt npm utvecklingsberoende.

På samma sätt, när en .eslintrc fil inte hittas, visas ett guldfält. Med det här meddelandet kan du köra en konfigurationsguide som installerar de plugin-program som gäller för det aktuella projektet.

Inaktivera lintningsregler och automatisk korrigering
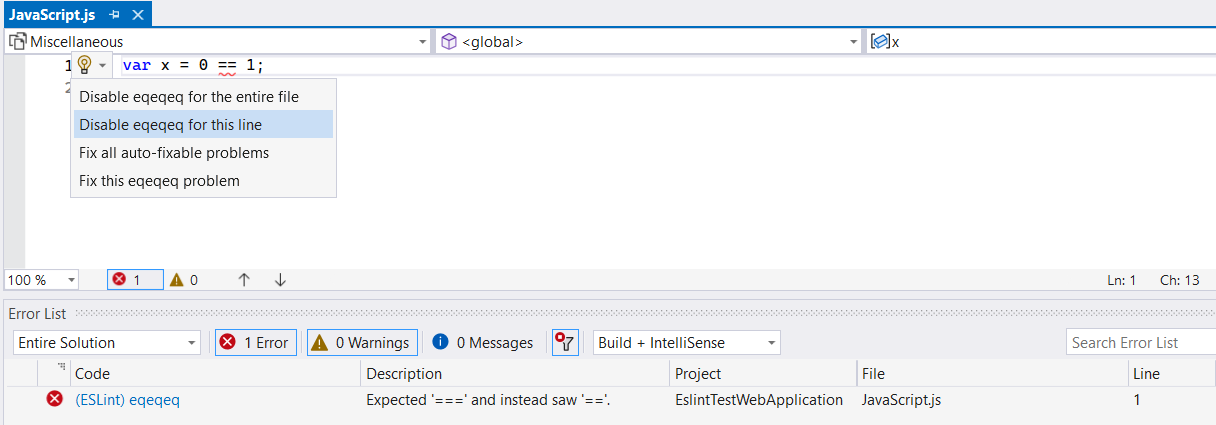
Du kan inaktivera lintningsfel på en specifik rad eller fil. Du kan inaktivera felen med hjälp av snabbåtgärders glödlampans meny:

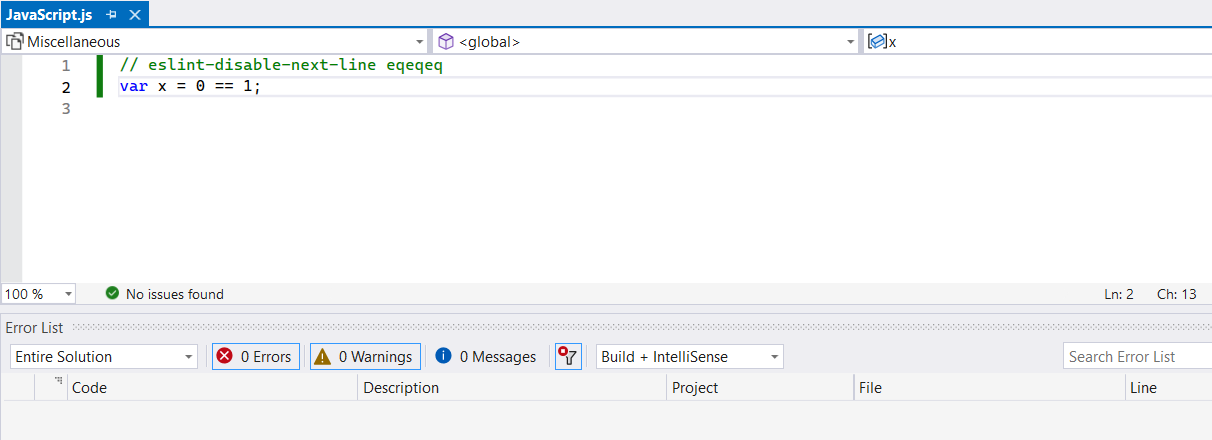
Följande bild visar resultatet om du inaktiverar ett lintningsfel för den valda kodraden.

Dessutom kan du använda autofix-kodåtgärder för att åtgärda respektive lintningsfel.
Felsökning
Du kan öppna fönstret ESLint Language Extension i utdatafönstret för att se eventuella felmeddelanden eller andra loggar som kan förklara problemet.