Deploy agents
In this unit, you learn how to test and deploy your agent.
Test panel
You have already seen the test pane where you can try out your agent as you're building it.
Select the Test button in the top-right of the screen to open the testing panel.
Select the three dots at the top of the testing panel in the top-right of the screen.
Select Track between topics. This shows the topic and path of conversation of the agent when responding to prompts
Select the Refresh icon at the top of the testing panel. This resets the agent's conversation and variables.
Publish
With Copilot Studio, you can publish agents to engage with your customers on multiple platforms or channels. These include live websites, mobile apps, and messaging platforms like Microsoft Teams and Facebook.
After you've published at least once, you can connect your agent to more channels.
Each time you update your agent, you can publish it again from within Copilot Studio. Publishing your agent applies to all the channels where you've inserted or connected your agent.
Publish the latest content
- With your agent open for editing, in the navigation menu, select Publish and then select Publish again in the Publish this agent window.
Note
Publishing can take a few minutes.
- After publishing, scroll to the bottom of the Overview tab to see the published agent's status including who published it and when it was published.
Share
You can share an agent with others for:
- Collaborative authoring
- Testing
Share an agent for collaborative authoring
You can share an agent with users or a security group and allow users to edit your agent.
Select the three dots next to the Settings button in the top-right of the screen and select Share.
For more information, see Share agents with other users.
Share an agent for testing
The Demo website allows users without a license to test your agent. You can provide them with the URL to the demo website.
Begin by navigating to the Settings page for your agent by selecting Settings in the top-right of the screen.
Under the Settings window, select the Security tab, then choose the Authentication option.
In the Authentication menu, select the No authentication option and Save. Select Save again in the Save this configuration? window that pops up.
Tip
Authentication needs to be turned off to use the demo website feature.
Navigate back to the agent's Overview and Publish your changes to the agent.
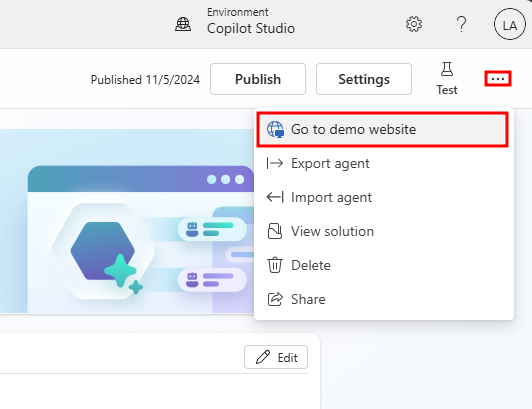
After publishing, select the three dots next to the Settings button in the top-right of the screen and choose Go to demo website.
The demo website allows anyone to test your agent without needing to worry about distributing access rights.
Note
The Demo website uses the published version of the agent.
Teams
With your agent published, you can make your agent available to users in Teams. This way you, your teammates, and your broader organization can interact with it.
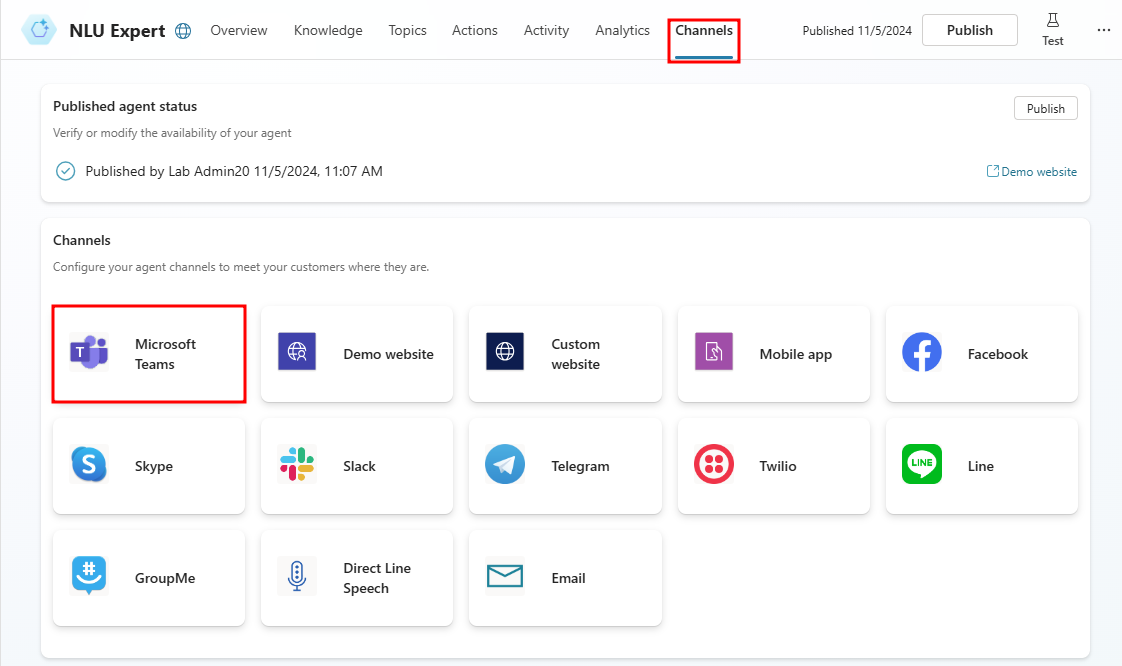
With your agent open in Microsoft Copilot Studio, select the Channels tab.
Select the Microsoft Teams tile under Channels.
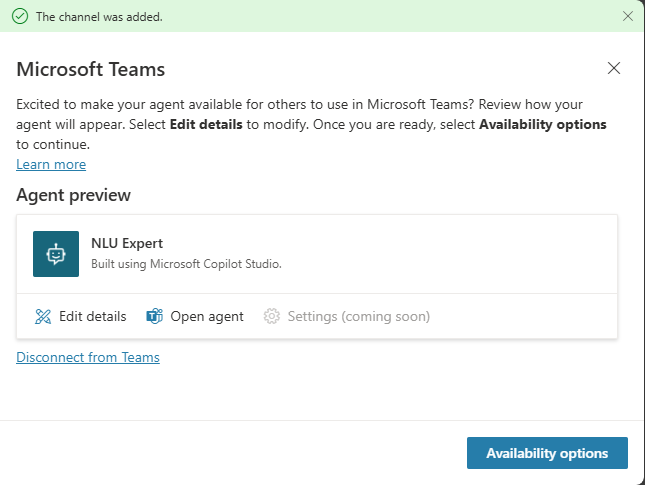
In the Microsoft Teams window, select Turn on Teams.
Select Turn on Teams.
There are also availability options to control the appearance and how users can add the agent to a team in Microsoft Teams.
For more information, see Add an agent to Microsoft Teams.


