Manage Surface UEFI settings
Surface devices are designed to use a unique Unified Extensible Firmware Interface (UEFI) engineered by Microsoft specifically for these devices. Surface UEFI settings allow IT admins to enable or disable built-in devices and components, protect UEFI settings from being changed, and adjust the Surface device boot settings.
Supported products
| Product Line | Supported Models | Notes |
|---|---|---|
| Surface Pro | Surface Pro 11th Edition (Snapdragon processor), Surface Pro 11th Edition (Intel processor), Surface Pro 10, Surface Pro 9, Surface Pro 9 with 5G (commercial SKUs only), Surface Pro 8 (commercial SKUs only), Surface Pro 7+ (commercial SKUs only), Surface Pro 7, Surface Pro 6, Surface Pro (5th Gen), Surface Pro 4, Surface Pro X | Commercial SKUs are noted where applicable |
| Surface Laptop | Surface Laptop 7th Edition (Snapdragon processor), Surface Laptop 7th Edition (Intel processor), Surface Laptop 6 (commercial SKUs only), Surface Laptop 5 (commercial SKUs only), Surface Laptop 4 (commercial SKUs only), Surface Laptop Go 3 (commercial SKUs only), Surface Laptop Go 2 (commercial SKUs only), Surface Laptop SE, Surface Laptop 3 (Intel processors only), Surface Laptop 2, Surface Laptop (1st Gen), Surface Laptop Go | Commercial SKUs are noted where applicable |
| Surface Studio | Surface Studio 2+, Surface Studio 2, Surface Studio (1st Gen) | |
| Surface Book | All generations | |
| Surface Laptop Studio | All generations (commercial SKUs only) | |
| Surface Go | Surface Go 4 (commercial SKUs only), Surface Go 3 (commercial SKUs only), Surface Go 2, Surface Go | Surface Go uses a third-party UEFI and doesn't support DFCI. Surface Go 2 supports DFCI only on commercial SKUs |
Tip
Commercial SKUs (aka Surface for Business) run Windows 10 Pro/Enterprise or Windows 11 Pro/Enterprise; consumer SKUs run Windows 10/Windows 11 Home. In UEFI, commercial SKUs are the only models to feature the Devices page and Management page. To learn more, see View your system info.
Support for cloud-based management
With Device Firmware Configuration Interface (DFCI) profiles built into Microsoft Intune, Surface UEFI management extends the modern management stack down to the UEFI hardware level. DFCI supports zero-touch provisioning, eliminates BIOS passwords, provides control of security settings and lays the groundwork for advanced security scenarios in the future.
DFCI is currently available for the following commercial devices: Surface Pro 11th Edition, Snapdragon processor; Surface Pro 11th Edition, Intel processor; Surface Pro 10, Surface Pro 10 with 5G, Surface Pro 9, Surface Pro 9 with 5G, Surface Pro 8, Surface Pro 7+, Surface Pro 7, Surface Pro X, Surface Laptop 7th Edition, Snapdragon processor; Surface Laptop 7th Edition, Intel processor; Surface Laptop 6, Surface Laptop 5, Surface Laptop 4, Surface Laptop 3, Surface Laptop Studio 2, Surface Laptop Studio, Surface Laptop SE, Surface Laptop Go 2, Surface Laptop Go, Surface Book 3, Surface Studio 2+, Surface Go 3, and Surface Go 4. For more information, see Manage DFCI on Surface devices.
Open Surface UEFI menu
To adjust UEFI settings during system startup:
- Shut down your Surface and wait about 10 seconds to ensure it's off.
- Press and hold the Volume-Up button and - at the same time - press and release the Power button.
- As the Microsoft or Surface logo appears on your screen, continue to hold the Volume-Up button until the UEFI screen appears.
UEFI PC information page
The PC information page includes detailed information about your Surface device:
Model – Your Surface device's model, such as Surface Laptop Studio 2 or Surface Pro 9, is displayed here. The exact configuration of your device isn't shown (such as processor, disk size, or memory size).
System UUID – This Universally Unique Identification number is specific to your device and is used to identify the device during deployment or management.
Serial number – This number identifies this specific Surface device for asset tagging and support scenarios.
Asset tag – The asset tag is assigned to the Surface device with the Asset Tag Tool.
You can also find detailed information about the firmware of your Surface device. Surface devices have several internal components that each run different versions of firmware. The firmware versions for these components are displayed on the PC information page. Components include the following and may vary depending on your device:
- System UEFI
- SMF Controller
- SAM Controller
- Intel Management Engine
- PD Controller
- Keyboard Controller
- Trackpad Controller
- Touch Firmware
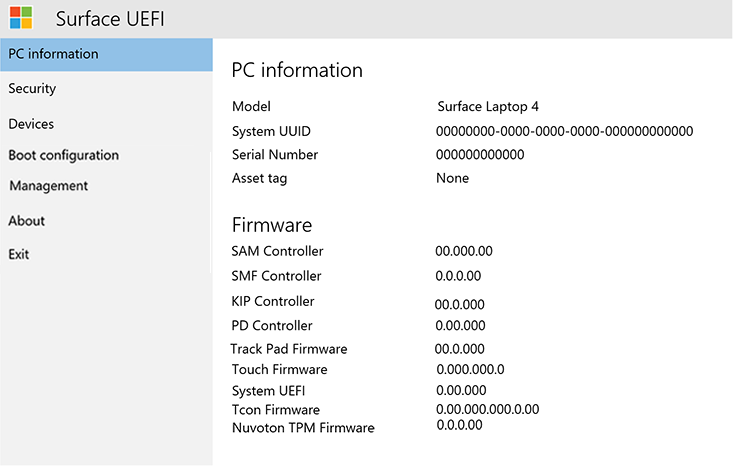
Figure 1. System information and firmware version information.
You can find up-to-date information about the latest firmware version for your Surface device in the Surface Update History for your device.
UEFI Security page
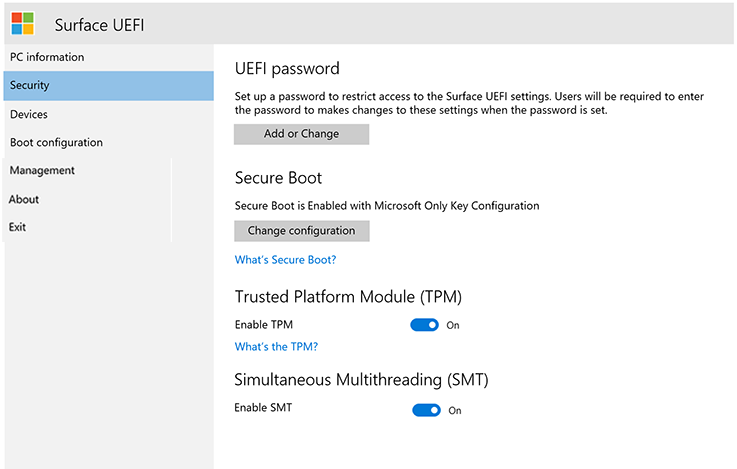
Figure 2. Configure Surface UEFI security settings.
The Security page allows you to set a password to protect UEFI settings. This password must be entered when you boot the Surface device to UEFI. The password can contain the following characters (as shown in Figure 3):
Uppercase letters: A-Z
Lowercase letters: a-z
Numbers: 1-0
Special characters: !@#$%^&*()?<>{}[]-_=+|.,;:’`”
The password must be at least six characters and is case-sensitive.
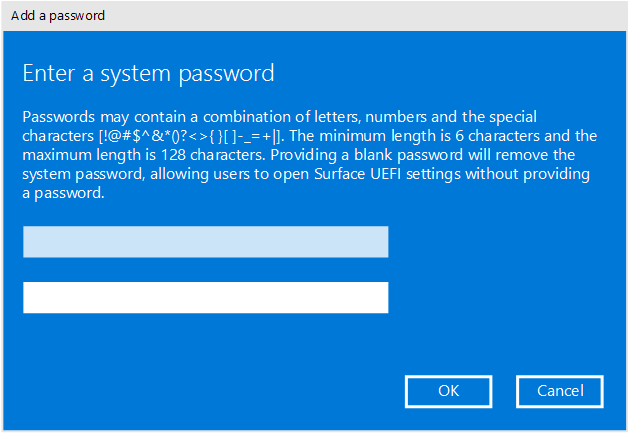
Figure 3. Add a password to protect Surface UEFI settings.
On the Security page, you can also change the configuration of Secure Boot on your Surface device. Secure Boot technology prevents unauthorized boot code from booting on your Surface device, which protects against bootkit and rootkit-type malware infections. You can disable Secure Boot to allow your Surface device to boot other operating systems or bootable media. You can also configure Secure Boot to work with custom third-party certificates, as shown in Figure 4. To learn more, see Secure Boot.
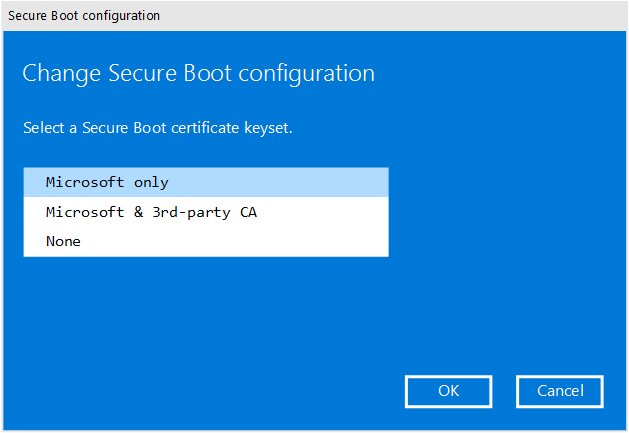
Figure 4. Configure Secure Boot.
Depending on your device, you may also see if your TPM is enabled or disabled. If you don't see the Enable TPM setting, open tpm.msc in Windows to check the status, as shown in Figure 5. The TPM is used to authenticate your device's data encryption with BitLocker. To learn more, see BitLocker overview.
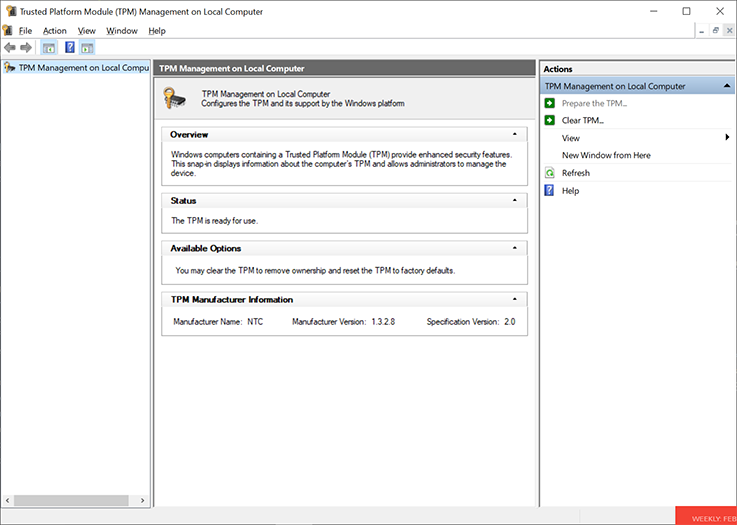
Figure 5. TPM console.
UEFI Devices page
The Devices page allows you to turn specific components on eligible devices on or off. Components consist of the following:
- Docking USB Port
- Front camera
- Rear camera
- IR camera
- On-board Audio
- SDcard
- Wi-Fi & Bluetooth
- Bluetooth
- Type Cover port
Each device has a slider button to move to On (enabled) or Off (disabled) position, as shown in Figure 6. (Components may vary by Surface device.)
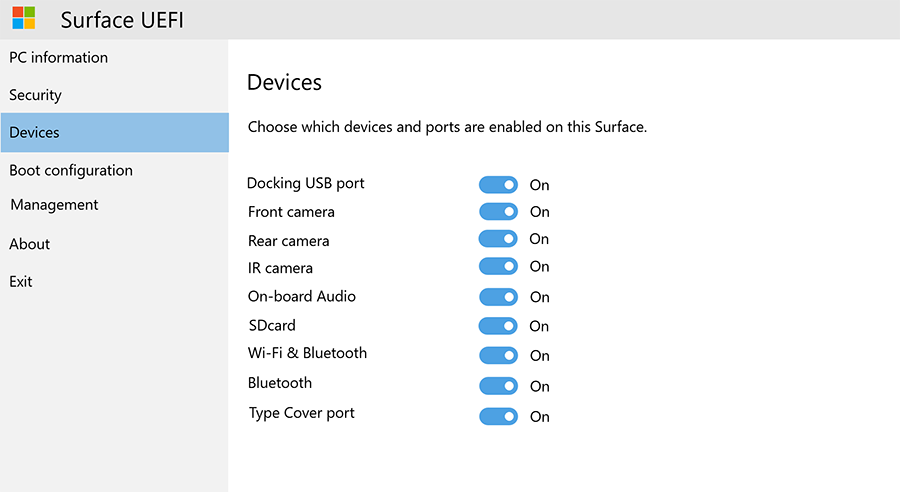
Figure 6. Enable and disable specific devices.
UEFI Boot configuration page
The Boot Configuration page allows you to change the order of your boot devices and enable or disable the boot of the following devices:
Windows Boot Manager
USB Storage
PXE Network
Internal Storage
You can boot from a specific device immediately or swipe left on that device's entry in the list using the touchscreen. You can also boot immediately to a USB device or USB Ethernet adapter when the Surface device is powered off by pressing the Volume Down button and the Power button simultaneously.
For the specified boot order to take effect, you must set the Enable Alternate Boot Sequence option to On, as shown in Figure 7.
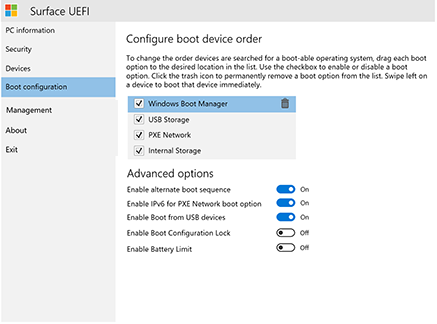
Figure 7. Configure the boot order for your Surface device.
You can also turn on and off IPv6 support for PXE with the Enable IPv6 for PXE Network Boot option, for example, when performing a Windows deployment using PXE where the PXE server is configured for IPv4 only.
UEFI Management page
The Management page allows you to manage the use of Zero-Touch UEFI Management and other features on eligible devices.
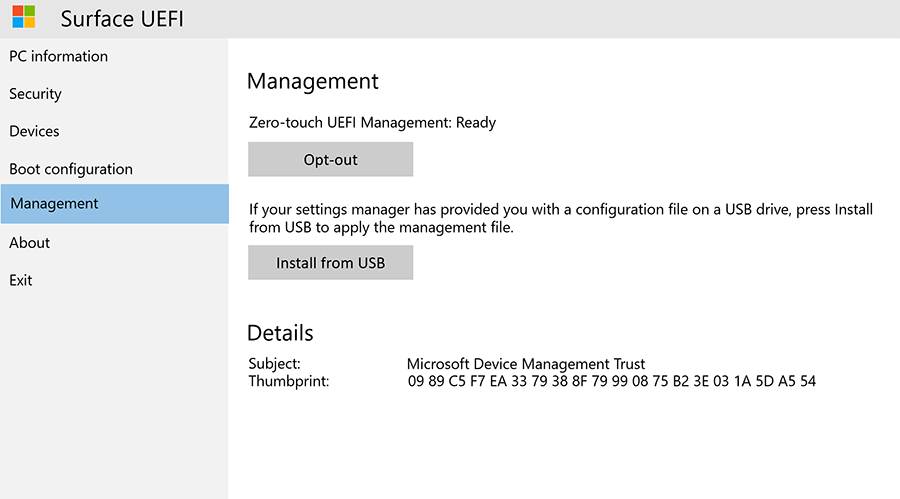
Figure 8. Manage access to Zero-Touch UEFI Management and other features.
Zero-Touch UEFI Management lets you remotely manage UEFI settings using a device profile within Intune called Device Firmware Configuration Interface (DFCI). If you don't configure this setting, the ability to manage eligible devices with DFCI is set to Ready. To prevent DFCI, select Opt-Out.
UEFI Exit page
Use the Restart Now button on the Exit page to exit UEFI settings, as shown in Figure 9.
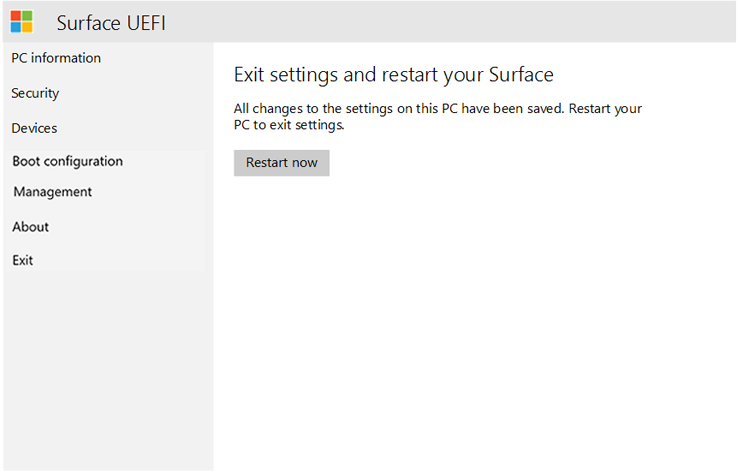
Figure 9. Select Restart Now to exit Surface UEFI and restart the device.
Surface UEFI boot screens
When you update the Surface device firmware using either Windows Update or manual installation, the updates aren't applied immediately to the device but during the next reboot cycle. You can learn more about the Surface firmware update process in Manage and deploy Surface driver and firmware updates. The firmware update progress is displayed on a screen with progress bars of different colors to indicate the firmware for each component. Each component's progress bar is shown in Figures 9 through 18.

Figure 10. The Surface UEFI firmware update displays a blue progress bar.
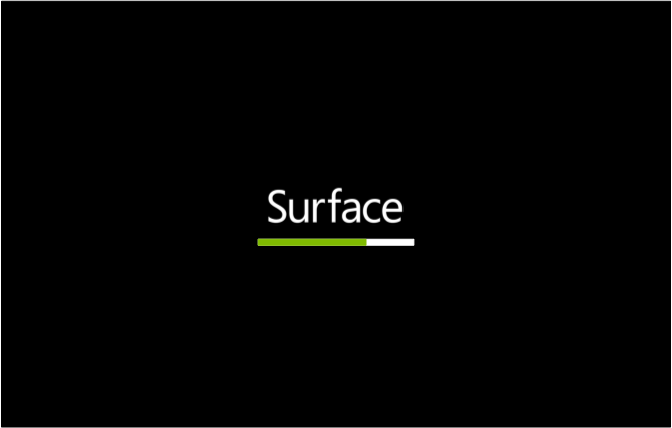
Figure 11. The System Embedded Controller firmware update displays a green progress bar.

Figure 12. The SAM Controller firmware update displays an orange progress bar.

Figure 13. The Intel Management Engine firmware update displays a red progress bar.

Figure 14. The Surface touch firmware update displays a gray progress bar.
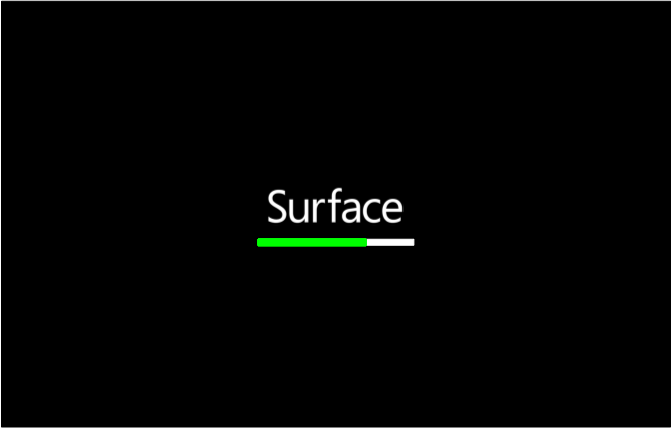
Figure 15. The Surface KIP firmware update displays a light green progress bar.

Figure 16. The Surface ISH firmware update displays a light pink progress bar.
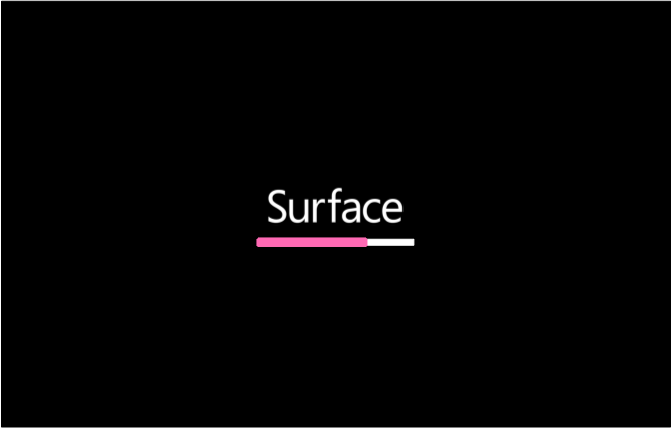
Figure 17. The Surface Trackpad firmware update displays a pink progress bar.

Figure 18. The Surface TCON firmware update displays a light gray progress bar.
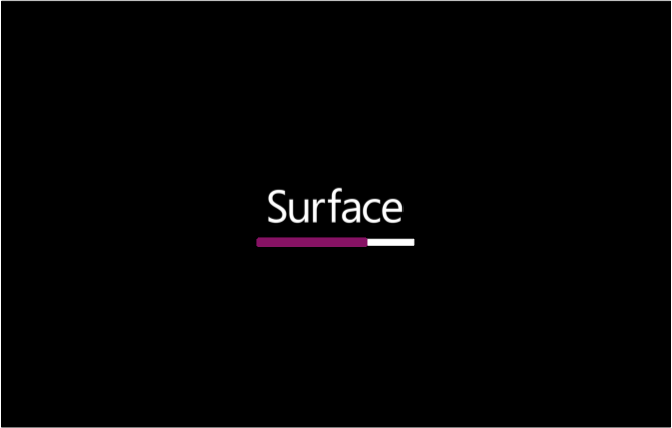
Figure 19. The Surface TPM firmware update displays a purple progress bar.
Note
An additional warning message that indicates Secure Boot is disabled is displayed, as shown in Figure 19.
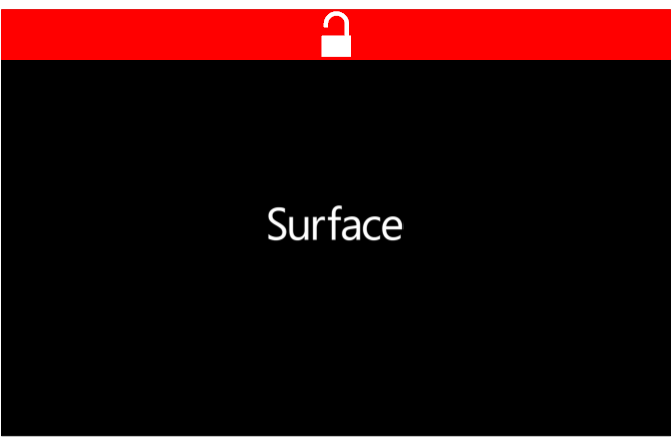
Figure 20. Surface boot screen that indicates Secure Boot has been disabled in Surface UEFI settings.