Import custodians to an eDiscovery (Premium) case
Important
This article applies only to the classic eDiscovery experience. The classic eDiscovery experience will be retired in August 2025 and won't be available as an experience option in the Microsoft Purview portal after retirement.
We recommend that you start planning for this transition early and start using the new eDiscovery experience in the Microsoft Purview portal. To learn more about using the most current eDiscovery capabilities and features, see Learn about eDiscovery.
For Microsoft Purview eDiscovery (Premium) cases that involve many custodians, you can import multiple custodians at once by using a CSV file that contains the information necessary to add them to a case. The import custodians tool will also validate the CSV file before the import job is created. This means you can fix any errors in the CSV file instead of having to wait until the import job is complete before learning there are errors that prevent a custodian from being added to the case.
Tip
If you're not an E5 customer, use the 90-day Microsoft Purview solutions trial to explore how additional Purview capabilities can help your organization manage data security and compliance needs. Start now at the Microsoft Purview trials hub. Learn details about signing up and trial terms.
Before you import custodians
- You can import a maximum of 1,000 custodians (rows) per CSV file. Note that importing 1,000 custodians at the same time might result in timeout errors and some custodians might fail the import. To remediate this, repeat the import and the failed custodians should be imported. To avoid timeouts we recommend importing 200 custodians at a time.
- You can associate up to 500 data sources for each custodian.
- You can only import custodians that are part of your organization's Microsoft Entra ID.
- Each custodian must have a unique email address.
- To import an inactive mailbox as a custodian or to associate an inactive mailbox with another custodian, add a "." prefix to the email address of the inactive mailbox (for example, .sarad@contoso.onmmicrosoft.com).
Import custodians
Note
For a limited time, the classic eDiscovery experience is available in the new Microsoft Purview portal. Enable Purview portal classic eDiscovery experience in eDiscovery experience settings to display the classic experience in the new Microsoft Purview portal.
Open the eDiscovery (Premium) case and select the Data sources tab.
Select Add data source > Import custodians.
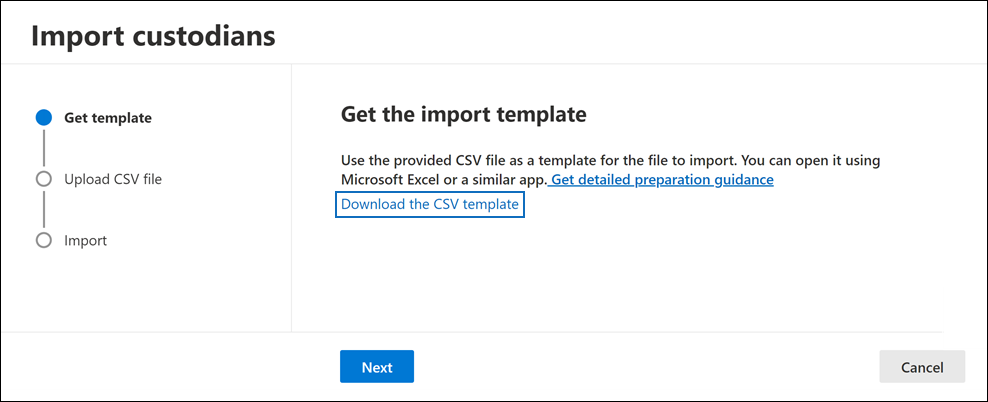
On the Get template workflow page, select Download the CSV template to download a custodian template CSV file.

Add the custodial information to the CSV file and save it to your local computer. See the Custodian CSV file section for detailed information about the required properties in the CSV file.
After you've prepared the CSV file with the custodian information, go back to the Data sources tab, and select Add data source > Import custodians again.
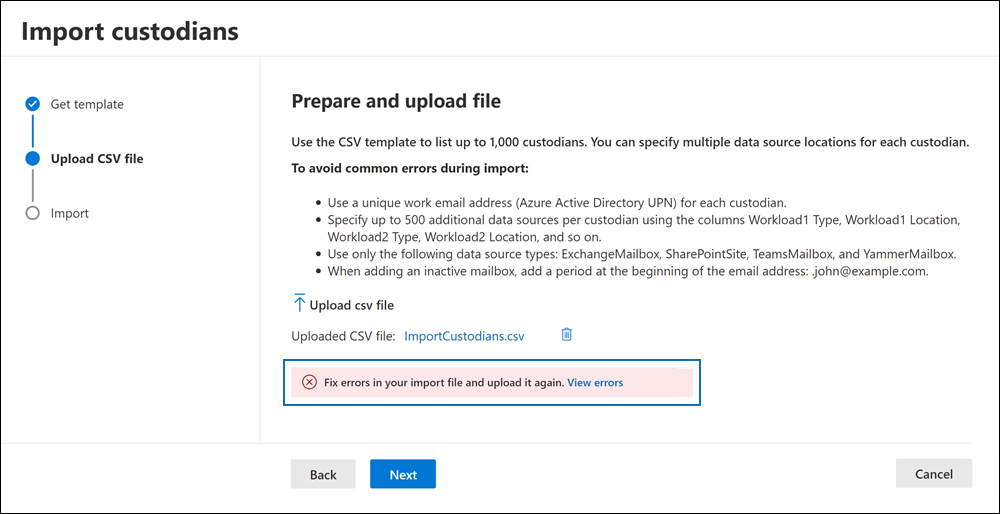
On the Upload CSV file workflow page, select Upload csv file and then upload the CSV file that contains the custodian information.
After you upload the CSV file, the import workflow validates the CSV file. If any validation errors exist, the workflow displays an error banner with a link to view the errors.

The error information identifies the row and column of the cell that contains the error, and suggests a remediation action. You have to fix any validation error and then reupload the fixed CSV file. The CSV file must be successfully validated before you can create the import custodian job.
Once the CSV file has been successfully validated, select Next and then select Import to start the import job.
After you start the import job, eDiscovery (Premium) does the following things:
- Creates a job named Import custodians on the Jobs tab of the case. You can select the Import custodians job on the Jobs tab to view the status and details of the import custodian job under the Support information section. For more information, see Manage jobs.
- Performs Advanced indexing of all data sources for each custodian.
- Places all custodian data sources on hold (if the Is OnHold property in the CSV file is set to TRUE)
When the import custodian job is complete, the custodians and their associated data sources are added to the Data sources page of the case.
Custodian CSV file
After you download the CSV custodian template, you can add custodians and their data sources in each row. Be sure not to change the column names in the header row. Use the workload type and workload location columns to associate other data sources to a custodian.
| Column name | Description |
|---|---|
| Custodian contactEmail | The custodian's UPN email address. For example, sarad@contoso.onmicrosoft.com. |
| Exchange Enabled | TRUE/FALSE value to include or not include the custodian's mailbox. |
| OneDrive Enabled | TRUE/FALSE value to include or not include the custodian's OneDrive for Business account. |
| Is OnHold | TRUE/FALSE value to indicate whether to place the custodian data sources on hold. 1 |
| Workload1 Type | String value indicating the type of data source to associate with the custodian. Possible values include: - ExchangeMailbox - SharePointSite - TeamsMailbox2 - YammerMailbox2. The previous values for these workload types are case sensitive. The CSV file contains columns for three workload types and their corresponding workload locations. You can add a total of 500 workload types and locations. |
| Workload1 Location | Depending on your workload type, this would be the location of the data source. For example, the email address for an Exchange mailbox or the URL for a SharePoint site. |
Note
1 If you put more than 1,000 mailboxes or 100 sites on hold in a case, the system will automatically scale the eDiscovery hold as needed. This means the system automatically adds data locations to multiple hold policies, instead of adding them to a single policy. However, the limit of 10,000 case hold policies per organization still applies. For more information about hold limits, see Limits in eDiscovery (Premium).
2 When you include TeamsMailbox and YammerMailbox workloads in the CSV file, the group site (TeamSite and YammerSite) are automatically added by default. You don't need to specify TeamsSite and YammerSite separately in the CSV file.
Here's an example of a CSV file with custodian information:
| Custodian contactEmail | Exchange Enabled | OneDrive Enabled | Is OnHold | Workload1 Type | Workload1 Location |
|---|---|---|---|---|---|
| robinc@contoso.onmicrosoft.com | TRUE | TRUE | TRUE | SharePointSite | https://contoso.sharepoint.com |
| pillarp@contoso.onmicrosoft.com | TRUE | TRUE | TRUE | ||
| johnj@contoso.onmicrosoft.com | TRUE | TRUE | TRUE | ||
| sarad@contoso.onmicrosoft.com | TRUE | TRUE | TRUE | ExchangeMailbox | .saradavis@contoso.onmicrosoft.com |
Note
As previously explained, add a "." prefix to the UPN address of an inactive mailbox to import an inactive mailbox as a custodian or to associate an inactive mailbox with another custodian.
Retry hold action
Once a custodian is placed on hold, you can validate the status in the Hold column of the list page. If the hold status isn't equal to True (when hold is enabled) or False (when hold is disabled), you can multi-select the relevant custodians and select Retry hold action at the top of the page. Retry hold action is only available for custodial sources and when multiple custodians are selected. If Retry hold action is performed for data sources succesfully placed or released from hold, no action is triggered. For more information about managing holds, see Manage holds in eDiscovery (Premium).