Create a scan rule set
In a Microsoft Purview Data Map, you can create scan rule sets to enable you to customize data source scans in your organization.
A scan rule set is a container for grouping a set of scan rules together so that you can easily associate them with a scan. For example, you might create a default scan rule set for each of your data source types, and then use these scan rule sets by default for all scans within your company. You might also want users with the right permissions to create other scan rule sets with different configurations based on business need.
Steps to create a scan rule set
To create a scan rule set:
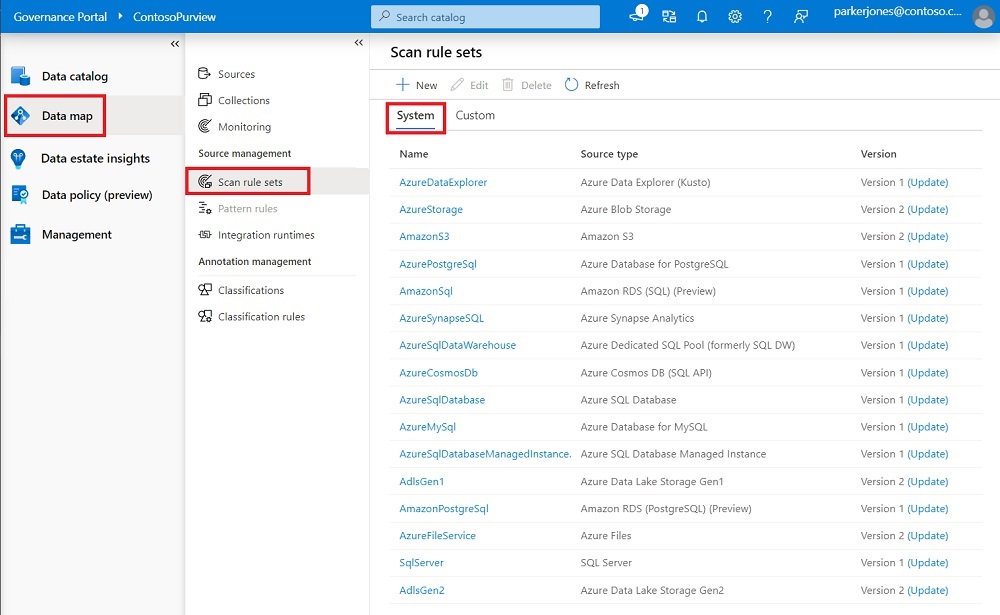
From the Microsoft Purview portal select the Data Map solution.
Under the Source management section, select Scan rule sets, and then select New.
From the New scan rule set page, select the data sources that the catalog scanner supports from the Source Type drop-down list. You can create a scan rule set for each type of data source you intend to scan.
Give your scan rule set a Name. The maximum length is 63 characters, with no spaces allowed. Optionally, enter a Description. The maximum length is 256 characters.

Select a domain.
Important
You will only be able to use the scan rule set in the domain where you create it.
Select Continue.
The Select file types page appears. Notice that the file type options on this page vary based on the data source type that you chose on the previous page. All the file types are enabled by default.
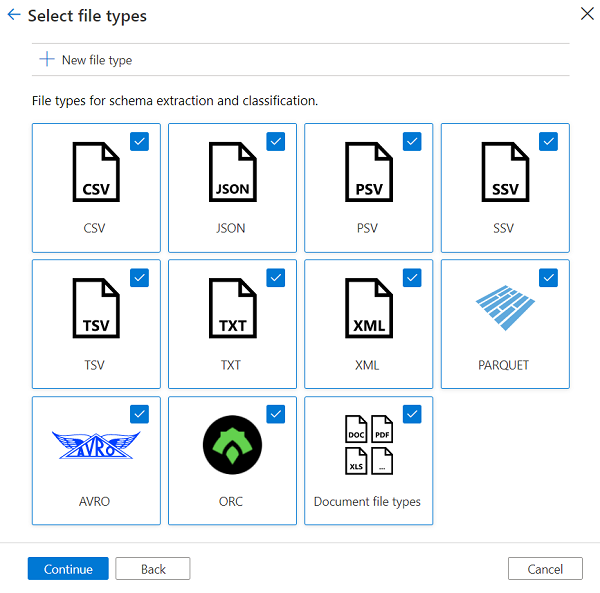
The Document file types selection on this page allows you to include or exclude the following office file types: .doc, .docm, .docx, .dot, .odp, .ods, .odt, .pdf, .pot, .pps, .ppsx, .ppt, .pptm, .pptx, .xlc, .xls, .xlsb, .xlsm, .xlsx, and .xlt.
Enable or disable a file type for schema and classification by selecting or clearing its check box. If you choose a Data Lake type data source (for example, Azure Data Lake Storage Gen2 or Azure Blob), enable the file types for which you want to have schema extracted and classified.
Important
De-selecting a file type doesn't mean it won't be ingested. The file's information will still be ingested, but its schema and classifications will not be extracted.
For certain data source types, you can also Create a custom file type.
Select Continue.
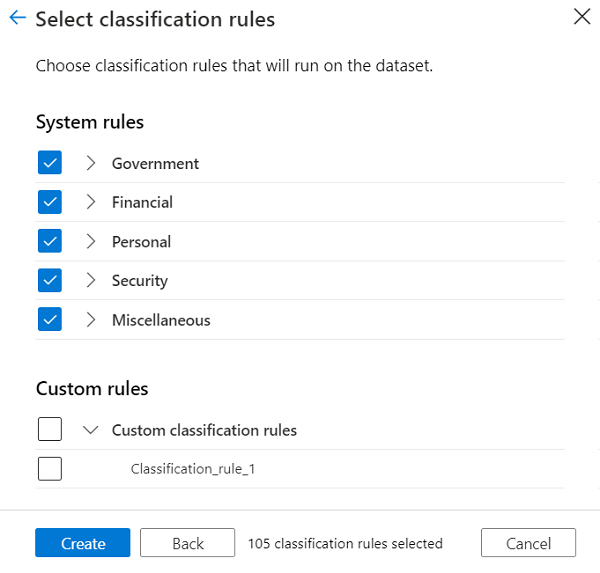
The Select classification rules page appears. This page displays the selected System rules and Custom rules, and the total number of classification rules selected. By default, all the System rules check boxes are selected
For the rules you want to include or exclude, you can select or clear the System rules classification rule check boxes globally by category.
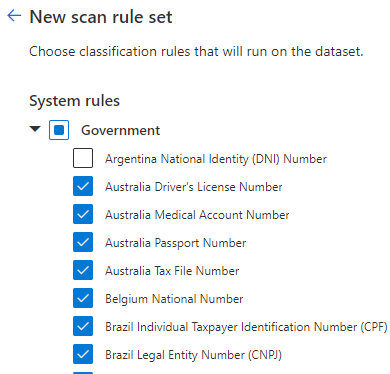
You can expand the category node and select or clear individual check boxes. For example, if the rule for Argentina.DNI Number has high false positives, you can clear that specific check box.
Select Create to finish creating the scan rule set.
Create a custom file type
Microsoft Purview supports adding a custom extension and defining a custom column delimiter in a scan rule set.
To create a custom file type:
Follow steps 1–5 in Steps to create a scan rule set or edit an existing scan rule set.
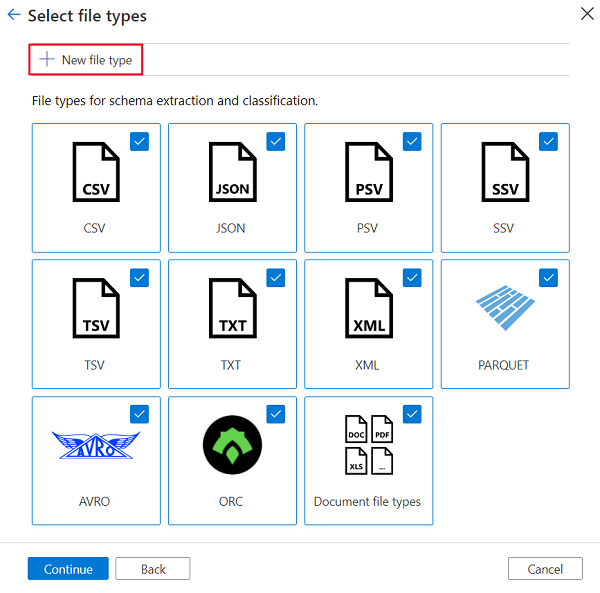
On the Select file types page, select New file type to create a new custom file type.
Enter a File Extension and an optional Description.
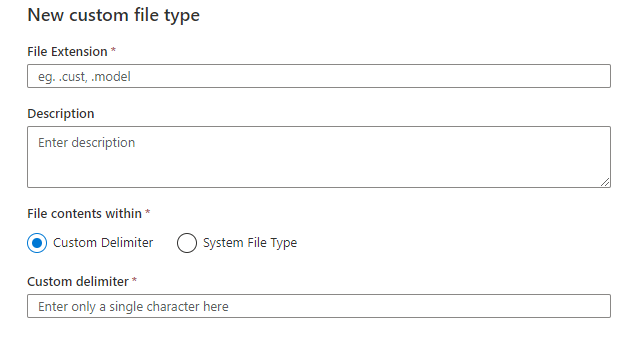
Make one of the following selections for File contents within to specify the type of file contents within your file:
Select Custom Delimiter and enter your own Custom delimiter (single character only).
Select System File Type and choose a system file type (for example XML) from the System file type drop-down list.
Select Create to save the custom file.
The system returns to the Select file types page and inserts the new custom file type as a new tile.
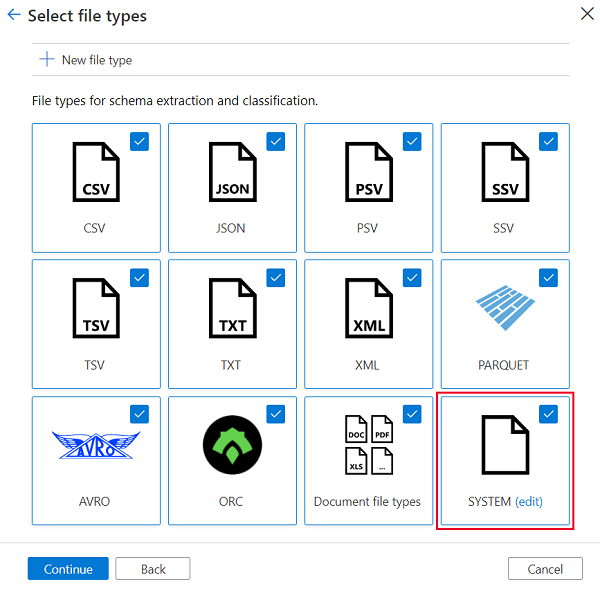
Select Edit in the new file type tile if you want to change or delete it.
Select Continue to finish configuring the scan rule set.
Ignore patterns
Microsoft Purview supports defining regular expressions (regex) to exclude assets during scanning. During scanning, Microsoft Purview will compare the asset's URL against these regular expressions. All assets matching any of the regexes mentioned will be ignored while scanning.
The Ignore patterns blade pre-populates one regex for spark transaction files. You can remove the pre-existing pattern if it is not required. You can define up to 10 ignore patterns.
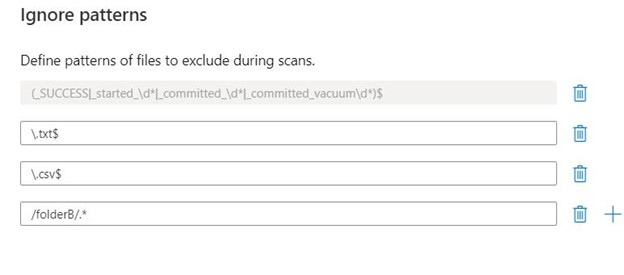
In the above example:
- Regexes 2 and 3 ignore all files ending with .txt and .csv during scanning.
- Regex 4 ignores /folderB/ and all its contents during scanning.
Here are some more tips you can use to ignore patterns:
While processing the regex, Microsoft Purview will add $ to the regex by default.
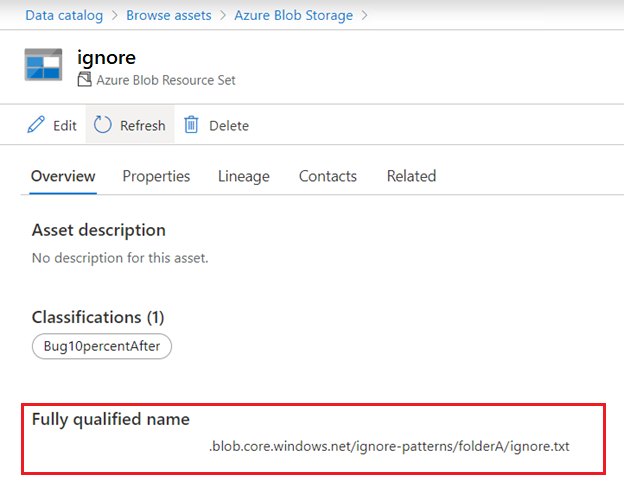
A good way to understand what url the scanning agent will compare with your regular expression is to browse through Microsoft Purview Unified Catalog, find the asset you want to ignore in the future, and see its fully qualified name (FQN) in the Overview tab.
System scan rule sets
System scan rule sets are Microsoft-defined scan rule sets that are automatically created for each Microsoft Purview catalog. Each system scan rule set is associated with a specific data source type. When you create a scan, you can associate it with a system scan rule set. Every time Microsoft makes an update to these system rule sets, you can update them in your catalog, and apply the update to all the associated scans.
To view the list of system scan rule sets, select Scan rule sets in the Management Center and choose the System tab.
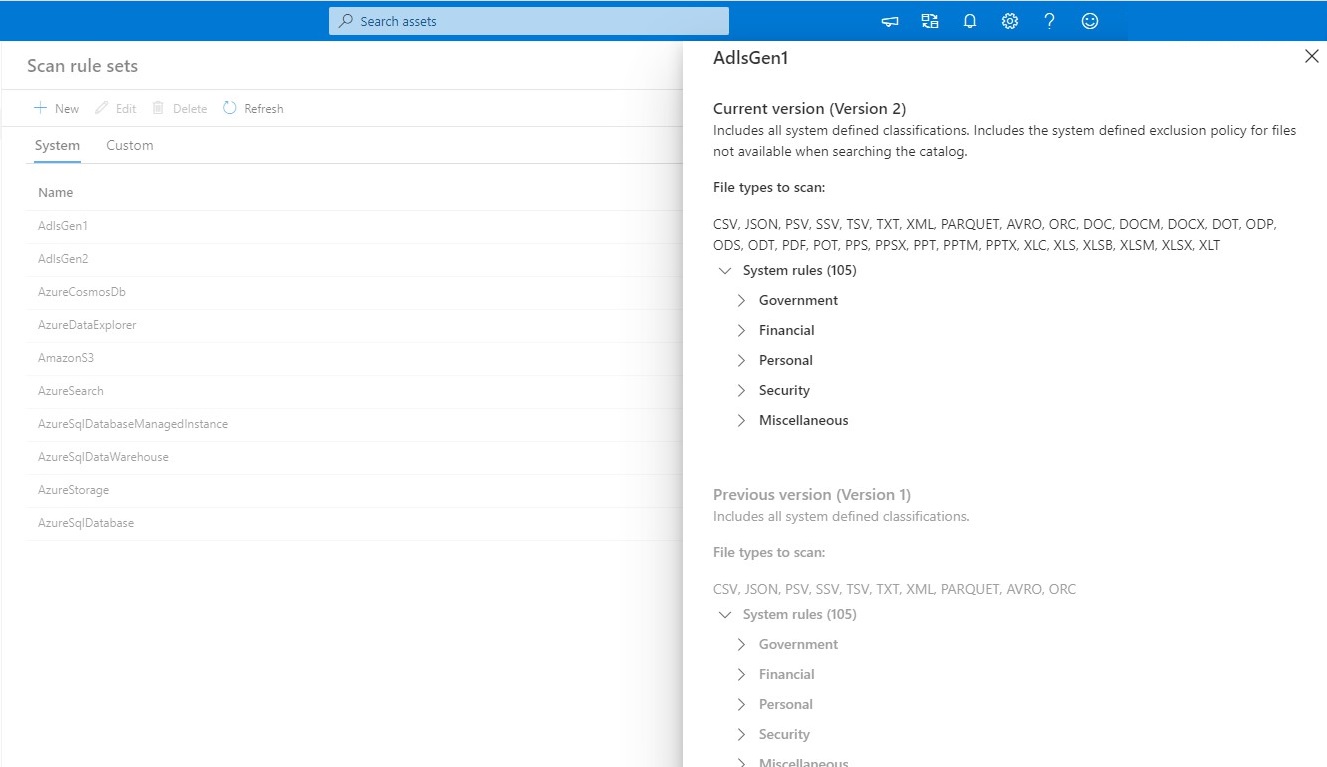
Each system scan rule set has a Name, Source type, and a Version. If you select the version number of a scan rule set in the Version column, you see the rules associated with the current version and the previous versions (if any).
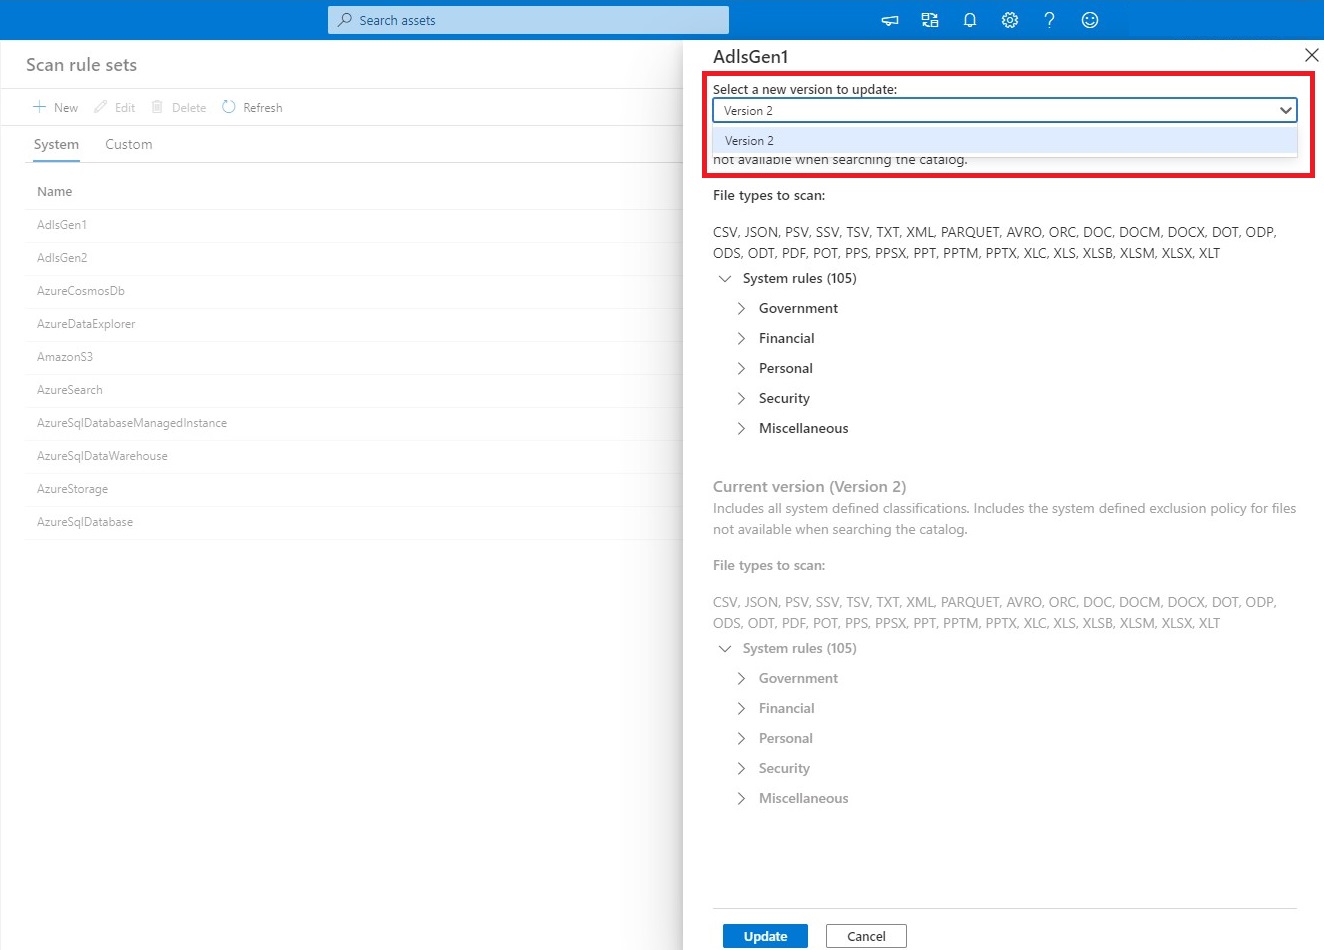
If an update is available for a system scan rule set, you can select Update in the Version column. In the system scan rule page, choose from a version from the Select a new version to update drop-down list. The page provides a list of system classification rules associated with the new version and current version.
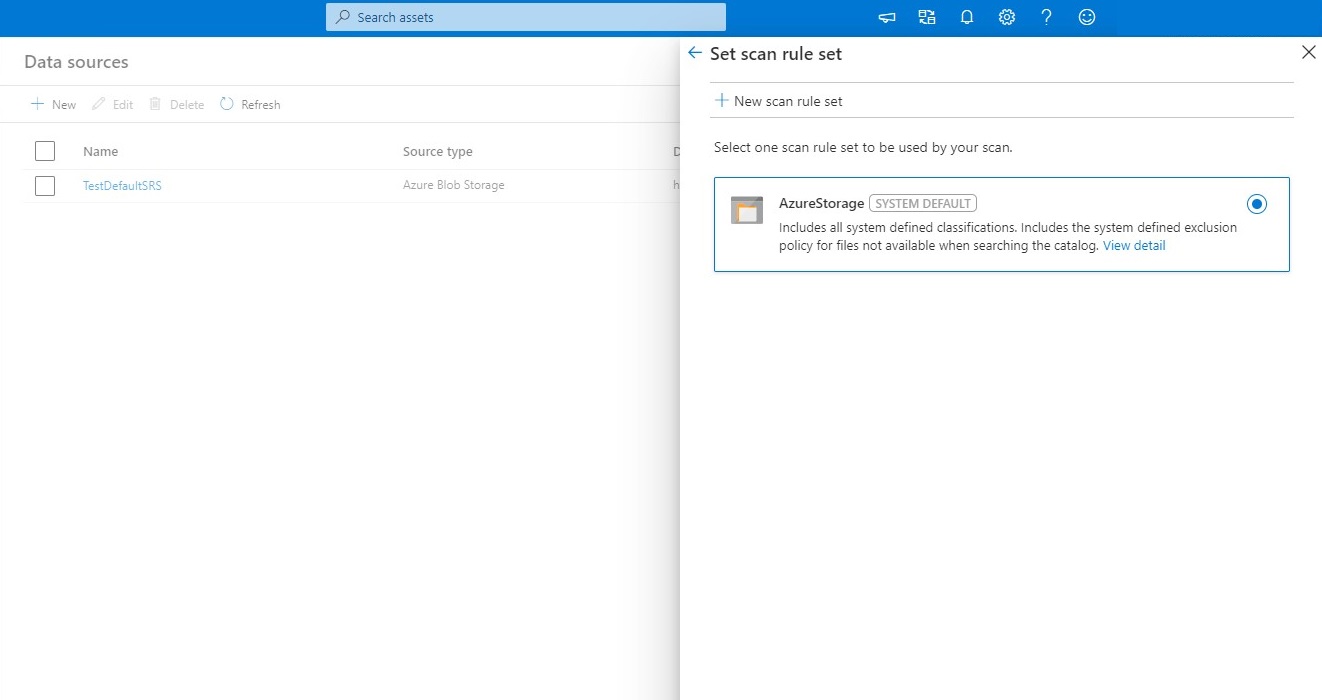
Associate a scan with a system scan rule set
When you create a scan, you can choose to associate it with a system scan rule set as follows:
