Add code components to a column or table in model-driven apps
Code components let you transform columns that traditionally contain text into visualizations. Similarly, you can use code components to transform datasets, such as a view, to display in a more visual rendering rather than a list of records. Code components can appear as visualizations on forms, dashboards, views, and homepage grids.

Add a code component to a column
Following the steps below will change the default label and text box column of the Budget Amount column to the slider code component on the Opportunity table. You can use similar steps to replace an existing column with a code component or configure a code component for a custom column.
Navigate to Settings > Customizations > Customize the System.
Expand Entities, expand the table that you want, such as the Opportunity table, select Forms, and then open a form such as the Main form.
In the form editor, double-click the column where you want to add a code component, such as the Budget Amount column on the opportunity main form. You can also create a custom column.
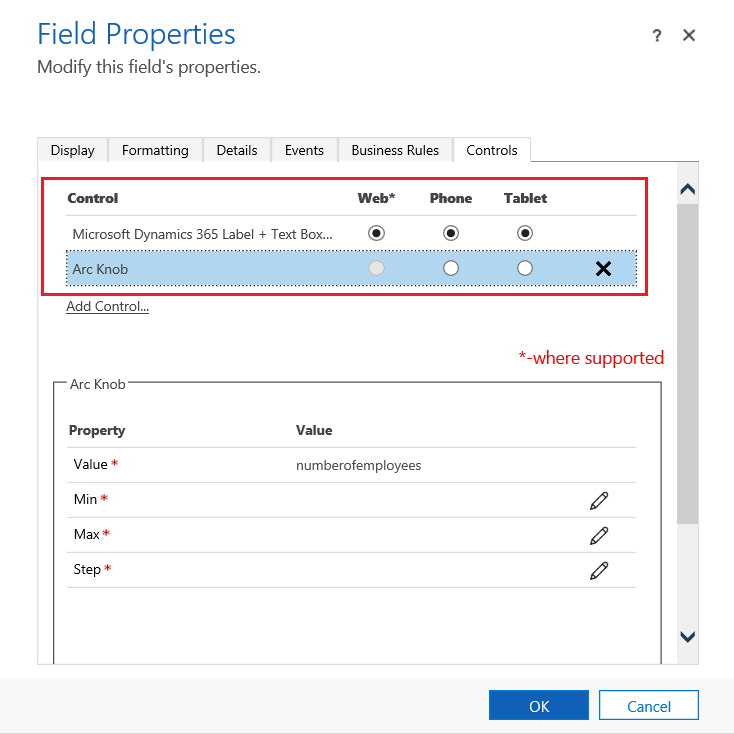
Select the Controls tab on the Field Properties page, and then select Add Control.
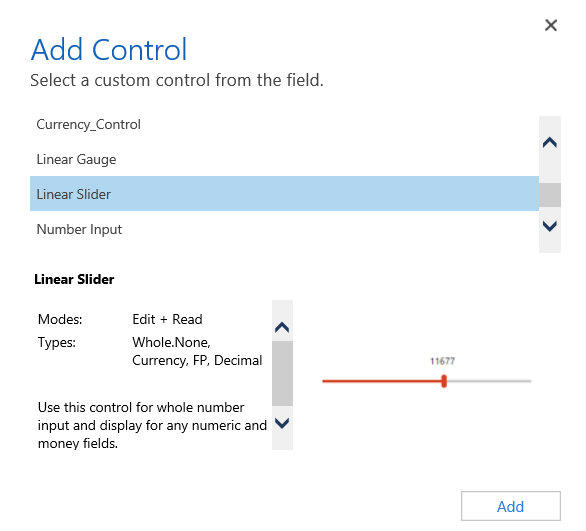
On the Add Control page, select the component that you want, such as the Linear Slider component, and then select Add.

Choose the client where you want the component to appear.
Web. To make the code component available from any web browser, select the Web option next to the component. Notice that setting the Web option includes rendering the component in web browsers on PCs, Macs, and mobile devices.
Phone. To make the code component available on phones running Dynamics 365 for phones, select the Phone option next to the component.
Tablet. To make the code component available on tablet devices running Dynamics 365 for tablets, select the Tablet option next to the component.

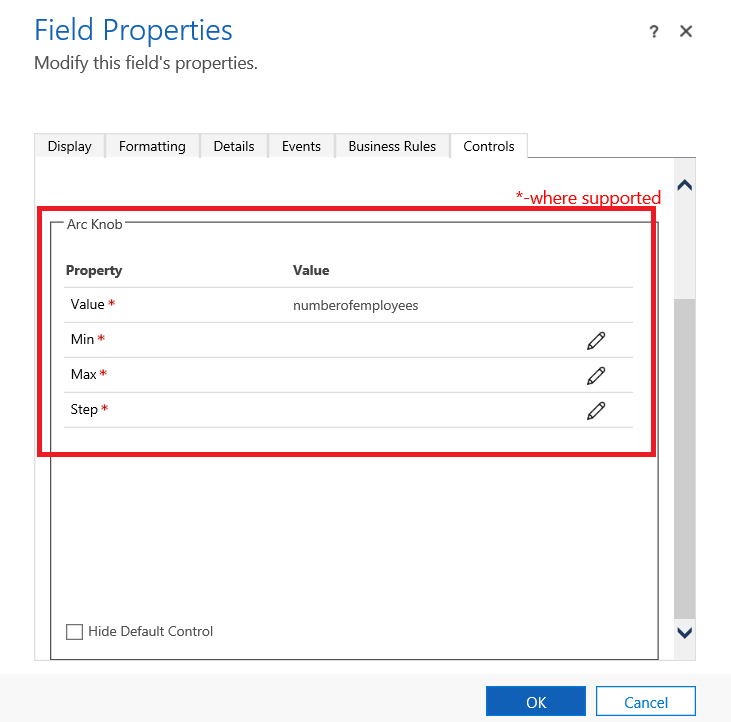
Select the pencil icon next to Min, Max, and Step, set the property option, and then select OK.

Min. Set the minimum accepted value. You can bind a static value that you enter or bind the value to an existing column. In this example Bind to static value is Currency and the minimum value that can be entered is zero.
Bind to a static value. Select the data type, such as a whole number (Whole.None), currency, floating point (FP), or decimal. Next, enter a number that represents the minimum accepted value for the column.
Bind to values on a field. Select a column from the list that will be used as the minimum accepted value.
Max. Set the maximum accepted value for the column. Similar to the Min value, you can bind a static value that you enter or bind the value to an existing column as described earlier. In this example, Bind to static value is Currency and the maximum value that can be entered is 1 billion.
Step. This represents the unit to increment or decrement when adding to or subtracting from the current value. For example, for budget amount you can select 100 dollar increments\decrements.
Hide Default Control. Hides the component so neither the component nor the data is displayed in any of the clients that don't support the code component.
Select OK, to close the Field Properties page.
To activate the customization, on the table form select Save, and then select Publish.
Select Save and Close to close the form editor.
Add code component to a table
To add a code component like dataset component or simple table component to a grid or view, follow the steps below:
- Navigate to Settings > Customizations and click on Customize the System.
- Click on the arrow next to Entities tab a select the table you want to add the code component.
- Click on the Controls tab and click on Add a control.
- On the Add Control page, select the component that you want, such as Simple Table component and then select Add.
- Choose the client where you want the component to appear.
See the code component in action
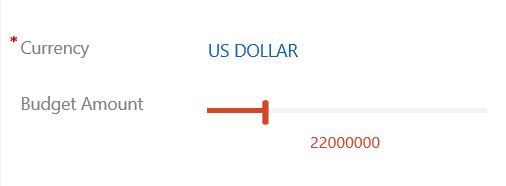
Open a record that includes the column with the code component, such as the Opportunity form from the previous example, and view how the column is changed. The column is now rendered as a slider component instead of the text column.

See also
Implementing components in TypeScript
Power Apps component framework API reference
Power Apps component framework overview