Office Scripts sample scenario: Automated task reminders
In this scenario you're managing a project. You use an Excel worksheet to track your employees' status every month. You often need to remind people to fill out their status, so you've decided to automate that reminder process.
You'll create a Power Automate flow to message people with missing status fields and apply their responses to the spreadsheet. To do this, you'll develop a pair of scripts to handle the working with the workbook. The first script gets a list of people with blank statuses and the second script adds a status string to the right row. You'll also make use of Teams Adaptive Cards to have employees enter their status directly from the notification.
Scripting skills covered
- Create flows in Power Automate
- Pass data to scripts
- Return data from scripts
- Teams Adaptive Cards
- Tables
Prerequisites
This scenario uses Power Automate and Microsoft Teams.
Setup instructions
Download the workbook
Download the sample workbook to your OneDrive.
Open the workbook in Excel.
Create the scripts
First, we need a script to get all the employees with status reports that are missing from the spreadsheet. Under the Automate tab, select New Script and paste the following script into the editor.
/**
 * This script looks for missing status reports in a project management table.
 *
 * @returns An array of Employee objects (containing their names and emails).
 */
function main(workbook: ExcelScript.Workbook): Employee[] {
  // Get the first worksheet and the first table on that worksheet.
  let sheet = workbook.getFirstWorksheet()
  let table = sheet.getTables()[0];

  // Give the column indices names matching their expected content.
  const NAME_INDEX = 0;
  const EMAIL_INDEX = 1;
  const STATUS_REPORT_INDEX = 2;

  // Get the data for the whole table.
  let bodyRangeValues = table.getRangeBetweenHeaderAndTotal().getValues();

  // Create the array of Employee objects to return.
  let people: Employee[] = [];

  // Loop through the table and check each row for completion.
  for (let i = 0; i < bodyRangeValues.length; i++) {
    let row = bodyRangeValues[i];
    if (row[STATUS_REPORT_INDEX] === "") {
      // Save the email to return.
      people.push({ name: row[NAME_INDEX].toString(), email: row[EMAIL_INDEX].toString() });
    }
  }

  // Log the array to verify we're getting the right rows.
  console.log(people);

  // Return the array of Employees.
  return people;
}

/**
 * An interface representing an employee.
 * An array of Employees will be returned from the script
 * for the Power Automate flow.
 */
interface Employee {
  name: string;
  email: string;
}
Save the script with the name Get People.
Next, we need a second script to process the status report cards and put the new information in the spreadsheet. In the Code Editor task pane, select New Script and paste the following script into the editor.
/**
 * This script applies the results of a Teams Adaptive Card about
 * a status update to a project management table.
 *
 * @param senderEmail - The email address of the employee updating their status.
 * @param statusReportResponse - The employee's status report.
 */
function main(workbook: ExcelScript.Workbook,
  senderEmail: string,
  statusReportResponse: string) {

  // Get the first worksheet and the first table in that worksheet.
  let sheet = workbook.getFirstWorksheet();
  let table = sheet.getTables()[0];

  // Give the column indices names matching their expected content.
  const NAME_INDEX = 0;
  const EMAIL_INDEX = 1;
  const STATUS_REPORT_INDEX = 2;

  // Get the range and data for the whole table.
  let bodyRange = table.getRangeBetweenHeaderAndTotal();
  let tableRowCount = bodyRange.getRowCount();
  let bodyRangeValues = bodyRange.getValues();

  // Create a flag to denote success.
  let statusAdded = false;

  // Loop through the table and check each row for a matching email address.
  for (let i = 0; i < tableRowCount && !statusAdded; i++) {
    let row = bodyRangeValues[i];

    // Check if the row's email address matches.
    if (row[EMAIL_INDEX] === senderEmail) {
      // Add the Teams Adaptive Card response to the table.
      bodyRange.getCell(i, STATUS_REPORT_INDEX).setValues([
        [statusReportResponse]
      ]);
      statusAdded = true;
    }
  }

  // If successful, log the status update.
  if (statusAdded) {
    console.log(
      `Successfully added status report for ${senderEmail} containing: ${statusReportResponse}`
    );
  }
}
Save the script with the name Save Status.
Create the Power Automate flow
Open the Power Automate Create tab.
Tip
If you haven't created a flow before, please check out our tutorial Start using scripts with Power Automate to learn the basics.
Create a new Instant cloud flow.
Choose Manually trigger a flow from the options and select Create.
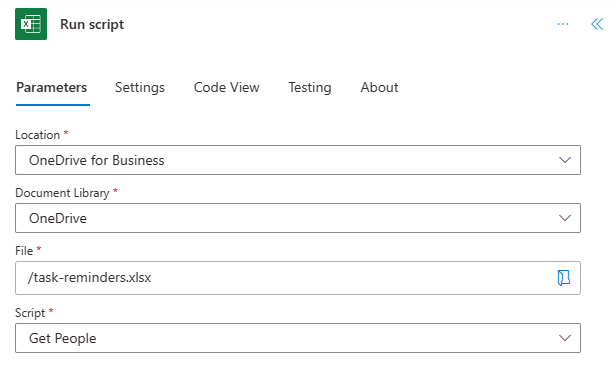
The flow needs to call the Get People script to get all the employees with empty status fields. In the flow builder, select the + button and Add an action. Select the Excel Online (Business) connector's Run script action. Provide the following entries for the flow step:
- Location: OneDrive for Business
- Document Library: OneDrive
- File: task-reminders.xlsx (Chosen through the file browser)
- Script: Get People
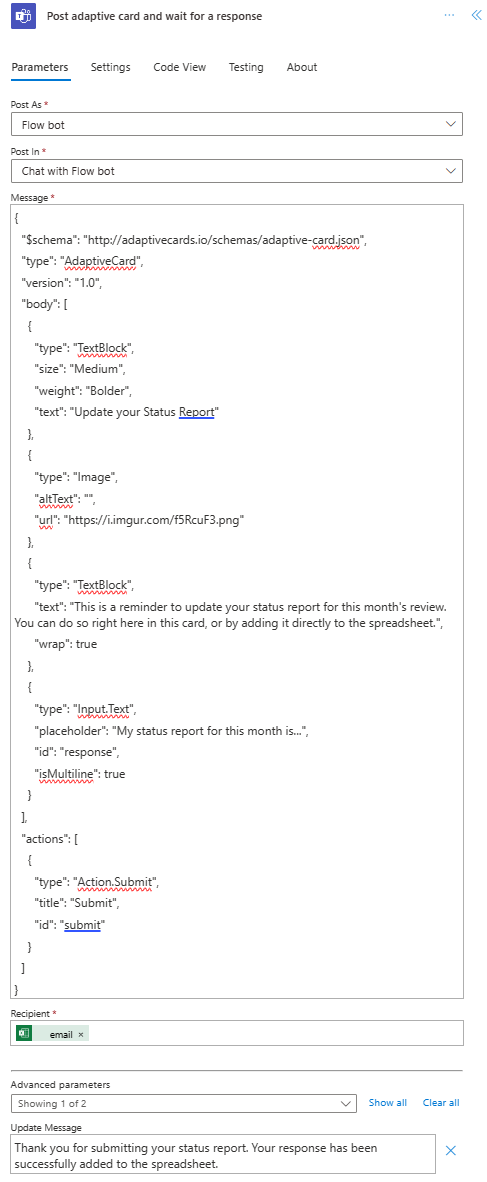
Next, the flow needs to process each Employee in the array returned by the script. Add the Microsoft Teams connector's Post adaptive card and wait for a response action.
Sending an Adaptive Card requires the card's JSON to be provided as the Message. You can use the Adaptive Card Designer to create custom cards. For this sample, use the following JSON.
{
  "$schema": "http://adaptivecards.io/schemas/adaptive-card.json",
  "type": "AdaptiveCard",
  "version": "1.0",
  "body": [
    {
      "type": "TextBlock",
      "size": "Medium",
      "weight": "Bolder",
      "text": "Update your Status Report"
    },
    {
      "type": "Image",
      "altText": "",
      "url": "https://i.imgur.com/f5RcuF3.png"
    },
    {
      "type": "TextBlock",
      "text": "This is a reminder to update your status report for this month's review. You can do so right here in this card, or by adding it directly to the spreadsheet.",
      "wrap": true
    },
    {
      "type": "Input.Text",
      "placeholder": "My status report for this month is...",
      "id": "response",
      "isMultiline": true
    }
  ],
  "actions": [
    {
      "type": "Action.Submit",
      "title": "Submit",
      "id": "submit"
    }
  ]
}
For the Recipient field, add email from the dynamic content (the selection will have the Excel logo by it). Adding email causes the flow step to be surrounded by a For each block. That means the array will be iterated over by Power Automate.
Fill out the remaining fields as follows:
- Post as: Flow bot
- Post in: Chat with Flow bot
- Update message: Thank you for submitting your status report. Your response has been successfully added to the spreadsheet.
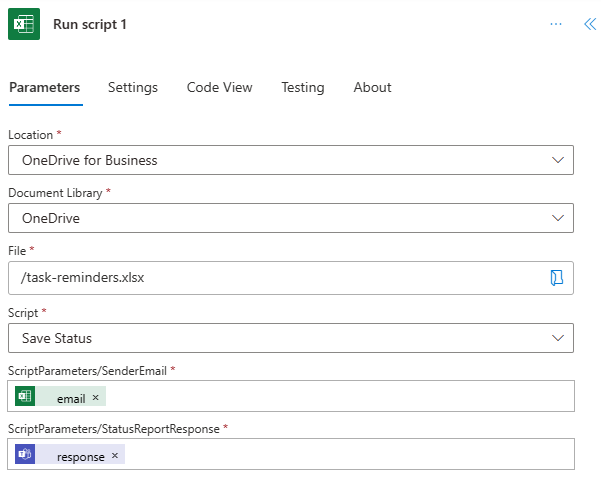
In the For each block, following the Post adaptive card and wait for a response action, add a new action. Select the Excel Online (Business) connector's Run script action. Provide the following entries for the flow step:
- Location: OneDrive for Business
- Document Library: OneDrive
- File: task-reminders.xlsx (Chosen through the file browser)
- Script: Save Status
- senderEmail: email (dynamic content from Excel)
- statusReportResponse: response (dynamic content from Teams)
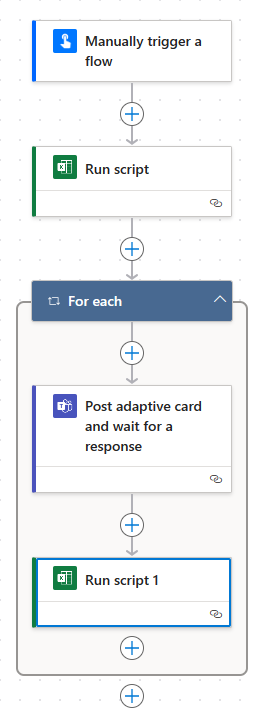
Save the flow. The flow designer should look like the following image.
Running the flow
To test the flow, make sure any table rows with blank status use an email address tied to a Teams account (you should probably use your own email address while testing). Use the Test button on the flow editor page or run the flow through your My flows tab. Be sure to allow access when prompted.
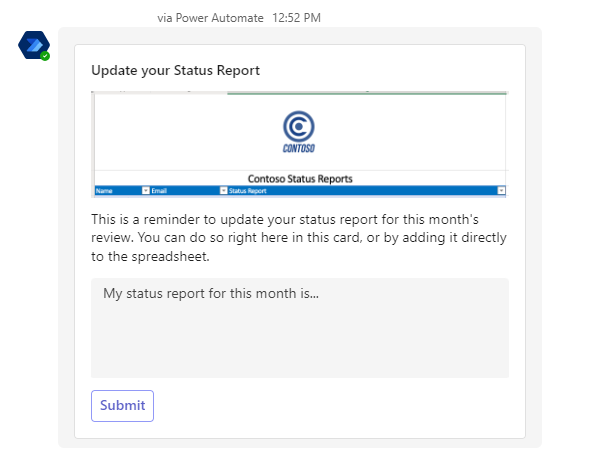
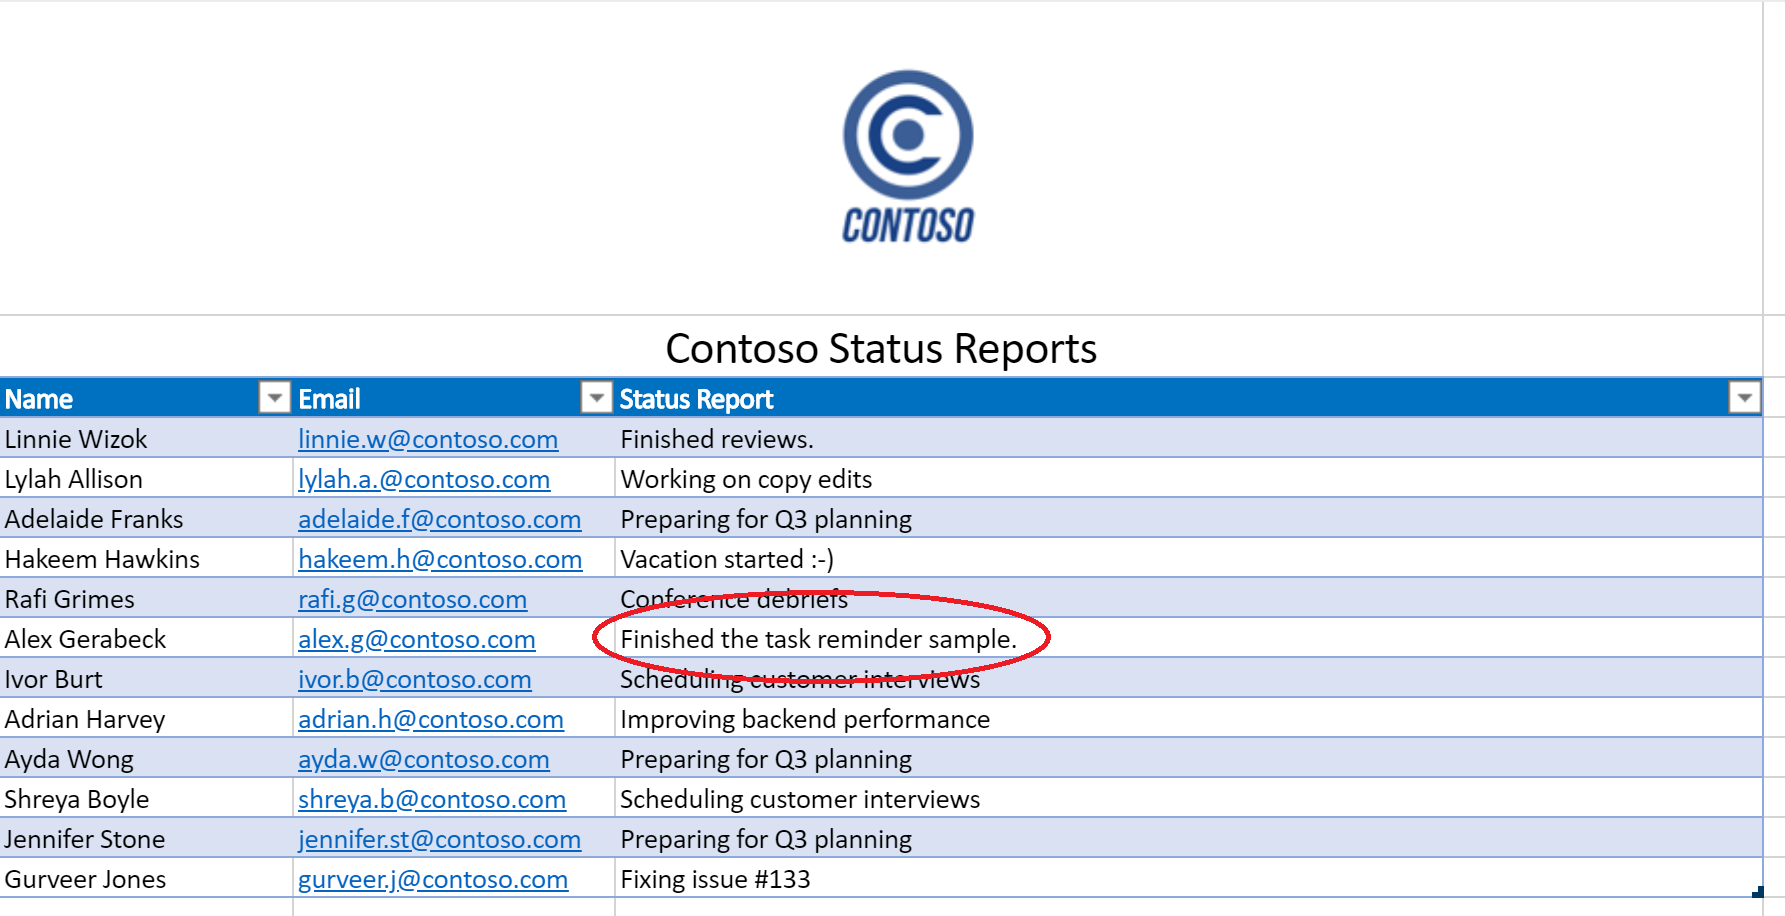
You should receive an Adaptive Card from Power Automate through Teams. Once you fill out the status field in the card, the flow will continue and update the spreadsheet with the status you provide.
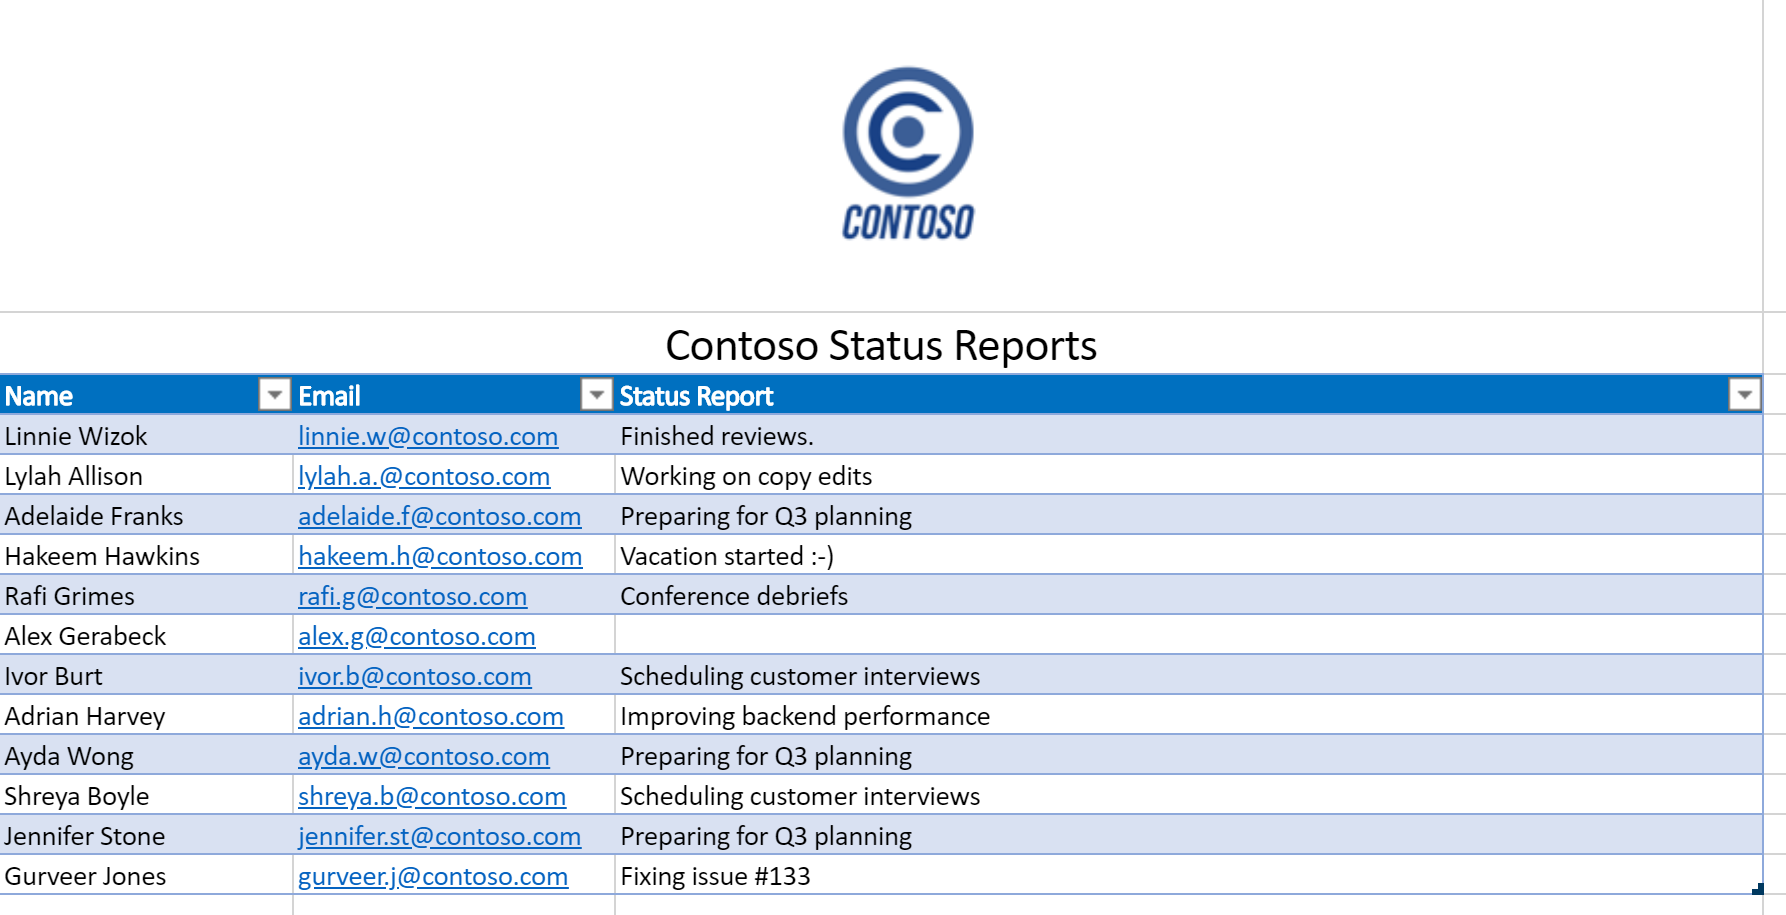
Before running the flow
Receiving the Adaptive Card
After running the flow
Office Scripts