Display content in the title bar area using Window Controls Overlay
A Progressive Web App (PWA) that's installed on the desktop can display content where the title bar normally is, to make the PWA feel more native, by using the Window Controls Overlay API.
The Window Controls Overlay API does the following:
- Allows you to display web content over the entire surface area of the app.
- Moves the critical system-required window controls into an overlay.
- Makes it possible for your content to stay clear of this overlay.
A Progressive Web App (PWA) can define how it should be displayed on mobile platforms, by using the display member in the web app manifest file. However, to create an immersive, native-like experience, desktop PWAs can use another approach.
By default, a PWA installed on desktop can display content in an area that starts immediately below the reserved title bar area:
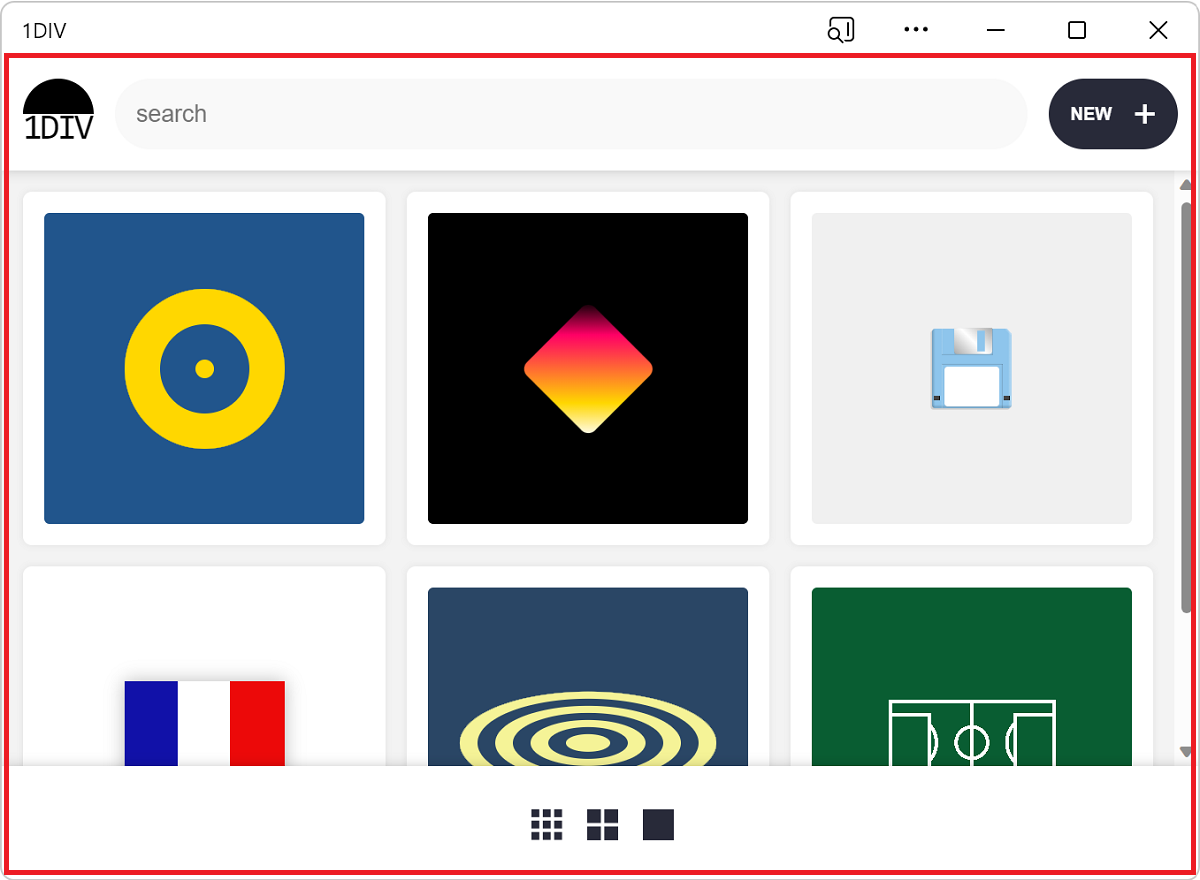
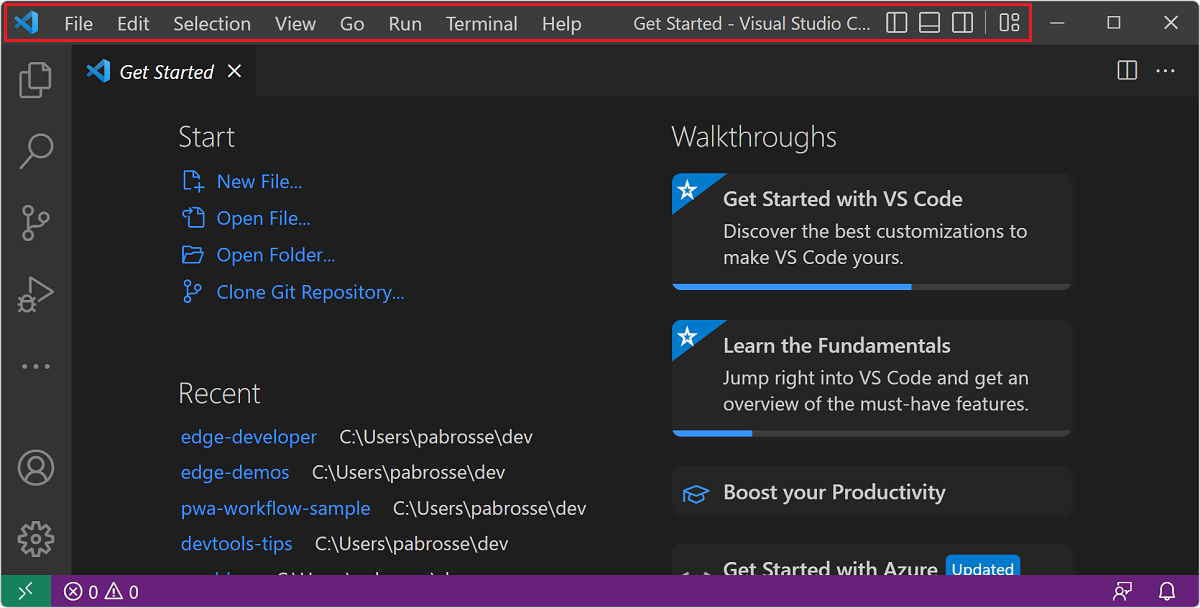
Displaying content where the title bar normally is can help PWAs feel more native. Many desktop applications, such as Visual Studio Code, Microsoft Teams, and Microsoft Edge already do this:
Enable the Window Controls Overlay in your app
First, enable the Window Controls Overlay feature in your app's web app manifest file. To do this, in the manifest file, set the display_override property:
{
  "display_override": ["window-controls-overlay"]
}
See also:
- display_override at MDN > References > Web app manifests.
- Web app manifests at MDN > References.
- The web app manifest in Making PWAs installable at MDN > References > Progressive web apps > Guides.
Toggle the title bar
When the Window Controls Overlay feature is enabled, the user can choose to have the title bar or not, by clicking the title bar toggle button:
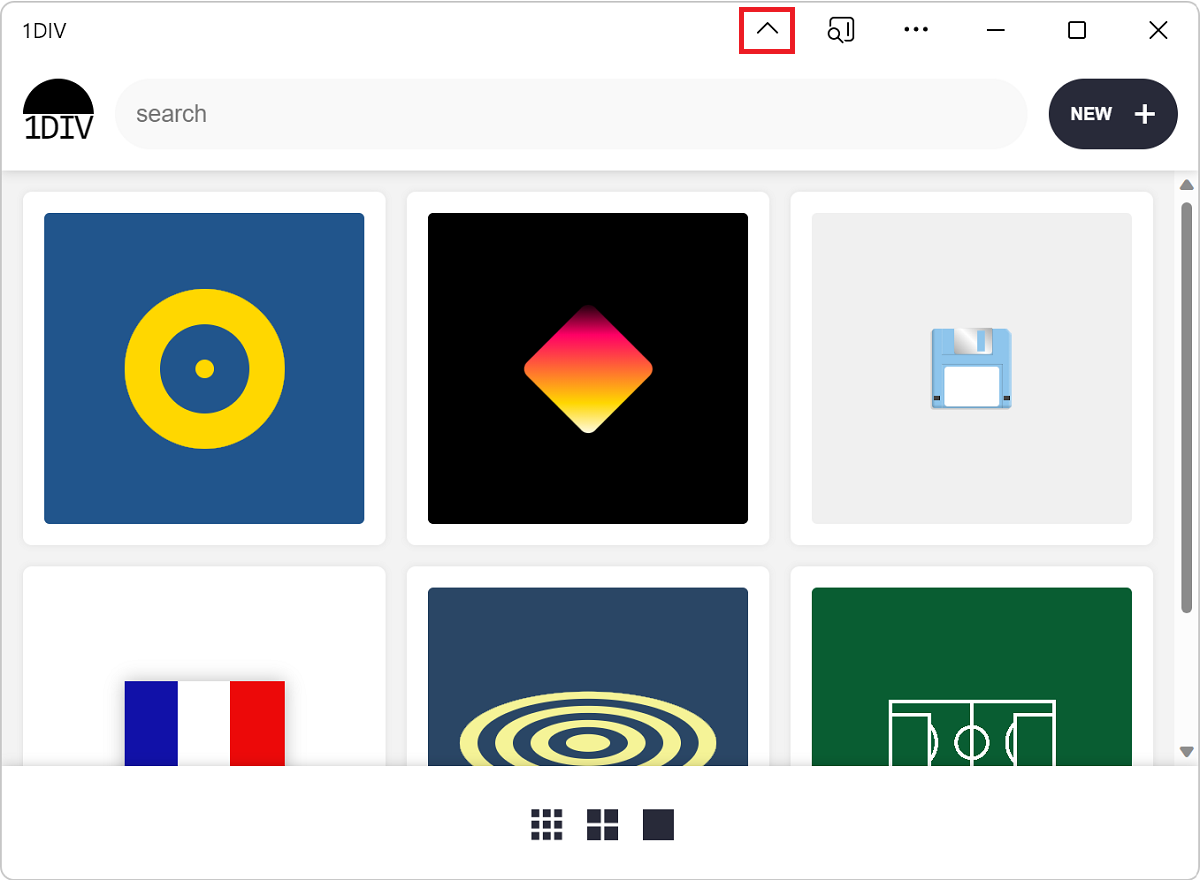
Your code can't assume that the window controls overlay is displayed, because:
- The user can choose whether to display the title bar.
- Your app can also run in a web browser or on a mobile device, as well as running as a desktop app.
Therefore, your code needs to react to title bar geometry changes. To learn more, see React to overlay changes.
Use CSS environment variables to stay clear of the overlay
The env() CSS function can be used to access environment variables that the user agent defines.
Four environment variables are added by the Window Controls Overlay feature:
| Variable | Description |
|---|---|
titlebar-area-x |
Distance, in px, of the area normally occupied by the title bar from the left side of the window |
titlebar-area-y |
Distance, in px, of the area normally occupied by the title bar from the top side of the window |
titlebar-area-width |
Width of the title bar area, in px |
titlebar-area-height |
Height of the title bar area, in px |
You can use these environment variables to position and size your own content where the title bar would normally appear, when the window controls overlay feature is disabled:
#title-bar {
  position: fixed;
  left: env(titlebar-area-x, 0);
  top: env(titlebar-area-y, 0);
  height: env(titlebar-area-height, 50px);
  width: env(titlebar-area-width, 100%);
}
Using position: fixed; makes sure your title bar does not scroll with the rest of the content and instead stays aligned with the window controls overlay.
Knowing where the overlay is and how big it is is important. The overlay might not always be on the same side of the window; on macOS, the overlay is on the left side, but on Windows, the overlay is on the right side. Also, the overlay might not always be the same size.
The env() CSS function takes a second parameter that's useful for defining the position of your app content when the window controls overlay feature is missing or disabled.
Make a region a drag handle for the window
When the title bar is hidden, only the system-critical window controls remain visible (the Maximize, Minimize, Close, and App Info icons). This means that there is very little space available for users to move the application window around.
You can use the -webkit-app-region CSS property to offer more ways for users to drag the app. For example, if your app has its own titlebar, you can turn its titlebar into a window drag handle:
#title-bar {
  position: fixed;
  left: env(titlebar-area-x, 0);
  top: env(titlebar-area-y, 0);
  height: env(titlebar-area-height, 50px);
  width: env(titlebar-area-width, 100%);
  -webkit-app-region: drag;
}
React to overlay changes
A user can toggle the title bar or change the window dimensions while the app is running. Knowing when these things happen can be important for your app. Your app might need to rearrange some of the content that's displayed in the title bar, or rearrange the layout elsewhere on the page.
To listen for changes, use the geometrychange event on the navigator.windowControlsOverlay object. To detect whether the title bar is visible, use the visible property on the navigator.windowControlsOverlay object.
Note that the geometrychange is fired very frequently when the user resizes the window. To avoid running layout-changing code too often and causing performance problems in your app, use a debounce function to limit how many times the event is handled. See The Difference Between Throttling and Debouncing.
const debounce = (func, wait) => {
  let timeout;
  return function executedFunction(...args) {
    const later = () => {
      clearTimeout(timeout);
      func(...args);
    };
    clearTimeout(timeout);
    timeout = setTimeout(later, wait);
  };
};

if ('windowControlsOverlay' in navigator) {
  navigator.windowControlsOverlay.addEventListener('geometrychange', debounce(e => {
    // Detect if the Window Controls Overlay is visible.
    const isOverlayVisible = navigator.windowControlsOverlay.visible;

    // Get the size and position of the title bar area.
    const titleBarRect = e.titlebarAreaRect;

    console.log(`The overlay is ${isOverlayVisible ? 'visible' : 'hidden'}, the title bar width is ${titleBarRect.width}px`);
  }, 200));
}
Demo app
1DIV is a PWA demo app that uses the Window Controls Overlay feature.
In Microsoft Edge, open the 1DIV demo app in a new window or tab.
In the Address bar, click the App available. Install 1DIV (
 ) button. The Install 1DIV app dialog opens.
Click the Install button. The 1DIV app opens in its own window, with the App installed dialog open:
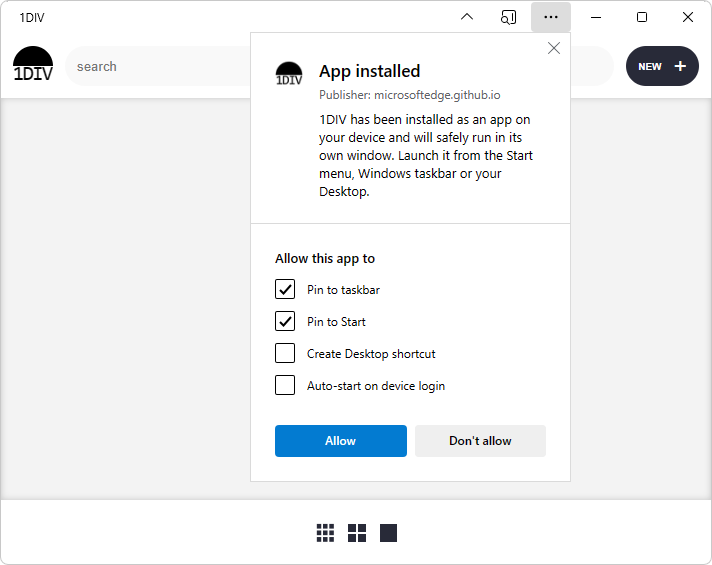
Click the Close (X) button of the dialog. (Or, select or clear checkboxes and then click the Allow button.)
The app's title bar contains at least the following window controls:
Icon Tooltip 
Hide title bar 
Settings and more 
Minimize 
Restore 
Close In the title bar, click the Hide title bar (
 ) button.
The app now displays content all the way to the top of the window frame, where the title bar used to be:
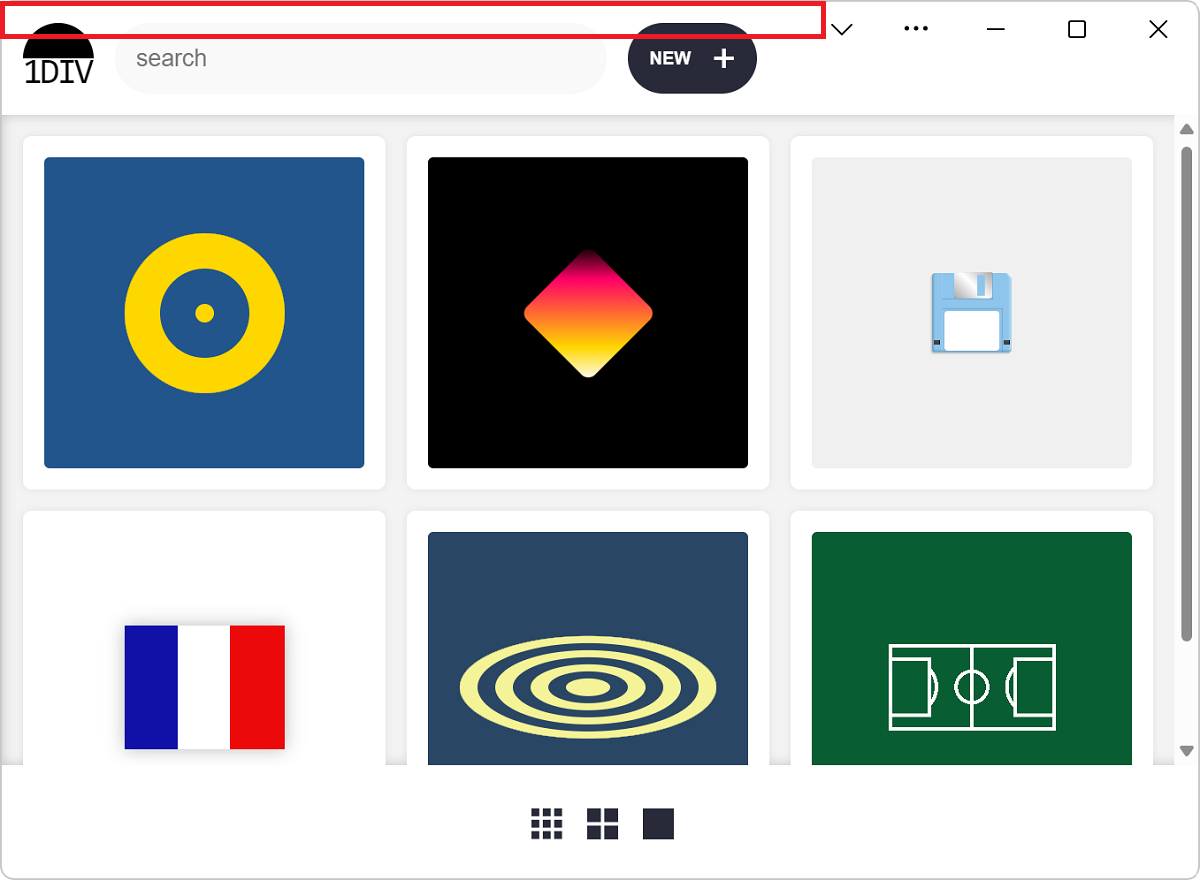
The top area of the app is a drag handle, to let users move the window.
The source code for this demo app is in the 1DIV repo.
The manifest.json source file declares the app's use of the Window Controls Overlay feature.
The app.js source file uses the
navigator.windowControlsOverlayobject.The app.css source file uses the
titlebar-area-*CSS environment variables.
Preview the custom overlay without installing the PWA
In Microsoft Edge DevTools, in the Application tool, you can simulate the Window Controls Overlay (WCO) feature, without having to install the PWA first and enable the WCO feature. By simulating the WCO feature from within DevTools, you can test CSS code changes for your title bar area more quickly than by re-installing the revised PWA.
The simulated overlay is a static image. The values of the CSS variables env(titlebar-area-left), env(titlebar-area-top), env(titlebar-area-width), and env(titlebar-area-height) are set to match the platform that you select.
See Simulate the Window Controls Overlay API without installing your PWA.