Sample: Display an image in a pop-up
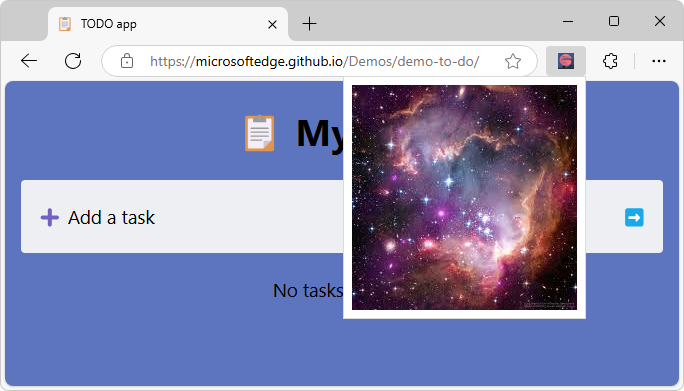
This sample is a simple static extension, without JavaScript, that displays the stars.jpeg image in a small webpage in a pop-up in any Microsoft Edge tab:
Clone the MicrosoftEdge-Extensions repo
You can use various tools to clone a GitHub repo. You can download a selected directory, or clone the entire repo. These instructions use GitHub Desktop to clone the repo and switch to a working branch.
To clone the MicrosoftEdge-Extensions repo to your local drive:
If not done already, install GitHub desktop: go to https://github.com/apps/desktop, and then click the Download now button.
Go to MicrosoftEdge-Extensions.
Click the Code button, and then select Open with GitHub Desktop.
A dialog opens, saying This site is trying to open GitHubDesktop.exe.
Click the Open button.
GitHub Desktop opens, with the MicrosoftEdge-Extensions repo selected in the upper left dropdown list.
Or, in GitHub Desktop, the Clone a repository dialog opens:
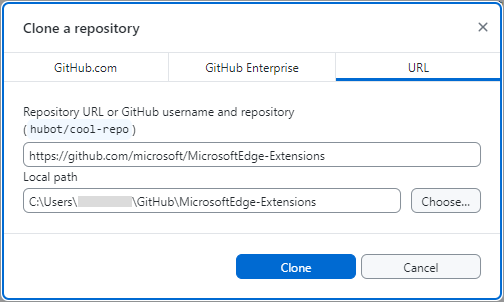
Specify the local drive path to place the cloned repo directory into; for example:
C:\Users\accountname\GitHub\.Click the Clone button.
Create working branch:
In GitHub Desktop, make sure that in the upper left of GitHub desktop, Current repository is MicrosoftEdge-Extensions.
In the Current branch drop-down list, it says main.
In the Current branch drop-down list, click the Branches tab, and then click the New branch button.
The Create a branch dialog opens.
In the Name text box, enter a branch name, such as ext-sample-1, and then click the Create branch button.
In the upper middle and lower left of GitHub Desktop, the current branch is shown, such as ext-sample-1.
You are now free to modify the code in your working branch, without altering the code that's in the "main" branch of the repo. Later you might want to switch back to the "main" branch, or create a different branch based off the "main" branch.
Install the sample locally
Instead of installing the sample from the Store, you'll install the sample locally, so that you can possibly modify it and quickly test the changes. Installing locally is sometimes called sideloading an extension.
In Microsoft Edge, click the Extensions (
 ) button, next to the Address bar, if this icon is displayed. Or, select Settings and more (...) > Extensions. The Extensions pop-up opens:
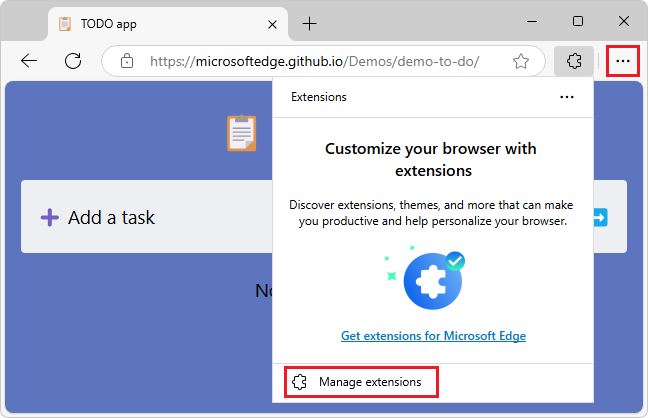
Click Manage extensions. The Extensions management page opens in a new tab:
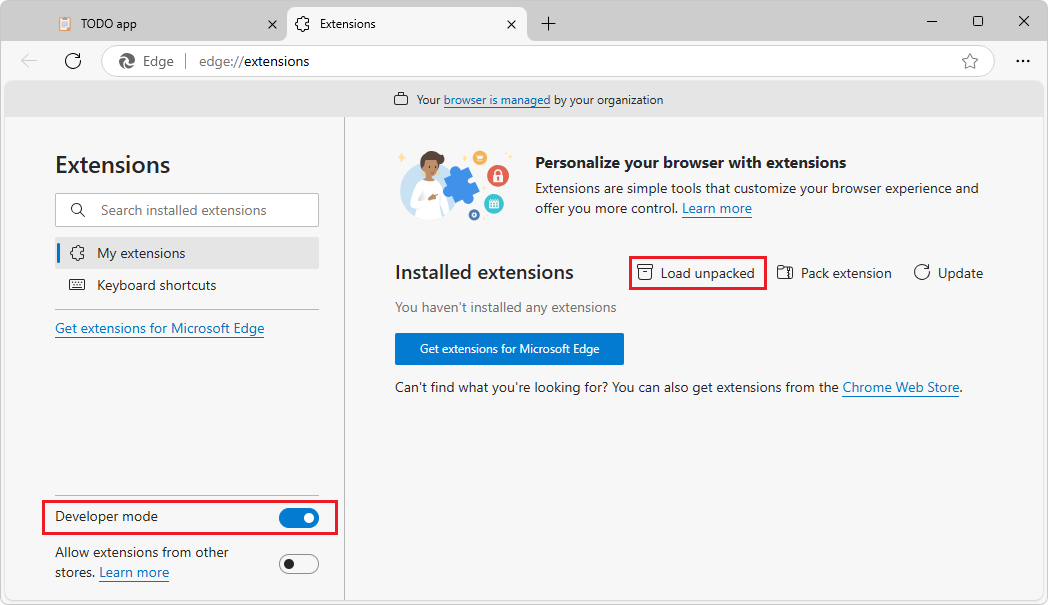
Turn on the Developer mode toggle.
When installing your extension for the first time, click the Load unpacked (
 ) button. The Select the extension directory dialog opens.
Select the directory that contains the extension's source files, such as
manifest.json, and then click the Select Folder button.Example path:
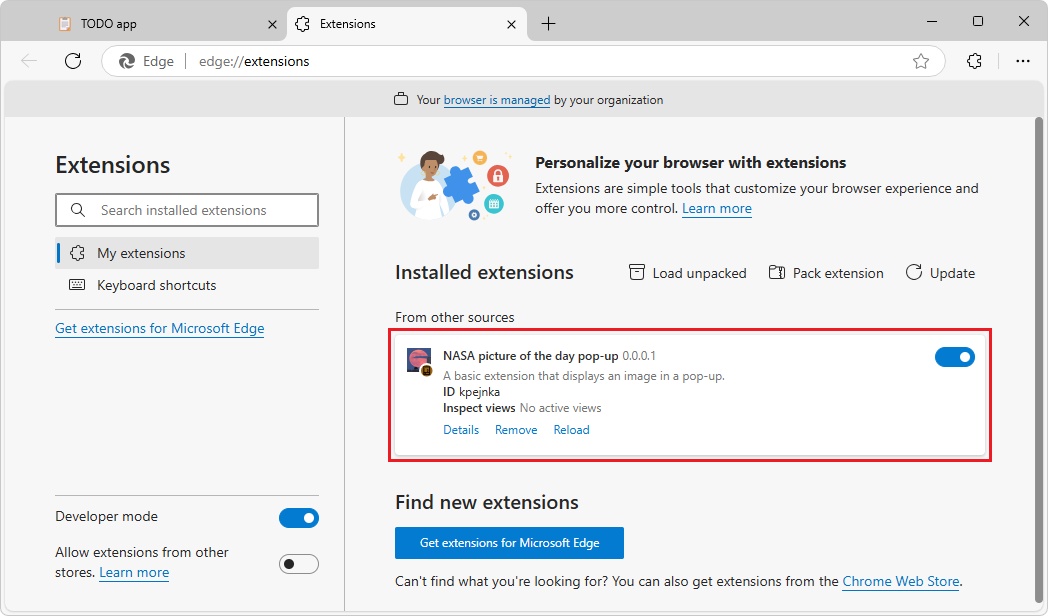
C:\Users\myUsername\GitHub\MicrosoftEdge-Extensions\Extension samples\extension-getting-started-part1\part1\The extension is installed in the browser, similar to an extension that's installed from the store:
Run the sample
Go to a webpage, such as TODO app, in a new window or tab. For this sample, this step is optional and is just to match the screenshots; this sample doesn't require a webpage to be open.
In the upper right of Microsoft Edge, click the Extensions (
 ) button. Or, select Settings and more (...) > Extensions.
The Extensions pop-up opens:
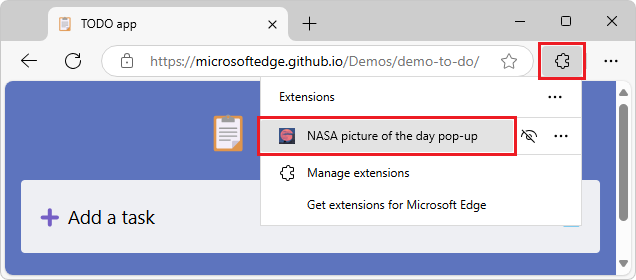
Click the extension's icon or name (NASA picture of the day pop-up).
The extension opens, and the extension's icon is added next to the Address bar and Extensions (
 ) icon. The extension displays
 popup.html, containingstars.jpeg, in a pop-up:
You can open this particular sample extension in any tab, including an empty tab or the Manage Extensions tab.
See also:
Study the sample
In the following sections, you study the sample. After that, to develop your own Microsoft Edge extension, you can copy and modify the sample's directory, and install and test the resulting extension.
Files and directories
The sample has the following directory structure:
Example path for the sample:
C:\Users\localAccount\GitHub\MicrosoftEdge-Extensions\Extension samples\extension-getting-started-part1\part1\
Directories and files in the \part1\ directory:
/icons/
   nasapod16x16.png
   nasapod32x32.png
   nasapod48x48.png
   nasapod128x128.png
/images/
   stars.jpeg
/popup/
   popup.html
manifest.json
- The
/icons/directory contains versions of a.pngfile that's used to represent the extension near the browser's Address bar. - The
/images/directory containsstars.jpeg, which is displayed in the extension's pop-up. - The
/popup/directory containspopup.html, which defines the webpage content that's displayed in the extension's pop-up. manifest.jsoncontains basic information about the extension.
The manifest file (manifest.json)
Every extension package must have a manifest.json file at the root. The manifest provides details of your extension, the extension package version, and the extension name and description.
manifest.json contains the following lines:
{
  "name": "NASA picture of the day pop-up",
  "version": "0.0.0.1",
  "manifest_version": 3,
  "description": "A basic extension that displays an image in a pop-up.",
  "icons": {
      "16": "icons/nasapod16x16.png",
      "32": "icons/nasapod32x32.png",
      "48": "icons/nasapod48x48.png",
      "128": "icons/nasapod128x128.png"
  },
  "action": {
      "default_popup": "popup/popup.html"
  }
}
Icons for launching the extension
The /icons/ directory contains the icon image files. The icons are used as the background image for the button that you click to launch the extension:
![]()
When the extension is running, one of the icons is displayed on the toolbar, next to the Address bar:
![]()
To close the extension, click the extension's icon on the toolbar, or click the Extensions (![]() ) button.
) button.
Recommendations for icons:
- Use
PNGformat, but you can also useBMP,GIF,ICOorJPEGformats. - If you provide a single icon file, use 128 x 128 px, which can be resized by the browser if necessary.
The pop-up dialog (popup.html)
popup.html in the popup directory runs when you launch the extension. When you click the icon to launch the extension, this file is displayed as a modal dialog.
popup.html contains the following code, to display a title and the stars image:
<html lang="en">
    <head>
        <meta charset="UTF-8" />
        <title>NASA picture of the day</title>
    </head>
    <body>
        <div>
            <img src="/images/stars.jpeg" alt="Stars" />
        </div>
    </body>
</html>
The popup (popup.html) is registered as the "default_popup" in manifest.json, in the action key section:
manifest.json (portion)
{
    ...
    "action": {
        "default_popup": "popup/popup.html"
    }
}
Next steps
To develop your own Microsoft Edge extension, you can copy and modify the sample's directory, and install and test the resulting extension.
After running and testing this extension sample, you can continue on to Sample: Insert an image in the webpage, which dynamically inserts JavaScript running as content in the browser tab.
See also
GitHub:
- MicrosoftEdge-Extensions repo.
- /part1/ - source code of the Part 1 sample.