Walkthrough: Flat File Disassembly Using a Header and Trailer
Overview
This walkthrough demonstrates the use of schemas created by the Flat File Schema Wizard to perform flat file disassembly of a file containing a header, a trailer, and a repeating message body. In this walkthrough, you develop part of a fictitious error-tracking system that meets the following requirements:
Error messages are logged at various physical sites within the company and sent to a central location for processing into various back-end systems.
Error messages are written into a flat file format that contains a header indicating location, a body containing one or more error messages, and a trailer indicating the batch number.
Messages are considered invalid if they do not have a header, body, and trailer.
When the walkthrough is completed you will have a BizTalk Server application that processes flat files and writes them out as XML for processing by a back-end system.
Prerequisites
For this example you need to be comfortable with creating BizTalk Server projects, signing an assembly, and using the BizTalk Server Administration console to view applications and ports. You should also be comfortable with the ideas presented in Walkthrough: Deploying a Basic BizTalk Application. Basic familiarity with the Flat File Schema Wizard is also helpful but not required.
What This Example Does
This example processes inbound flat file messages using a custom pipeline and the Flat File Disassembler component. Messages are parsed using header, trailer, and body schemas and then written out to a send location for back-end processing.
Example
To create the example, follow the steps outlined in the following sections.
Create a New BizTalk Project
Before building a solution you need to create a BizTalk project, ensure that it is strongly named, and assign it an application name. Assigning an application name prevents BizTalk Server from deploying the solution into the default BizTalk application.
Use Visual Studio to create a new BizTalk project. Call the project FFDisassemblerWalkthrough.
Generate a key file and assign it to the project. For more information about this task, see Signing Page, Project Designer.
In the deployment properties for the project, set Application Name to “FlatFileExample” and set Restart Host Instances to
True. Setting this flag tells the host to clear any cached instances of the assembly.
Create the Sample Data File
Before generating schemas, you need to create a test file.
Start Notepad or another text editor.
Create a sample test file. The file consists of a header indicating the location reporting the error(s), a trailer with a batch ID for this batch, and a body consisting of one or more error records. The format of the file is as follows:
Location
ERRORid|type|priority|description|errorDateTime
…additional error records
BatchID
The ERROR record is tagged with the text “ERROR” and delimited with the “|” character (versus positional). The data elements of the ERROR record are described in the following table.
Element Data type Description ID integer ID for this error. Type integer Type of error. Priority string Priority indicator: Low, Medium, or High. Description string Description of the error. ErrorDateTime DateTime Date and time that the error occurred. The file can have one or more ERROR records.
-- OR --
Copy the following sample data into the new file. The last line contains a trailing linefeed:
East Coast Facility
ERROR102|0|High|Sprocket query fails.|1999-05-31T13:20:00.000-05:00
ERROR16502|2|Low|Time threshold exceeded.|1999-05-31T13:20:00.000-05:00
8675309
Save the new sample file in the project directory. Use a descriptive name like "ErrorFile.txt" so it can be located easily.
Create and Test the Header, Trailer, and Body Schemas
After the sample data file is created, the next step is to create the header, trailer, and body schemas. These schemas are used with the Flat File Disassembler receive pipeline component to process received messages.
Use the Flat File Schema Wizard to create the header schema
Add a new schema to the project. In Solution Explorer, right-click FFDisassemblerWalkthrough, point to Add, and then click New Item.
In the Add New Item dialog box, click Schema Files and select Flat File Schema Wizard. Name the new schema "Header.xsd" and then click Add.
On the Welcome to the BizTalk Flat File Schema Wizard page, click Next.
On the Flat File Schema Information page, click Browse and locate the sample data file created earlier. Change the Record Name to "Header", verify the code page, and then click Next.
Note
If you saved the sample file in Unicode format the code page will be Little-Endian-UTF16 (1200). This will not adversely affect the example.
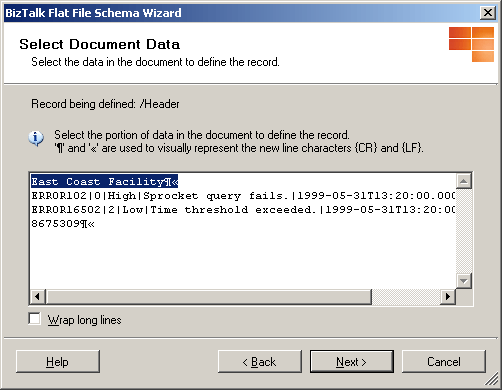
Next select the document data. On the Select Document Data page, highlight the first line of data including the new-line characters {CR} and {LF} as shown:
Click Next.
On the Select Record Format page, click Next to accept the default. You can accept the default "by delimiter symbol" because the data file does not use relative position.
On the Delimited Record page, click Next.
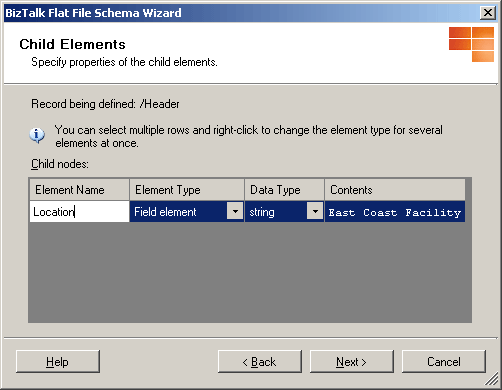
Now you specify child elements. The header contains one element named "Location":
Click Next to continue.
On the Schema View page, verify the schema.
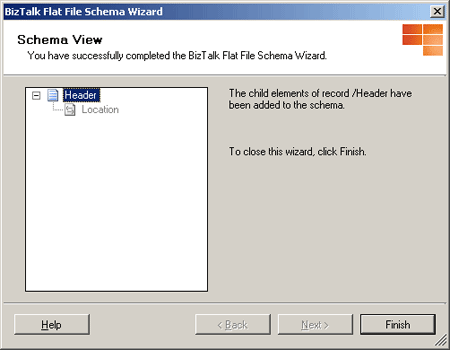
When you are satisfied, click Finish to complete the wizard.
Click the <Schema> node in the Header schema pane. In the Properties pane, change Element FormDefault to Qualified. This indicates that locally declared elements must be qualified by the target namespace in an instance document.
Use the Flat File Schema Wizard to create the trailer schema
Add a new schema to the project. In Solution Explorer, right-click FFDisassemblerWalkthrough, point to Add , and then click New Item.
In the Add New Item dialog box, click Schema Files and select Flat File Schema Wizard. Name the new schema "Trailer.xsd" and then click Add.
On the Welcome to the BizTalk Flat File Schema Wizard page, click Next.
On the Flat File Schema Information page, click Browse and locate the sample data file created earlier. Change the Record Name to "Trailer", verify the code page, and then click Next.
Note
If you saved the sample file in Unicode format the code page will be Little-Endian-UTF16 (1200). This will not adversely affect the example.
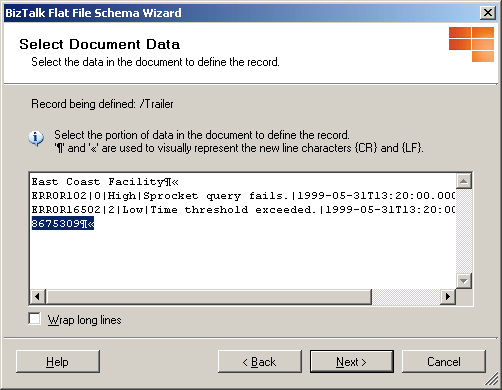
Next select the document data. On the Select Document Data page, highlight the last line of data including the new-line characters {CR} and {LF} as shown:
Click Next.
On the Select Record Format page, click Next to accept the default. You can accept the default "by delimiter symbol" because the data file does not use relative position.
On the Delimited Record page, click Next.
Now you specify child elements. The header contains one element named "BatchID":
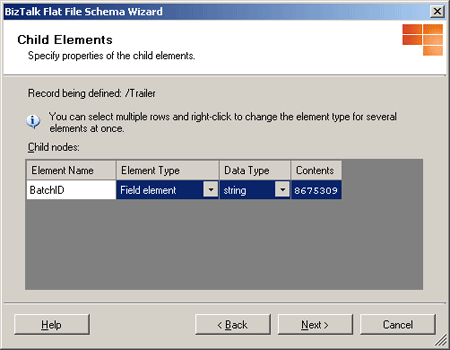
Click Next to continue.
On the Schema View page, verify the schema.
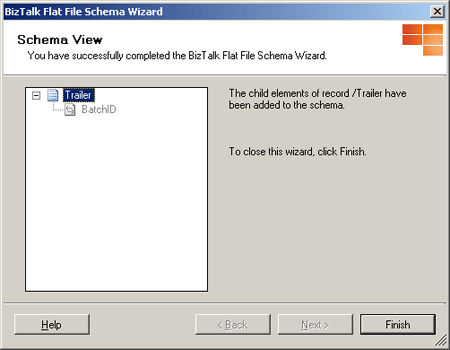
When you are satisfied, click Finish to complete the wizard.
Click the <Schema> node in the Trailer schema pane. In the Properties pane, change elementFormDefault to Qualified. This indicates that locally declared elements must be qualified by the target namespace in an instance document.
Use the Flat File Schema Wizard to create the body schema
Add a new schema to the project. In Solution Explorer, right-click FFDisassemblerWalkthrough, point to Add, and then click New Item.
In the Add New Item dialog box, click Schema Files and select Flat File Schema Wizard. Name the new schema "Body.xsd" and then click Add.
On the Welcome to the BizTalk Flat File Schema Wizard page, click Next.
On the Flat File Schema Information page, click Browse and locate the sample data file created earlier. Change the Record Name to "Body", verify the code page, and then click Next.
Note
If you saved the sample file in Unicode format the code page will be Little-Endian-UTF16 (1200). This will not adversely affect the example.
Next select the document data. On the Select Document Data page, highlight lines two and three of data including the new-line characters {CR} and {LF} as shown:
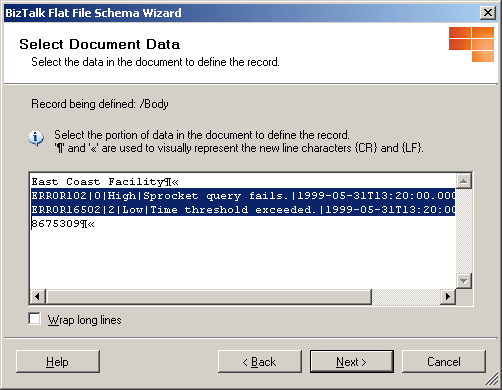
Click Next.
On the Select Record Format page, click Next to accept the default. You can accept the default "by delimiter symbol" because the data file does not use relative position.
On the Delimited Record page, select Next.
Next define the child elements. Change Body_Child1 to Errorand set its element type to Repeating record. Set the Body_Child2 element record type to Ignore.
On the Schema View page, click Next to define the child elements of the Error record.
On the Select Document Data page, click Next. The wizard chooses the record-defining data correctly.
On the Select Record Format page, click Next. The data is formatted by delimiter symbol.
On the Delimited Record page, select | for the Child delimiter. Next, select the Record has a tag identifier check box and type ERROR for the tag value.
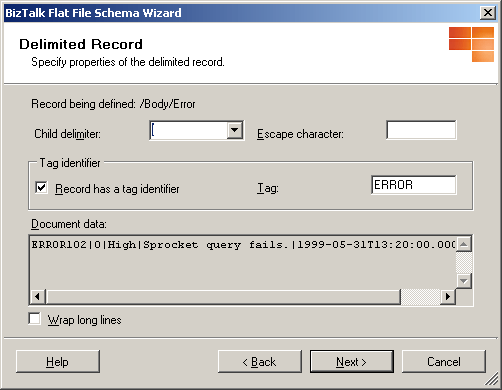
Click Next.
Now define the child elements of the Error record.
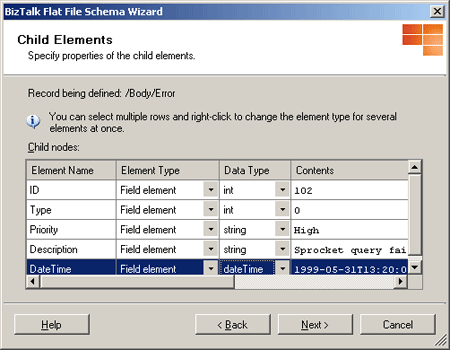
Click Next.
On the Schema View page, verify the schema.
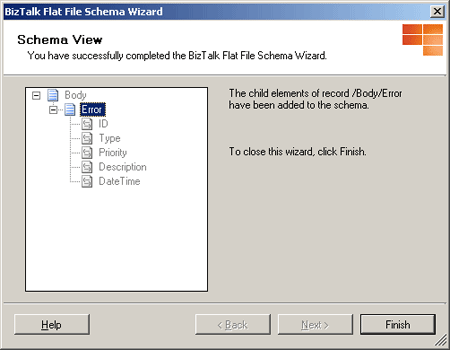
If you have made any mistakes, click Back and make the necessary corrections. When you are satisfied, click Finish to complete the wizard.
Click the <Schema> node in the Body schema pane. In the Properties pane, change Element FormDefault to Qualified. This indicates that locally declared elements must be qualified by the target namespace in an instance document.
Click the <Error> node on the Body schema pane. In the Properties pane, change Max Occurs to 1. This causes the Flat File Disassembler to split each error into its own message.
Test the schemas using FFDasm
Open a command prompt and change the directory to your project directory.
From the command prompt, run FFDasm.exe as shown below.
<Samples Path>\SDK\Utilities\PipelineTools\FFDasm ErrorFile.txt -hs header.xsd -bs body.xsd -ts Trailer.xsdFor information about the location of this and other pipeline tools, see Pipeline Tools.
FFDasm.exe should produce two output files named {GUID}.xml, one for each ERROR record in the test file. The high-priority error record looks like the following:
<Body xmlns="http://FFDisassemblerWalkthrough.Body">
  <Error>
    <ID>102</ID>
    <Type>0</Type>
    <Priority>High</Priority>
    <Description>Sprocket query fails.</Description>
    <DateTime>1999-05-31T13:20:00.000-05:00</DateTime>
  </Error>
</Body>
Create a Custom Receive Pipeline
Now that the flat file schemas are defined, you need to create a custom pipeline that uses the Flat File Disassembler component. The Flat File Disassembler component can then be configured to use the header, body, and trailer schemas to break up messages.
Add a new receive pipeline to the project. In Solution Explorer, right-click the FFDisassemblerWalkthrough project, point to Add, and then click New Item.
In the Add New Item dialog box, point to Pipeline Files and then click Receive Pipeline. Name the new pipeline "FFReceivePipeline" and then click Add.
Configure the new pipeline by dragging the Flat File Disassembler component from the Toolbox pane to the Disassemble step.
In the Properties pane, set the Document schema to FFDisassemblerWalkthrough.Body, the Header schema to FFDisassemblerWalkthrough.Header and the Trailer schema to FFDisassemblerWalkthrough.Trailer.
Deploy the Application and Configure the Send and Receive Ports
With the schemas and custom receive pipeline created, you need to compile and deploy the project. After it is deployed, you can use the BizTalk Server Administration console to configure the send and receive ports.
Deploy
From within Visual Studio, deploy the solution by right-clicking on the project and then clicking Deploy.
Using the BizTalk Server Administration console, expand the Applications group to verify that FlatFileExample is present as a custom application.
Configure the receive port
Use Windows Explorer to create a directory named "Receive" under the FFDisassemblerWalkthrough project directory.
In the BizTalk Server Administration console, expand the FlatFileExample application, right-click Receive Ports, point to New, and then click One-way Receive Port.
In the Receive Port Properties dialog box, set the name of the port to "ReceiveError".
Click Receive Locations, and then click New to add a receive location. Name the new receive location "ReceiveErrorLocation". Set the Receive Pipeline to FFReceivePipeline. For Transport Type, select FILE, and then click Configure. Select the receive directory you created, and then set the File mask to *.txt.
Click OK. Your receive port should now be configured. Click OK to close.
Configure the send port
Use Windows Explorer to create a directory named "Send" under the FFDisassemblerWalkthrough project directory.
In the BizTalk Server Administration console, expand the FlatFileExample application, right-click Send Ports, point to New, and then click Static One-Way Send Port….
In the Send Port Properties dialog box, set the name of the port to "Send".
For transport type, select FILE, and then click Configure. Set the destination folder to the send directory you created earlier.
Now configure the filter. Click Filters and add one expression:
- BTS.MessageType ==
http://FFDisassemblerWalkthrough.Body#Body
- BTS.MessageType ==
Click OK to complete the send port configuration. Your send port should be configured.
Run the Example
It is now time to run the example. After using the BizTalk Server Management console to start the application, copy the test files to the receive location and observe what is produced in the send location.
In the BizTalk Server Administration console, right-click the FlatFileExample application, and then click Start. This enlists and starts the send and receive ports.
Drop the copy of the sample Errorfile.txt into the receive directory. Two output files should be written to the send directory.