Import Siebel Data Using Visual Studio
This section provides information about how to use Microsoft Visual Studio to import data from a Siebel system into a SQL Server database. It also provides instructions on how to create and execute an SSIS package to import this data.
Prerequisites
Before performing the procedures provided in this topic, make sure:
The Data Provider for Siebel is installed on the computer.
Microsoft Visual Studio is installed on the computer.
Import in Visual Studio
Start Visual Studio and create an Integration Service project.
From the Project menu, select SSIS Import and Export Wizard. This starts the SQL Server Import and Export Wizard.
Read the information on the Welcome screen, and then click Next.
In the Choose a Data Source dialog box, from the Data Source drop-down list .NET Framework Data Provider for Siebel eBusiness Applications. Specify values for the different connection properties for the Data Provider for Siebel connection string. For more information about the connection string properties, see Data provider properties for the Siebel connection string.
Click Next.
In the Choose a Destination dialog box:
From the Destination drop-down list, select SQL Native Client.
From the Server name drop-down list, select a SQL Server name.
Select an authentication mode.
From the Database drop-down list, select the database to which you want to import the Siebel table.
Click Next.
In the Specify Table Copy or Query dialog box, choose the Write a query to specify the data to transfer option.
In the Provide a Source Query dialog box, specify a SELECT query to filter the data to be imported into the SQL Server. For more information about the grammar for a SELECT query for the Data Provider for Siebel, see Syntax for a SELECT Statement in Siebel.
To validate the query, click the Parse button, click OK in the pop-up dialog box, and then click Next.
In the Select Source Tables and Views dialog box, select the check box against the source and destination tables. The source is the query you specified to retrieve data from Siebel. The destination will be the table that will be created in the SQL Server database.
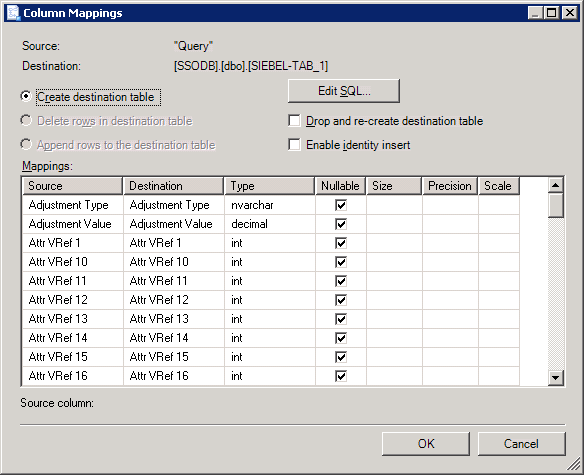
The wizard creates a default mapping between the source and destination table fields. However, you can change the mappings according to your requirement. To change the field mappings, click Edit Mappings.
In the Column Mappings dialog box, you can:
Change the names of columns in the destination table.
Ignore certain columns in the destination table.
Change the data type for fields in destination table.
Change other field attributes such as nullable, size, precision, and scale.
Click OK.

In the Select Source Tables and Views dialog box, click Next.
In the Complete the Wizard dialog box, review the summary of actions that the wizard will perform, and then click Finish.
In the Performing Operations dialog box, the wizard starts executing tasks to import the information from Siebel into a SQL Server database table. The status for each task is displayed in the wizard.
After all the tasks are successfully executed, click Close. If a task fails, see the corresponding error message, fix the issue, and rerun the wizard.
The wizard adds an SSIS package to your Integration Service project. Save the Integration Service project.
Run the SSIS Package
Once the package is created within an Integration Service project, you can execute it to import data from a Siebel system into a SQL Server database. Perform the following steps to import Siebel data by executing the package.
Navigate to the SSIS package in Solution Explorer.
Right-click the package name, and then select Execute Package.
Run Integration Services (SSIS) Packages provides more info.
Verify the Results
After executing the package, you must verify the results by logging on to the SQL Server and navigating to the database to which the Siebel data is imported. Executing the package should have created a table in the destination database. This table should be populated with the values from the Siebel table.