Custom Styles in Universal Apps Part 2
In Part 1 of this two part series, I covered how to create a ResourceDictionary with a custom style and reference that style in a Textblock control. Although, I created a Universal App, I did mainly focus on the Windows 8 project not taking advantage of the Universal App capabilities. Here, I will take what we learned in Part 1 and apply it to both Windows 8 and Windows Phone taking advantage of the benefits of using a Universal App. If you haven’t followed through Part 1, I would recommend checking it out because I will be building on what we are already created there.
Let’s start simple. Right now, we have a universal app. In our Windows 8 project, we have a ResourceDictionary file called Styles.xaml that contains our “TextStyle” style made for TextBlocks. So, how would we go about referencing that style sheet in our Windows Phone project. We could very easily just copy that file over to the Windows Phone project, but then we would have two copies of the same exact file. Needless to say, if we needed to update the file, we would have to do it in two different places. Here is where we will take advantage of using a Universal App.
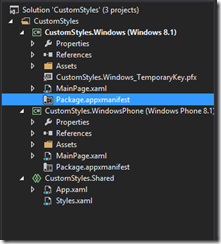
Instead of just copying Styles.xaml to the Windows Phone project, let’s copy it into our shared folder. When we do, let’s also delete it from our Windows project so that we only have one copy in the shared folder. Your project should look more or less like this now.
In general, anything in the Shared project can be shared between both the Windows and Windows Phone projects. Yes, the Shared project is aptly named :) Anyways, now that we stored our Styles.xaml file there, we should be able to run our Windows project again, and get exactly what we had in the previous post.
That works well. Now, let’s turn our attention to the Windows Phone project. We have yet to edit anything there, so open up it’s MainPage.xaml and simply copy the stack panel code (see Part 1) inside of the grid tags. Should look like this.
<Grid>
< StackPanel>
< TextBlock Text="Text 1" Style="{StaticResource TextStyle}"/>
< TextBlock Text="Text 2" Style="{StaticResource TextStyle}"/>
< TextBlock Text="Text 3" Style="{StaticResource TextStyle}"/>
</StackPanel>
</Grid>
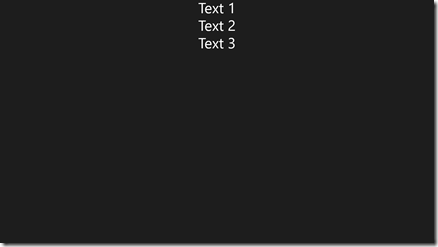
If you run this in the Windows Phone emulator (or just take a look at the visual editor) you will notice that we are successfully referencing our TextStyle style from the Styles.xaml file in the shared project.
Obviously, this is a super simple example so far, but you can see the power of putting files, data, etc. in the Shared project. Let’s take it one step further before we move on. You might have noticed that both the MainPage.xaml files for the Windows and Windows Projects are exactly the same. Typically it’s a good idea to keep these files separate because the UI will look different for each, but that’s not the case here. Because of this, take one of them and copy it into the Shared project, and then delete the two existing ones.
You will notice that both run exactly as they had before but instead of having two different MainPage.xaml files, we only have the one. However, like I mentioned, typically these XAML pages will be separate because you will want slightly different UI’s for the two different platforms. I mean things that fit on a computer might not look as good on a phone’s smaller screen. Regardless, through this example, you have gotten a glimpse of the power of using custom styles in Universal Apps!
Feel free to follow me on twitter for upcoming posts! @jquickwit As always comment with any questions, comments, or concerns below!
Comments
- Anonymous
June 18, 2015
Can you make an example where we can change the style when running the app. Like the text becomes red or something... Thank you!


