Creating an Eclipse Development Environment for Azure
This post focuses on how to create a virtual machine with the tools necessary to deploy Java code to an Azure worker role using Eclipse and Tomcat.
Background
The wonderful part of my job as an Architect for the Azure Center of Excellence at Microsoft is that it opened my eyes to all the wonderful technologies customers use. While I was so laser-focused on SharePoint, of course everything seemed like an ASP.NET world. Now that I no longer focus on SharePoint, I realize that our customers do far more than just Microsoft. Java is still huge (in fact, a recent article, “What is the Most Popular Software Development Language?” cites it as the most popular language), and Java works just fine with Azure.
Recently, I have been working with a customer to build components for Azure using Java. It’s been quite some time since I did anything with Java, and I was very impressed at how easy the Eclipse add-in for Azure makes this. Even better, there’s a virtual machine template in Azure that already has the JDK installed, so I can knock out the virtual machine used for development and some of the pre-requisites in one step. This post will show how to create a virtual machine with Eclipse and Tomcat to deploy components in Azure.
Create the Virtual Machine in Azure
The first step is to visit the Azure Management Portal (https://manage.windowsazure.com). While you could do this with PowerShell or the cross-platform command line interface, it’s pretty easy to do this with the portal. Click on the Virtual Machines icon, and then choose New / Compute / Virtual Machine / From Gallery.
On the “Choose an Image” page, type “JDK” into the search bar. You will see 3 virtual machine images to choose from. We will choose the JDK 8 virtual machine.
Click next. Choose the latest version release date, give it a name, choose a size (I chose A4), a user name, and password.
On the virtual machine configuration page, choose a cloud service (or have one created for you), a storage account (or have one created for you), and a region where the VM will be created (the closest location to you).
On the final Virtual machine configuration page, leave the defaults and choose OK to create the virtual machine.
After a few minutes (mine was ready in about 10 minutes), your virtual machine will be created. Once created, highlight the virtual machine and choose Connect in the toolbar.
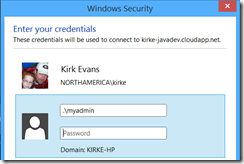
You will be prompted to download an RDP file. Log in with the username and password you specified earlier while creating the virtual machine.
Once logged in, you can go to the “c:\program files\java” directory and see that the JDK and JRE are on the server.
The image is a Windows Server image, which has Internet Explorer Enhanced Security enabled. You might decide to disable this to make browsing easier from within the image. On the server manager, I choose the IE Enhanced Security Configuration and change the value to “off” for Administrators.
This step is not strictly required, but as a developer I find it helps my productivity. If you are uncertain about making this change, then don’t… it’s not required.
Install a Servlet Container
The next step is to install a servlet container such as Apache Tomcat or Jetty. I will use Apache Tomcat for this post. Visit the Apache Tomcat site and choose a version. I am using version 8, the latest at the time of this writing, available at https://tomcat.apache.org/download-80.cgi. Choose a mirror and then download the file using the 64-bit Windows zip file.
Extract the contents of the ZIP file. To make things easy to find, I extracted to c:\.
Note that you are downloading this file from a mirror, which means you need to verify that the files you just downloaded are the same as the ones that Apache released. Follow the directions on the Verification page to verify the authenticity of the files. I am not including these steps here, but it is imperative that you verify the files that you downloaded.
Once the files are downloaded and verified, add an environment variable to Windows. Open Windows Explorer and right-click the “This PC” node to choose Properties.
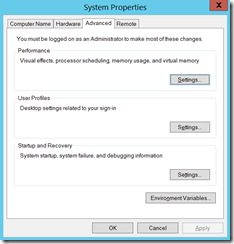
Click “Advanced System Settings” and then click the Environment Variables button.
Create a new System Variable named “CATALINA_HOME” with the value of the path you extracted Apache Tomcat to.
Since we just added a system environment variable, we need to reboot for programs to be able to read the value. Restart the virtual machine (Windows + C, click the Settings charm, click Power, then choose Restart).
Once you’ve rebooted, you can test Apache Tomcat. Go to the BIN folder where you extracted Apache Tomcat to and run the Startup.bat file.
You’ll see a downright scary command window with lots of extraneous text.
Once it finishes spewing text at you, you can open a browser and go to “https://localhost:8080”. You should see the following:
That tells you that Apache Tomcat is working.
Install Eclipse
We now have the JDK (which was already installed when we created the VM) and the servlet container (Apache Tomcat), we now will install Eclipse. Visit the Eclipse Downloads page to download the latest version of Eclipse IDE for Java EE Developers. Choose the “Windows 64 bit” link.
Once downloaded, unzip the files. To keep things simple, I unzipped to c:\.
Once unzipped, follow the instructions to verify the signature. Same as before, you need to verify the signatures of the files to verify their authenticity. These steps are not included here.
Once downloaded and verified, run the Eclipse.exe program to launch the Eclipse IDE. You are prompted to create a workspace, which is really just a folder where your project files will be kept. To keep things simple, I choose “c:/workspace”. Once that’s done, I now have Eclipse running in a virtual machine hosted in Azure!
Installing the Azure Toolkit for Eclipse
Now that we have Eclipse installed and working, let’s install the tools that make deploying Java code to an Azure worker role easy. The Microsoft Open Technologies group created an Eclipse add-in to simplify deploying Java code to Azure roles.
Note: While these instructions work as of the time of this writing, the instructions could change at some time in the future. Visit Installing the Azure Toolkit for Eclipse for updated links and directions.
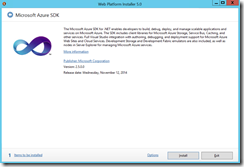
Install the Azure SDK using the Web Platform Installer using the link https://go.microsoft.com/fwlink/?LinkID=252838. You will be prompted to save or run, I chose run.
Click Install, then Accept the license terms. The installer will install pre-requisites as well as the Azure SDK.
Once completed, you will see the list of components that were installed.
Now we need to install the Eclipse add-in. Open Eclipse and choose Help / Install New Software.
On the Available Software page, enter https://dl.msopentech.com/eclipse in the “Work with” field and press Enter.
Check the Azure Toolkit for Java node, and UNCHECK the “Contact all update sites during install to find required software” option.
On the Install Details page, click Next.
Review the terms and conditions, accept, and click Finish.
Finally, restart Eclipse.
Create a Hello World Project
Create a new Dynamic Web Project in Eclipse.
Provide a name for the project (such as MyHelloWorld) and click Finish.
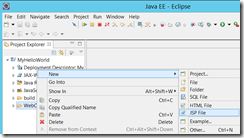
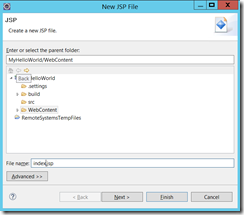
Within Eclipse's Project Explorer view, expand MyHelloWorld. Right-click WebContent, click New, and then click JSP File.
Name the new file index.jsp.
Click Next, and then choose the “New JSP file (html)” template. Click Finish.
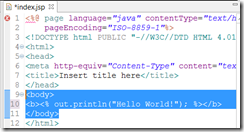
Once the file is generated, add some code to output text.
<body>
<b><% out.println("Hello World!"); %></b>
</body>
Save all.
Notice the red X icon in the margin at the top of the index.jsp file. If you hover over that, you’ll see an error:
The superclass "javax.servlet.http.HttpServlet" was not found on the Java Build Path
This one stumped me for awhile, but thanks to https://agung-setiawan.com/eclipse-error-the-superclass-javax-servlet-http-httpservlet-was-not-found-on-the-java-build-path/ for posting the solution. Right-click on the MyHelloWorld project and choose Properties. Go to the Project Facets node, choose the Runtimes tab, and click New.
We are using Apache Tomcat, so we’ll add Apache Tomcat v8.0.
On the Tomcat Server page, provide the path to the folder where you extracted Apache Tomcat to in the “Tomcat installation directory” textbox. Click Finish.
Once completed, check the server in the Runtimes pane.
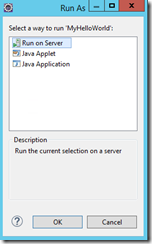
To test the project, in Eclipse go to the Run menu and choose Run. Choose “Run on Server” and choose OK.
We just defined the server, so leave the defaults (using Tomcat v8.0 on localhost) and click Finish.
You will see the following in Eclipse, which shows that you are successfully running your JSP page in Tomcat on the local server.
Note: if you see an error saying the port is already in use, go close the command window that you opened previously to test Tomcat and try again.
Create an Azure Deployment Project
We now need an Azure Deployment Project. Right-click the MyHelloWorld project and choose Package for Azure.
Name the project MyAzureProject and choose Next.
On the JDK tab, check the “Use the JDK from this file path for testing locally” option and provide the path to the JDK, if not already populated.
On the Server tab, provide the path to the Tomcat folder, leaving the defaults.
Click Finish, and you now have a new project called MyAzureProject.
Run the Azure Project in the Emulator
Let’s test things out locally first. In Eclipse, go to the Run in Azure Emulator button and click it.
After some time, the emulator window appears. Expand the WorkerRole1 node and you’ll see that Tomcat is running in the emulator.
Now open a browser and go to “https://localhost:8080/MyHelloWorld/” (case sensitive!) and you will see the following:
Congratulations… you are serving pages from Tomcat using the Azure Emulator!
Deploy to Azure
Now the part you’ve worked so hard for… let’s get this baby to the cloud. Right-click the Azure Deployment Project and choose Deploy to Azure Cloud.
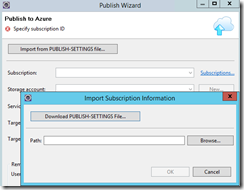
Click Import from PUBLISH-SETTINGS file, then Download PUBLISH-SETTINGS file.
You are prompted to log into the Azure portal. Once you log in, you are prompted to save the .publishsettings file locally.
In the “Import Subscription Information” dialog, browse to the file you just downloaded and choose OK.
In the resulting dialog, you need to choose a storage account. Click New to create a new storage account (or just choose an existing one).
You also need a cloud service. Either choose an existing one, or create a new one. The cloud service and the storage account should be in the same location (note both of mine are in West US).
Finally, choose the target OS for your Azure worker role. I chose Windows Server 2012 R2, and the target environment is Staging.
Click Publish. As we are deploying a role, the time for deployment can take awhile. Be patient. You can see the status in Eclipse.
After some time, you will see the status is “Published”. Click that.
A browser window opens, and you see the Tomcat default page. Sweet!
Now add “MyHelloWorld” (case sensitive) to the end of the URL.
Bob’s yer uncle… we are now serving JSP pages using Tomcat deployed in an Azure worker role.
That’s enough for now, we’ll revisit some of this in upcoming posts.
For More Information
What is the Most Popular Software Development Language?


