Setting up Geneva Server for Issuing Managed Information Cards
I started this blog on the plane returning from The Experts Conference (TEC) 2009 in Las Vegas this past week where I had the opportunity to deliver a session about using AD FS, MOSS 2007 and AD RMS together – now there’s some moving parts!! But it’s really cool to have it all working across five Virtual Machines on my laptop! Anyway, I’ll wrap this up and provide guidance on how to setup Geneva Server to issue managed information cards. It couldn’t be much easier…
Disclaimer: This blog is not the source for official guidance regarding Microsoft Code Name “Geneva”. Please always refer to the Geneva Team Blog for official information from the product group and post any Geneva questions on the Geneva Forum.
Step 1: Setup a Username/password Information Card [2-4 minutes]
- Fire up your Geneva-Server VM.
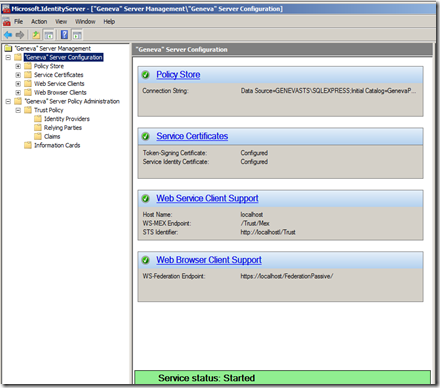
- Confirm that the Geneva Server is Started.
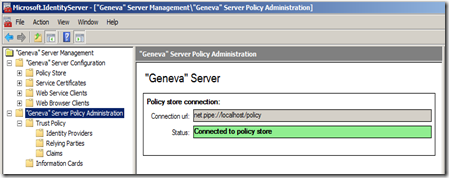
- Confirm that the Policy Store is Connected.
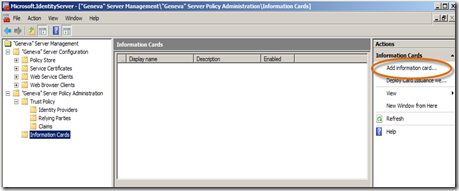
- Now, click the Information Cards node, then the Add information card… link under Actions.
- In the wizard, click Start.
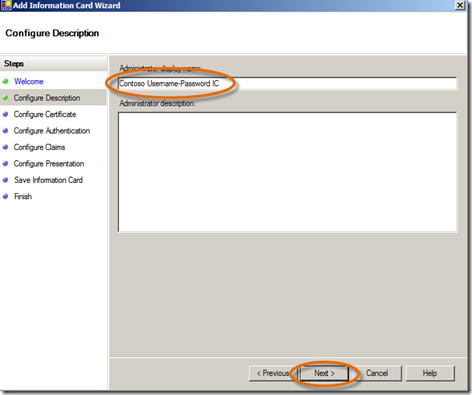
- In the Configure Description panel, type Contoso Username-Password IC, click Next. (Note: this is the display name that will show in the Geneva Server MMC for the information card – this name will not be seen by the user.)
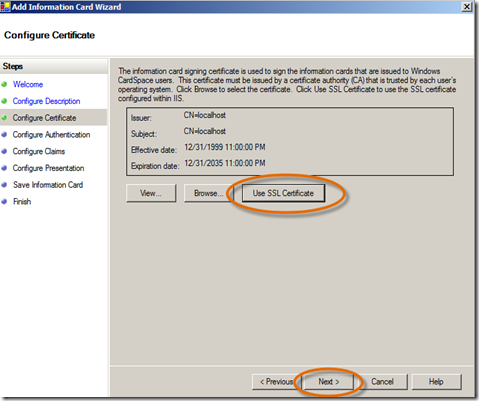
- In the Configure Certificate panel, for simplicity, choose Use SSL Certificate, click Next.
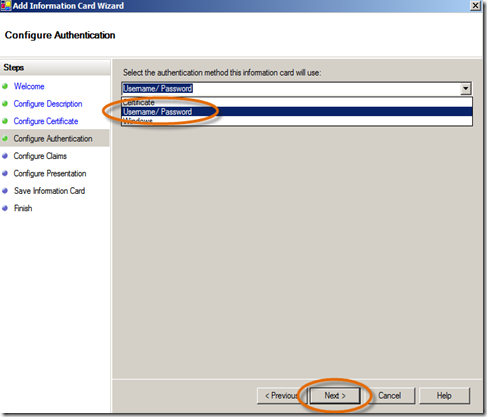
- In the Configure Authentication panel, select Username/Password, click Next. (Note: Notice that you also set up to issue information cards that are backed by Windows (i.e. Kerberos, these can be used in intranet scenarios) and Certificates (e.g. smart cards).
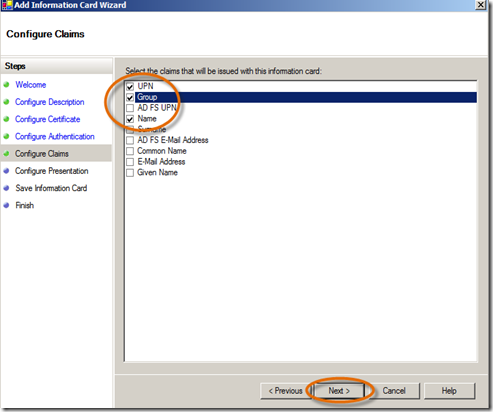
- In the Configure Claims panel, select UPN, Group and Name (to be consistent with the claims we used in the previous web app), click Next.
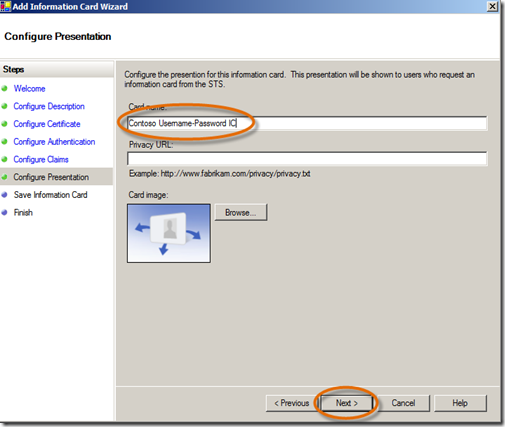
- In the Configure Presentation panel, type Contoso Username-Password IC, click Next. (Note: I have named this with the same name that I used for the display name; however, that is not a requirement. But this is the name that users of the card will see.) You also have the option here to enter a URL so that users of this information card can read information you provide regarding privacy. Also, you can “brand” the card with any image that you want so that the card is readily recognizable to those that will use it. I’ve just kept the default, but you can put your favorite cat or dog picture on it if you like.
- On the Save Information Card panel, click Save, then Close. Wow, that was easy!
Step 2: Deploy Card Issuance website to IIS [1-3 minutes]
- Now that we have an information card defined that we can issue to our users, we need to set up the website that the user can hit to download the desired Information Card. Click on the Information Cards node and click the Deploy Card Issuance website to IIS link.

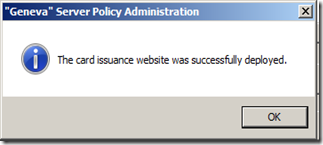
- You will receive the following prompt, click OK.
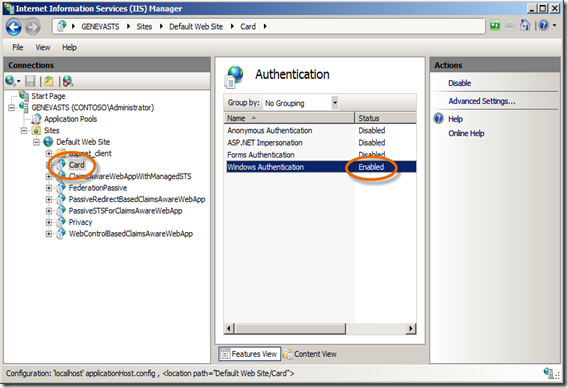
- The default deployment Authentication method for the site in IIS needs to be adjusted because of the way we’re using Geneva Server in this single VM environment. Open IIS Manager and expand the nodes under Default Web Site. Click on the Card site. In the center section, scroll down and double-click on the Authentication icon for the site. Enable Windows Authentication. Disable all others.
Step 3: Retrieve an Information Card and access a Claims-Aware Application [2-5 minutes]
- OK, let’s have our user download the username/password information card and use it to access the claims-aware web application we setup in the last post.
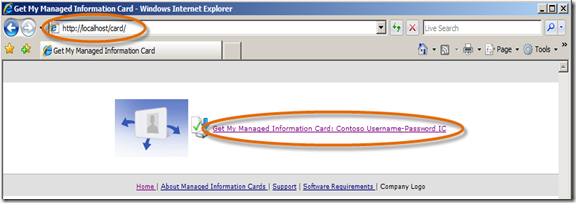
- Open a Browser and navigate to https://localhost/card/ .
- Since we only have one Information Card setup in Geneva Server, there is only one link listed. Click on the link Get My Managed Information Card: Contoso Username-Password IC.
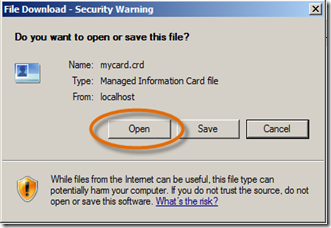
- On the download prompt, click Open.
Note: I’m showing this using CardSpace v1, so that if you haven’t used CardSpace before, you will see it in its first incarnation. But if you recall, you downloaded the Windows CardSpace Geneva setup package when you first built the VM so you should have it on the C drive. So once you’ve completed this blog’s exercise, go ahead and install it, reboot, and run the applications again. Then, you’ll have something to contrast the new look-and-feel with.
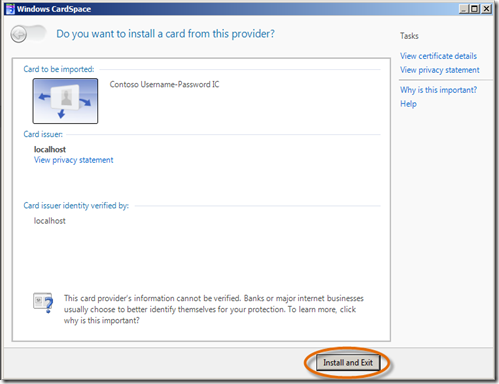
- Windows CardSpace opens. Choose Install and Exit.
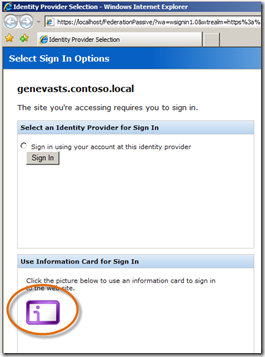
- Open a Browser if one is not already open, and navigate to https://localhost/ClaimsAwareWebAppWithManagedSTS/default.aspx or https://localhost/WebControlBasedClaimsAwareWebApp/default.aspx. These are the claims-aware web applications we wired up to Geneva Server in the last post. But this time when prompted with Select Sign In Options, choose the Information Card icon.
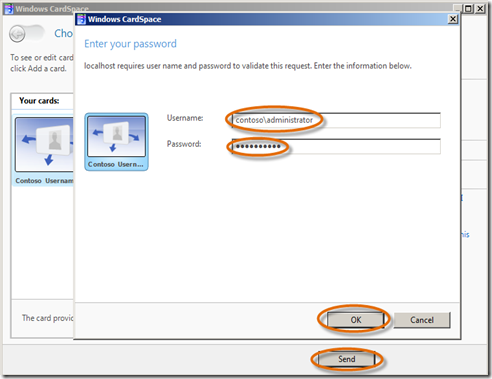
- CardSpace will open, select the Contoso Usern… card and click Send. You will be prompted by CardSpace to enter your username and password. Enter them and click OK.
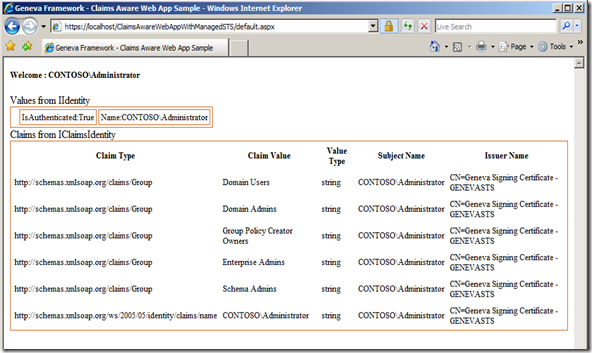
- And the result? EXACTLY the same result as if the user had authenticated on the Sign In Options page with Windows Integrated Authentication, Username and password form as with the Username/Password Information Card. Geneva Server handles all the various authentication methods for the claims-aware application.
- With the Browser still on the website you just accessed, access the “other” claims-aware application. You’ll see that Geneva Server manages single sign-on (SSO) to the second application for you, regardless of your authentication choice. So if you have a number of claims-aware applications relying upon Geneva Server, it will manage SSO across all of them!!
- Oh, and by the way, if you want to tweak what Sign in Options Geneva Server presents to users, simply click the Web Browser Clients node in Geneva Server, Check/Un-Check any of the Checkboxes in the Enable sign-in pages for the following authentication types section and click Apply changes. That’s it, give it a try. (Note: If you want to simulate an intranet scenario for access to your web application, un-check all but Windows Integrated. No sign-in page will be presented and the logged on user will have access to the site.)

You might say, so what’s the point? Well, the claims-aware application does not change irrespective of the type of plumbing that is used to authenticate the user. That’s the responsibility of the Identity Provider, Geneva Server in our case. The end result was that a token was issued from Geneva Server with the appropriate claims that the application could use to do it’s business. That’s really cool!!
Again, no changes are needed in your application and it’s capable of being reached (due to Geneva’s use of standards-based, interoperable protocols and tokens) by users from different security domains and various computing platforms. Architect and write the application once, and have it reached from anywhere. I like it!!!
Ok, now you’re ready to venture into building your own claims-aware sample application on your Geneva-Server VM. For that, I’ll refer you to Vittorio’s blog Vibro.NET. He has two great posts to get you rolling. His first shows you how to use a very handy tool called FedUtil and the second shows how Geneva Server can use the metadata generated by FedUtil to automatically wire up a Relying Party claims-aware application, where we followed manual steps to do this. Your implementation will not be a federated one, since your Geneva Server is serving as both the Identity Provider and the STS for your Relying Party claims-aware application, but you will use FedUtil the same way in any case.
Here’s a few tips to follow Vittorio’s blog posts with your Geneva-Server VM:
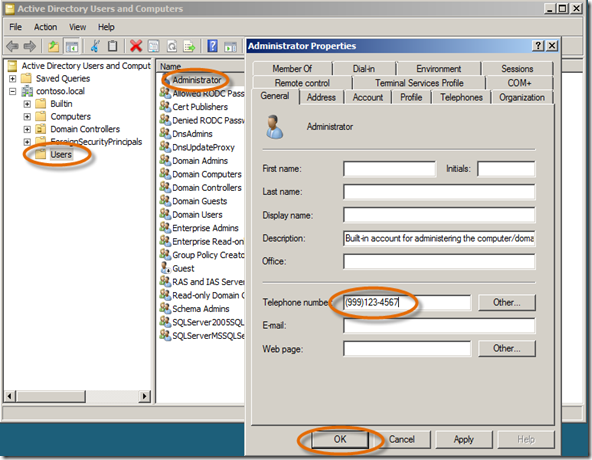
- Before you start the first exercise, you need to add a telephone number to the Administrator user account using Active Directory Users and Computers MMC from the Administrative Tools Menu. When the MMC opens, click the Users node, double-click on Administrator, type in a bogus Telephone number and click OK.
- You will need to add a new Telephone and Role claim to Geneva Server. In Geneva Server, click on the Claims node, click on Add claim, type Telephone for the Display name, type https://schemas.xmlsoap.org/ws/2005/05/identity/claims/otherphone for the unique Claim identifier and click Add.
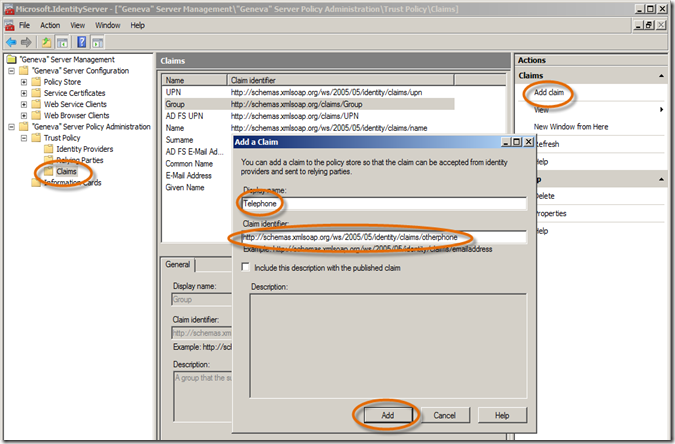
In the exercise where a telephone number is referred to, this is the one you’ll use. - Ok, repeat step 2 and add a new Role claim, https://schemas.microsoft.com/ws/2008/06/identity/claims/role, we will use this rather than the Group claim in FedUtil.
- When using FedUtil, you will want to be sure that all your URLs are for localhost and the certificate used is the localhost cert. Also, be sure to pick our two new claims along with the name claim.
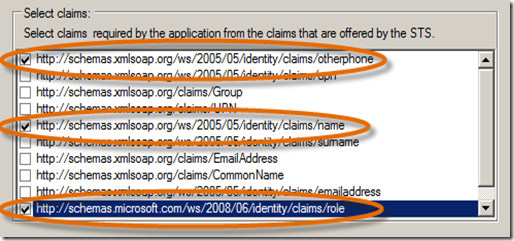
- On Vittorio’s second post where he sources the TestWeb1 Relying Party telephone number claim with the attribute telephoneNumber from AD, you will do that same thing for your Telephone claim. Then, follow the same steps you did for the Telephone claim and map an AD attribute to your new Role claim. For the Role claim, use tokenGroups as the AD attribute. By doing this you don’t need to make the change to the <securityTokenHandlers> element in the web.config. When these Role claims arrive at TestWeb1, the Geneva Framework will automatically plumb the https://schemas.microsoft.com/ws/2008/06/identity/claims/role claim values directly into ASP.NET roles. Therefore, there is no need for special configuration in the web.config. As Vittorio mentions, some Identity Providers may not have named their claims exactly like you (e.g. group rather than role ), in these cases Geneva Server can do a claim transformation for you. Therefore, again, your application doesn’t need to change. The point is that the Geneva Server and Geneva Framework give you a variety of options on how you choose to map a claim to ASP.NET roles. Check out the Geneva Framework Using Claims in IsInRole getting started sample for more insight.
Thanks Vibro.NET!!!
As always, please post any questions relating to the Geneva Framework or Geneva Server on the Geneva Forum. If you have questions about this VM setup, please feel free to post them here. Geneva related resources, including excellent whitepapers, are available at https://microsoft.com/geneva.
Enjoy!
Comments
Anonymous
March 28, 2009
PingBack from http://computers.linkablez.info/2009/03/28/setting-up-geneva-server-for-issuing-managed-information-cards/Anonymous
April 01, 2009
Admittedly this is a lot of setup. If you just want to play with a managed card and understand the flow, I built out a full end-to-end claims federation scenario involving Username/Password backed Managed Cards and the Cardspace Identity Selector. Let me know what you think: http://francisshanahan.com/cardspace