Running Selenium Tests as part of your release with VSTS Release Management
It’s always a good idea to have a set of automated tests execute after you’ve performed a deployment to validate your application, perform smoke testing, sanity-checking, and otherwise ensure you haven’t utterly broken everything. For web applications, Selenium is the standard. VSTS can run these tests for you very easily as both a part of your build and a part of your release.
Step 1: Create a custom build agent
If you want to run tests using Chrome, FireFox or IE, you’re going to need to stand up your own agent. This is because the hosted agent does not run in interactive mode and it does not have the various web browsers installed on it. If you try to run tests that spawn Chrome using the hosted agent you will see an error like the following in the build output:
unknown error: cannot find Chrome binary
Note: You will be able to use the PhantomJSDriver with the hosted build agent.
So, in summary, if you want to run Selenium tests that spawn a web browser, you must stand up your own agent. If you want to run headless tests with PhantomJSDriver, you can still use the hosted build agents.
For instructions on how to stand-up your custom build agent, go here for the official documentation. Or, check out Donovan Brown’s blog post here for an in-depth set of instructions. It is simple and straightforward and should take less than 20 minutes. You’ll need to install Chrome and Firefox on the agent machine, as well as any other dependencies (Azure Powershell, for instance).
Step 2: Writing our Tests
I’ve written a couple of tests below, one using ChromeDriver and one using PhantomJSDriver as a sample and checked them into a separate test project in my solution
Step 3: Create the Build Definition
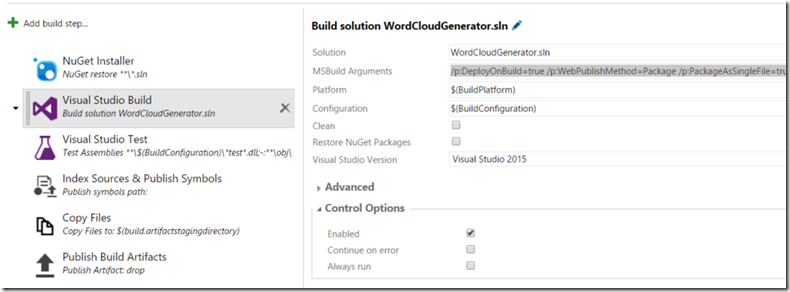
The trick with the build is you need to be sure to output the test assemblies as part of the build artifacts so we can run them in the Release step. Copy the following magic string into the MSBuild Arguments parameter of the Visual Studio Build step:
/p:DeployOnBuild=true /p:WebPublishMethod=Package
/p:PackageAsSingleFile=true /p:SkipInvalidConfigurations=true
/p:PackageLocation="$(build.stagingDirectory)\drop"
For the test task, I’ve specified a filter telling the Visual Studio Test task to run only those tests in the “Selenium” Test Category. I have also checked “Continue on Error”, since I don’t want to completely fail the build if one of the tests fails.
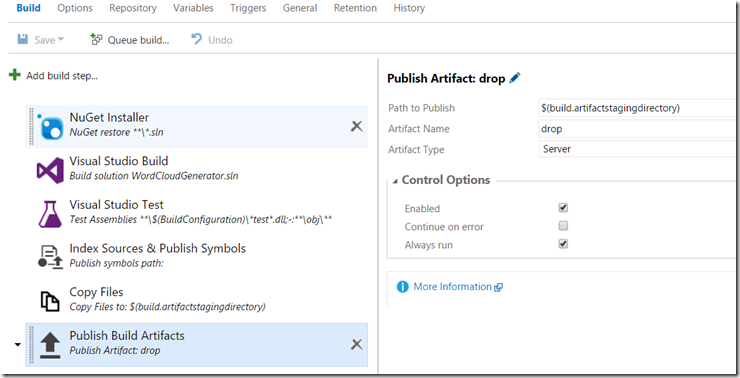
I also include a “Publish Build Artifacts” step as well. Don’t forget to include this. Here are the settings below:
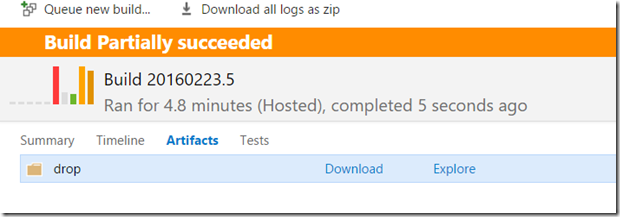
Queue your build see it run. If you’re using you’re own build agent, and are running tests with Chrome, Firefox or IE, you’ll see the browser spawn and execute your tests for you if you’re RDP’ed into the agent.
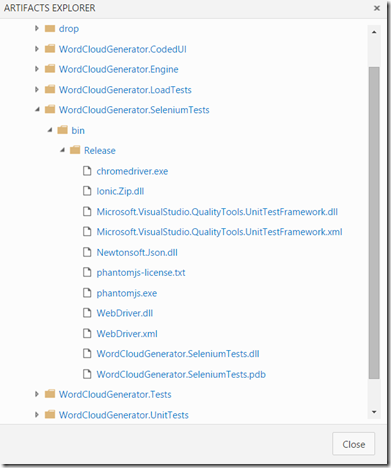
After the build completes, browse the Artifacts folder to make sure all your stuff is there. If you’re test assemblies aren’t found, then something is wrong.
Everything we need to deploy and test our app is there. It’s time to Release!
Step 5: Release Management
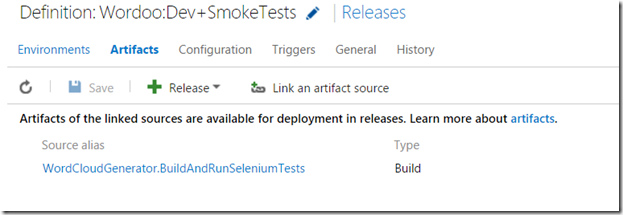
Now that we have a build, lets release it. Create a new Release Definition and link it to the build we just created:
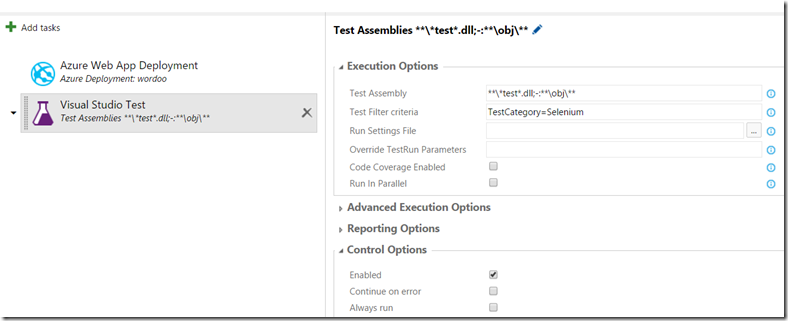
Add an environment and drop the Visual Studio Test task on there. Tell it which tests to run with the Test Filter criteria
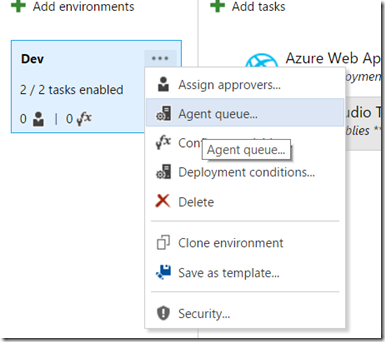
If your Selenium Tests are spawning browsers, you have to select the appropriate Agent Queue. Since I want to run Chrome and IE tests, I need to use my custom build agent, which I have placed in an Agent Queue named Default. To select that Agent Queue, click the “…” on the environment, and then click Agent Queue, and select the appropriate queue.
That’s it. You’re ready to queue releases.
Summary:
Depending on the type of Selenium tests you’re running, you may or may not have to create your own agent. If you are using the PhantomJSDriver, then you can use the Hosted Build agents. If you’re spawning browsers, then you’ll need to spin up your own agent (which is a fairly trivial task). Once that is done, build your application, create a release and then just select which tests you wish to run.
