Using WCF Tester with Azure
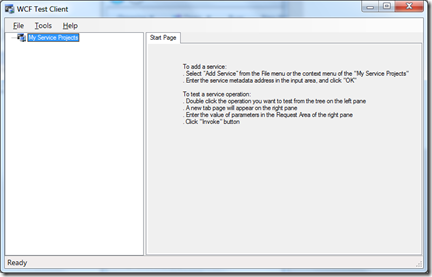
If you’ve tried to use the wcf testing tool wcftestclient.exe
(\Program Files (x86)\Microsoft Visual Studio 9.0\Common7\IDE\WcfTestClient.exe)
which comes with visual studio on an azure project, you will probably have come across this problem…
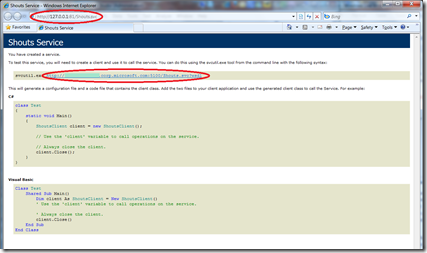
As the WCF service runs locally or in the cloud hosted in azure you will notice that the addresses are different between what is in the address bar in IE and the address given to run svcutil against… this is because Azure runs a load balancer and the url in the address bar is actually the load balancer’s address and not the services address.
This is a known bug in WCF, and currently there is a hotfix for this issue, which will make developing and testing Azure a lot easier.
HOTFIX
The hotfix is extremely simple to do:
Firstly if you have not already done so, go to
https://code.msdn.microsoft.com/wcfazure/Wiki/View.aspx?title=KnownIssues&referringTitle=Home
choose which OS you are using, click the downloads tab at the top, then download and install whichever version suits your OS architecture install.
Secondly in the web.config file in the same project as your WCF .svc files add the following tag in <behaviour> under <serviceBehaviours>:
<useRequestHeadersForMetadataAddress/>
so you should end up with:
 <system.serviceModel>
     <behaviors>
         <serviceBehaviors>
             <behavior name="ShoutboxWebRole.ShoutsBehavior">
                 <serviceMetadata httpGetEnabled="true"/>
                 <serviceDebug includeExceptionDetailInFaults="false"/>
                 <useRequestHeadersForMetadataAddress/>
             </behavior>
         </serviceBehaviors>
     </behaviors>
     <services>
         ...
     </services>
 </system.serviceModel>
now re-run the Azure application (you may need to restart after the hotfix install), you should see the same url in both the address bar at the top and the svcutil command within the page, this means that you can now add the service address of the load balancer (now both url’s) into the WCF test client and you will be able to poke your methods to your heart’s content, or your tester’s content ;)

