IoT Project for Anyone – Collecting and Streaming Data with Raspbian Operating System
IoT Project for Anyone Blog Series:
This is one of a series of blogs developed as part of an overall IoT implementation project for beginners. The project will walk through the hardware needed, operating system installation, data collection and a Power BI dashboard to view the data. These blogs can be reviewed in sequence as part of the overall project or on their own if looking for information on a particular IoT topic.
Project Blog Index:
IoT for Anyone - Materials and Connections
IoT for Anyone - Windows 10 IoT Core Operating System Installation
IoT for Anyone - Raspbian Operating System Installation
IoT for Anyone - Power BI Streaming Dataset Setup
IoT for Anyone - Collecting and Streaming Data from Windows 10 IoT (coming soon)
IoT for Anyone - Collecting and Streaming Data from Raspbian Operating System (this blog)
IoT for Anyone - Designing IoT Microsoft Power BI Dashboard
Introduction:
The steps in this blog will configure the Raspberry Pi running the Raspbian operating system to collect the temperature and humidity sensor data from the Adafruit DHT22. The data will then be streamed to Microsoft Azure. These steps are different than those used for the configuration of a Raspberry Pi running Windows 10 IoT Core. For Window 10 IoT Core, review the blog in this series.
Several of these commands were originally published in Sirui Sun's blog called "Building a Real-Time IoT Dashboard with Power BI: A Step-by-Step Tutorial." I have added additional instructions for readers who may unfamiliar with the Raspbian operating system.
Configure Data Collection:
While logged into the Raspbian operating system, open a shell.

Enter the commands below (all commands below are case sensitive). Enter "Y" at any prompts during the installation of each package.
sudo apt-get update

sudo apt-get install build-essential python-dev

git clone https://github.com/adafruit/Adafruit_Python_DHT.git && cd Adafruit_Python_DHT && sudo python setup.py install

In the Raspbian operating system, open the Chromium web browser application by clicking on the globe icon below.

Go to the following site to download the site https://github.com/Azure-Samples/powerbi-python-iot-client/

Verify you see the "uploadDHT22Data.py" Python script on the screen.

Download the Python script we'll use to collect the data. Click on the" Clone or download" option.

Click on the "Download Zip" option. The zip file containing the script will be downloaded to a default folder.
Open a Bash window and enter the commands below. We'll create a new directory and unzip the Python script there to then work with. Remember, these commands are case sensitive so copy this command exactly as displayed.
mkdir -p /home/pi/script && unzip /home/pi/Downloads/powerbi-python-iot-client-master.zip -d /home/pi/script

Now, we will edit the Python script to send data to your Power BI Dashboard. Begin by opening the File Explorer by clicking on the two folder icon in the upper left of the screen.

In the File Explorer icon, navigate to where the extracted files are located.

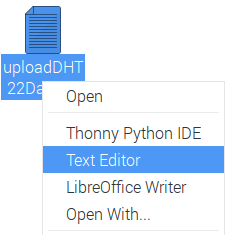
Right mouse click on the "uploadDHT22Data.py" file and select the "Text Editor."
With the file open in the Text Editor, locate the REST_API_URL = " *** Your Push API URL goes here *** "
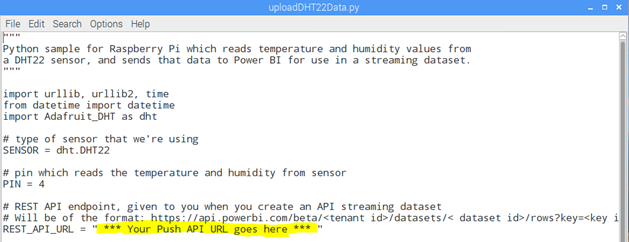
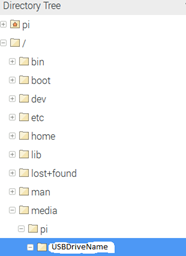
In this file, copy the Push URL you saved when you setup the Power BI Dashboard to receive a streaming data set in an earlier blog. Keep the quotation marks around the URL you enter. Because this URL is very long, instead of retyping the entire string I saved my URL to a text file on a USB thumb drive on my computer. Then, I inserted the thumb drive into the Raspberry Pi. Using the File Explorer, I located the USB thumb drive, opened my file, copied the contents, and then pasted it into the Python script file. If you are using the USB thumb drive method, remember in the Raspbian operating system that the drive is "mounted." By default, your drive should appear in the /media/pi/(USBDriveName) folder area.
When the file is edited to include your Power BI Push URL, it should look like the file below (I am not going to show my entire file):
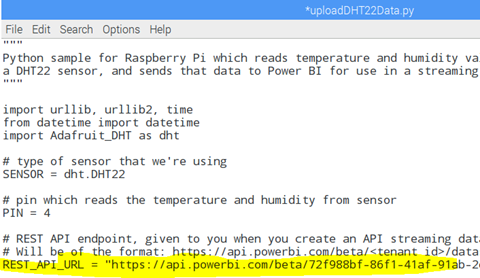
You also may want to modify the script to collect the temperature data in Fahrenheit instead of the default of Celsius. You will also want to change the label from C to F in the next line. If so, add the code below in the section shown within the script (case sensitive). Then change the C to F on the next line (highlighted).
temp = temp*9/5+32 #Convert Celsius to Fahrenheit using temp variable

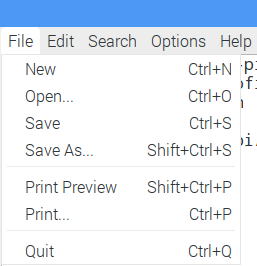
With the file edit complete, click on "File" and then "Save."
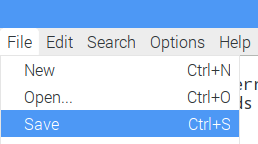
With the Python script to collect data and send it to Power BI, you are now ready to launch the script in the next section.
Run the Python Script:
Open a shell

Enter the command below to change to the directory where the Python script is located (remember, these commands are all case sensitive).
cd /home/pi/script/powerbi-python-iot-client-master

To confirm we are in the correct directory where the script is located, run a directory list command by entering the command below. You should see your "uploadDHT22Data.py" Python script with the file data and time of when you just modified it.
dir -l

Enter the command below to launch the data collection script (case sensitive):
python uploadDHTData.py

The temperature and humidity information should now be refreshing every second. A 200 response should be seen after each data polling, indicating the information is successfully uploading to the Power BI Dashboard area.

Troubleshooting:
- What happens if you do not see data being pushed?
- Check the wiring of the Adafruit temperature and humidity sensor. Make sure all wires are attached correctly to the Adafruit breadboard and are snug in place, in the correct slots. Doublecheck the wiring diagram from Adafruit. Also make sure the Adafruit Cobbler connector and ribbon cable all have snug connections. If you find any lose wires that you corrected, you will need to reboot the Raspberry Pi and execute the script again in the step above.
- Verify you have connectivity to the Internet
- What if there is a script error being thrown?
- If you see an error on the screen after executing the Python script, I recommend downloading a new copy of the uploadDHT22Data.py file from the Internet again. Then, edit that file with the Push URL you created and try again.
- If you are receiving an error similar to "unknown format code f for object of type str" that indicates the wiring on the Adafruit temperature and humidity sensor is not correct. How do I know this you ask? Because I found one my children playing with the wiring one day causing this error to be thrown. ;-)
Auto Start Data Collection Script:
Now that you have the data being successfully uploaded to Power BI, before we create our Power BI dashboard in the next blog we want to make sure this script runs on every boot of the Raspberry Pi or other IoT device. The instructions below will setup the sensor collection script to automatically start at boot.
While logged into the Raspbian operating system, open the folder explorer.

In the top navigation area, enter the folder path below. These folders are hidden by default, so you will not be able to browse to them.
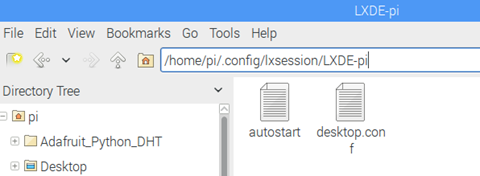
On the "autostart" file, right click and select "Text Editor"

At the bottom of the file, enter the text below (assuming you used the directory paths listed earlier in this blog (modify if needed)).
@/usr/bin/python /home/pi/example.py

Click on "File" and "Save" when the edit above has been added.
