Silverlight and C# in Orcas Beta 1
This post describes how a C# developer can set up and run a Silverlight project in Visual Studio Orcas.
The best place to begin is by making sure you have Visual Studio Orcas installed. I prefer using the VPC versions of the Orcas betas, but you may have reason for making other decisions. If you do install the VPC version, however, then starting with Beta 1 is essential, as you will want to download and install the other pieces inside the Beta 1 VPC.
Here are all the pieces you need:
- Orcas Beta 1
- Silverlight 1.1 Alpha for Windows
- Silverlight Tools Alpha for Visual Studio
- Expression Blend 2 Free Trial
- You will also find it helpful to download the Silverlight SDK as it contains useful documentation and examples.
A First Silverlight Project
You can create Silverlight projects directly in Visual Studio or you can create the project in Expression Blend. Visual Studio and Expression Blend are designed to work together, and you can easily move back and forth between them. In this post, I will show you to start by creating the application in Visual Studio.
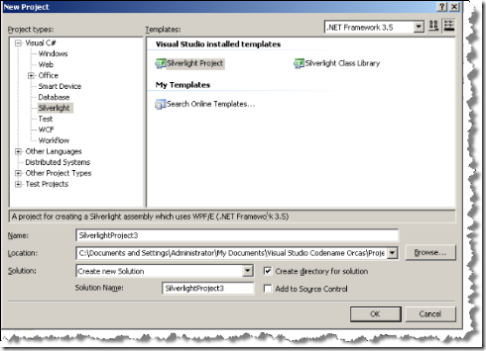
Choose File | New Project in Visual Studio. Select Silverlight under Project types, and select Silverlight project on the right under Templates. A new project will be created when you click the okay button.
Figure 1: Creating a Silverlight application in Visual Studio.
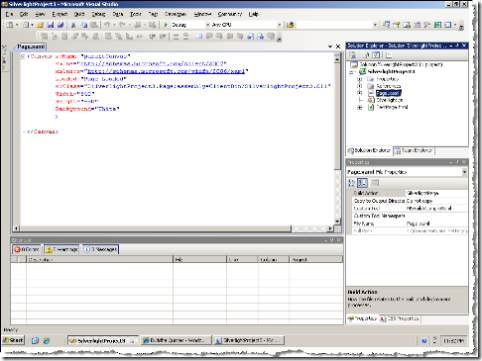
You should now be able to see your project in Visual Studio, as shown in Figure 2.
Figure 2: A default Silverlight application in Visual Studio. (Click to enlarge.)
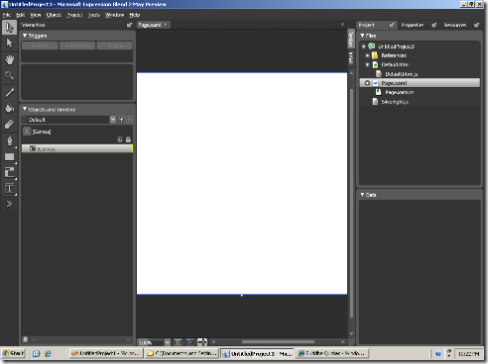
The code you see in the editor is written in an XML based description language called XAML that defines the interface of your application. XAML rhymes with Camel, and is pronounced like this: "zammel." If you wanted, you could now write XML to define your interface. However, that is a difficult and painful process. Instead, right click on the Page.xml node in the Solution Explorer, and choose "Open In Expression Blend" from the popup menu. You project will open in Expression Blend, as shown in Figure 3.
Figure 3: A default Silverlight application in Expression Blend. (Click to see a larger image.)
Off to the right of Figure 3 you see a list of files. This part of Expression Blend plays the same role as the Solution Explorer does in Visual Studio. The two applications share the same format for their projects, and hence these projects will open in either Visual Studio or in Expression Blend. In other words, a Silverlight application created in Expression Blend will open in Visual Studio, and vice versa. (For now, however, it is simplest to first create your application in Visual Studio, as Expression Blend leaves out code that Visual Studio will generate automatically.)
The white area shown in Figure 3 is called the Canvas, and on this portion of the screen you can create your interface. To get started, you might want to work with the tools found on the far left of the Expression Blend screen. Notice in particular the shape tool, shown second from the top in Figure 4, and the text tool, which is shown at the bottom of Figure 4.
Figure 4: The Shape tool and the Text tool in Expression blend can be used to create a simple interface for your application.
Right click on the shape tool and select Ellipse from the pop up menu. Drag the ellipse on to the Canvas and center and resize it.
On the right of of the Expression Blend interface choose Properties and use the tools found there to set the color of your shape.
Drop a Text block in the middle of your shape. Enter some text, and then use the Properties area in Expression Blend to set your font size and color.
Notice that in the Objects and Timeline section on the left of Expression Blend you can select either the Canvas, the Ellipse, or the Text block. You can change the traits of the selected item in the Properties window on the right.
When you are done editing, you might come up with something like the image shown in Figure 4, only hopefully a bit prettier.
Figure 4: An Ellipse and Text Tool on a white Canvas. On the left, the Canvas is select, on the right the properties for the canvas are visible. (Click to enlarge the image.
You can run the project from inside Expression Blend by pressing F5. However, you probably would like to see the project inside Visual Studio. To do this, simple Alt - Tab back to Visual Studio. You will be informed that your project has been updated. Click okay on the dialog, and the code you created in Expression Blend will be seen in Visual Studio, as shown in Listing 1.
Listing 1: The code generated in Expression Blend is visible near the bottom of this listing.
<Canvas
xmlns="https://schemas.microsoft.com/client/2007"
xmlns:x="https://schemas.microsoft.com/winfx/2006/xaml"
x:Name="parentCanvas"
Loaded="Page_Loaded"
x:Class="SilverlightProject3.Page;assembly=ClientBin/SilverlightProject3.dll"
Width="640"
Height="480"
Background="White"
>
<Ellipse Fill="#FF6071B9" Stroke="#FF000000" Width="374" Height="280" Canvas.Left="145" Canvas.Top="63"/>
<TextBlock Width="303" Height="104.97" Canvas.Left="181" Canvas.Top="152" FontFamily="Comic Sans MS" FontSize="22"
FontWeight="Bold" Foreground="#FF2C30EB" Text="Those who are free of resentful thoughts surely find peace." TextWrapping="Wrap"/>
</Canvas>
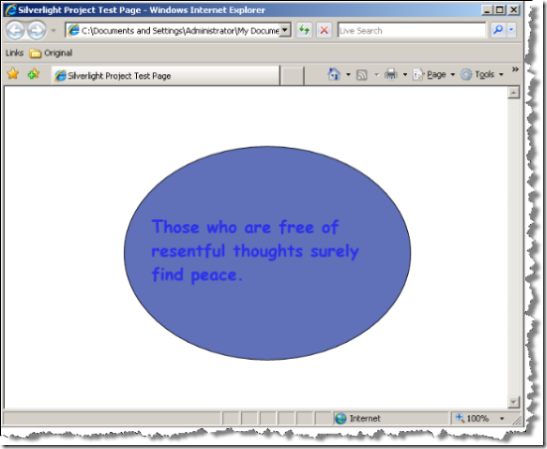
You can now press F5 to run the application. A browser will be launched, and you will see the application inside the browser, as shown in Figure 5.
Figure 5: The Silverlight application displayed in a browser. (Click to enlarge.)
Adding an Event Handler
Let's write just a little code so that we have an event handler which will be called when the user clicks on the text in the application. In the Text block section add the following attribute to the XML:
x:Name="MyText"
When you are done, the code should look like this:
<TextBlock x:Name="MyText" Width="303" Height="104.97" Canvas.Left="181" Canvas.Top="152" FontFamily="Comic Sans MS" FontSize="22" FontWeight="Bold" Foreground="#FF2C30EB" Text="Those who are free of resentful thoughts surely find peace." TextWrapping="Wrap"/>
Now click on the plus sign to the left of Page.xml in the Solution Explorer. This will give you access to Page.xaml.cs. In this file you can write C# code.
Modify the Page_Loaded method in Page.xaml.cs so that it looks like this:
1: namespace SilverlightProject3
2: {
3: public partial class Page : Canvas
4: {
5: public void Page_Loaded(object o, EventArgs e)
6: {
7: // Required to initialize variables
8: InitializeComponent();
9:
10: MyText.MouseLeftButtonDown +=
11: }
12: }
13: }
Immediately after you type in the += operator, press space once and then press Tab two times. Code should be automatically inserted into your source file. If it is not, delete the +=, type it in again, and then press Tab two times. When you are done, your code should look something like this:
1: namespace SilverlightProject3
2: {
3: public partial class Page : Canvas
4: {
5: public void Page_Loaded(object o, EventArgs e)
6: {
7: // Required to initialize variables
8: InitializeComponent();
9:
10: MyText.MouseLeftButtonDown += new MouseEventHandler(MyText_MouseLeftButtonDown);
11: }
12:
13: void MyText_MouseLeftButtonDown(object sender, MouseEventArgs e)
14: {
15: throw new Exception("The method or operation is not implemented.");
16: }
17: }
18: }
Modify line 15, and replace it so that the event handler looks like this:
1: void MyText_MouseLeftButtonDown(object sender, MouseEventArgs e)
2: {
3: MyText.Text = "What you think you become.";
4: }
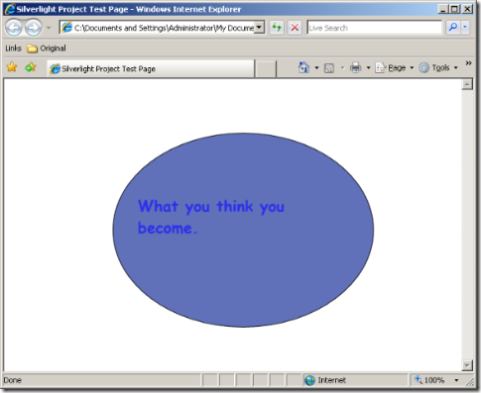
Run the application. Click once on the text in the middle of your Ellipse. The words written there will change, as shown in Figure 6.
Figure 6: The event handler changes the text shown in the ellipse. Compare this image with the one shown in Figure 5.
Summary
In this post you have learned the basic facts you need to know to write a Silverlight application. You saw how to create the application in Visual Studio, and how to load it in Expression Blend. You then used the tools in Blend to create an interface for your application. Back in Visual Studio, you saw how to add a simple event handler to your application.
Comments
Anonymous
May 20, 2007
You've been kicked (a good thing) - Trackback from DotNetKicks.comAnonymous
May 20, 2007
Thanks for the sharing your experience!Anonymous
May 21, 2007
You've been linked (a good thing:)) - Trackback from dotneturls.comAnonymous
May 21, 2007
Silverlight and C# in Orcas Beta 1(转载)Anonymous
May 22, 2007
One thing - as you may see in the pictures if you f5 from VS the page runs off as a flat file from the OS, but if you run it on Blend, it runs as a page delivered by the dev server (as it should be). This causes the projects cannot be debugged from vs and the BrowserHttpWebRequest falis because of the cross-domain restrictions. Does someone know how to fix this inside VS? Thanks and good post!!Anonymous
May 22, 2007
英文原版地址 http://blogs.msdn.com/charlie/archive/2007/05/21/silverlight-and-c-in-orcas-beta-1.aspx 本人讲述的是作为C#程序员,如何在VisualAnonymous
May 28, 2007
.csharpcode, .csharpcode pre { font-size: small; color: black; font-family: consolas, "Courier New",Anonymous
May 29, 2007
Well this week was a nice rest, most of it spent relaxing with my wife. So it was a non-coding week butAnonymous
June 09, 2007
you may find this video also useful by Scott Guthrie. HTH - DipeshAnonymous
June 09, 2007
you may find this video http://silverlight.net/learn/learnvideo.aspx?video=123 also useful by Scott Guthrie. HTH - DipeshAnonymous
December 15, 2007
I need example on creating listbox.Which created dynamically by using orcas.Anonymous
February 08, 2008
how add silverlight in page asp.net?Anonymous
November 29, 2008
The comment has been removed
