ConfigMgr 2012 - How to deploy SCEP Definition Updates via UNC Share for isolated environment
Issue:
You have a ConfigMgr 2012 environment in a isolated segment of your network, you still need to be able to download and deploy SCEP Definition Updates
Normally you would think that you could use the same process as you would with Software Updates, exporting the metadata and then copying the binaries and then importing the metadata over to the isolated environment and manually syncing the Software Update Point. In the case of SCEP the mechanics for ConfigMgr won't get you all the way to where you want to go, as when you right click to download the definition file and point it to an UNC path it will not recognize the files for the SCEP Definitions due to the hard coding of the extension types supported.
Resolution:
The answer lies in the SCEP Client Policies, those with the use of a powershell file allow you to download the SCEP Definition files and then copy them to your isolated network, the clients will then download the SCEP updates from the said UNC Share on the isolated network. The steps to perform this are outlined below:
1. On a server with internet access create a network share, example \\Server1\SCEPUPDATES
2. Create two sub folders x64 and x86 in the share
There are 6 files in total that will download to this share under each of the sub folders:
* 3 for the x64 bit machines (Mpam-fe.exe, Mpam-d.exe and Nis_full.exe)
* 3 for the x86 bit machines (Mpam-fe.exe, Mpam-d.exe and Nis_full.exe)
Mpam-fe.exe – Full Definitions
Mpam-d.exe – Delta Definitions
Nis_full.exe – Network-based exploit definitions
3. Using the PowerShell script from the Microsoft Gallery: https://gallery.technet.microsoft.com/scriptcenter/SCEP-Definition-Updates-to-fde57ebf to download the SCEP Updates to the UNC path
You can automate this script by creating a scheduled task on the server to run the script every X hours, the command example: powershell-file "script1.ps1", please note the script above is an example and will require some modification for your environment.
4. On a server on the isolated network create a network share, example \\Server2\SCEPUPDATES
You will want to assure that the share you created is configued so that client computers and the domain users connecting to the share have read permissions
5. From the Server with internet access, copy the contents from the original share, example \\Server1\SCEPUPDATES to the share on the isolated network, example \\Server2\SCEPUPDATES
6. Configure the SCEP Antimalware Policy in the ConfigMgr 2012 console:
a. Open the ConfigMgr 2012 Console
b. Navigate to Assets and Compliance \ Endpoing Protection \ Antimalware Policies
c. Select the Default Client Antimalware Policy (unless you have custom ones, then adjust to those), right click and select Properties
d. Select Definition Updates on the left hand side of the properties
e. Click the Set Source Button
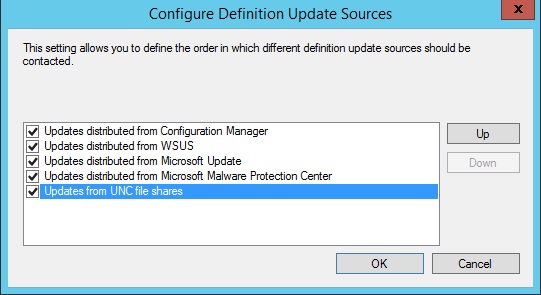
f. Place a check mark next to "Updates from UNC file shares" and then click the OK button
g. Click the Set Paths button
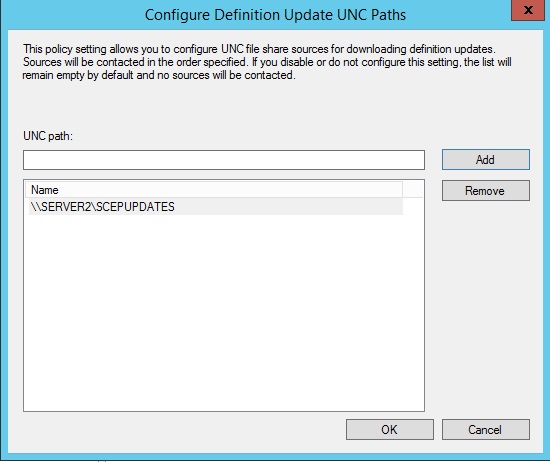
h. Enter the UNC path for the share on the isolated network, example \\Server2\SCEPUPDATES and click Add, then click the OK button
i. Click the OK button on the policy properties
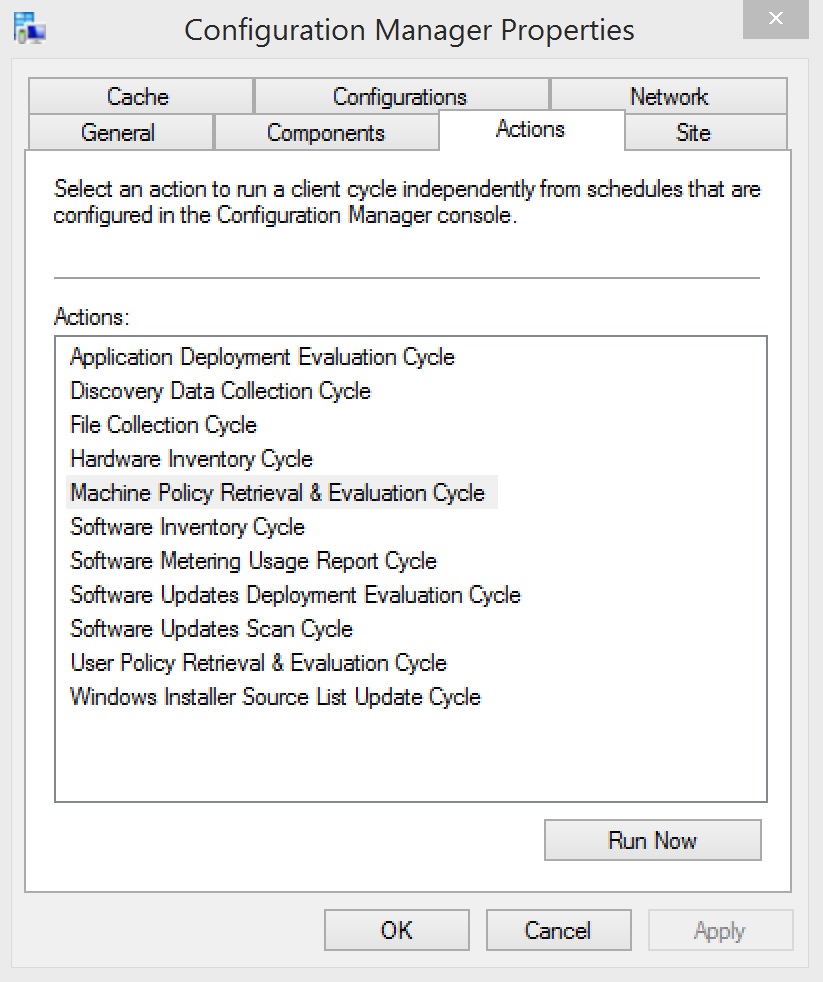
7. Update the ConfigMgr \ SCEP Policies on the client machines
To validate that the UNC path is being accepted and used by the clients, on a client machine that has updatd policy perform the following:
1. Open the Registry Editor
2. Navigate to one of the following paths depending on the OS version (x32 vs x64)
a. For 32bit - Navigate to HKEY_LOCAL_MACHINE\SOFTWARE\Policies\Microsoft\Microsoft Antimalware\Signature Updates
b. For 64bit – Navigate to HKEY_LOCAL_MACHINE\SOFTWARE\WoW6432Node\Policies\Microsoft\Microsoft Antimalware\Signature Updates
3. Validate the DefinitionUpdateFileSharesSources to assure pointing to the correct UNC
Now when you SCEP clients update in your isolated network they should pull the updates from the UNC share without issue, enjoy!


