My Take on an Azure Open Source Cross-Platform DevOps Toolkit–Part 6
| My Take on an Azure Open Source Cross-Platform DevOps Toolkit–Part 1 | Click Here |
| My Take on an Azure Open Source Cross-Platform DevOps Toolkit–Part 2 | Click Here |
| My Take on an Azure Open Source Cross-Platform DevOps Toolkit–Part 3 | Click Here |
| My Take on an Azure Open Source Cross-Platform DevOps Toolkit–Part 4 | Click Here |
| My Take on an Azure Open Source Cross-Platform DevOps Toolkit–Part 5 | Click Here |
| My Take on an Azure Open Source Cross-Platform DevOps Toolkit–Part 6 | Click Here |
| My Take on an Azure Open Source Cross-Platform DevOps Toolkit–Part 7 | Click Here |
| My Take on an Azure Open Source Cross-Platform DevOps Toolkit–Part 8 | Click Here |
| My Take on an Azure Open Source Cross-Platform DevOps Toolkit–Part 9 | Click Here |
| My Take on an Azure Open Source Cross-Platform DevOps Toolkit–Part 10 | Click Here |
| My Take on an Azure Open Source Cross-Platform DevOps Toolkit–Part 11 | Click Here |
| My Take on an Azure Open Source Cross-Platform DevOps Toolkit–Part 12 | Click Here |
Building a Docker Image
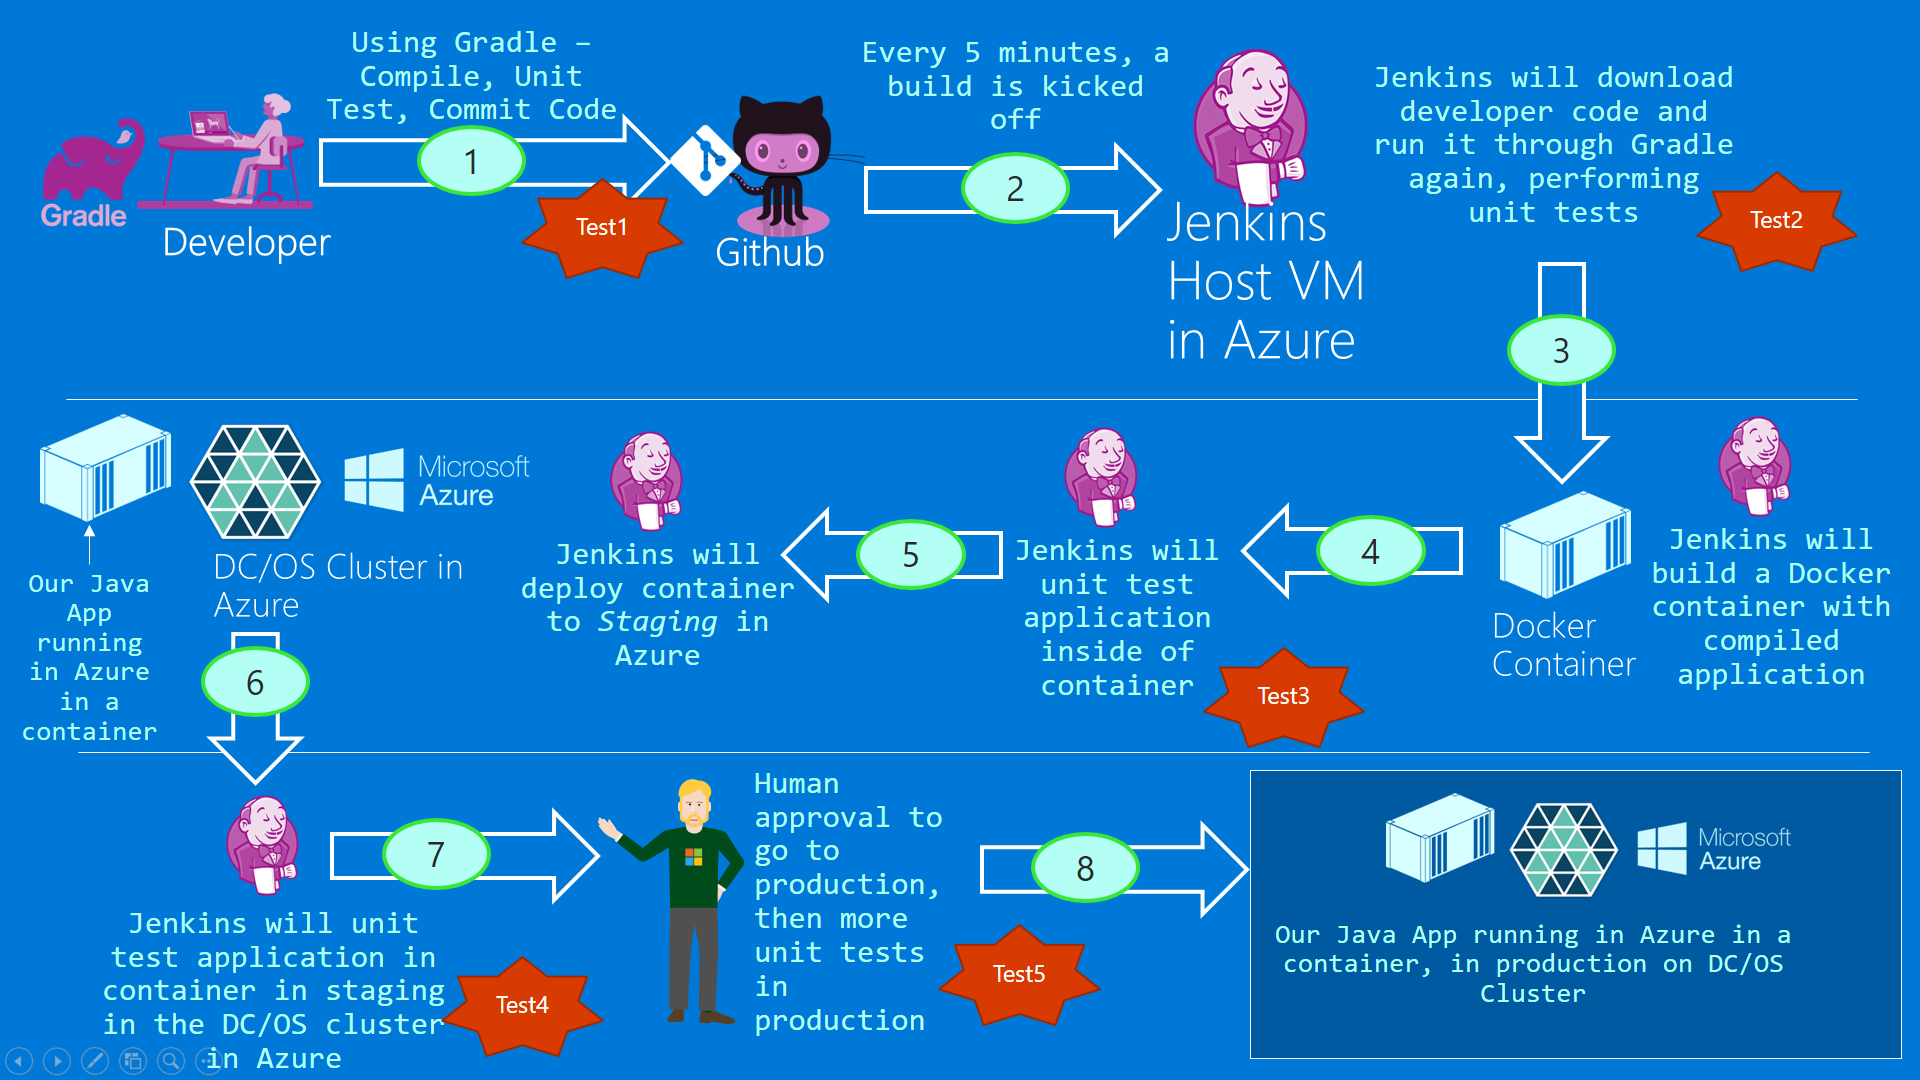
So finally we get to the point where we will build our docker image in this step. This Docker image will run our Java-based application httpservice.
Figure 1: The big picture
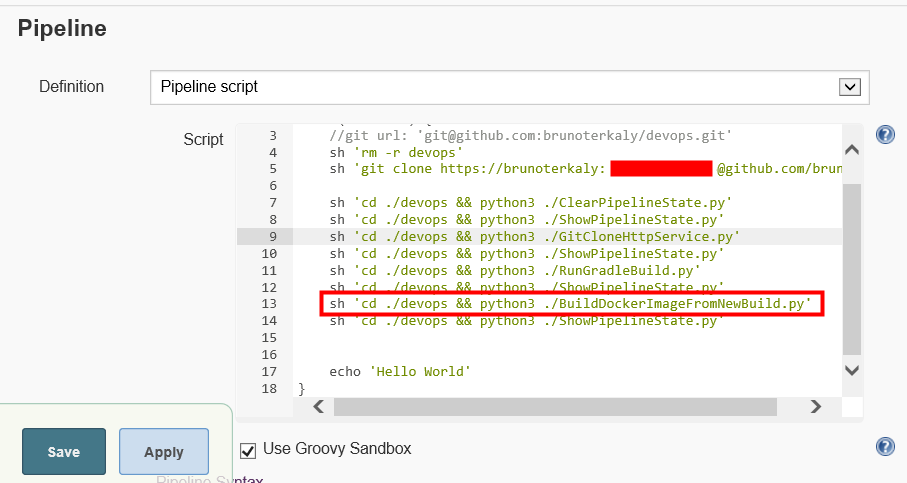
So you can see that on line 13 we actually start building out our Python script that will build our docker image.
The assumption we are making is that Line 11 executed correctly, meaning that we were able to build the application and unit test it successfully. If any step fails, the pipeline stops functioning until a fix is made.
Figure 2: The Pipeline - focusing on BuildDockerImageFromNewBuild.py
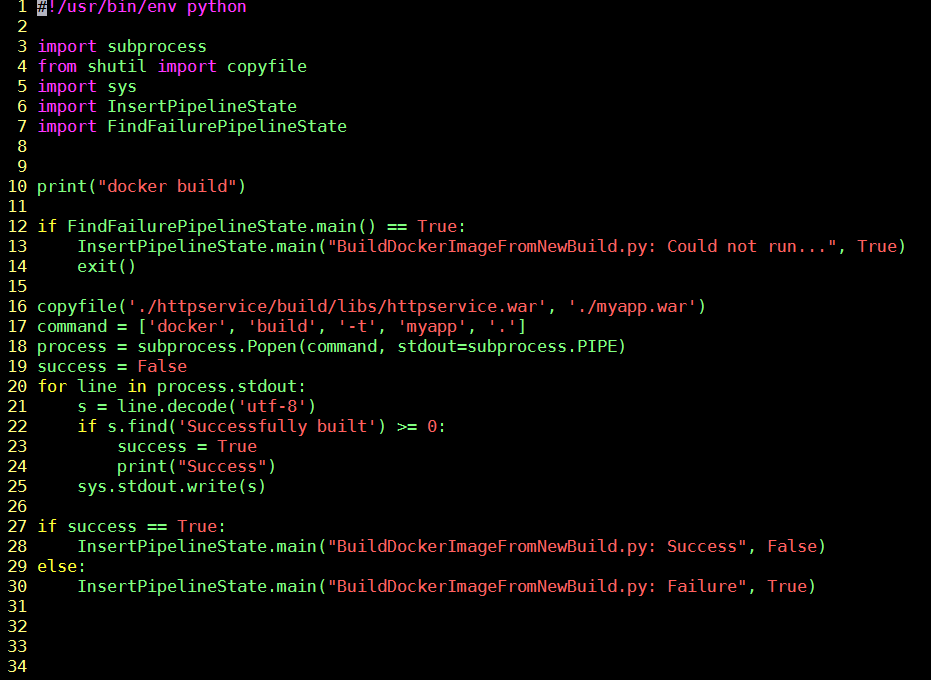
Take note of the code explanations below.
| Line | Explanation |
| 3-7 | The necessary import statements.I will show you the source code, line 7, shortly. |
| 12-14 | You will see this code at the beginning of all Python scripts. We are essentially testing to make sure the previous steps in the pipeline did not fail. If there was a failure, we immediately exit out. |
| 16 | The war file represents our application. It was compiled and tested in the previous step. Our entire app is packaged up inside of this war file. We need to copy it here to the local folder because it will be used during the docker build process. Notice that on line 17 we do the docker build. |
| 17 | This is the core command that is used to build containers. It relies on the fact that the Dockerfile is in the current folder. It was previously downloaded to the Jenkins build server by the github clone devops.git as the first step in the pipeline.This devops.git is where we store everything else that's needed for the pipeline execution, except for the Java application itself, which is a separate git clone (httpservice). See previous posts for more info. |
| 20-25 | Look through the output of the docker build process, looking for "Successfully built." This is how we know the docker image was built successfully. |
| 27-30 | Store the state of this step in the execution of the pipeline. The docker build command needs to execute successfully before we can continue the rest of the pipeline. |
Figure 3: BuildDockerImageFromNewBuild.py
Understanding FindFailurePipelineState
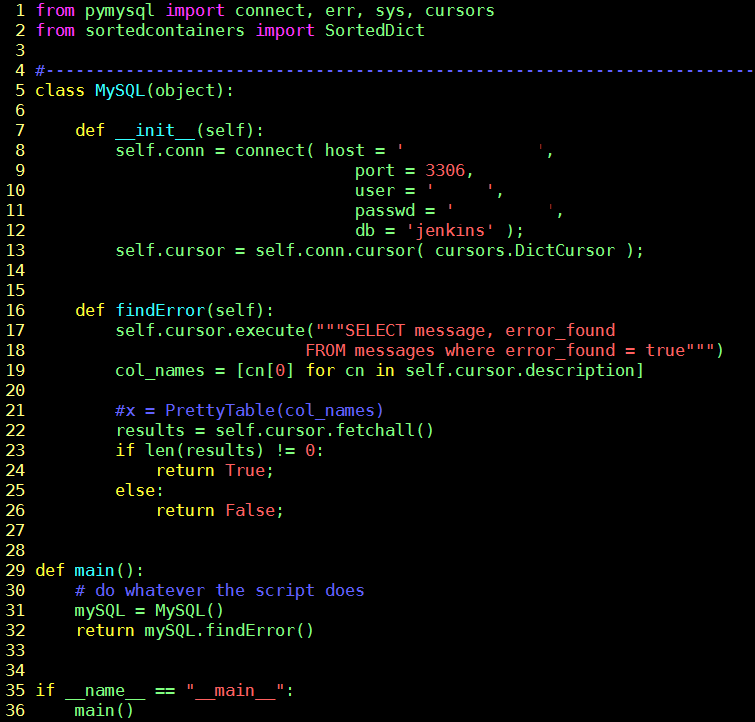
In figure 3 on line 12 we are checking the persistent store to make sure that there were no failures in previous steps of the pipeline execution.
The code below is called from almost every single step, every single Python script in the pipeline needs to verify that errors were not discovered in previous steps..
Here is that code:
| 17-18 | Perform SQL query to select records where error was found |
| 32 | Return boolean back to the caller of this script to indicate whether or not error was found in previous steps of pipeline execution. The pipeline halts execution on a fail. |
Figure 4: FindFailurePipelineState.py
Conclusion
This post is about the important step of building a docker container on the Jenkins host. We talked about BuildDockerImageFromNewBuild.py, which did some important work.

In the next post we will start testing this container that was just built. But before we can do that, we need to make sure we stop any old containers that might be running.


