Debuggin ASP.NET application in IIS - building development environment
This posting is provided "AS IS" with no warranties, and confers no rights. Use of included script samples are subject to the terms specified at https://www.microsoft.com/info/cpyright.htm
When you application is deployed into production it will be probably accessed like this https://myapp.mycompnay.com. It will also be subjected to various IIS configuration settings: authentication, authorization, custom routing, etc. But when you develop and test it, probably, lives in IIS express; and accessed like something like this https://localhost/myapp:400004.
Since most of the walkthroughs demonstrate configuration of the development environment using IIS Express, I would like to document the steps of using IIS 7.5 and creating the URL structure which resembles your desired end state. I am doing this because I myself had to spent considerable amount of time in accomplishing what might appear as a simple task.
The overall process can be divided into three stages:
- OS/Browser configuration
- IIS configuration
- Visual Studio configuration
OS and Browser
Let’s assume that in production our application will be accessed as https://myapp.mycompany.com. In order to mimic the same URL structure in our development environment we need to perform the following steps:
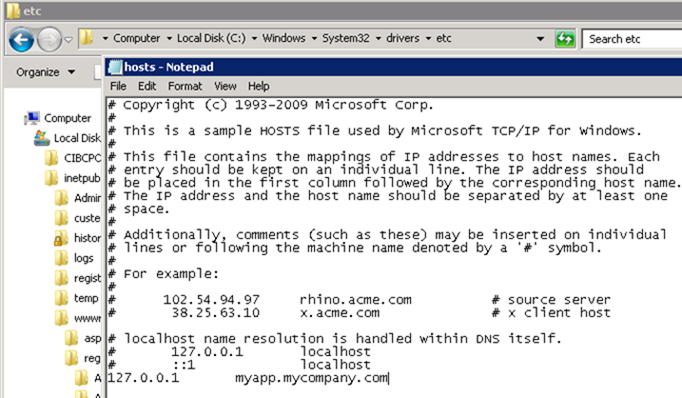
- Add an entry to the hosts file for myapp.mycompnay.com. This step is required unless, your DNS server will resolve myapp.mycompany.com to your development server.
- If your application will be using Windows Integrated Authentication, you need to disable LSA loopback (KB896861), otherwise you will be getting access deny errors due to the host name mismatch.
- Also to prevent credential prompts in IE add https://myapp.mycompany.com to the local intranet zone in IE.
- Create a folder where your application files will reside
- Optional, but recommended, add a user account which we will be used to run the application pool for your web application
Create IIS Site
Create application pool
The name could be arbitrary, but make sure to select the .NET framework version in which you will be developing your app.
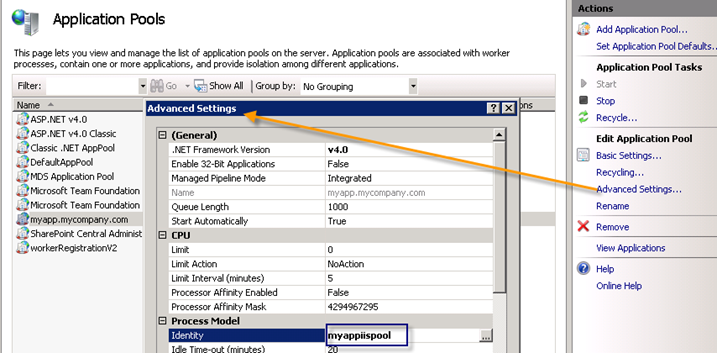
Once the pool is created, open Advanced Settings, and change the identity of the pool to the name of the user account you created in previous steps.
Create new Site
The name of the site is arbitrary.
Choose the name of the application pool you created in the previous step.
The value in the host name field should correspond to the record you added to your host file.
Configure Visual Studio
In Visual Studio create a new Web Site
In the location of the site select HTTP, then click on Browse.
Select IIS and then select the site
If required, enable Windows Integrated authentication in the web.config or IIS Manager
Test by debugging the app.


