How to: Get an Overview of a Schema Set Using the Graph View
Note
This article applies to Visual Studio 2015. If you're looking for the latest Visual Studio documentation, see Visual Studio documentation. We recommend upgrading to the latest version of Visual Studio. Download it here
This topic describes how to use the Graph View to see a high-level view of the nodes in a schema set and the relationships between the nodes.
To create a new XSD file and display the root element in the Content Model View
Create a new XML Schema file and save the file as Relationships.xsd.
Click the Use XML Editor to view and edit the underlying XML Schema file link on the Start View.
Copy the XML Schema sample code from Sample XML Schema: Relationships and paste it to replace the code that was added to the new XSD file by default.
Right-click anywhere in the XML Editor and select View Designer.
Select the Graph View from the XSD Toolbar.
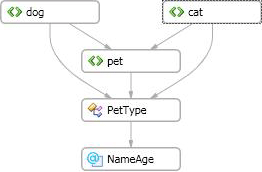
Select Schema Set node in the XML Schema Explorer and drag the node to design suface of the Graph View. You should see all the global nodes, and arrows connecting the nodes that have relationships.

Click on any node on the design surface and look at the breadcrumb bar to see where the selected node is located in the schema set.
Rick-click on any element node on the desing surface and select Generate Sample XML to see the XML instance document.