Shopify
How to install Clarity on the Shopify platform
Note
If you're using the new Shopify web pixel and have a Shopify Plus account, the checkout and post-checkout pages are currently not tracked in Clarity. We're working with the Shopify team to resolve this issue. For more information, see Shopify's website.
Step 1
Copy the Clarity tracking code from the dashboard.
Tip
Check Clarity Setup page to know where to find the tracking code.
Check out our Getting started page to know how to add a project.
Step 2
On your Shopify dashboard, select Online Store.
Step 3
Under Online Store, select Themes.
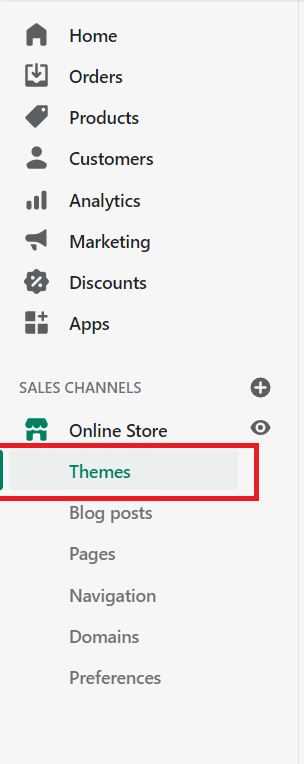
Step 4
On the top right, select Actions > Edit code.
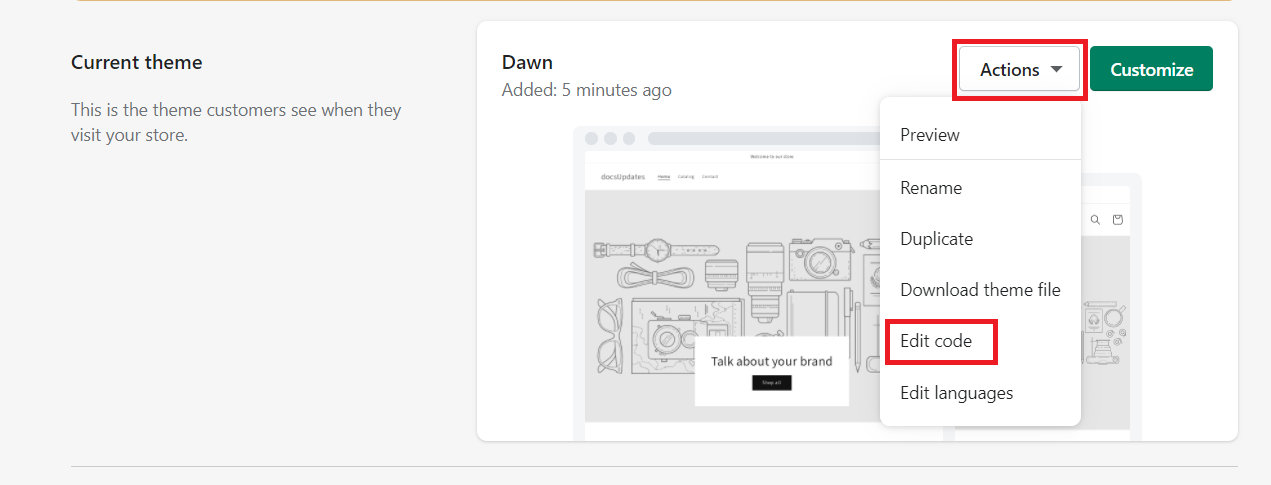
Step 5
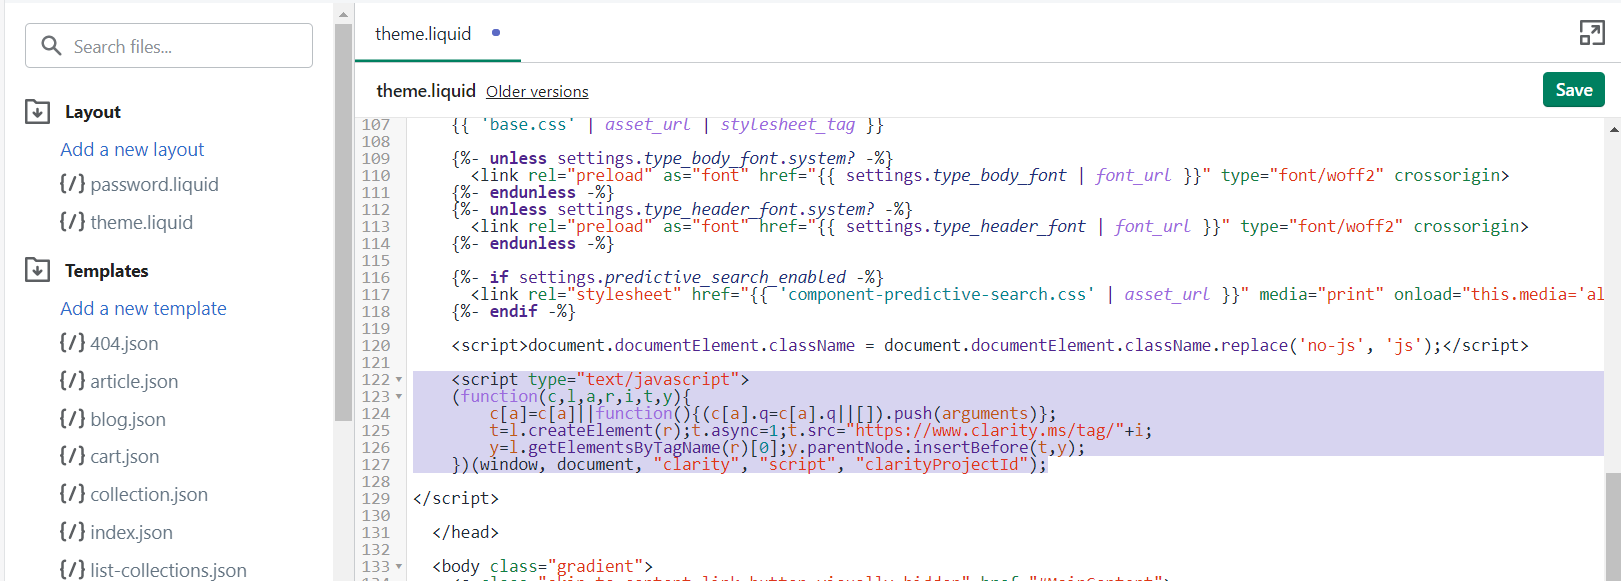
Under Layout, select theme.liquid.
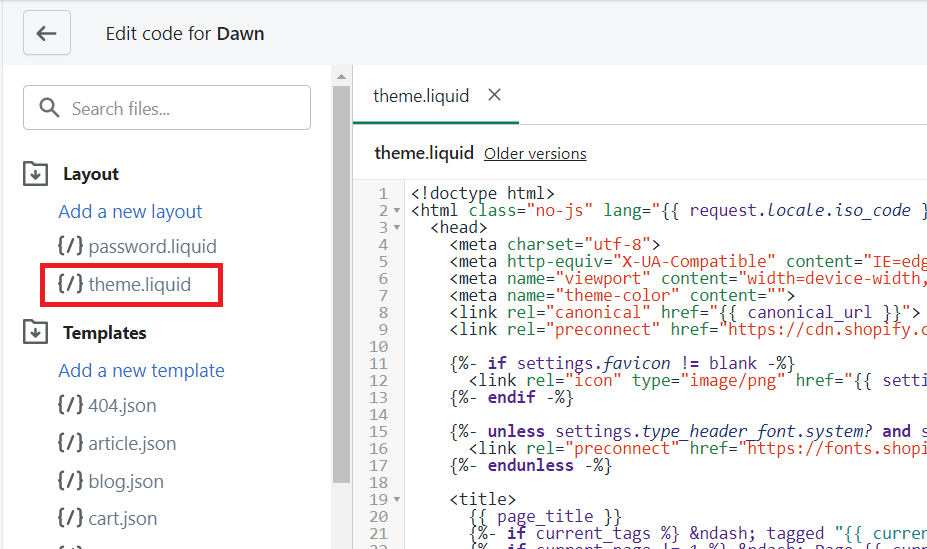
Step 6
Scroll down until you find this tag: </head>.
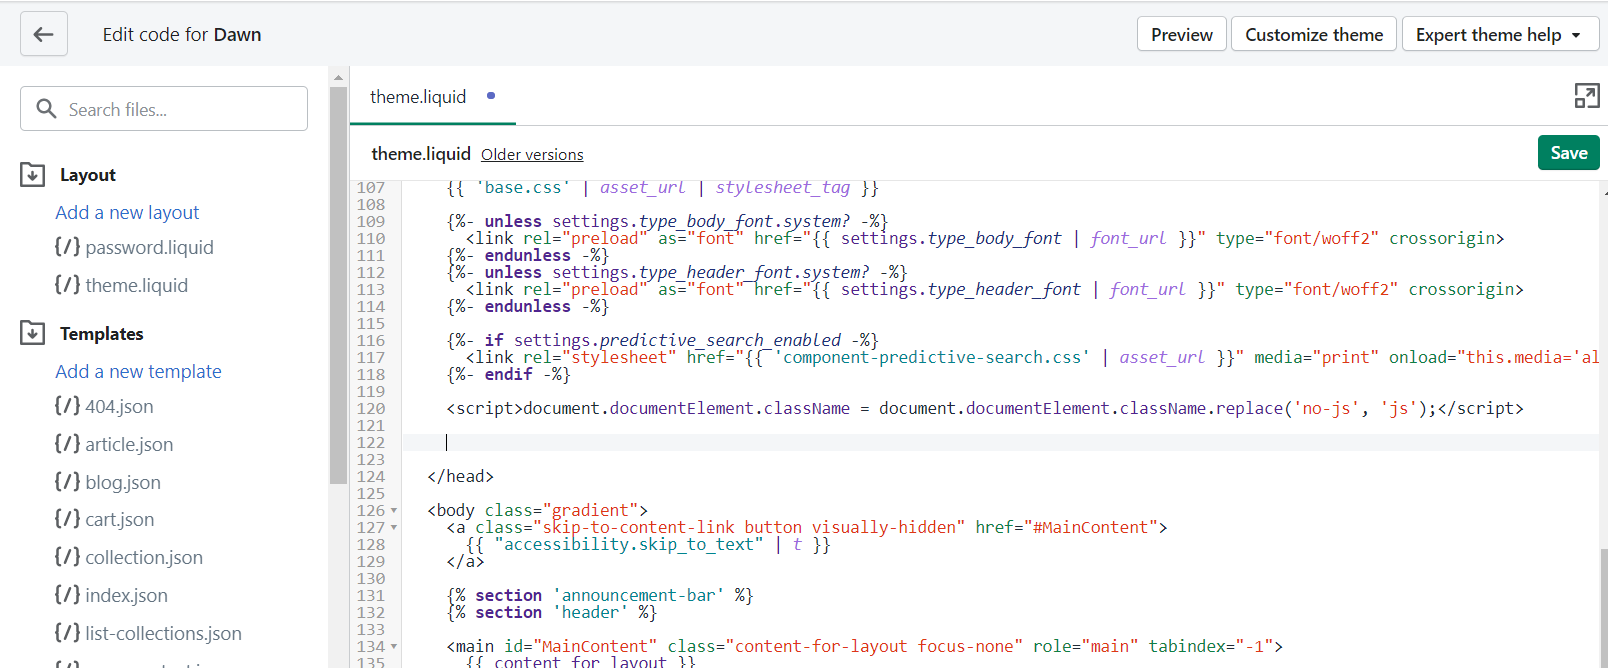
Step 7
Paste the Clarity tracking code just before the </head> tag.
Step 8
Select Save.
Step 9
The Clarity tracking code is now installed for Storefront and Order Status pages.
If your site is Shopify Plus, you can also install Clarity on your Checkout pages. Continue onto Step #14.
Note
- Shopify doesn't allow third-party scripts onto Checkout pages, except for Shopify Plus accounts. Any other Shopify plan can only track their Storefront and Order Status pages.
Step 10
Repeat from step 2 to step 4.
Step 11
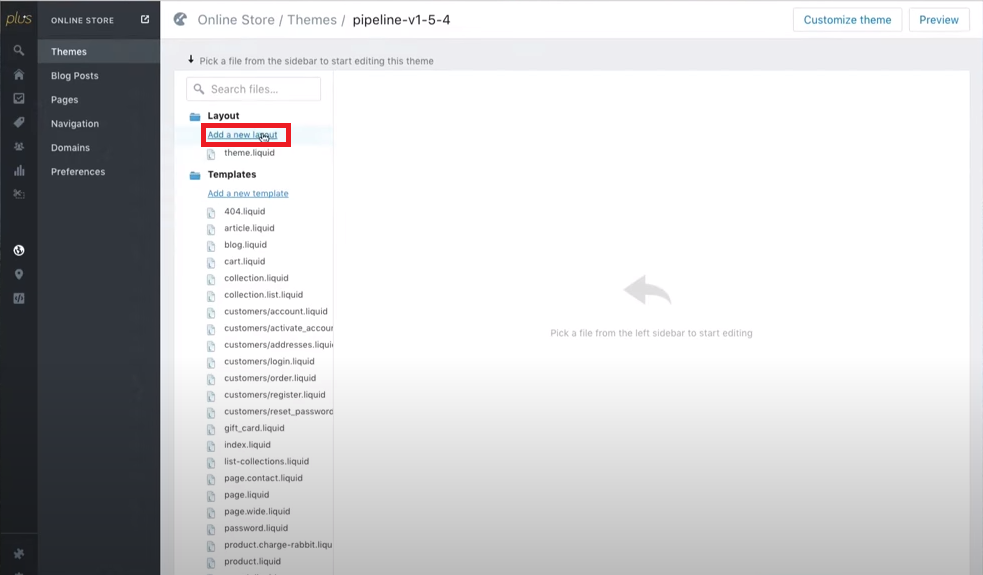
Under Layout, select Add a new layout.
Step 12
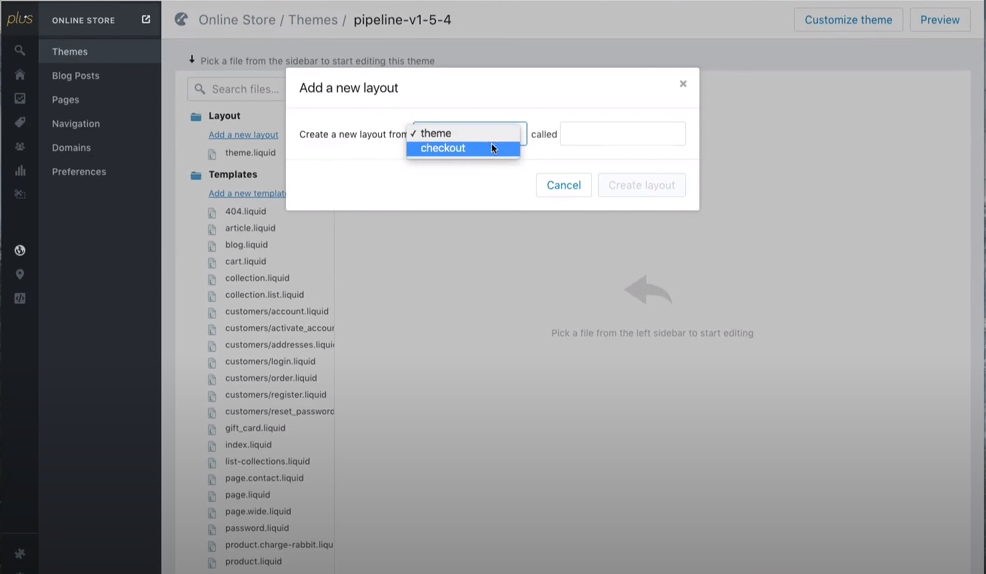
Select Checkout in the drop-down menu.
Note
If you don't see this option, contact your Shopify partner to enable this.
Step 13
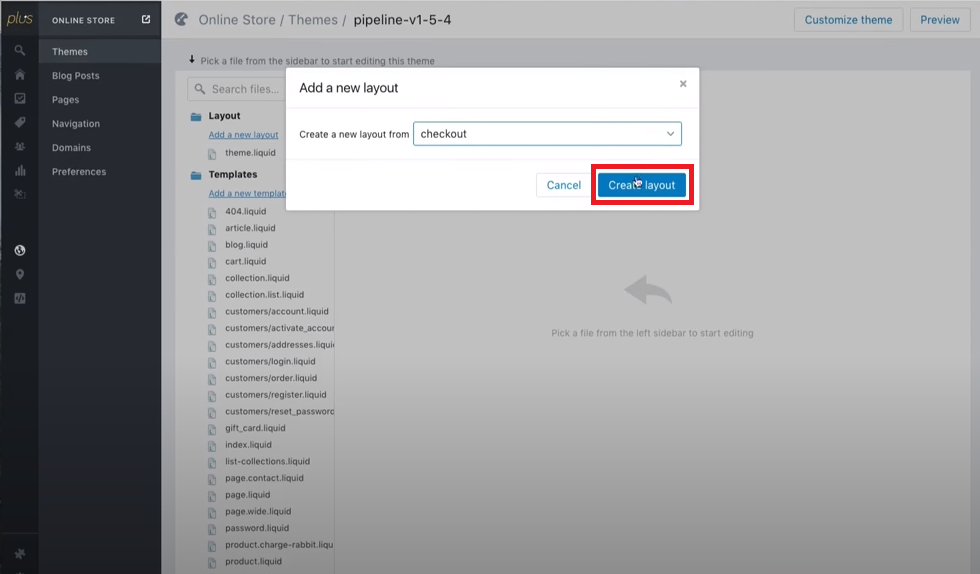
Select Create layout.
Step 14
Repeat from step 6 to step 7.
Step 15
The Clarity tracking code is now installed.
FAQ
For more answers, refer to Setup FAQ.