Step 2: Configure the Orchestration in BizTalk Server Administration Console

Time to complete: 10 minutes
Objective: In this step, you perform the following tasks:
Create a WCF-Custom send-receive port to send and receive messages from the SAP system using the SAP adapter. Configure this port to use the maps that you created in the previous step.
Configure the orchestration you deployed in the last step to use the WCF-Custom port.
Prerequisite
- Deploy the BizTalk orchestration for which you want to configure the WCF-Custom port.
To create a WCF-Custom port
When you generate schema for an RFC using the Consume Adapter Service BizTalk Project Add-in, a binding file is also added to the BizTalk project. You can import this binding file into your BizTalk application to create a WCF-Custom send-receive port. For instructions on importing a binding file, see Import Bindings.
After you import the binding file, a send port is created under the Send Ports folder in the BizTalk Server Administration console.
Right-click the WCF-Custom port, and then click Properties.
From the left pane of the send port properties dialog box, click the General tab. From the right pane, click Configure.
In the WCF-Custom Transport Properties dialog box, click the Credentials tab, and specify the credentials to connect to an SAP system.
Click OK.
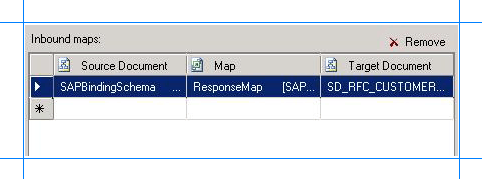
From the left pane of the send port properties dialog box, click Inbound Maps. From the right pane, click the field under the Map column, and from the drop-down, select ResponseMap.

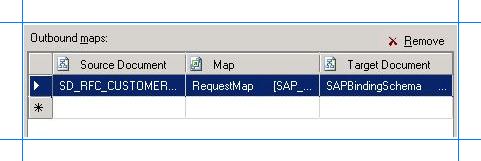
From the left pane of the send port properties dialog box, click Outbound Maps. From the right pane, click the field under the Map column, and from the drop-down, select RequestMap.

Click OK.
To configure the BizTalk application
In the BizTalk Server Administration console, expand BizTalk Group, expand Applications, and then expand the BizTalk Application where the orchestration is deployed.
Right-click the BizTalk application, and then select Configure.
From the left pane, click the orchestration to configure. From the right pane, from the Host drop-down list, select a BizTalk host instance.
Under the Bindings box, map the logical ports of the BizTalk orchestration to the physical ports in the BizTalk Server Administration console.
Select the file port where you will drop a request message. The BizTalk orchestration will consume the request message and send it to the SAP system.
Select the file port where the BizTalk orchestration will drop the response message containing the response from the SAP system.
Select the WCF-custom send port you created earlier in this topic.
Click OK.
For more information on configuring apps in BizTalk Server, see How to Configure an Application.
Next Steps
You have now completed migration of your vPrev BizTalk project to a BizTalk project that sends messages to the SAP system using the WCF-based SAP adapter. You must now test the migrated BizTalk application by sending a request message to invoke the SD_RFC_CUSTOMER_GET RFC, as described in Step 3: Test the Migrated Application.