Azure Container Service (AKS) and Kubernetes UI
Off late I was playing with new preview feature of Azure Container Services (AKS). This is a managed Kubernetes hosting environment. You don't need to be an expert container orchestration. And with all managed Azure service this too takes the pain of infrastructure management. So, what I was doing and thought to share with you. Just keep one thing in mind this is still under preview as of today (Dec 14, 2017)
- I had an Ubuntu Server where I deployed docker and pushed the local image to the Azure Container Registry (think of it as Docker Hub in Azure). This is your private repository. So that I can push these images to the Kubernetes. However, you can do it with Docker Hub as well.
- Since I am using Windows 10 as my working machine I installed
Azure CLI (/en-us/cli/azure/install-azure-cli?view=azure-cli-latest#install-on-windows)
I also needed kubectl. In Azure CLI I ran
az aks install-cli
This would install the magical Kubernetes CLI
Then I needed to create the AKS so I followed few steps
Connected the Azure CLI using az login
Attached the right subscription (if I have more than one) az account set –subscription Subscription_GUID
Then I ran the statement to create the AKS cluster
az aks create --resource-group myResourceGroup --name myK8sCluster --node-count 2 --generate-ssh-keys
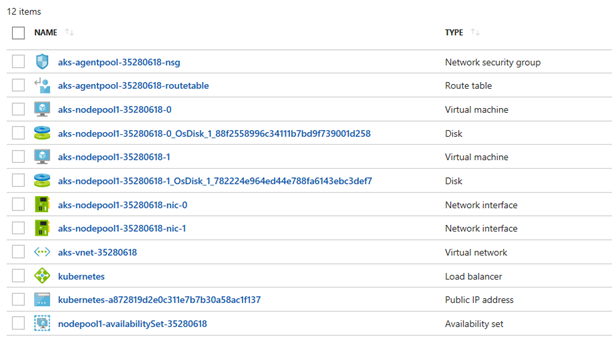
After this basic thing is done and my Kubernetes cluster is ready in Azure I can connect it from my local machine. This command creates a separate Resource Group to place all the cluster components. Total 12 + 1 (AKS Service in the myResourceGroup) components gets created from the above statement,

Now we are good to go and to connect Kubernetes from my local machine I need below step
az aks get-credentials --resource-group=myResourceGroup --name=aksName
This would add the info to a file at C:\Users\wghosh\.kube\config, post of which you will be able to connect the cluster from local machine. Now to check if this is working run the command,
kubectl get nodes

Because I had created two nodes cluster I can see only two here. You can scale this up to more and upgrade the Kubernetes without a downtime. Pretty cool!!!
To deploy in Kubernetes, you either can use Kubernetes UI or the REST API via ".yml" file. Let's see how we can invoke the UI in local machine.
To open the UI in local machine you need to run this command,
kubectl proxy

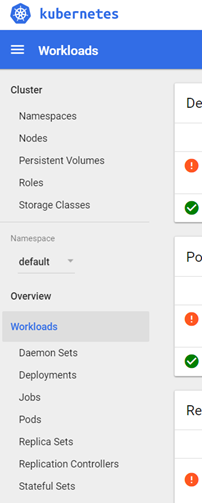
Since you are using Azure managed Kubernetes, you don't need to deploy the UI separately. It is already deployed.
Now open your local browser and type https://localhost:8001/ui and this would redirect you to https://localhost:8001/api/v1/namespaces/kube-system/services/kubernetes-dashboard/proxy but still nothing will appear on the browser till you type /# and the end. The final URL would look like
https://localhost:8001/api/v1/namespaces/kube-system/services/kubernetes-dashboard/proxy/# - this will be your working URL.

Enjoy.
Namoskar!!!