How to build Scala JARS with Maven from GitHub

 By Theo van Kraay, Data and AI Solution Architect at Microsoft
GitHub is a code hosting platform for version control and collaboration, letting you and others work together on projects from anywhere. Apache Maven is an open source software project management and comprehension tool based on the concept of a project object model (POM), and can manage a project's build, reporting and documentation from a central piece of information. This blog provides a “how to” guide for generating JAR files for Scala projects maintained in GitHub, which may be useful in scenarios where a user needs to take a fix to a project whose dependencies are coordinated in Maven, but where a recent fix might only be available in GitHub.
The example used here is a fix for a specific issue in Apache Spark 2.3 that was, at the time of writing, creating a conflict with the way in which the Spark to Azure Cosmos DB Connector runs on Azure Databricks. This affected Spark structured streaming. The fix for this issue was added to branch 2.3 in GitHub, however the change was not available in Maven Central. To take the fix, it would be necessary to “build from branch”.
As such, this blog will walk through the steps required to setup an environment that will enable you to build JARS and dependencies for a Scala-based Maven project from a given GitHub branch, using the Java-based IDE Eclipse and its Maven plug-in for compiling Scala source code. In this example we will build a set of JAR files from the 2.3 fix branch for the above-mentioned Cosmos DB Spark Connector.
-=-
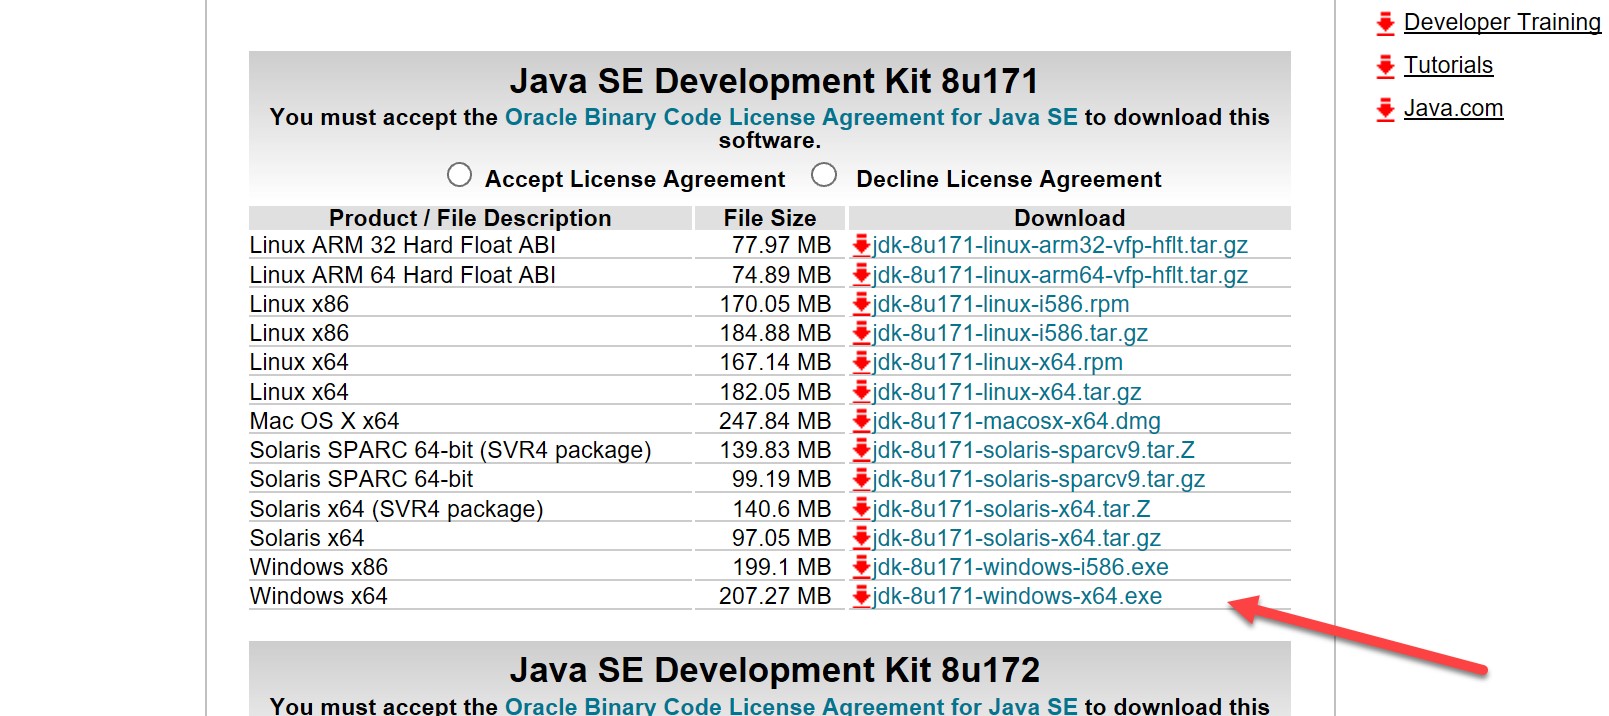
First, download and install the latest version of the Java Development Kit (JDK) for your operating system. Note: ensure you install JDK and not just JRE – e.g. the below link for a 64-bit Windows machine:
Then download and install the Eclipse IDE for Java Developers here (the latest version at the time of writing was “Eclipse Oxygen” – click on the download link and select run).
During the installation process, select Eclipse IDE for Java Developers:
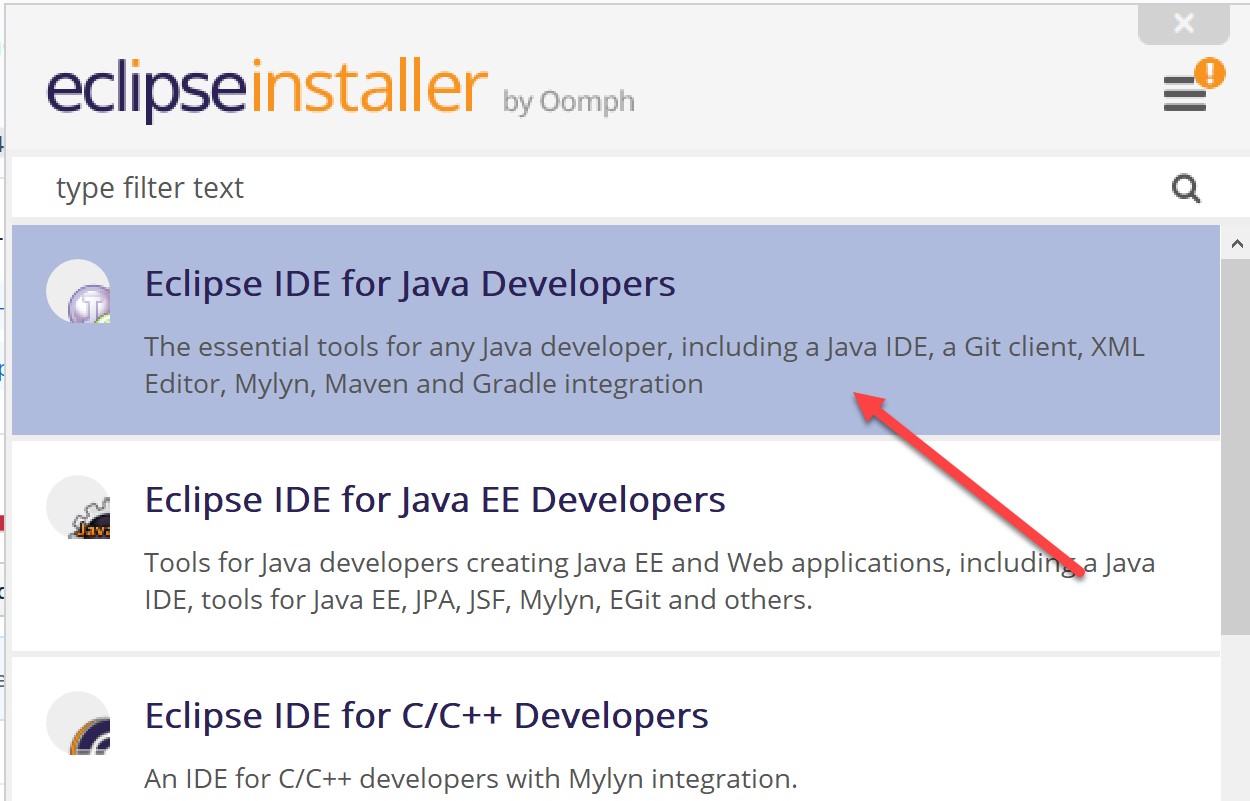
Select your preferred directory on the next page, and hit install (accepting the licence agreement dialogues that follow). You will also need to install a plug-in for Scala, which we will come to later. When Eclipse installation is complete you will be presented with a button to launch it – select this to launch. You will be asked to select a workspace - select the default and click launch:

This may take a few moments as Eclipse builds a profile in your new workspace for the first time). You should then see a welcome screen:

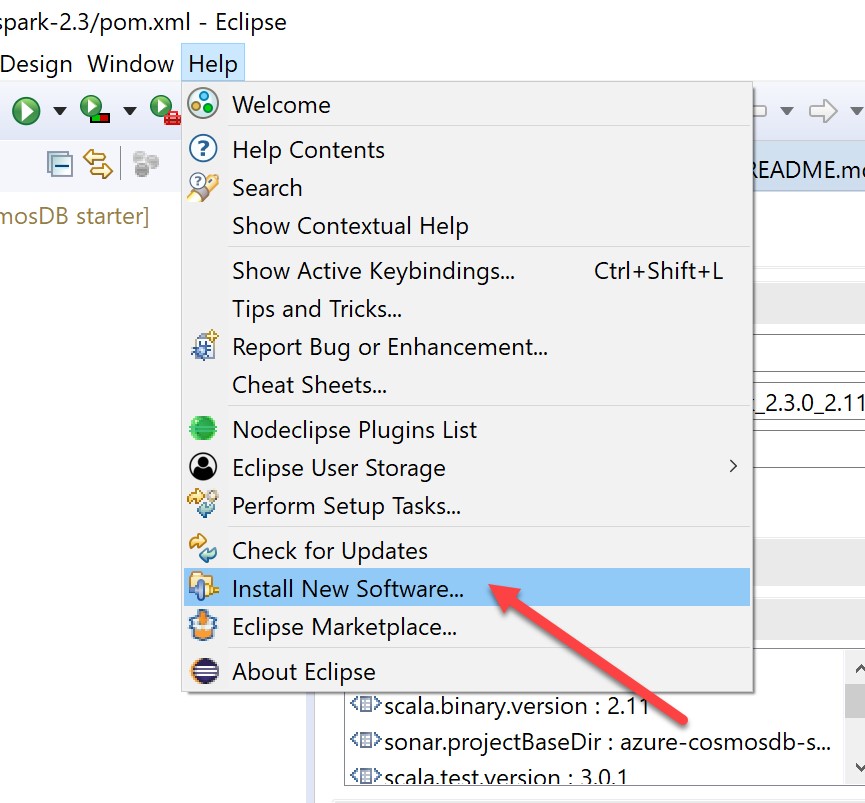
Now, let's install the Scala plug-in. Select Help and Install New Software:
In the dialogue, specify the Scala Maven repo (https://alchim31.free.fr/m2e-scala/update-site/) as below:

Select all options and click next:
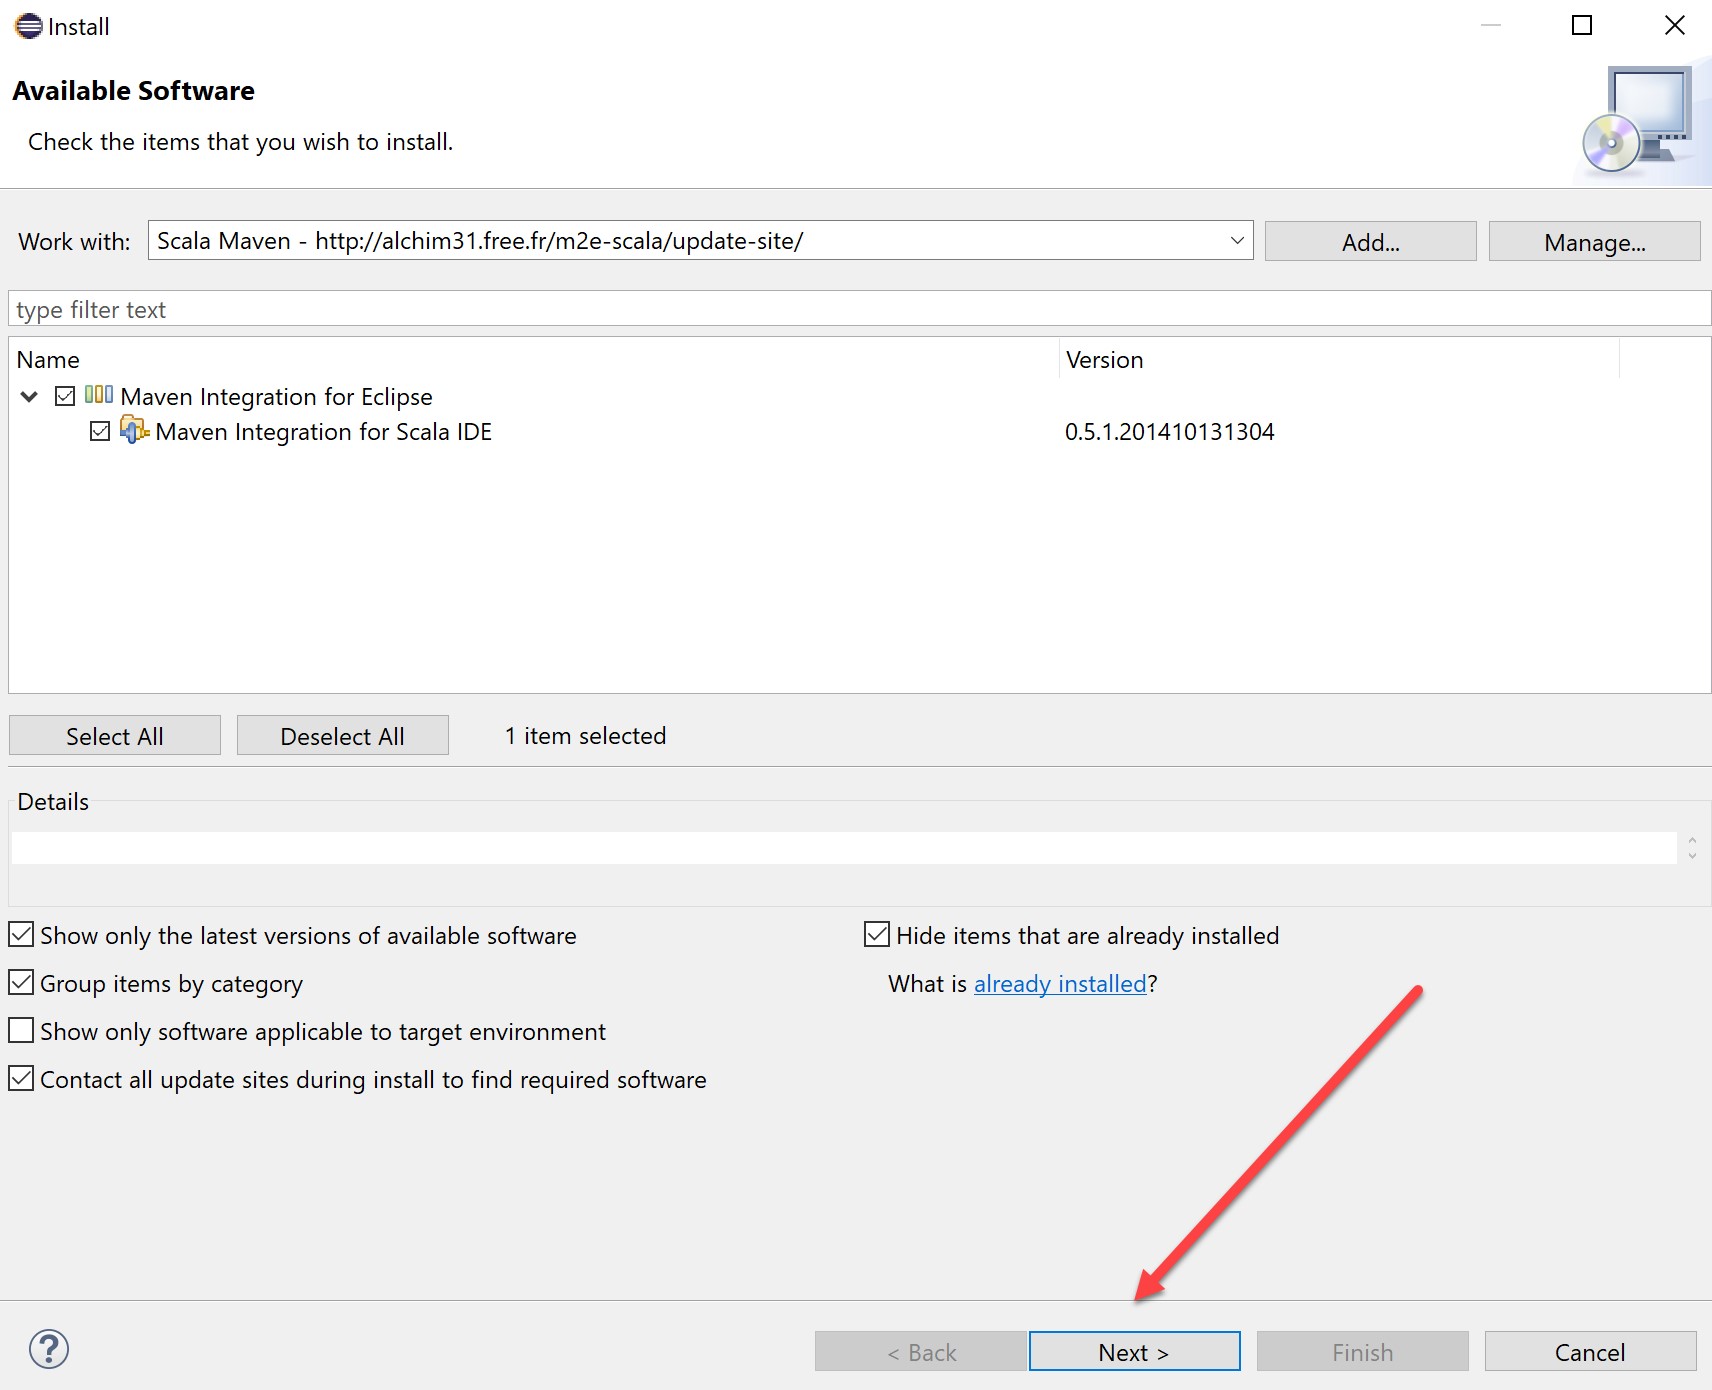
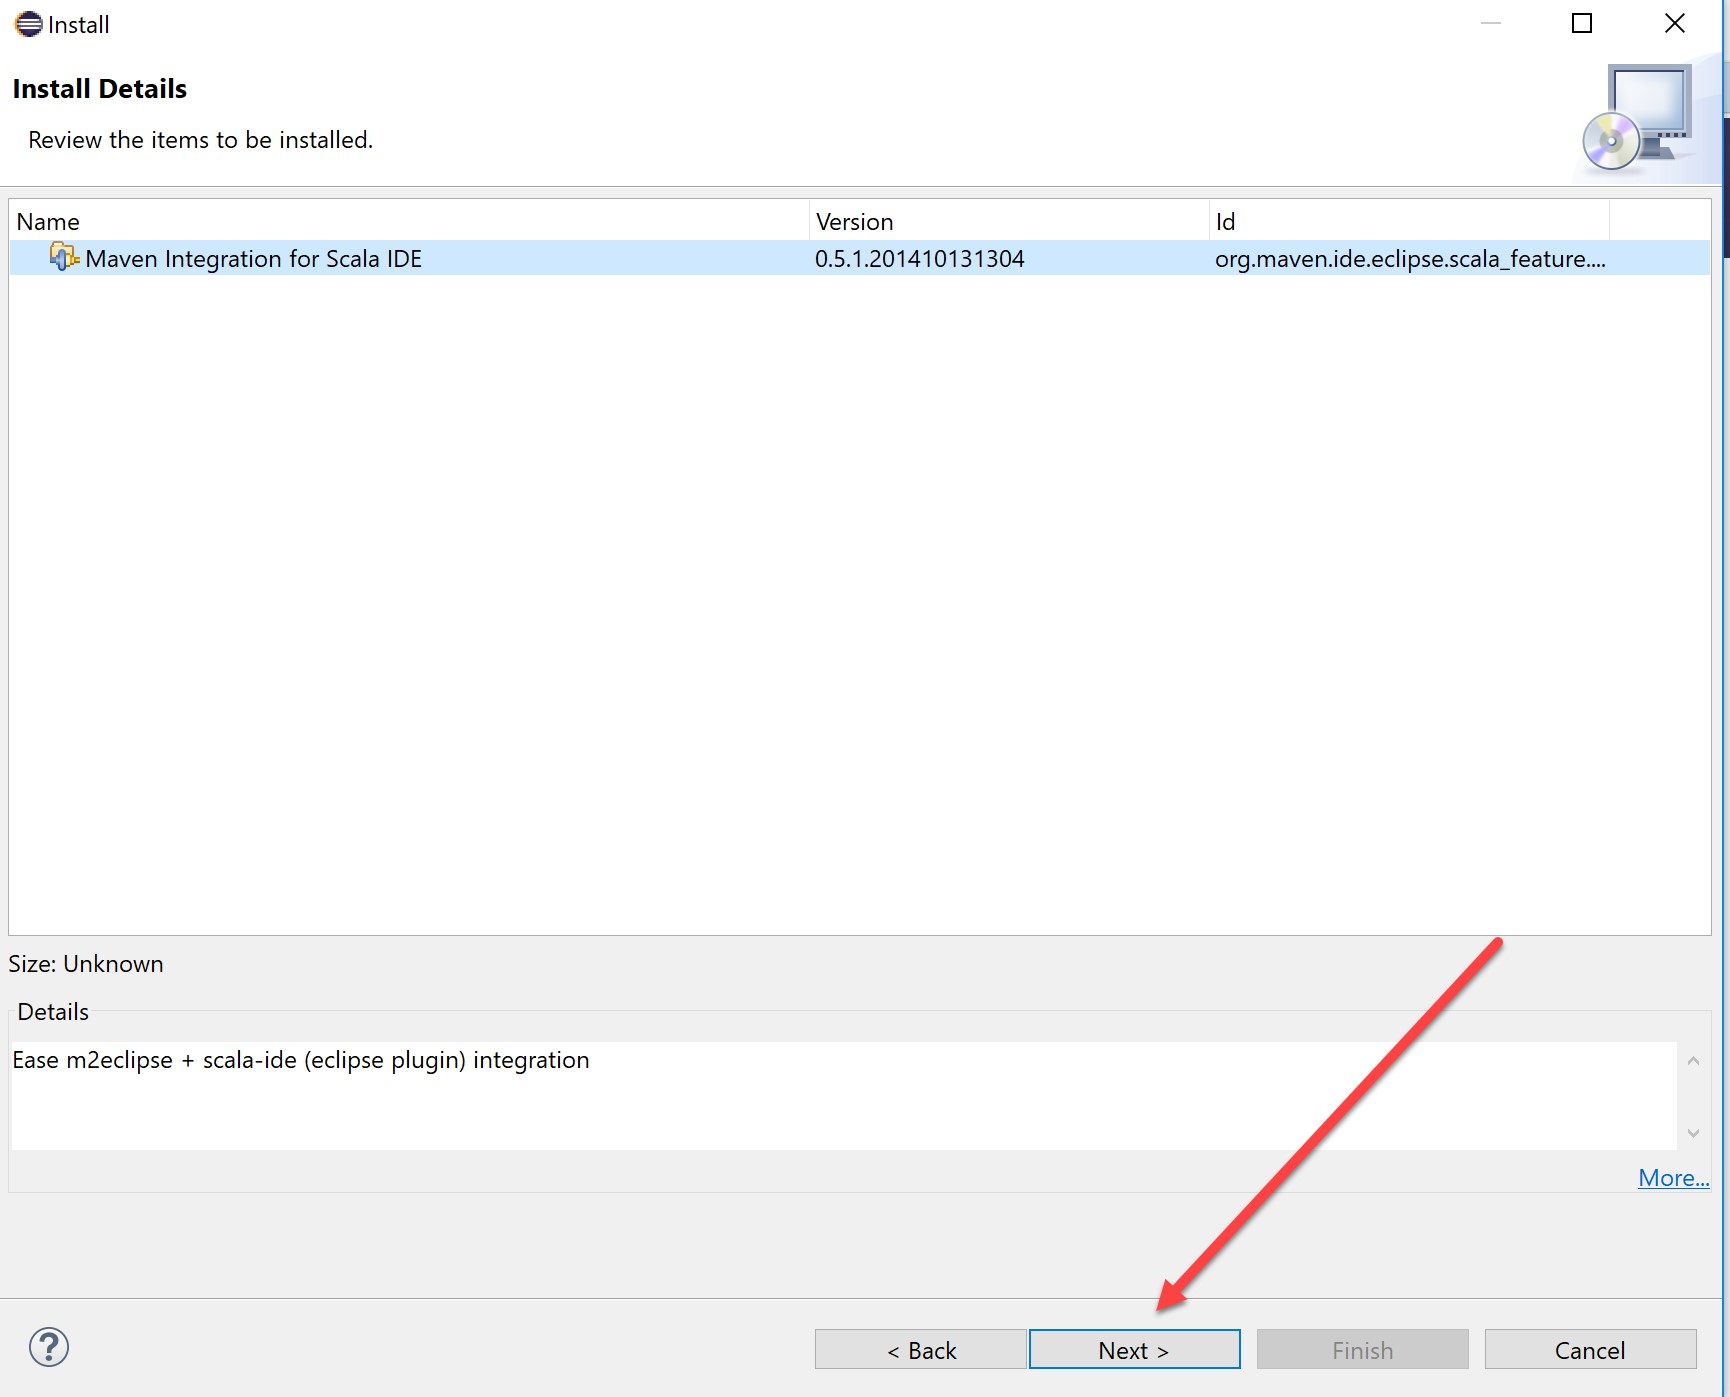
Click next again on the summary screen:
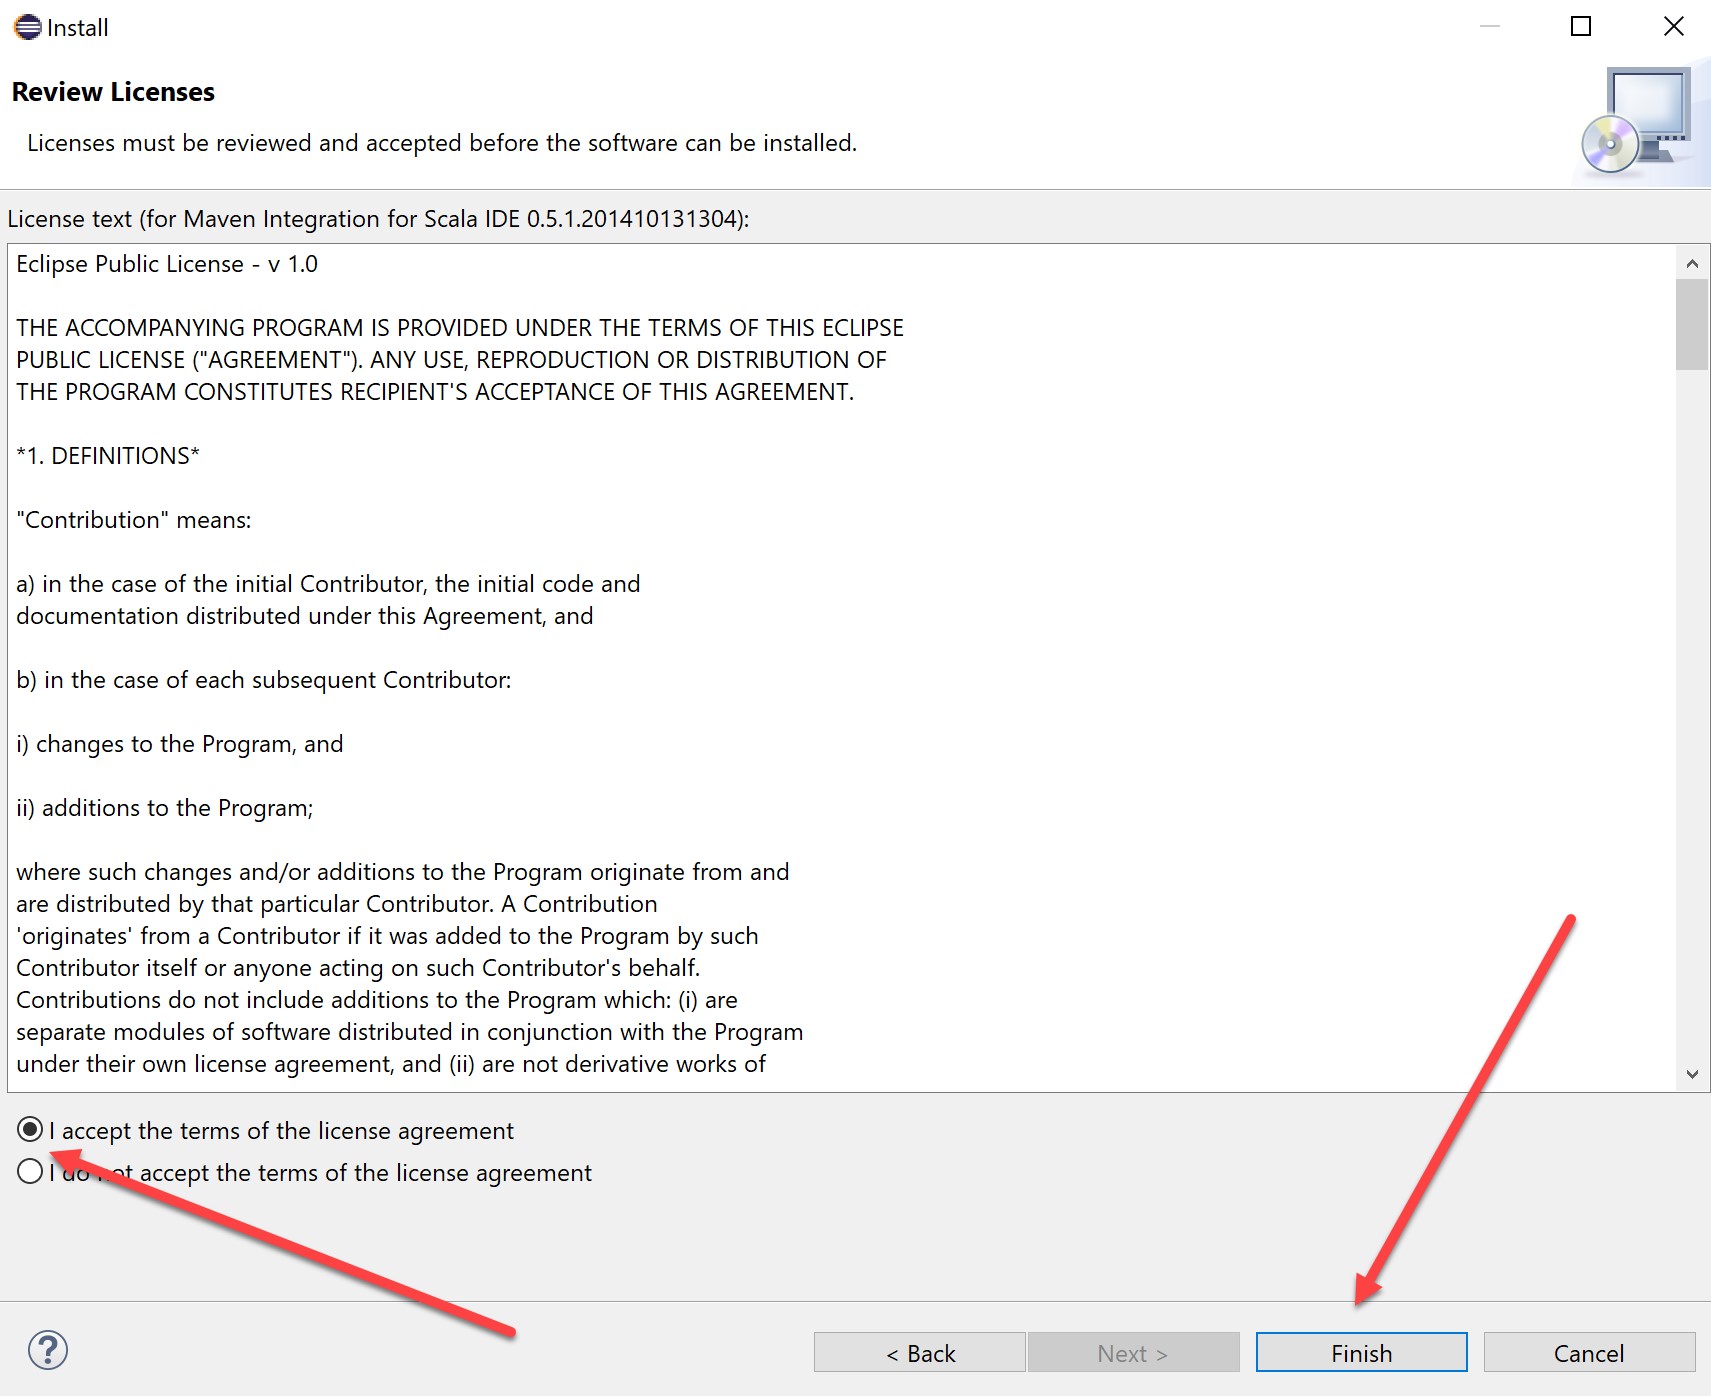
Accept the license and finish:
You may receive a warning such as the below – accept this and “install anyway”:

You will then be prompted to restart Eclipse:

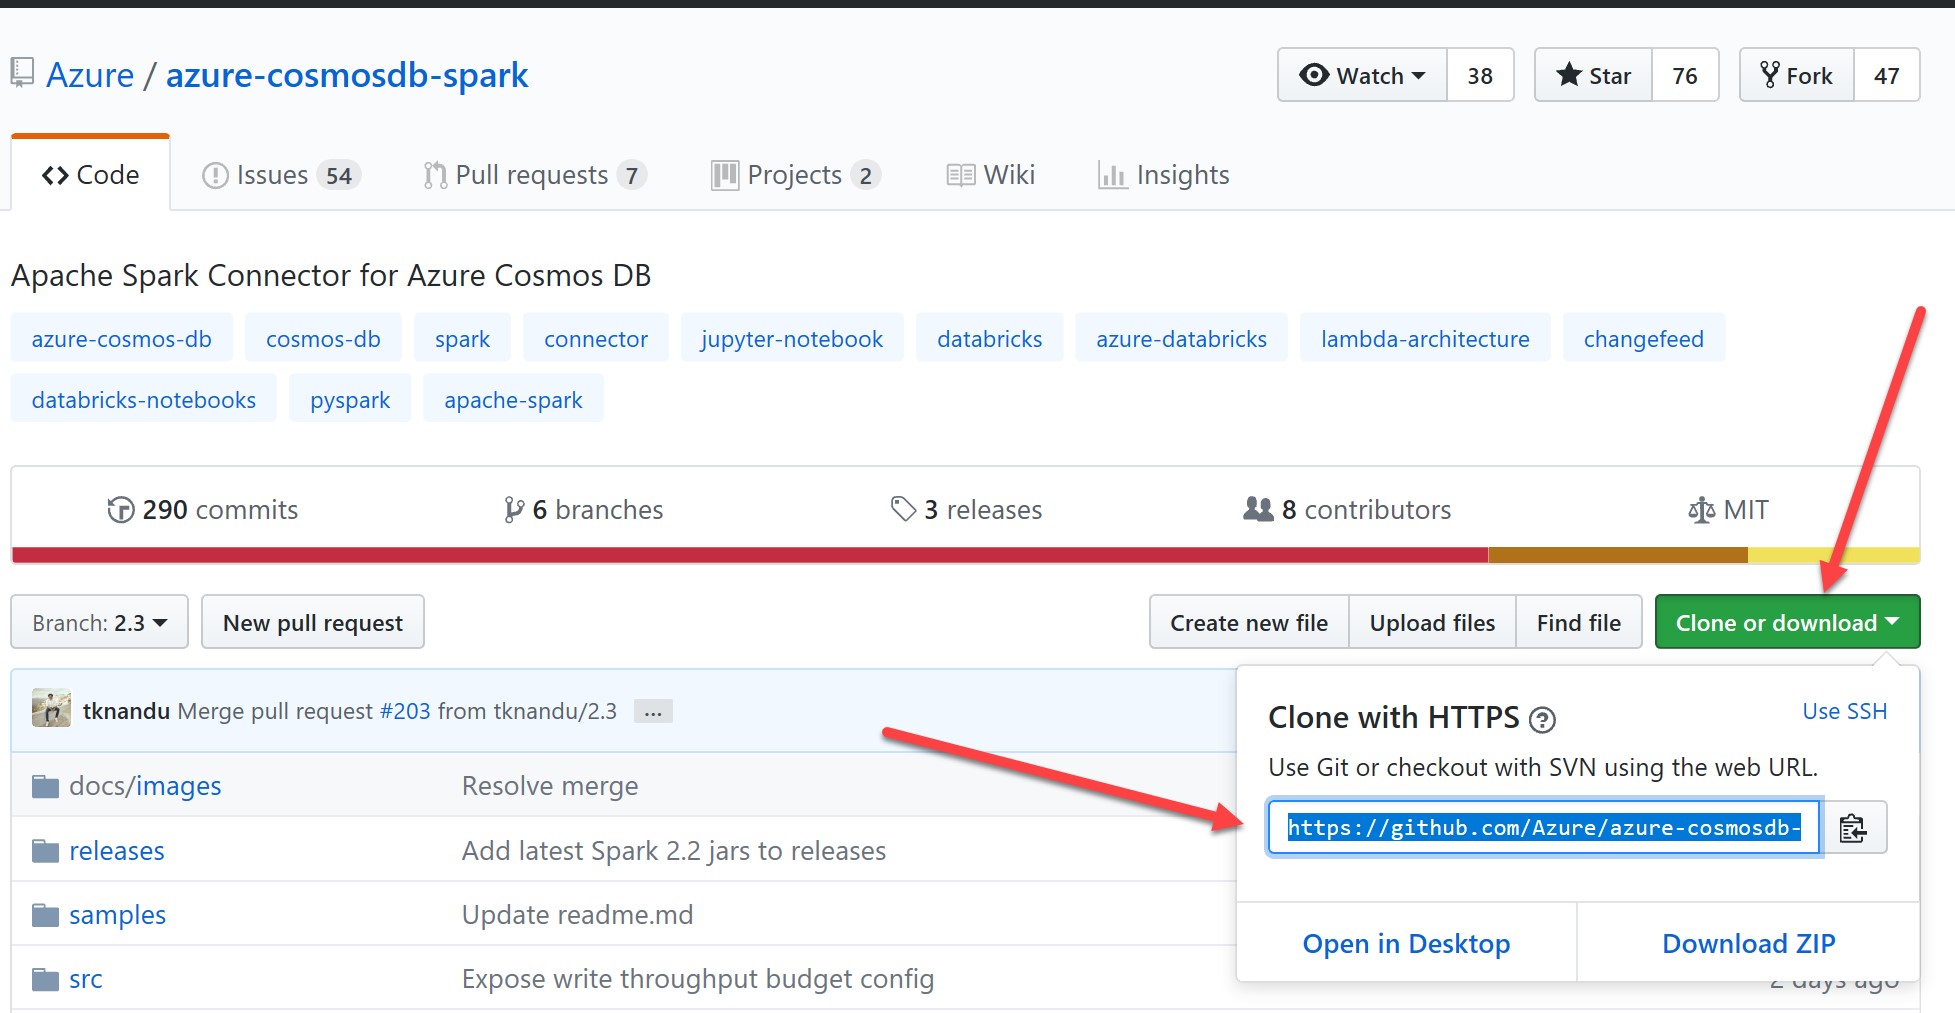
While Eclipse restarts, let's go to our GitHub repository. As above, here we will build a JAR containing all dependencies for the 2.3 branch of the Cosmos DB Spark Connector. Go to the repository and copy the URL for cloning:
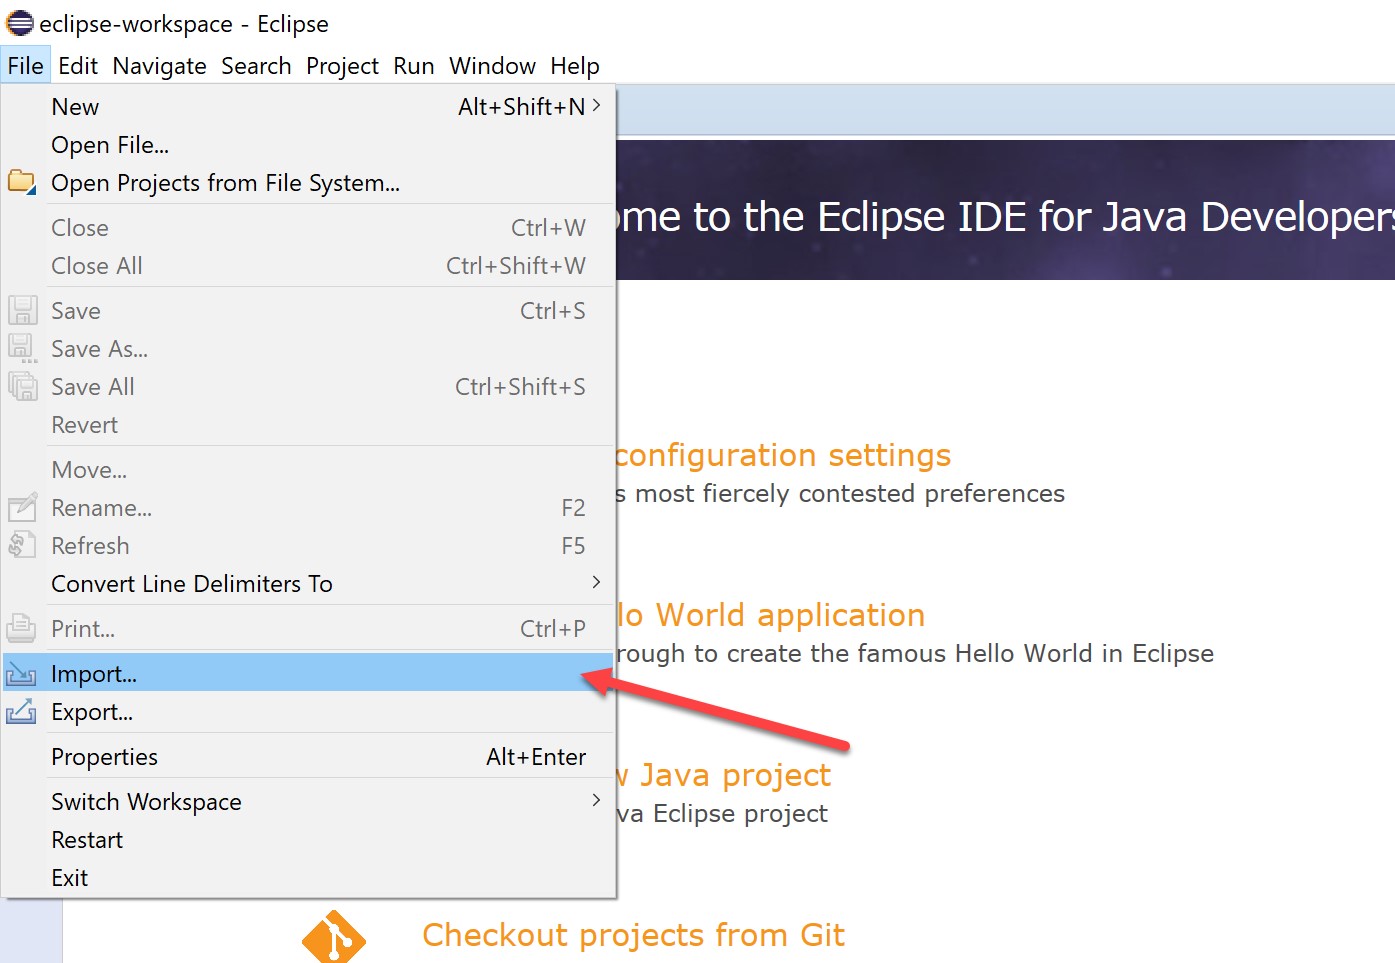
Back in Eclipse, we should now have restarted with the Scala plug-in applied. Click File -> Import:
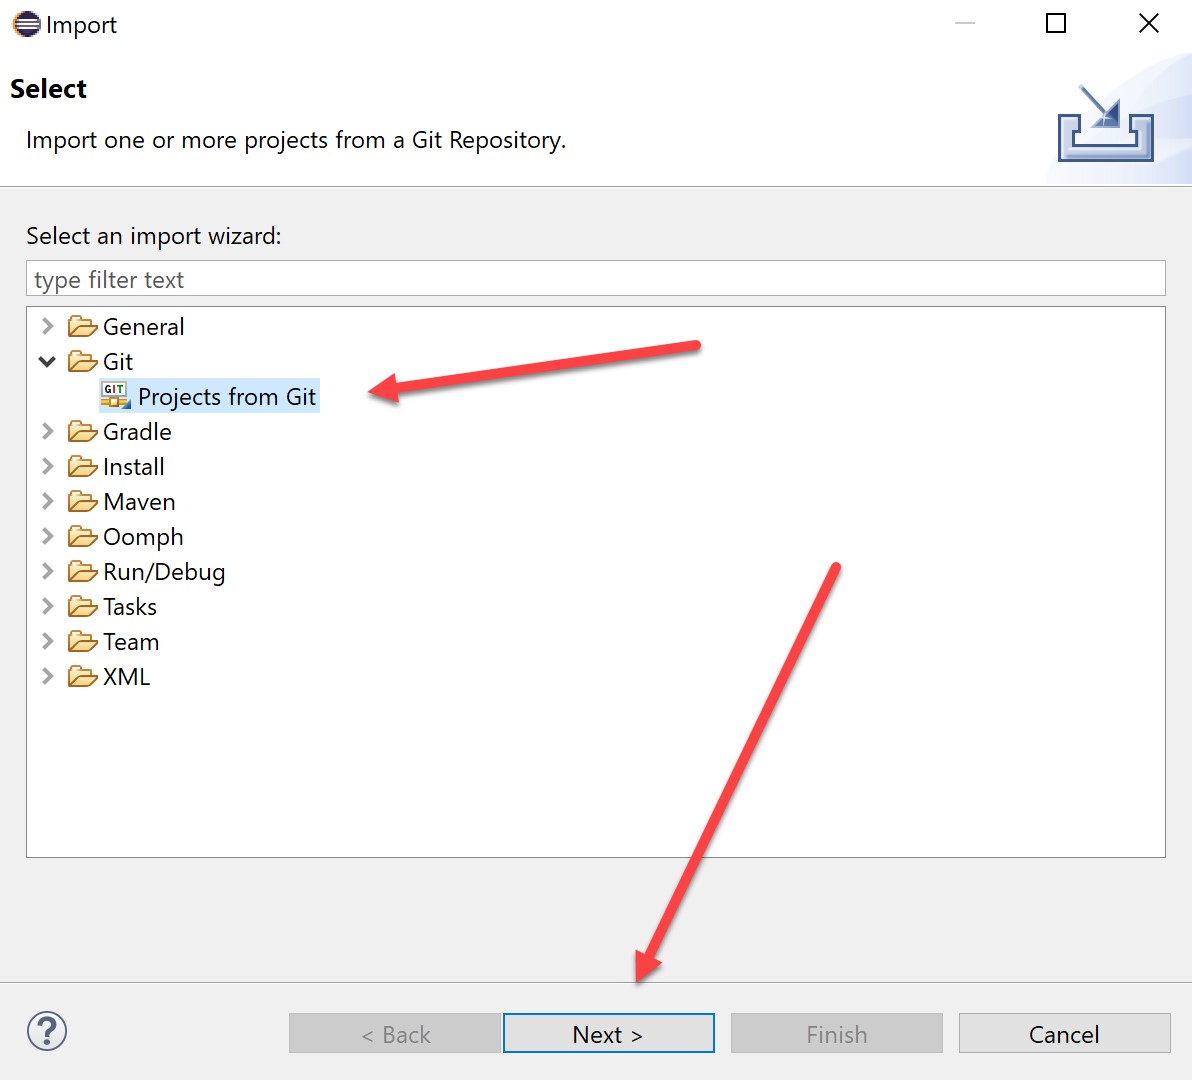
Expand the Git folder, select “Projects from Git”, and hit next:
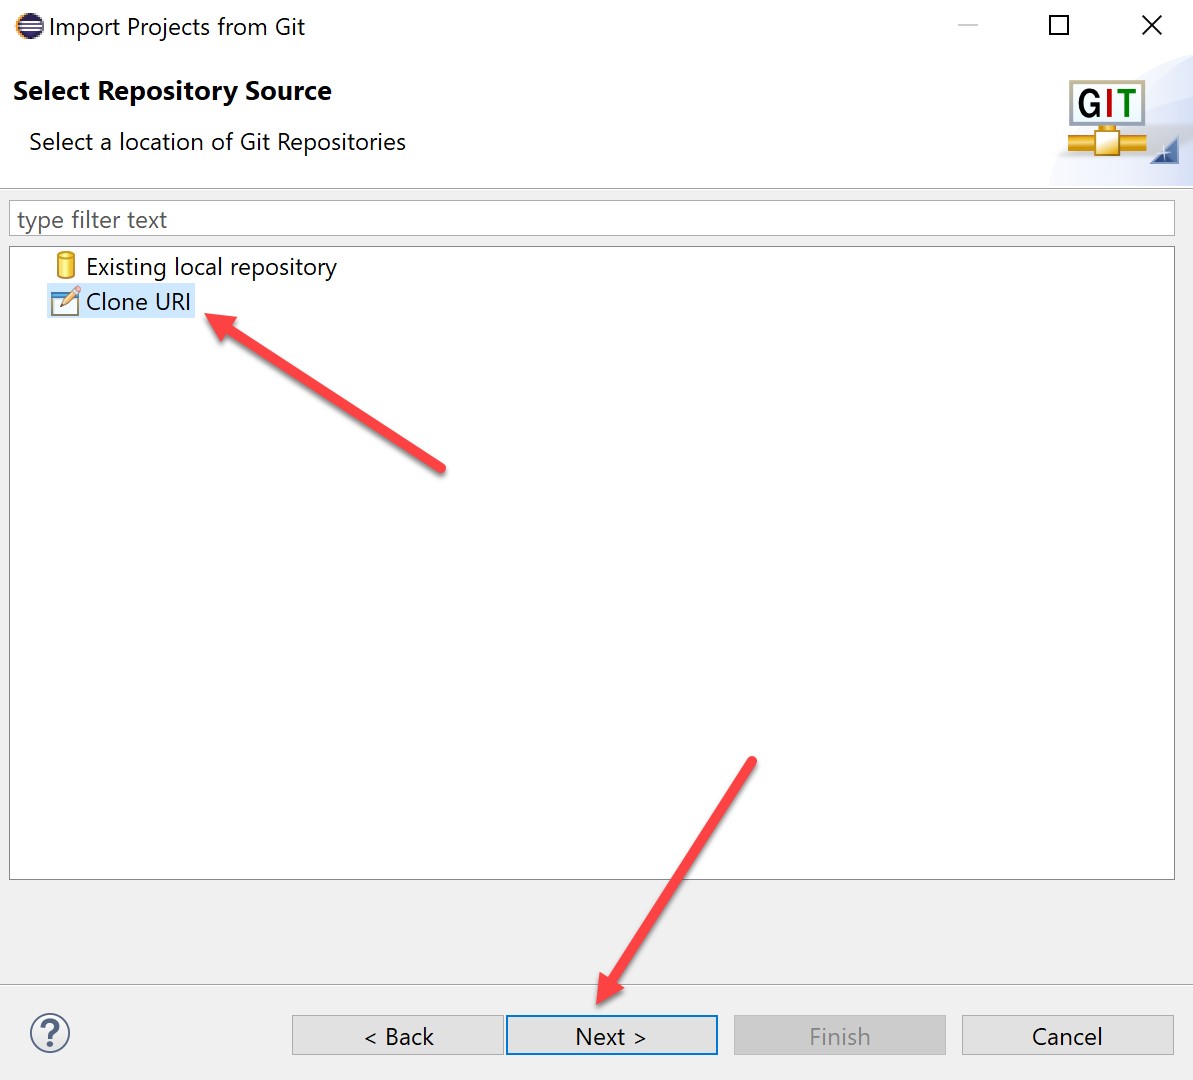
Select Clone URI and Next (note that you can also use a local repository but unless you plan to commit code to the project, this probably won’t be necessary for now):
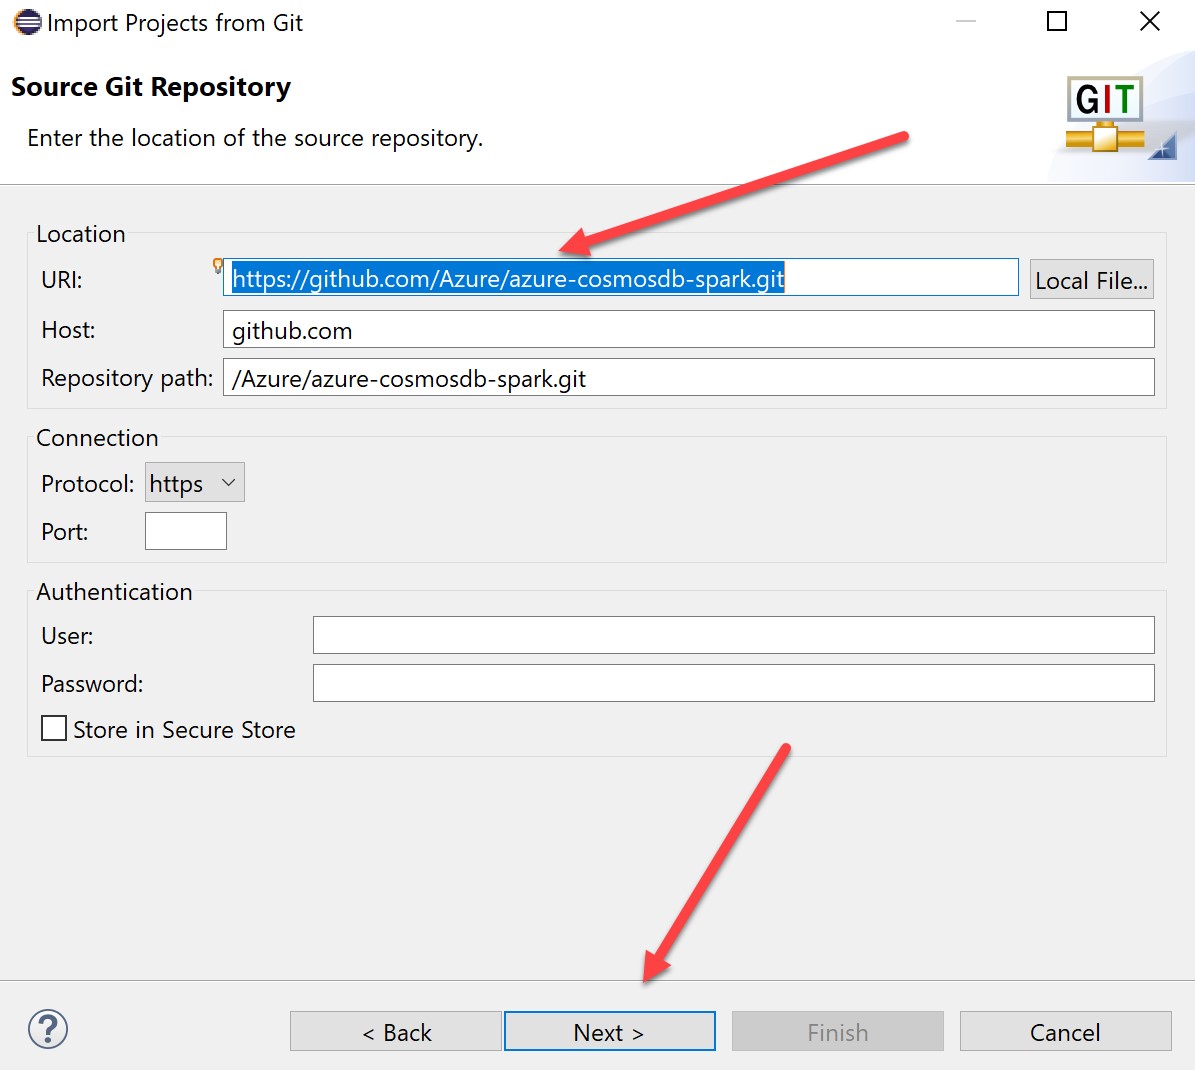
Paste the URL you copied from GitHub earlier and hit Next (host and repository path will be created automatically):
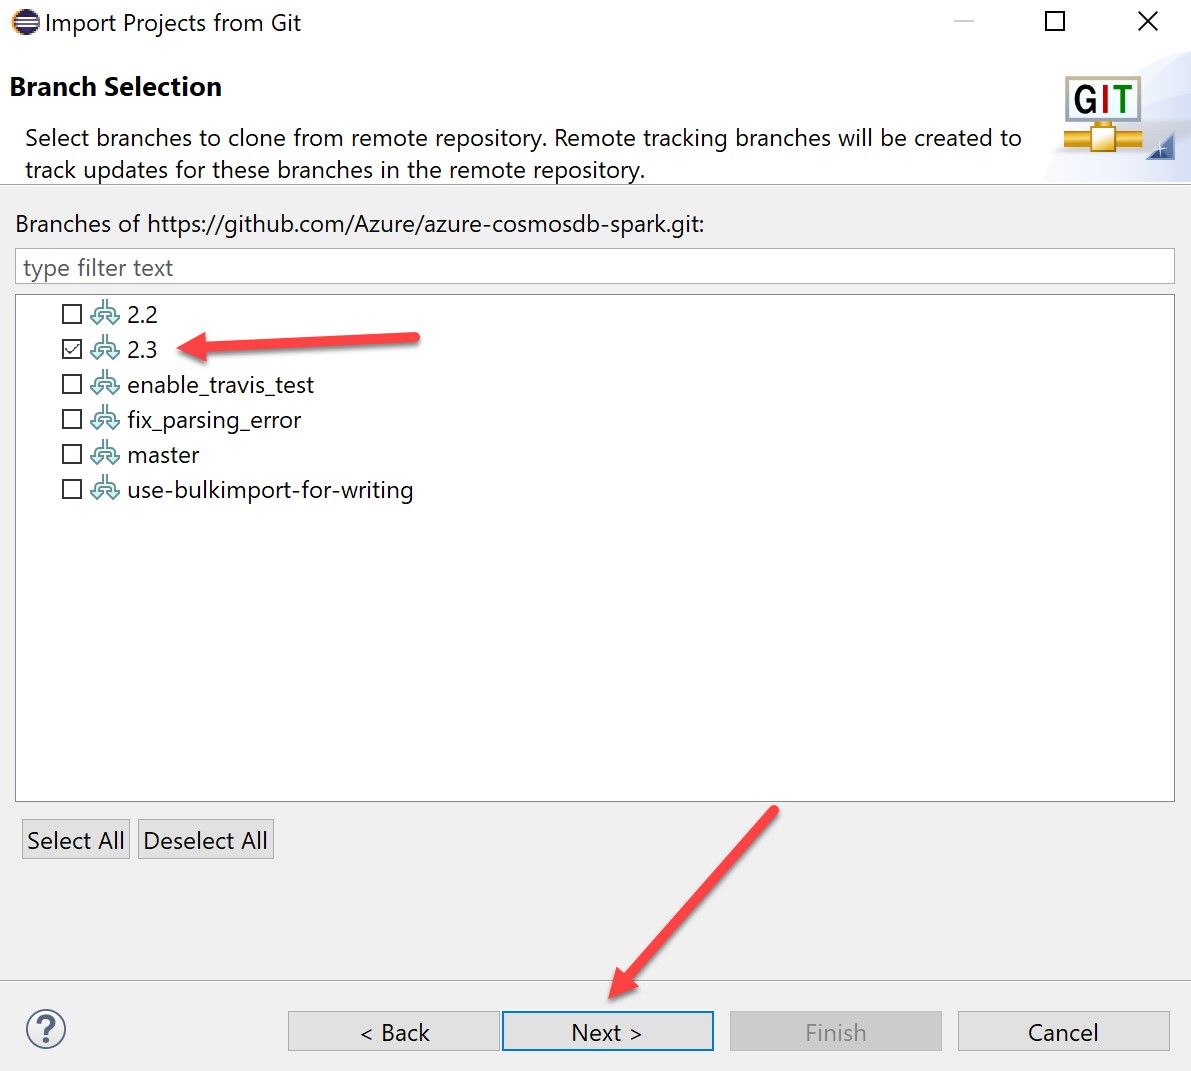
In the branch selection screen, select the branch(s) you are interested in (in this case, 2.3):
A local destination path will be generated for you. Hit next:

Eclipse will then start pulling down files from the GitHub repository. This may take a little while:

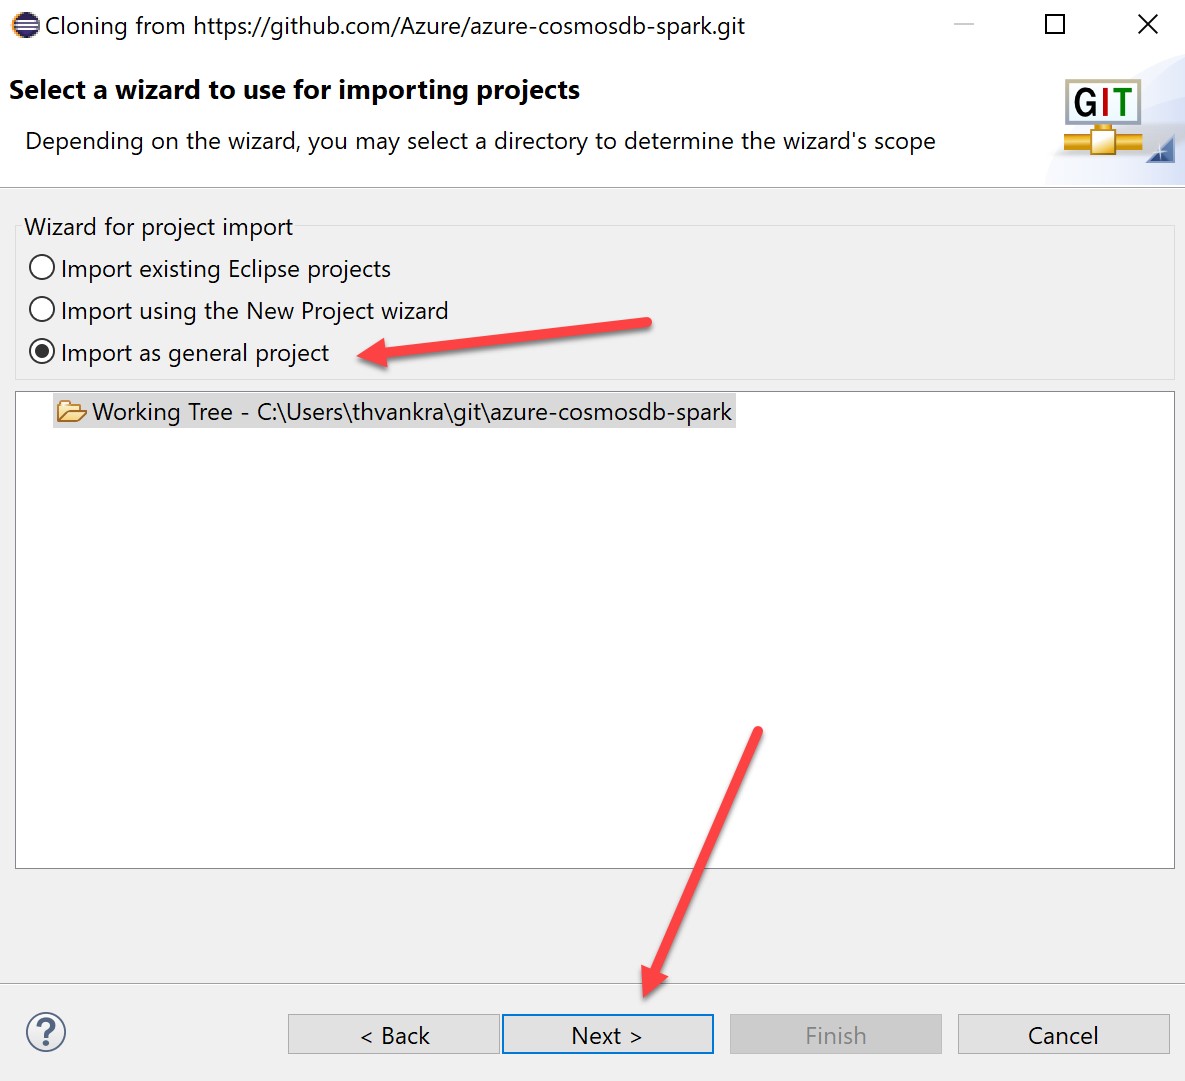
When the GitHub files have downloaded, select “Import as general Project” and hit next:
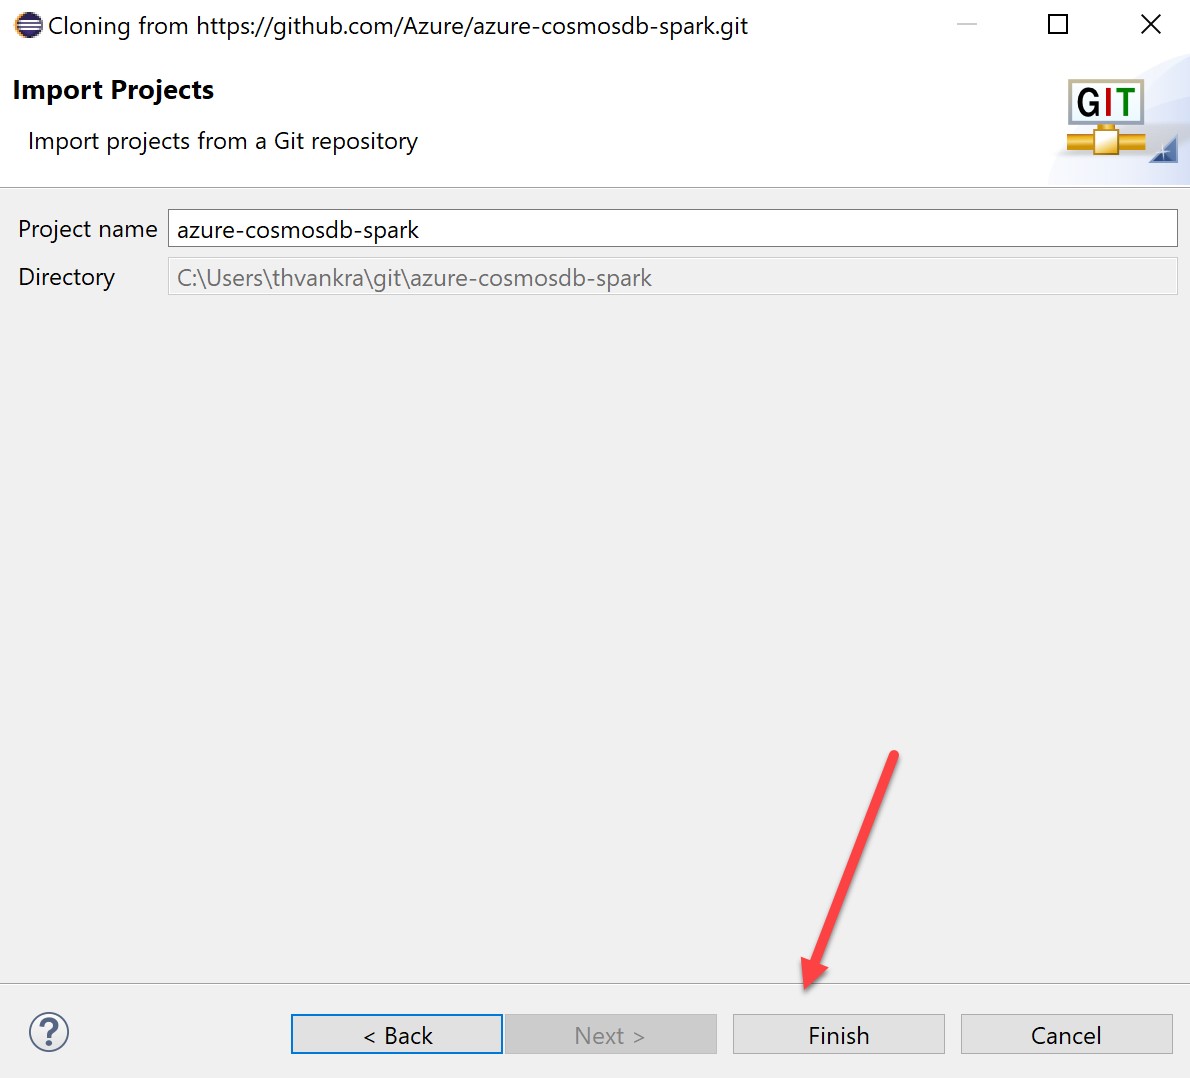
Accept the default project name, and finish:
Close the welcome page in Eclipse, and the project should appear in package explorer:
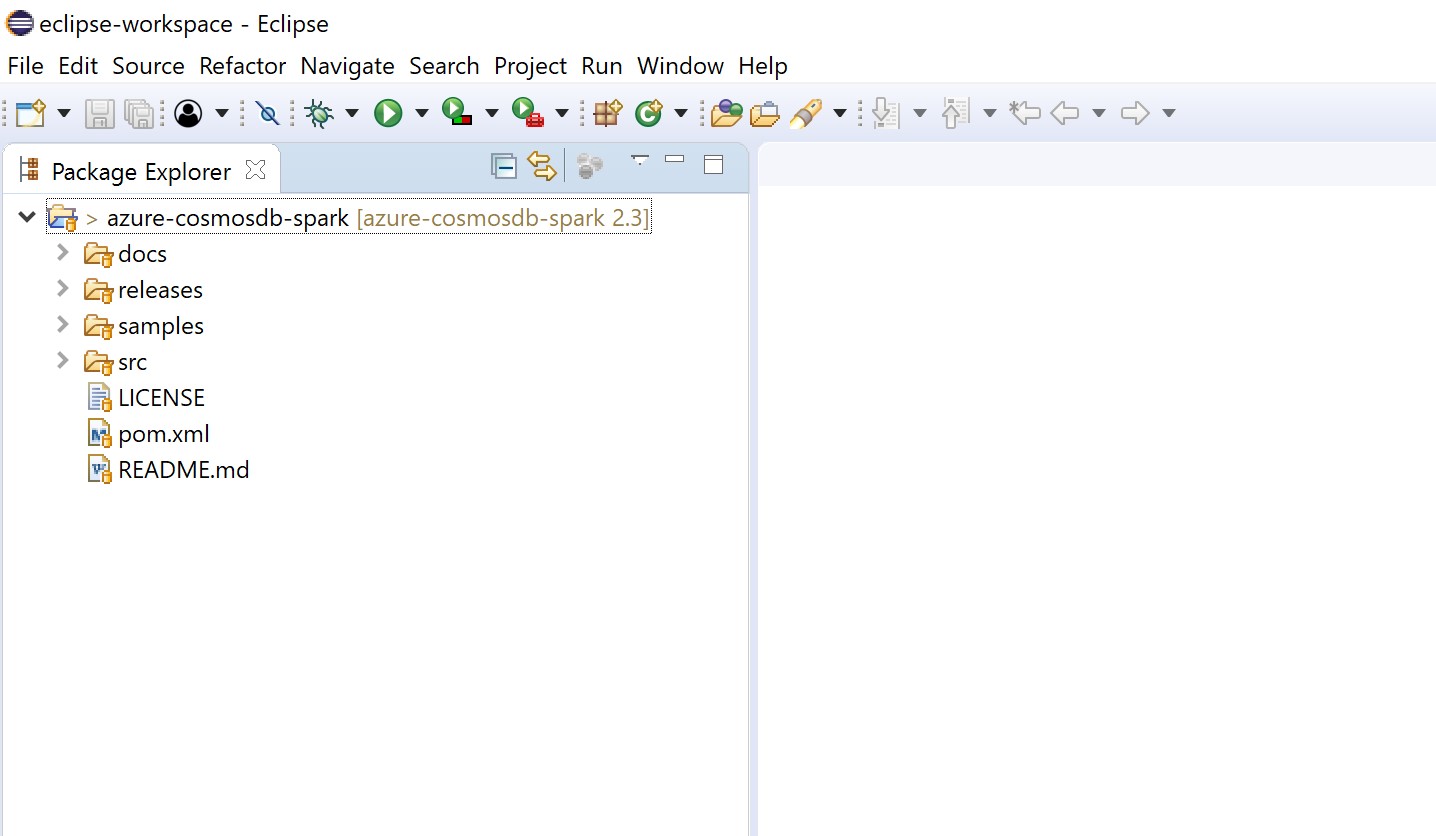
Right click on “pom.xml” and select Run As -> Maven build:

This will open a build configuration. Here it will be necessary to ensure that the Scala plug-in is able to find the local Java Compiler, so we will need to edit the path variable to ensure this includes the path to the JDK you installed. On the environment pane, hit Select, find the path variable, check it, and hit OK:
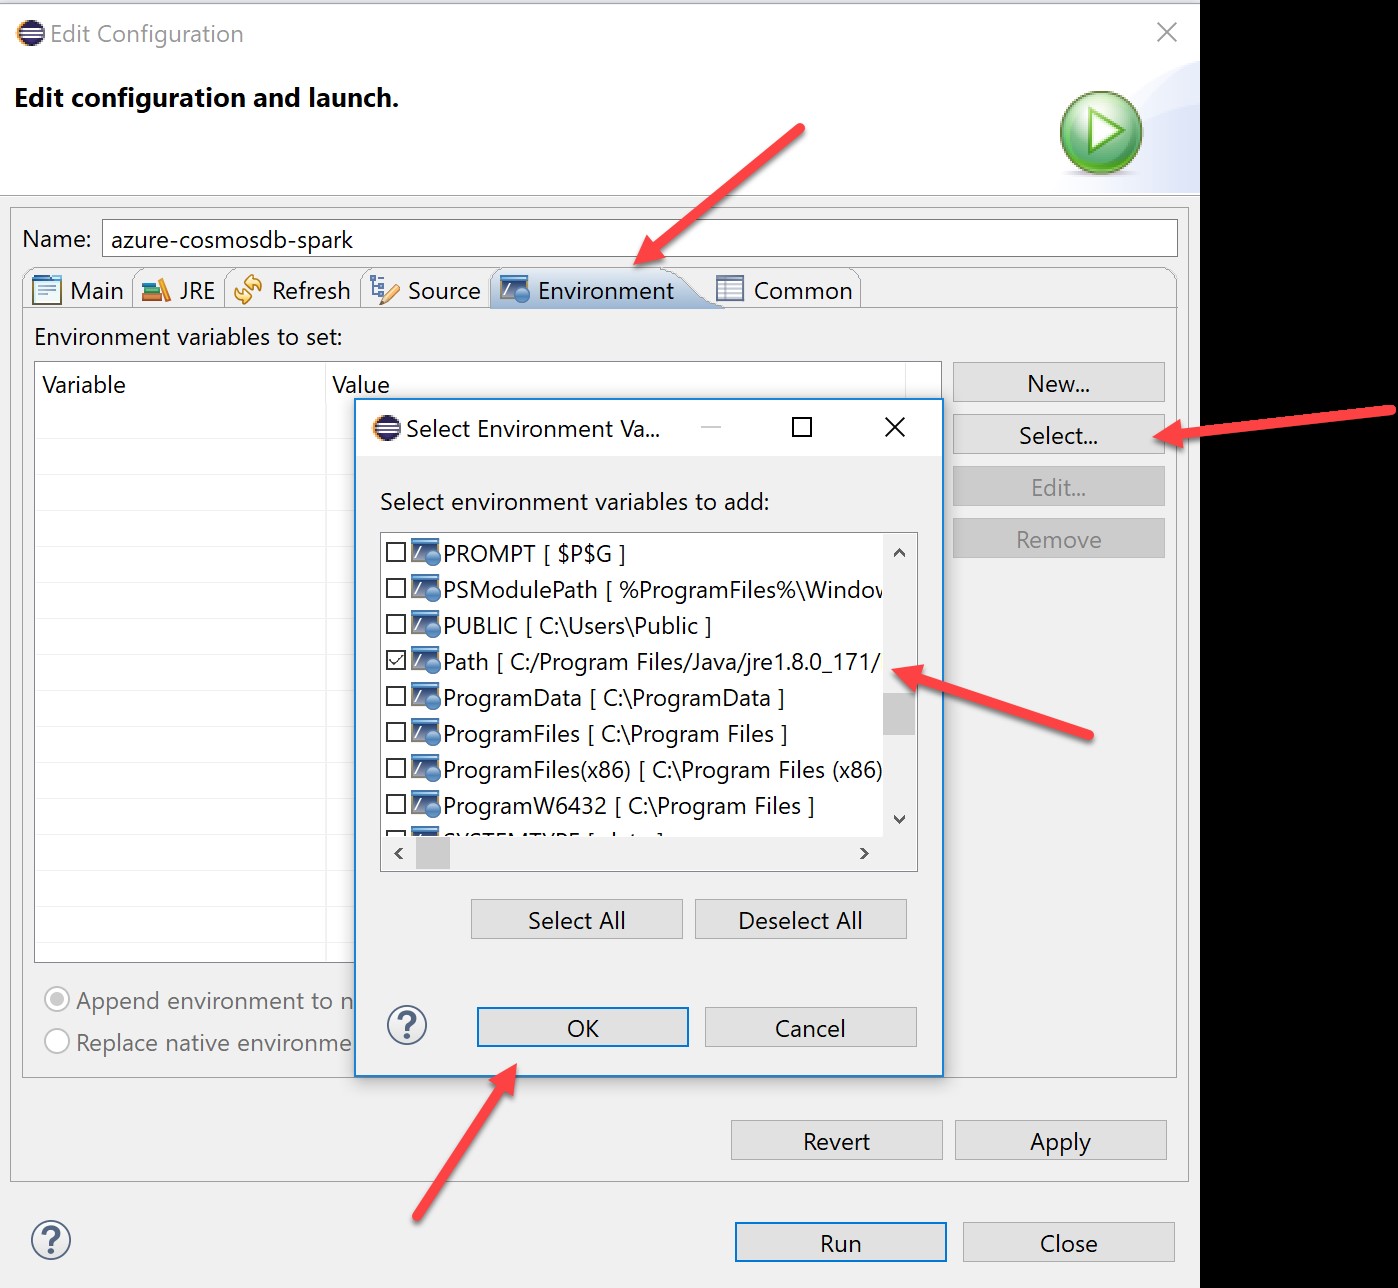
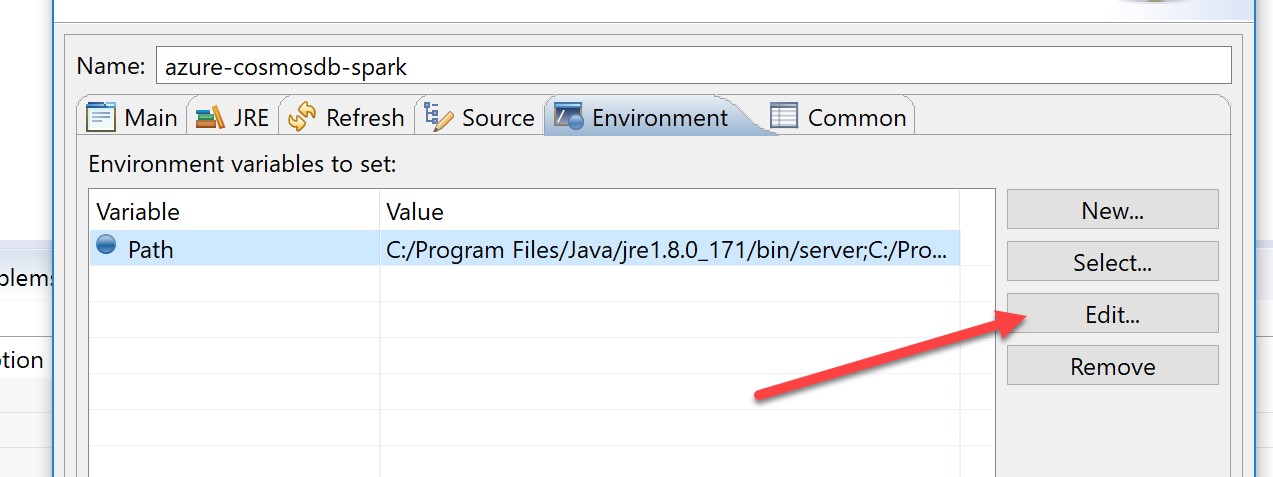
When the path appears in the environment window, select Edit:
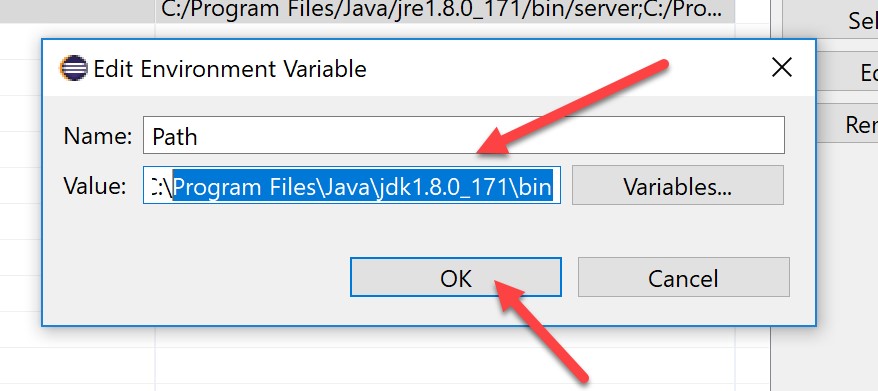
Append the location of your JAVA_HOME directory (which contains the “javac.exe” executable required to compile Java/Scala) to the path variable – this will typically be something like C:\Program Files\Java\jdk1.8.0_171\bin
Then hit OK:
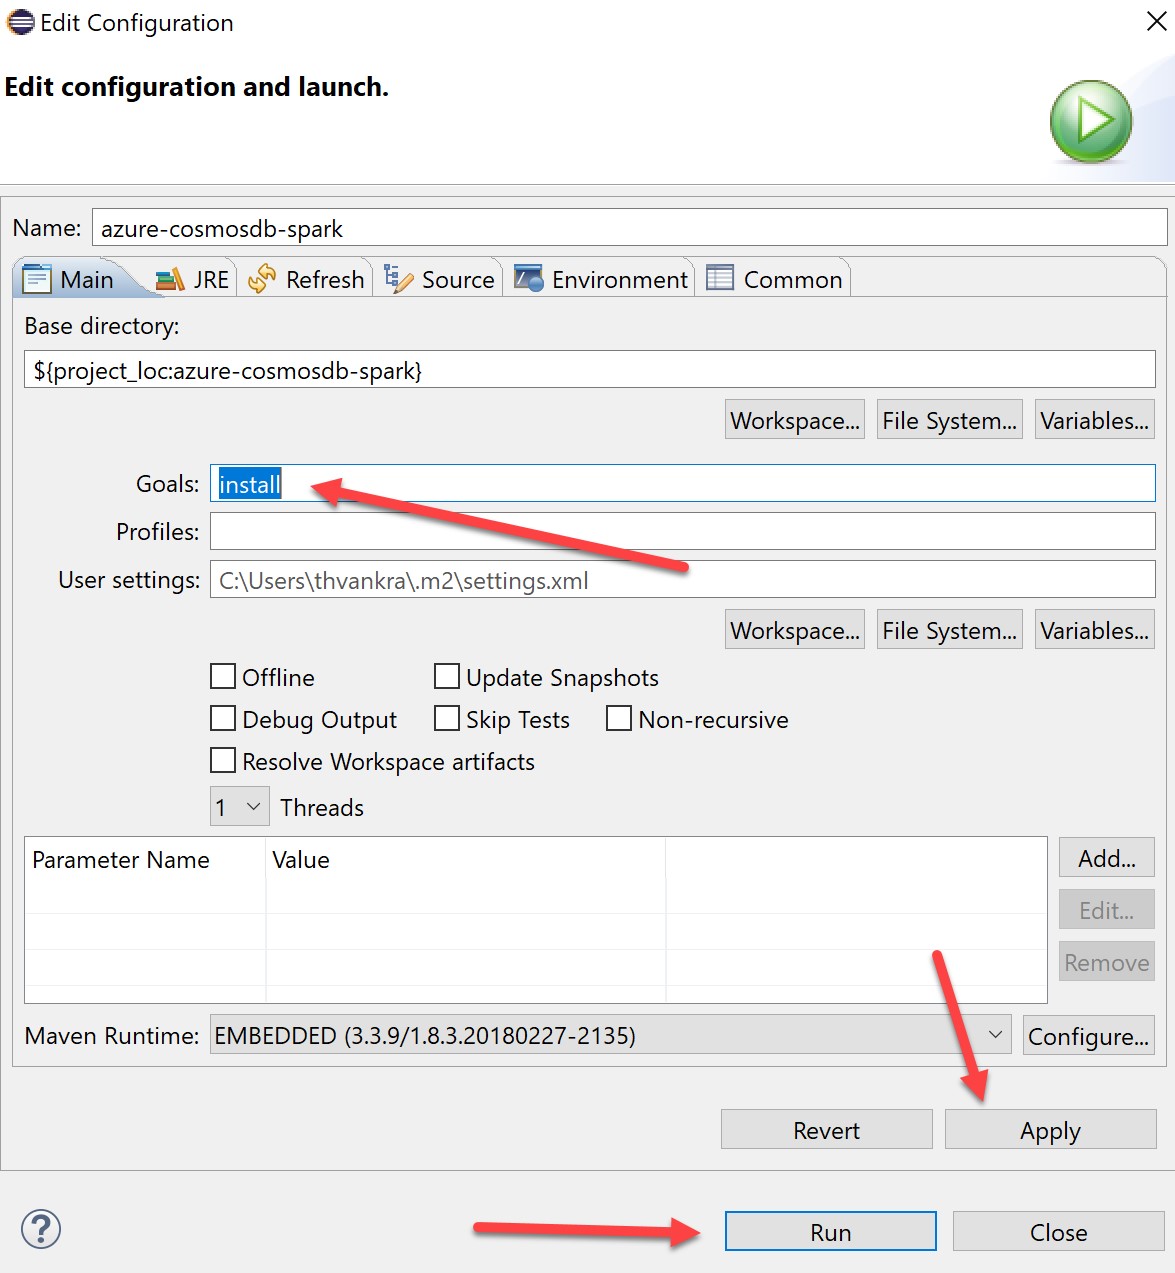
Now we are ready to compile. Go back to the main pane, type “install” in the “Goals” field, click Apply, then Run:
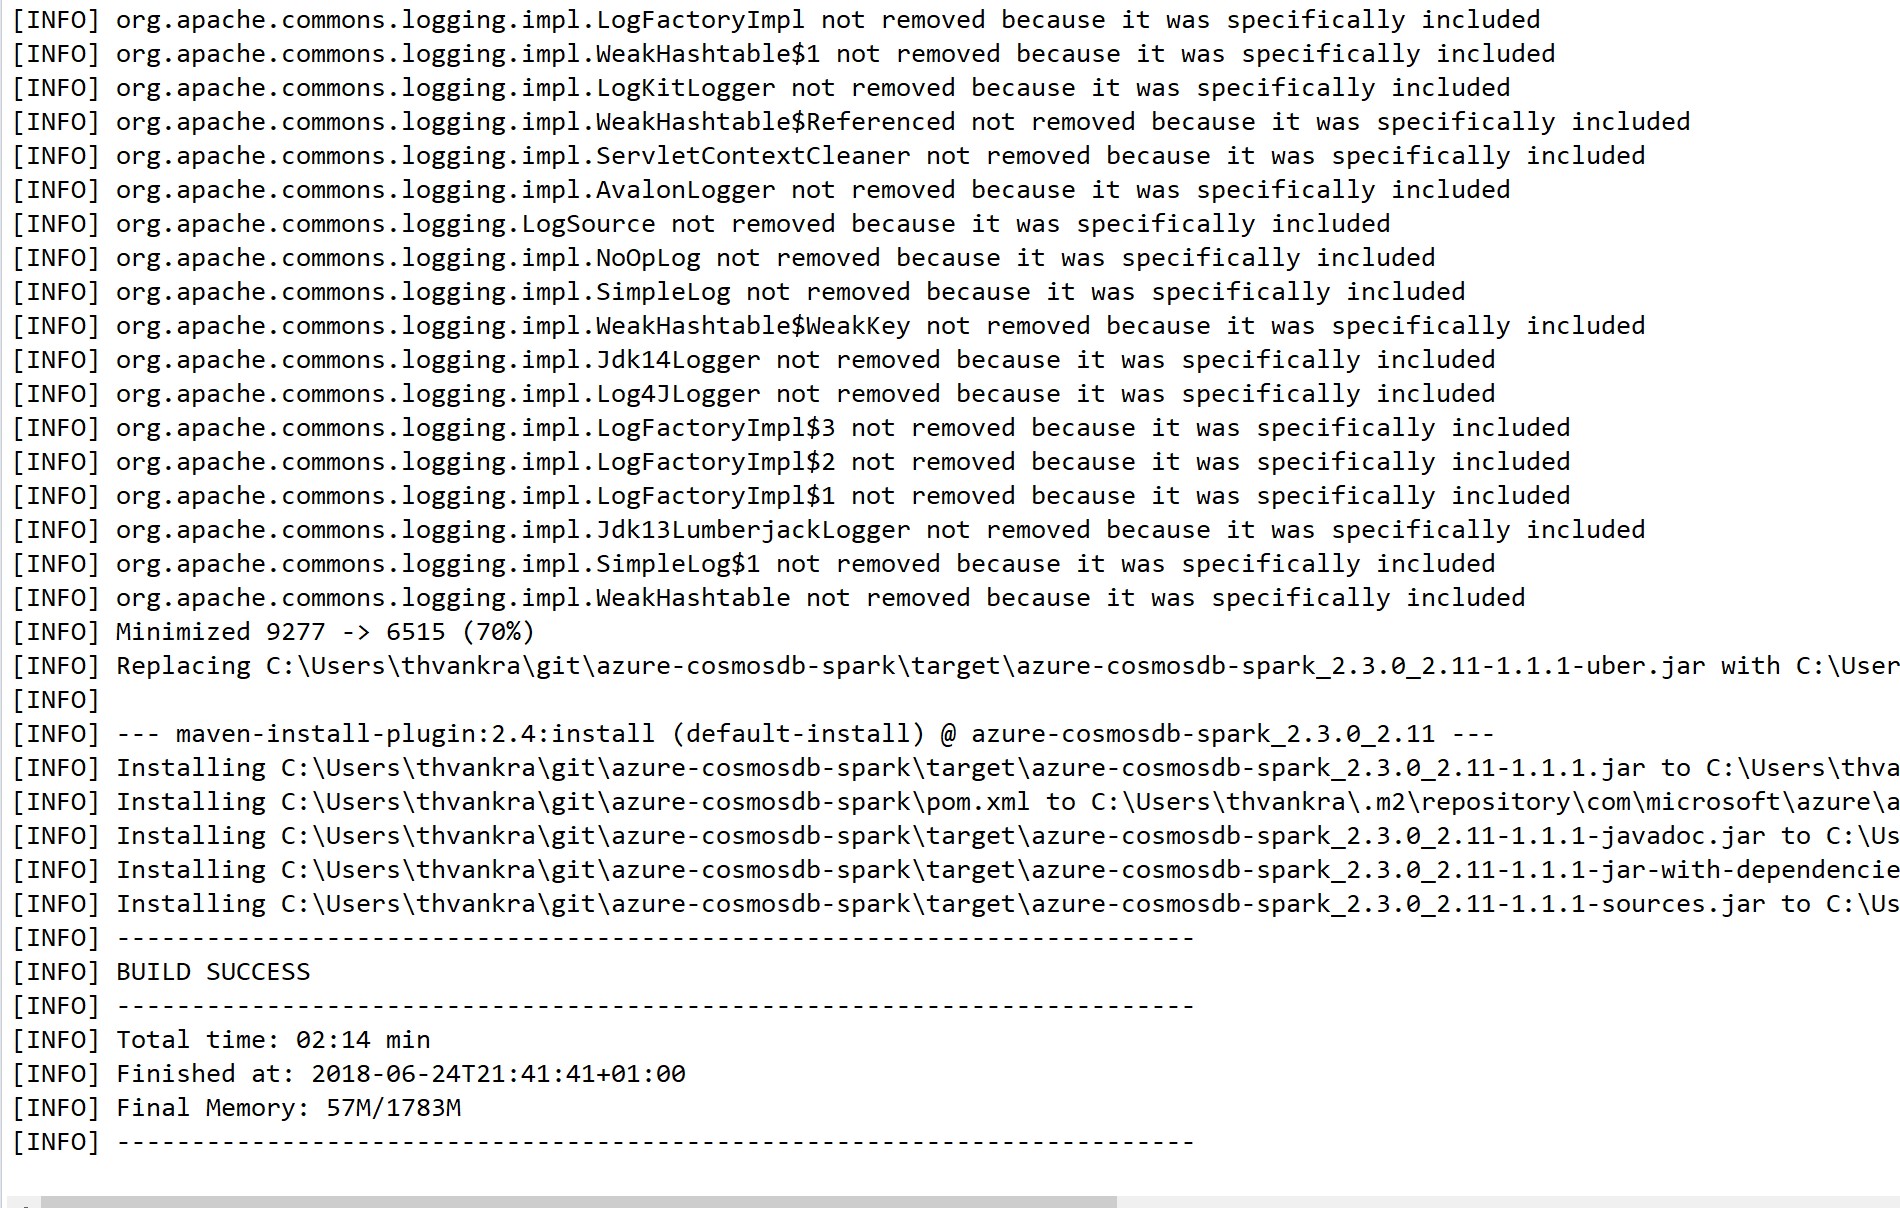
This will begin to build various resources and should eventually end with the below:
This should have built a series of JAR files, typically located as C:\Users\<your user>\git\<project name>\target\
See below:
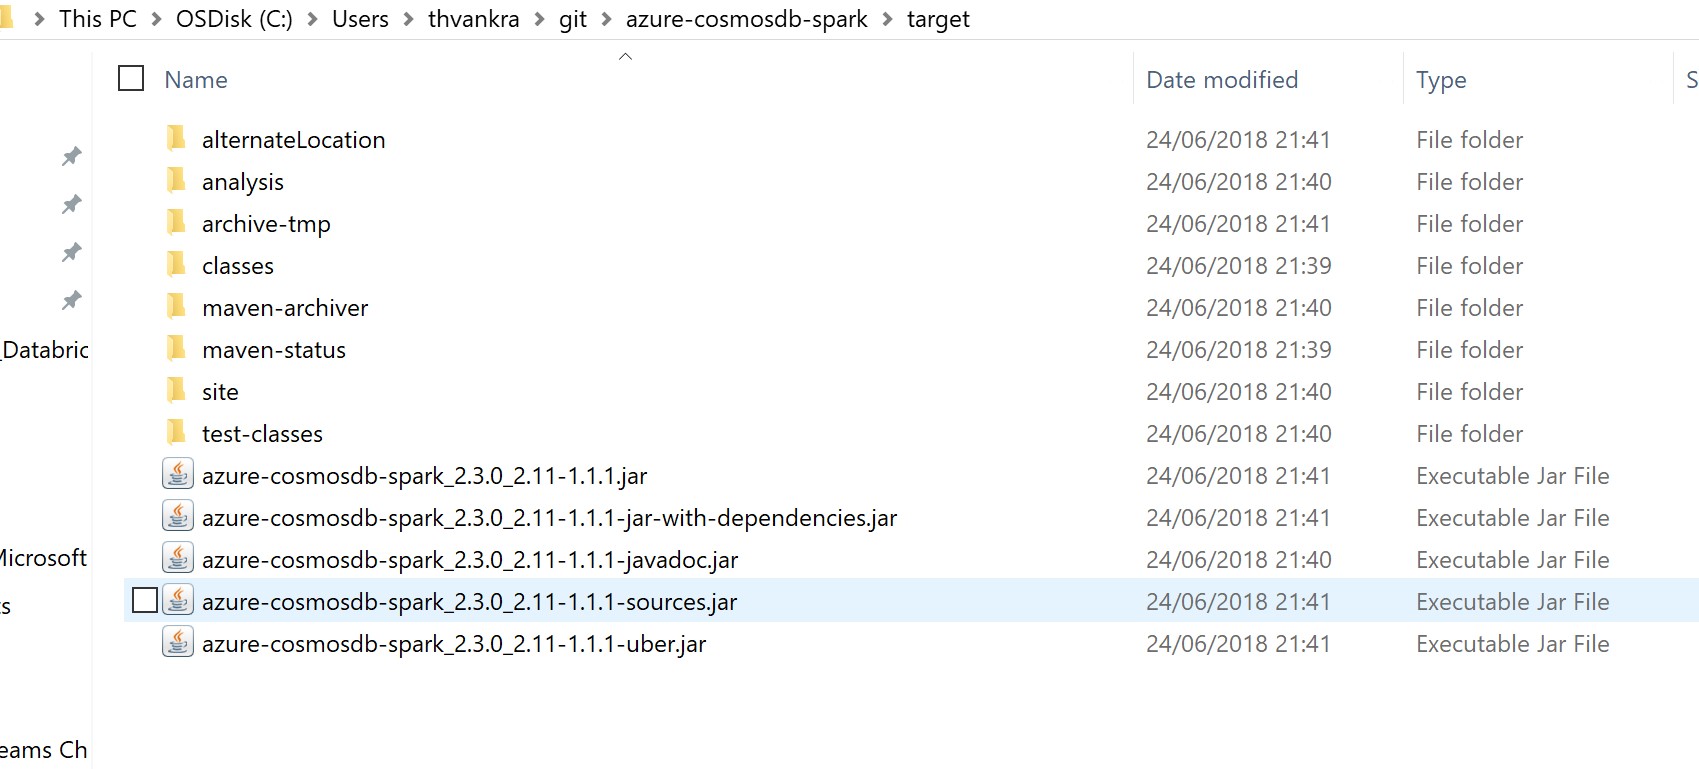
Typically the JAR ending with “”jar-with-dependencies.jar”, as the name implies, contains the branch feature/patch, but also all the dependencies associated with the project. You are now ready to use the JAR!
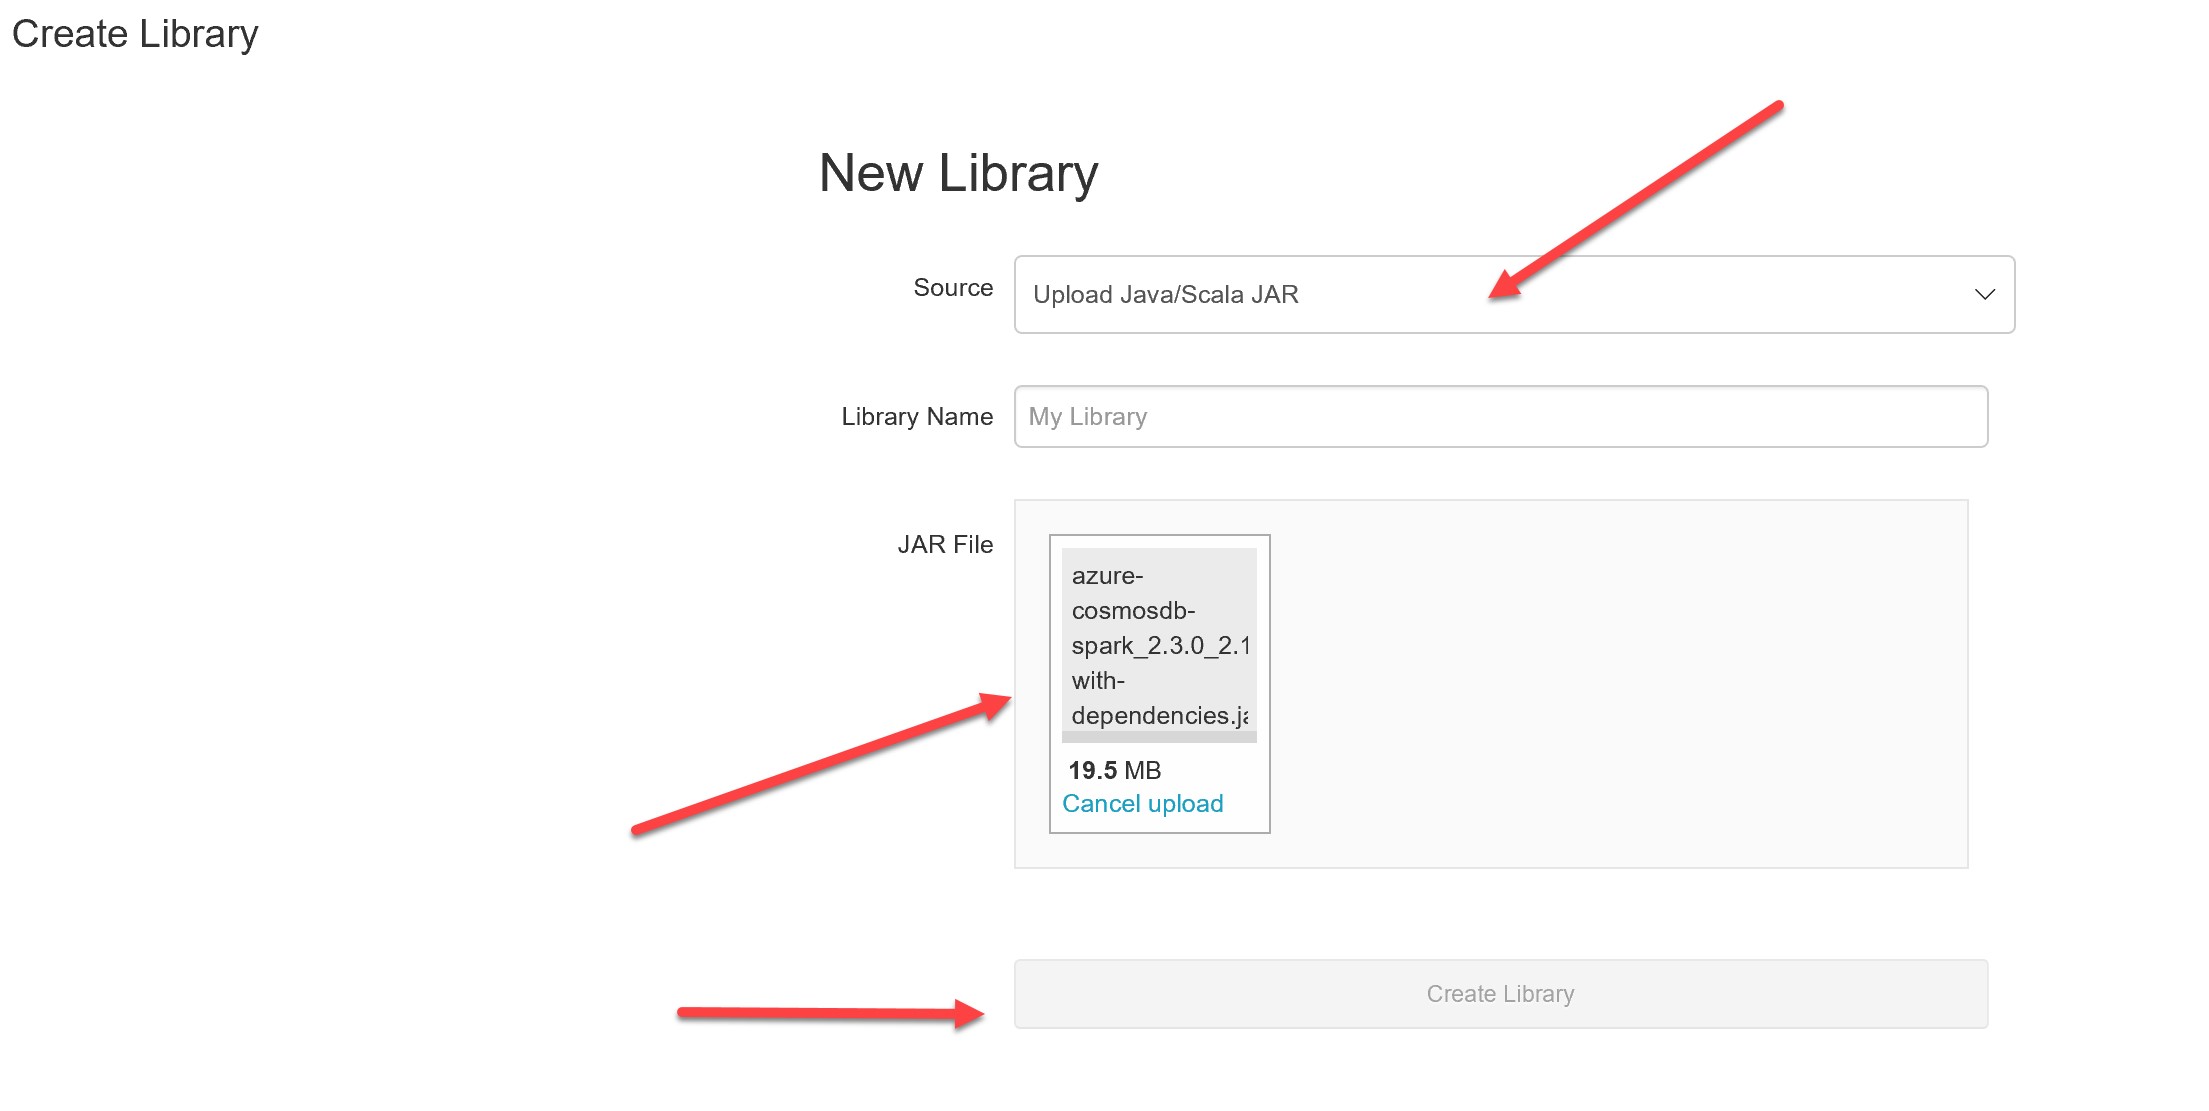
To apply the fix to the Databricks environment, we can go ahead and upload it. In Databricks go Create -> Library and leave “Source” as Upload Java/Scala JAR. Click on the JAR file, or drag and drop it:
Ensure that you select “Attach to clusters” (please note: this also applies to Maven artefacts, but you will need to scroll to the bottom for Maven artefacts to see this option as they can be quite large in number. They are individual JARs pulled from Maven rather than JARs bundled together in a single JAR, as is the case here):
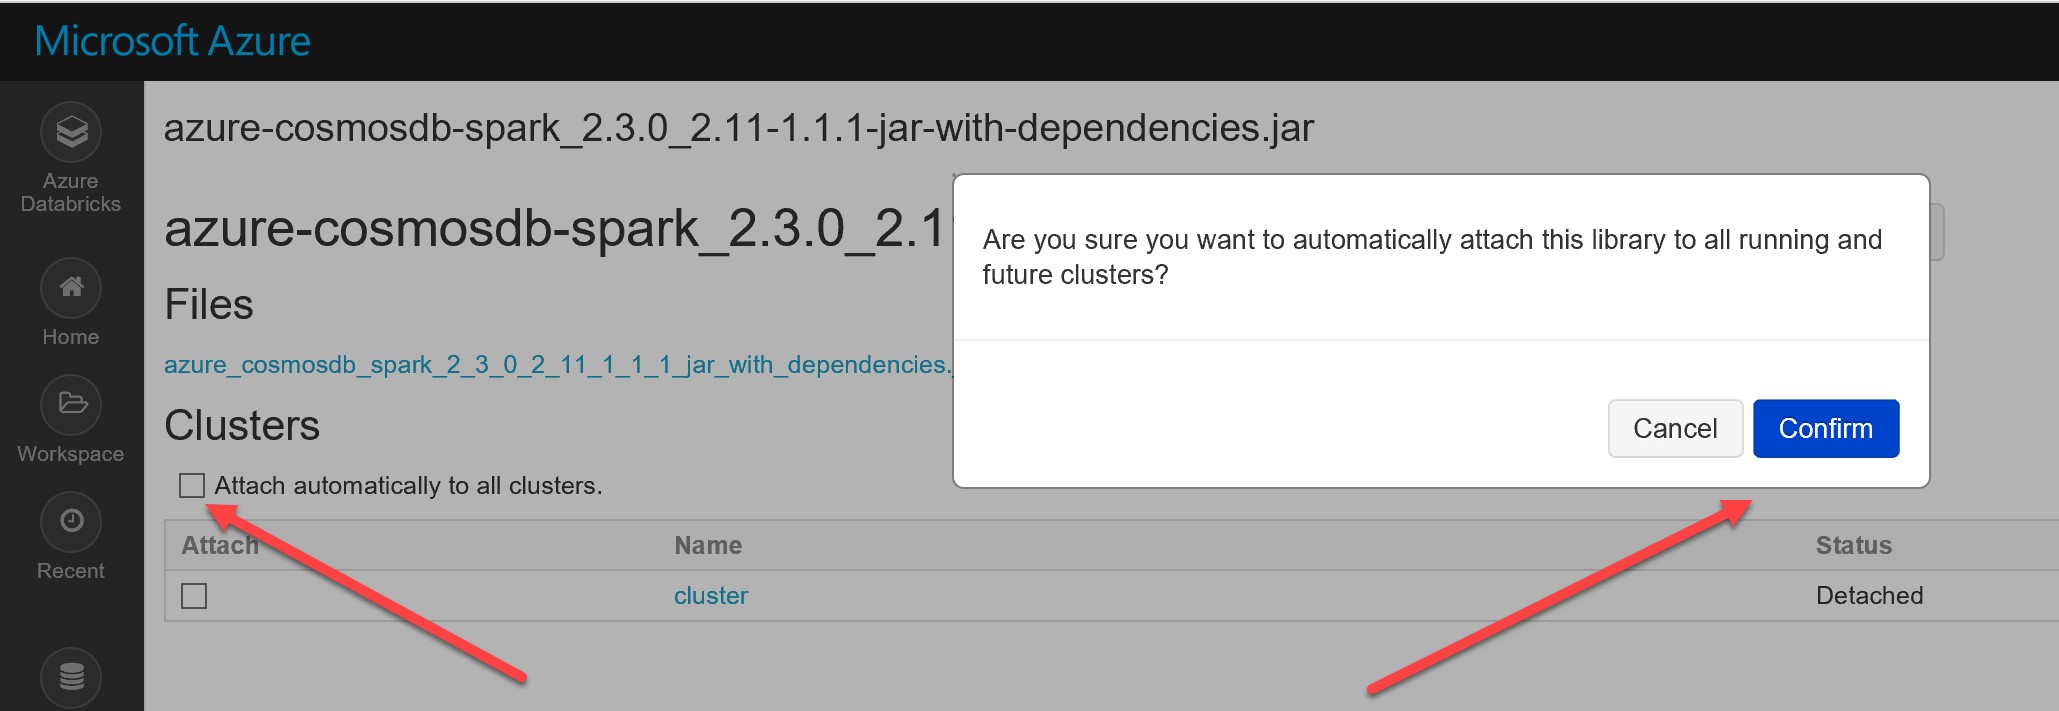
You will need to restart the cluster to ensure the new libraries take effect.