Changing the TFS URL being used by a release definition from server name to DNS name in Release Management.
Scenario:
I have two TFS connections added, for same TFS server, in Release Management.
The first one was added before DNS was setup for the TFS server. So it was of the format: https://<tfsservername>:8080/tfs. Release definitions were also created and assigned to this TFS connection.
The second connection to the same TFS server was added once the DNS was setup, like: https://<tfsdnsname>:8080/tfs
Here the first URL uses the server name and the second is the DNS name.
Note: Versions of TFS and RM used : 2013 update 4.
Issue Description:
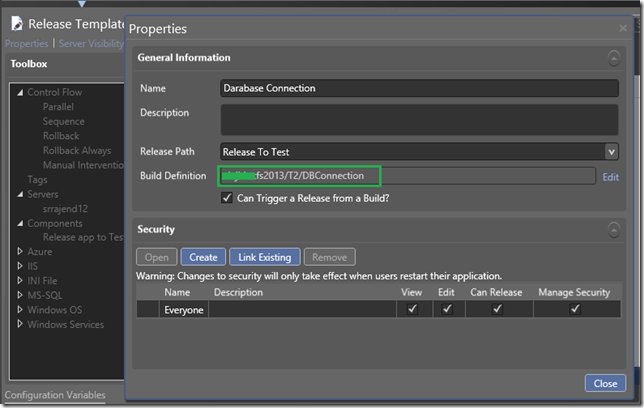
After the TFS connection that uses the DNS name of the TFS server has been added, I would like to update the already created Release Templates that were so far referring to the old connection using the server name. Below is a screen capture of one such template.
To update the URL:
· Open one such template and click on properties.
· Click on Edit to update the Build Definition.
· On the Team Project drop down, select the URL which uses the DNS name.
· Click on Save.
However, upon saving the template, the URL assigned to the build definition doesn’t update – it reverts back to the original connection (which uses the server name)
Builds which connect to this template to release the artifacts as part of the build process will also start failing with the below error message:
Resolution:
In order to update the TFS connection for the templates successfully, follow the below steps:
· Make sure all the in progress release for the template reaches one of the completed states – either Released or Abandoned.
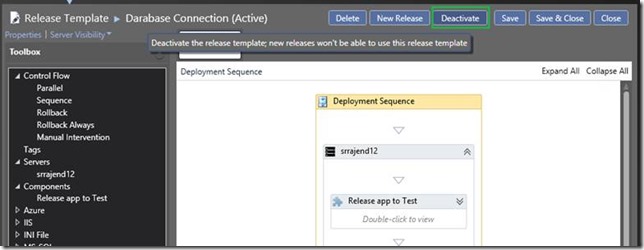
· Open the template and deactivate it.
· Deactivate all the templates that uses the old TFS connection.
· Once all the templates are deactivated, navigate to the Administration tab, and open the old TFS connection (using the server name) from the TFS connections tab under Manage TFS.
· Click on deactivate. Please note that you will be able to deactivate a TFS connection only if all of the Release Templates using the connection has been deactivated.
· Go back to the agent based templates tab, please note that you will have to choose All (not just active) in the drop down so that we get the list of disabled templates as well.
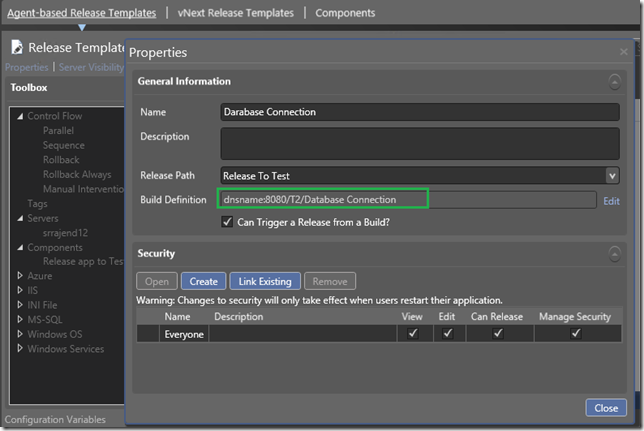
· Open a template and update the template properties and point it to the new URL with DNS:
· Save the template and activate it.
Content Created By : Sreeraj Rajendran
Content Reviewed By : Romit Gulati
Feel free to let us know if you needed any clarifications/improvements.


![clip_image003[1] clip_image003[1]](https://msdntnarchive.z22.web.core.windows.net/media/MSDNBlogsFS/prod.evol.blogs.msdn.com/CommunityServer.Blogs.Components.WeblogFiles/00/00/01/26/82/metablogapi/7462.clip_image0031_thumb_5FDA71A1.png)


