Configuring Microsoft Web Application Proxy Server (WAP) for Inbound Hybrid Topology with Office 365 and Microsoft SharePoint Server 2013 -Part7
This post is a companion to the earlier published part 2 of this hybrid configuration and deployment series. In this post we will replace the reverse proxy from Threat Management Gateway (TMG) as used in the previous post for Microsoft Web Application Proxy (WAP). Windows Server 2012 R2 includes WAP as a component of its Remote Access feature set and is recommended as a reverse proxy solution for SharePoint 2013 Server and for inbound hybrid scenarios.
At this point it is already assumed that the organization has completed a number of steps as defined in Part 1 of this hybrid series i.e.
1.> Subscribe to an Office 365 Tenant
2.> Configure Server to Server Trust with Windows Azure ACS
3.> Completed the Directory Synchronization steps
Additionally the organization should have deployed a SharePoint 2013 Server farm on premises and created a web application configured for Secure Sockets Layer (ssl) traffic using a Public Certificate Authority signed ssl certificate. Information on configuring SharePoint 2013 Server web application using ssl can be found here https://technet.microsoft.com/en-us/Library/ee806885.aspx .
Before we can configure SharePoint Online to display results from SharePoint Server 2013 on premises we must Install and Configure Microsoft Web Application Proxy server to accept incoming requests from SharePoint Online.
Once WAP is ready we can configure SharePoint Online to display results from SharePoint 2013 Server on premises. To do this we need to:
1> Configure a Secure Store Target Application
2> Create a Remote SharePoint Result Source
3> Create a Query Rule
In this post we will be focusing on the WAP Configuration and Deployment steps.
Microsoft Web Application Proxy Infrastructure Deployment
Microsoft Web Application Proxy (WAP) is available as a new Remote Access Role of Windows Server 2012 R2. Before we can install WAP we need to deploy an Active Directory Federation Services (ADFS) 3.0 Service which will serve as the Configuration Store and could optionally be used to support end user federated authentication if desired by the organization.
Deploy Active Directory Federation Services 3.0
Active Directory Federation Services 3.0 like WAP is a role that can be deployed on a Windows Server 2012 R2 server. ADFS requires a public ssl certificate to secure the Federation Services Public endpoint. In this case we have a certificate obtained from Digicert for the adfs.nellymo.com common name and have already loaded that into the local Computer Account Personal certificate store on the server where we will install ADFS. We will need this certificate later when we configure the ADFS service.
Install ADFS
Carry out the following steps to deploy ADFS for use with WAP
1> Add Windows Server 2012 R2 to the on premises domain.
Complete this task using your standard Corporate Policy.
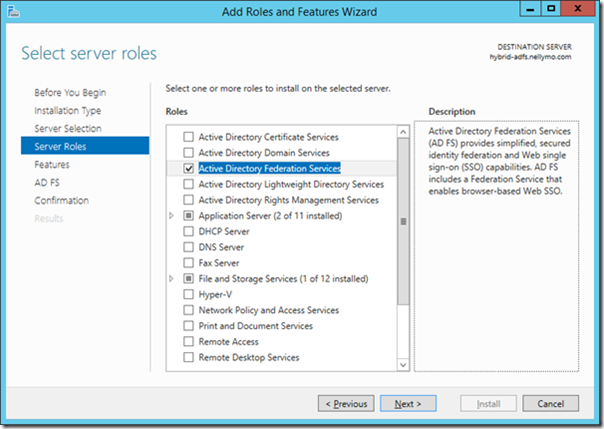
2> Use server manager Add Roles and Features Wizard to install Active Directory Federation Services on the choose server roles selection page.
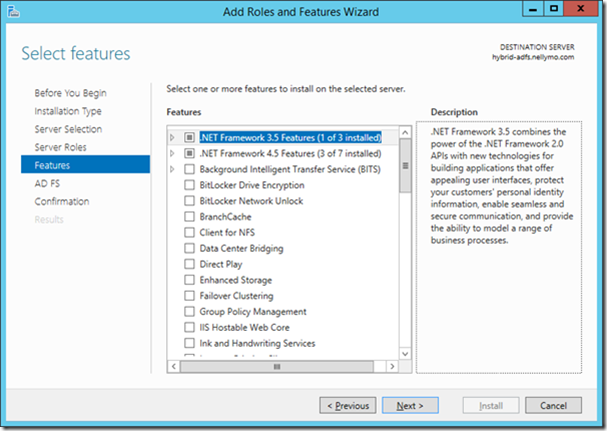
3> Accept defaults on the Add Features page.
4> On the ADFS install summary page review the provided information, specifically the information provided in the “things to note” section. We need to be domain joined which we are but also that Web Application Proxy cannot be installed on the same machine as the ADFS role for use as a federation proxy. We want to use WAP as a server publishing proxy but will still follow this guidance and install WAP on a separate server.
5> Click Next
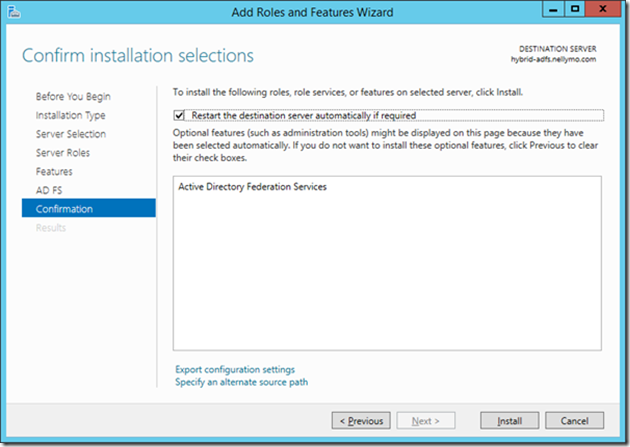
6> Select Auto Restart and acknowledge the popup then click Install
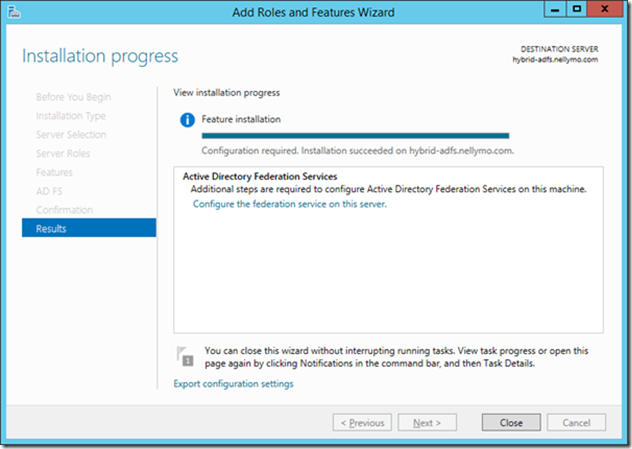
7> Wait until installation is complete and machine reboots.
8> After installation there are some post install setup tasks to complete. Reload Server Manager and review the items presented on the notification flag.
9> Select “Configure the federation services on this server”
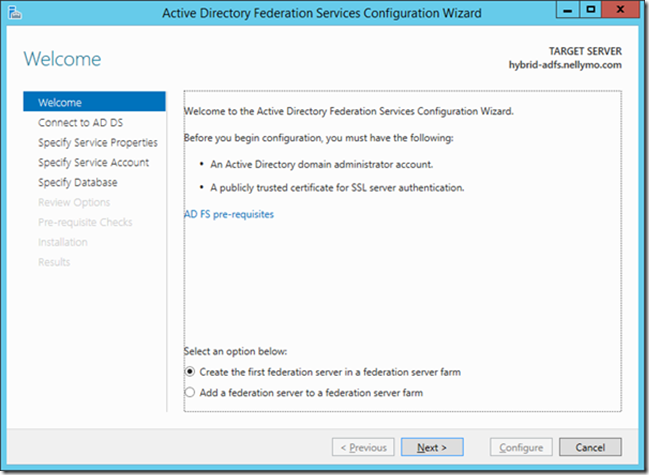
Default setting is to create the first federation server in a federation server farm. For the purpose of this installation this is going to be the first and only federation server but for production deployments we would recommend a minimum of two servers in the federation farm to support high availability.
10> Click next
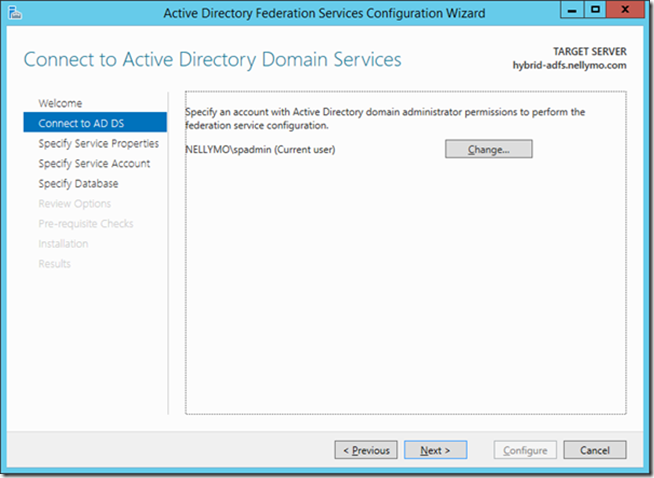
11> Specify alternate credentials if necessary. In this case NELLYMO\spadmin is a domain admin and therefore has permission to perform federation services configuration. Click Next
12> Here we choose the SSL certificate uploaded earlier and provide a federation service display name. At this point you should also have the federation service name configured in your on premises DNS to provide name resolution to this federation server. If you are intending using this ADFS service as a federation service endpoint for federated authentication in Office 365 you should also ensure this endpoint is publically accessible and has a public DNS registration. Click Next
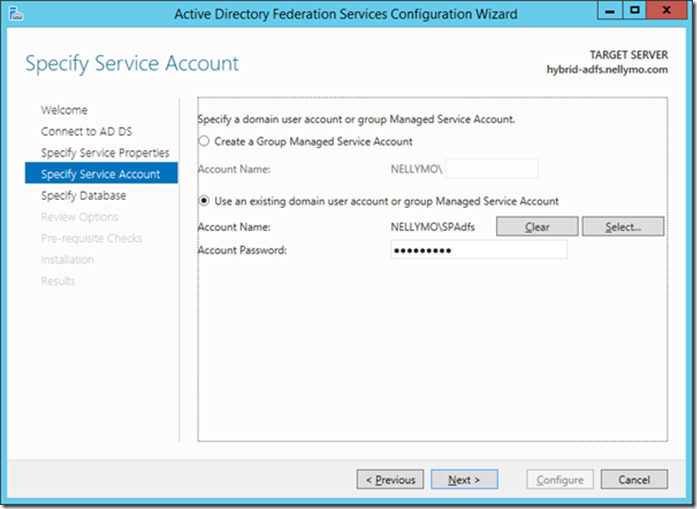
13> Provide a domain user account credential or managed service account to act as the ADFS Service Account. Click Next.
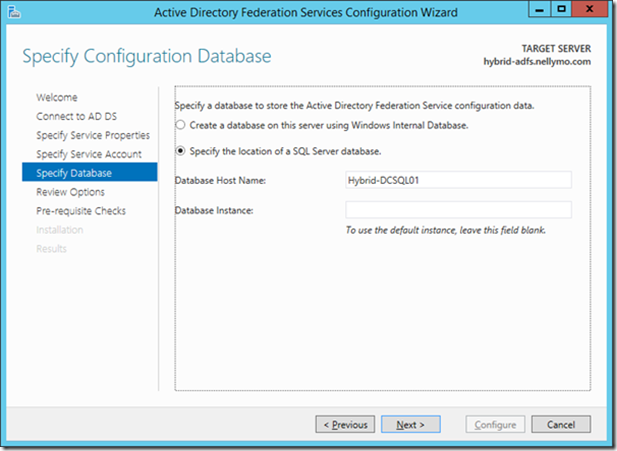
14> Provide a location to store the ASDF configuration database. When creating the ADFS database we can either use the local Windows Internal Database which is the default setting, or else we can choose a SQL Server Instance in the same domain. In this case I will use a SQL Server Instance on a separate machine.
Note. After clicking Next you may be prompted to overwrite an existing ADFS database instance if one exists. Act accordingly and be careful not to overwrite any current production configuration while deploying or testing this feature.
Click Next
15> Review the configuration selections. At this point we can also export the configuration as a Windows PowerShell script for future use. Click next
If we take a look at the Windows PowerShell script that was generated by this process it becomes clear how we can adapt this to install multiple servers in the same farm or deploy additional farms.
#Windows PowerShell script for AD FS Deployment
#
Import-Module ADFS
# Get the credential used for the federation service account
$serviceAccountCredential = Get-Credential -Message "Enter the credential for the Federation Service Account."
Install-AdfsFarm `
-CertificateThumbprint:"182602ECD225A7C66555465B889C7A5AE1099EDA" `
-FederationServiceDisplayName:"Nellymo Corporation" `
-FederationServiceName:"adfs.nellymo.com" `
-ServiceAccountCredential:$serviceAccountCredential `
-SQLConnectionString:"Data Source=hybrid-dcsql01;Initial Catalog=ADFSConfiguration;Integrated Security=True;Min Pool Size=20"
If we take a look at the Windows PowerShell script that was generated by this process it becomes clear how we can adapt this to install multiple servers in the same farm or deploy additional farms.
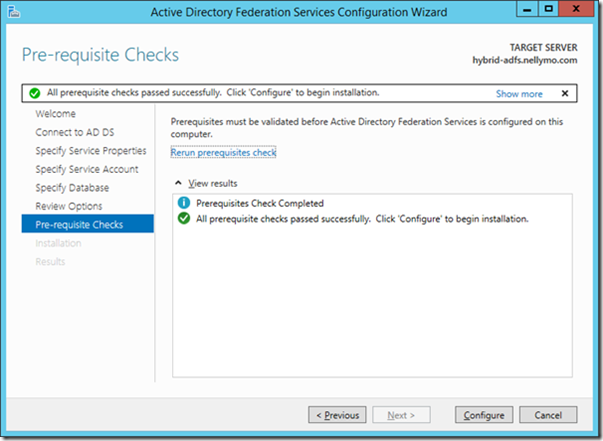
16> Pre-requisite checks are carried out automatically and must be passed before Installation can begin.
Click Configure if pre-requisite checks are successful. If checks are not successful review the Results pane for warnings r failures, remediate accordingly and rerun the prerequisite checks.
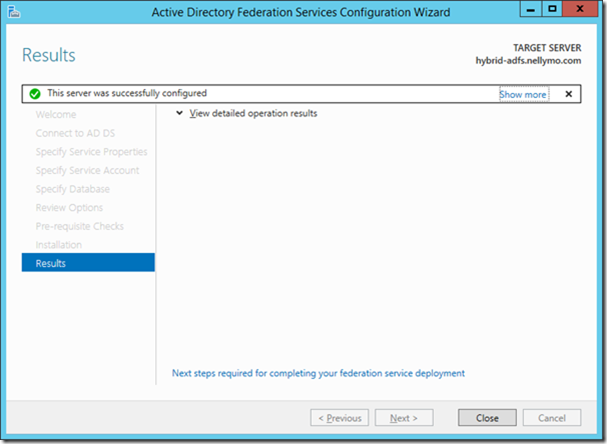
17> Install proceeds and you can smile when you see “This server was successfully configured”
Click close to exit the ADFS Configuration Wizard..
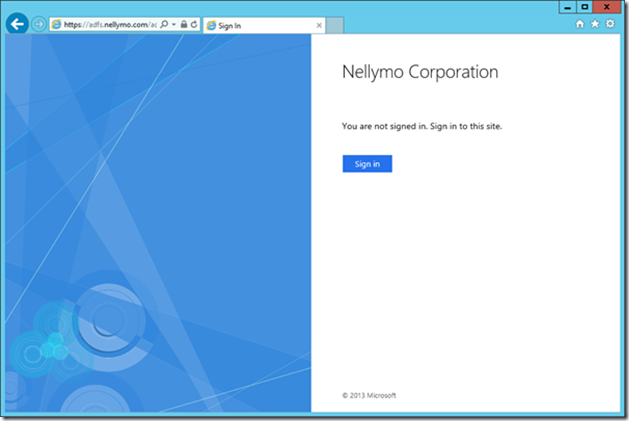
18> You can test ADFS is installed correctly by browsing to the ADFS sign in page here - https://adfs.nellymo.com/adfs/ls/idpinitiatedsignon.aspx
You have now successfully installed and configured ADFS for use in this scenario
Installing WAP on Windows Server 2012 R2
As this server will function as the gateway to your corporate domain, recommended security good practice is to ensure the server is not domain joined and should be located in a secure DMZ.
19> To begin installing WAP launch Server Manager and choose Add Roles and Features
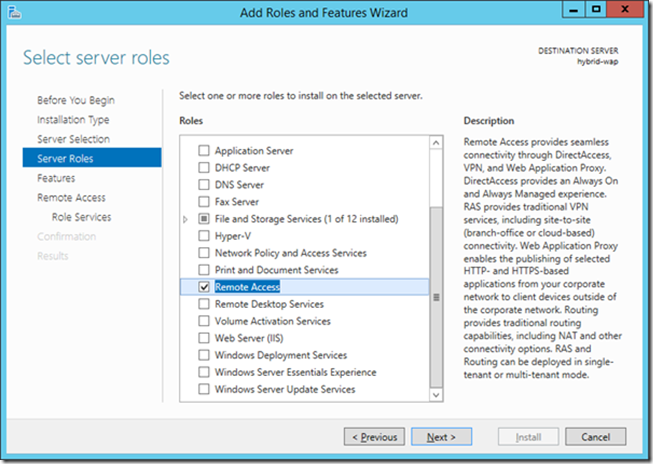
20> In Server Roles, choose Remote Access and click Next
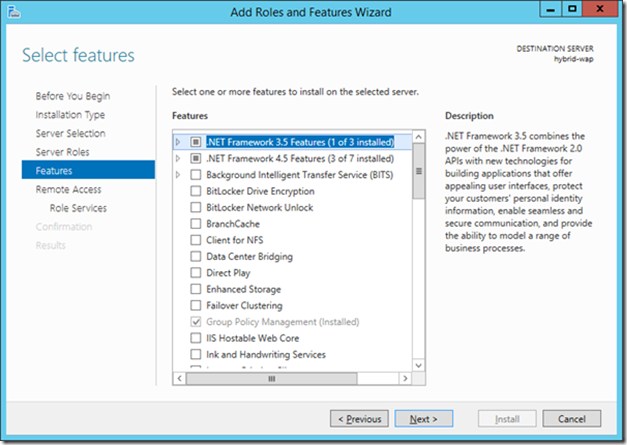
21> On the Feature selection panel accept the defaults, click Next
22> Review the details about the Remote Access Role and click Next
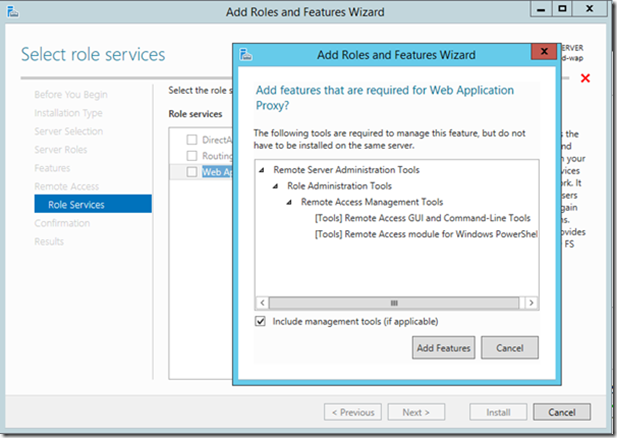
23> On the Roles Services selection panel choose Web Application Proxy and a popup will appear. Click Add Features to accept installation of the Remote Access administration tools.
Click Next after the PopUp disappears
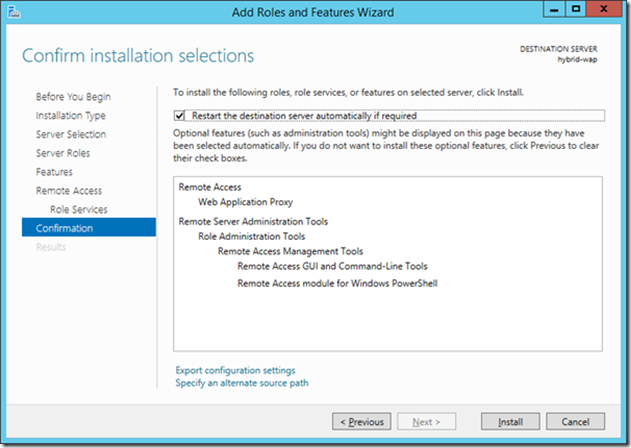
24> Review and confirm the installation choices
Optionally select “Restart destination server if required” and accept the dialog popup.
Click Install to complete the installation.
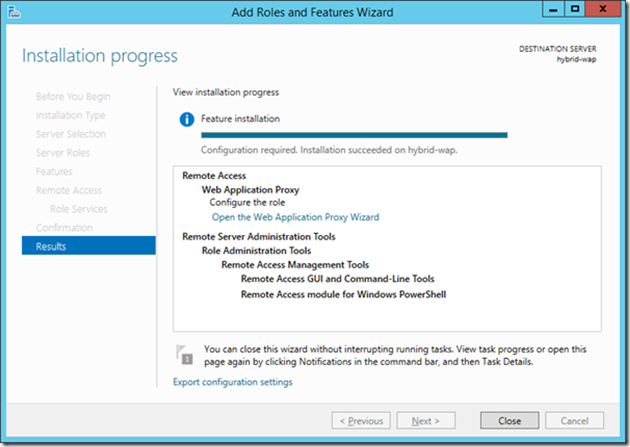
25> Installation proceeds until complete and which point you can close the installation wizard.
26> After installation there are some post install setup tasks to complete. Reload Server Manager and review the items presented on the notification flag.
27> Select “Open the Web Application Proxy Wizard”
28> Review the configuration notes and Click Next
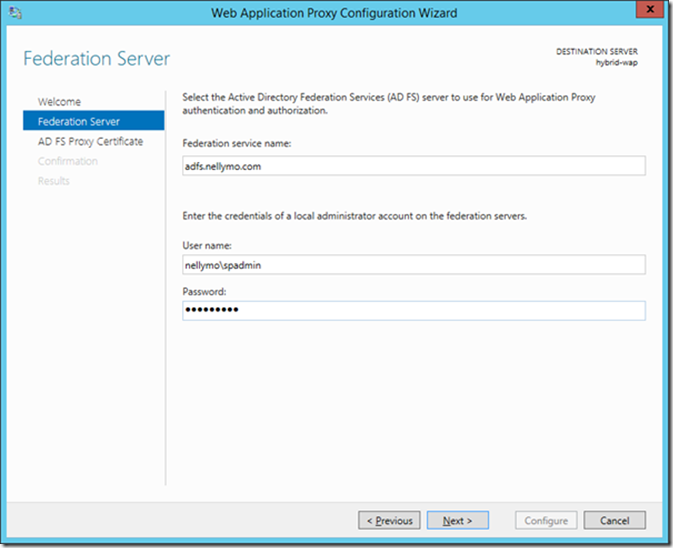
29> Enter the ADFS service name as entered during the ADFS installation phase and supply a username and password for an account that has admin rights to the ADFS Server.
Click next
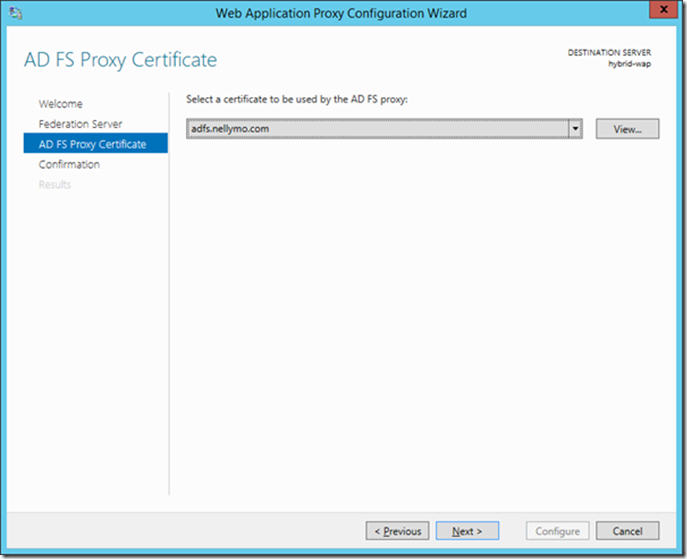
30> Choose the ADFS public cert. Once again this cert must be loaded into the local computer account personal certificate store on the WAP Server in the same manner as it was with the ADFS setup.
Click next
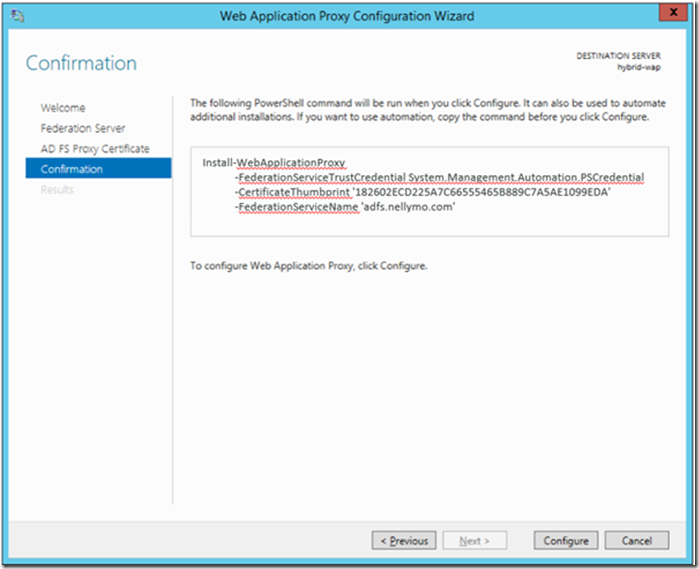
31> As with the ADFS setup we get a Windows PowerShell script that can be used to deploy WAP on other machines
Click Configure
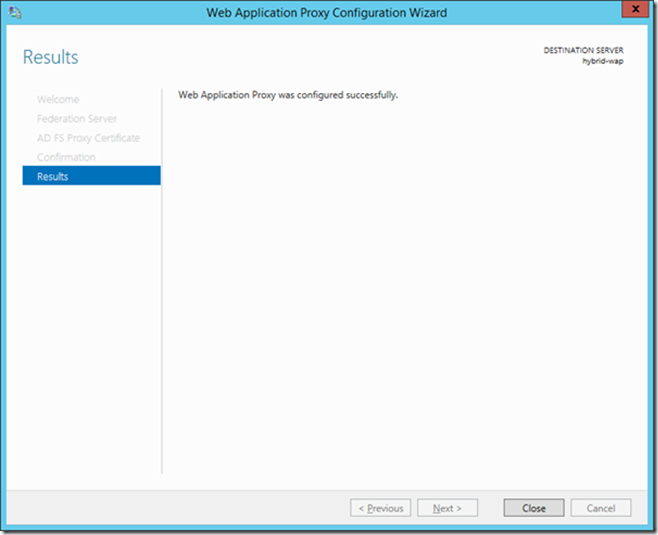
32> Configuration proceeds until complete.
Click close and the remote access console loads.
Configuring SharePoint publishing rules for Web Application Proxy
The Windows Web Application proxy supports publishing SSL enabled web applications using either pass-through, ADFS authentication or client certificate authentication. For our scenario we are going to look at configuring WAP to support client certificate authentication as this is the preferred mechanism to validate that an incoming search or BCS request is coming from a trusted location.
Important: The client pre-authentication certificate can be the same certificate used to establish the SSL channel, the only requirement is that Office 365 can validate the certificate publisher chain. The advantage to using a separate unique certificate though is that the client pre-authentication certificate is never available publically. This prevents unscrupulous individuals from trying to submit inbound hybrid requests and presenting a publically accessible certificate for client pre authentication. For testing purposes you can use either approach but Microsoft strongly recommends using a unique single purpose certificate for client authentication.
To publish a SharePoint web application to support inbound hybrid configurations we need to use a certificate for two processes.
· A certificate to establish the ssl channel. This is a public certificate that matches the external url of the published SharePoint web application. We will be using https://internet.nellymo.com in the scenarios to follow.
· A certificate to upload into the secure store in Office 365. This is presented during client pre-authentication when challenged by the WAP server.
In our scenario we will be using two different certificates as follows.
The first certificate is a one acquired from a well-known public certificate authority and is used to secure our externally published SharePoint Web Application https://internet.nellymo.com
The second certificate is also acquired from a well-known public certificate authority and is used for client pre-authentication. It has the common name userauth.nellymo.com.
Each of the certificates has been stored in the local computer account personal certificate store on the WAP server. In this example we will also have a local copy of the .pfx version of each certificate on the local filesystem for use in the PowerShell configuration script where we publish the web application.
To publish a SharePoint web application using client certificate pre-authentication you have to use PowerShell. WAP can only be configured to publish pass-through and ADFS secured web applications using the GUI.
33> Open PowerShell ISE as Administrator and use the following script to implement the reverse proxy publishing rule
As mentioned earlier the two certificates we are using to configure the WAP publishing rule have been copied to the local file system. The filepaths below should be updated to reflect the location on your own server where you have stored these certificates.
You should also modify the script to reflect the internal and external urls within your own environment. By default WAP expects you to have identical BackedServerUrl and ExternalUrl. If you have configured different Urls for these parameters then you will need to disbale URL translation for the publishing rule and add Alternate Access Mappings to the SharePoint web application. This is a more complex configuration and will be the subject of a future blog post.
#Get the thumbprint of the external URL certificate
$externalcert = Get-pfxCertificate -FilePath "c:\cert\internet_nellymo_com.pfx"
$externalcert.Thumbprint
#Get the thumbprint of the client pre-authentication certificate
$clientcert = Get-pfxCertificate -FilePath "c:\cert\userauth_nellymo_com.pfx"
$clientcert.Thumbprint
Add-WebApplicationProxyApplication `
-Name "Hybrid Inbound Rule" -BackendServerUrl "https://internet.nellymo.com" `
-ExternalUrl "https://internet.nellymo.com" `
-ExternalCertificateThumbprint $externalcert.Thumbprint `
-ExternalPreauthentication "ClientCertificate" `
-ClientCertificatePreauthenticationThumbprint $clientcert.Thumbprint
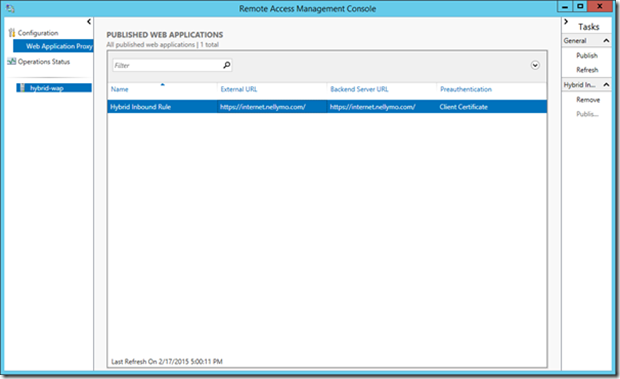
34> Execute the script and refresh the remote access console to review the published rule
This is the rule as published by WAP to the internet.
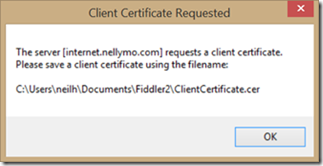
35> Validate the rule by navigating from an external web browser to the external published url with fiddler2 loaded to inspect the web traffic. Fiddler2 will respond with a dialog indicating a certificate challenge was received.
So now we have the web application published successfully and we need to configure Office 365 to send the certificate to the proxy when challenged for inbound hybrid requests.
Configure the Office 365 Secure Store
In order to configure the secure store you need to be a Global administrator on the Office 365 tenancy and have access to the certificate used for the client pre-authentication on the WAP server.
36> To configure the secure store, login to the tenant admin portal and open the SharePoint administration site.
37> Navigate to the Secure Store admin page and select New to create a new Secure Store Target Application.
38> Enter a name for the new application and set the credential fields to match the table below
Field Name |
Field Type |
Certificate |
Certificate |
Certificate Password |
Certificate Password |
Complete the other fields for providing administrative control over this application and also specify the group(s) of users who are mapped to this identity. The mapped users will able to consume this secure store application from SharePoint Online. In this case we are stating all users of the tenancy except external users can call this application.
Click OK to create and save the target secure store application
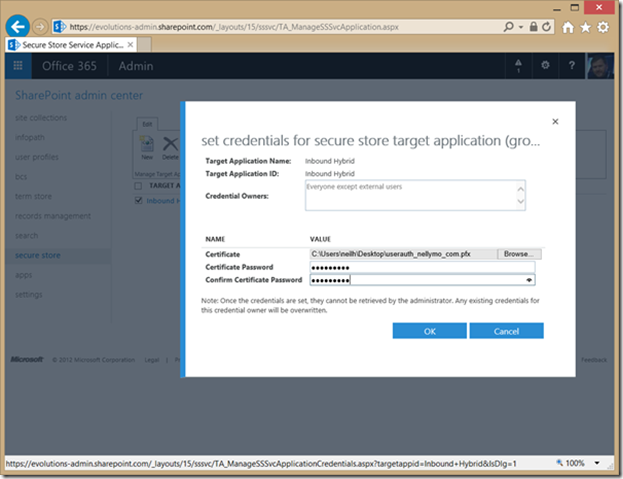
39> Highlight the new application in the secure store admin page and select Set Credentials
Browse to the same pfx certificate file used for the client pre-authentication when configuring the WAP publishing rule and supply the password used to encrypt the file.
Click OK
That concludes the ADFS, WAP and Secure Store configuration required to support inbound hybrid with WAP as a reverse proxy. The final stage is to configure the result source and query rules as you have seen in the earlier part 2 of this blog series on configuring inbound hybrid.
POST BY Manas Biswas [MSFT] & Neil Hodgkinson [MSFT]
Comments
Anonymous
June 23, 2015
This blog is very informative and clear explanation www.staygreenacademy.com/Anonymous
July 08, 2015
The comment has been removedAnonymous
July 19, 2015
Trying to answer the ask around WAP certificate requirement below. Web Application proxy supports publishing SSL enabled web applications using either pass-through, ADFS authentication or client certificate authentication. The client pre-authentication certificate can be the same certificate used to establish the SSL channel, the only requirement is that Office 365 should be able to validate the certificate publisher chain. The advantage of using a separate unique certificate though is that the client pre-authentication certificate is never available publically. To publish a SharePoint web application to support inbound hybrid configurations we need to use a certificate for two purposes. 1.A certificate to establish the ssl channel. This is a public certificate that matches the external url of the published SharePoint web application. 2.A certificate to upload into the secure store in Office 365. This is presented during client pre-authentication when challenged by the WAP server. You can use two different certificates as mentioned below or use the same certificate for both purpose. In case you are using two below is how it is used.. The first certificate is a one acquired from a well-known public certificate authority and is used to secure our externally published SharePoint Web Application The second certificate is also acquired from a well-known public certificate authority and is used for client pre-authentication. Thanks.Anonymous
July 22, 2015
Hi Manas, I have used global admin (SharePoint online ) to configure the result source in SharePoint online. I am using an account which is the site collection administrator of the SharePoint online website. This is also from Onprem Active directory account. I am still getting error. I logged a request with MS . But I had been sent to online team and on premise team with no success. Could you please help me in this regard. I have got a service request no : 615072394138987 with my Office365 subscription. I would appreciate your help . Thanks SowelAnonymous
July 28, 2015
Manas, Neil Thanks for this blog post - very useful indeed. Do you happen to know whether it is possible to get Office Web Apps previews of on-premises content within SPO, in an inbound search hybrid configuration? I assume that we can configure the WAP to publish an on-premises WAC farm using pass-through in order to achieve this, but have not tried it yet. Thanks! BenAnonymous
September 10, 2015
Hello Ben , Yes you need to publish WAC or ensure that the users are able to access the WAC url via some means , example have them logged in via VPN to corpnet where your WAC server resides, in order to see previews. Thanks, ManasAnonymous
September 10, 2015
Hello Sowel, Could you let us know what error you get when you try to submit a inbound Query from SharePoint Online.Anonymous
October 28, 2015
Thanks for this guide, very helpful. I set up the WAP as you advised with a user auth certificate but when my SPO is trying to reach my WAP I got a 403. In the event log of the WAP I can see : "The client presented an SSL certificate to Web Application Proxy, but the certificate was not valid for the requested usage." Details: Certificate thumbprint: fdcdf673e979*******************" More info : This thumbprint is the one of the certificate I uploaded in the Secured Storage. It is in the Personal and Trusted Root CA store of the WAP. The times are looking good on my WAP and ADFS server. When I browse to https://URLofIntranet the certificate is looking good in the browser; Fiddler tells me as expected I should use cert auth. Any idea? Thanks!Anonymous
June 03, 2017
The comment has been removedAnonymous
October 18, 2017
I have an issue where I'm working behind a WAP gateway, whereby it decodes then removes a / from the URL that's passed as part of a query string. Is it possible to make an exception in WAP to allow the query string for a particular route to pass through un-modified?I do not have access to the WAP server itself.
