Windows Multipoint Server 2012 – Customizing Virtual Desktop Template - Part 2
Today's post comes from Ratnesh Yadav from the Windows MultiPoint Server team. (Updated March 27th, 2013 with information on Update Rollup 1. Updated April 2nd, 2013 with details on connecting remote stations to WMS Virtual Desktops, both at the end)
This blog is in continuation of the “WMS 2012 - Creating Virtual Desktop Stations - Part 1” blog, where we talked about creating virtual desktop templates & virtual desktop stations in WMS 2012. In this blog we will walk through the process of customizing the virtual desktop template.
Customization is the process by which administrator can install windows updates, add applications, configure settings, etc. on a master virtual desktop template and then recreate the virtual desktop stations so that all stations inherit all of the changes made to the master. Let’s go through the process.
Tip: We recommend performing the steps of this process from a remote computer connected to the WMS host using the Windows Remote Desktop Connection client.
Step 1: Prepare the System for Virtual Desktop Template Customization
If the virtual desktop template that you want to customize is already in use by virtual desktop stations that have been created from the template, you will need to prepare the WMS system before customization can be completed. We recommend switching the WMS system to console mode and shutting down all virtual desktop stations before starting the process. An administrator can switch to console mode by opening MultiPoint Manager, going to the Home tab and clicking on Switch to console mode. Once WMS is in console mode, the administrator must shut down all the virtual desktop stations by going to the Virtual Desktops tab and, for each running virtual desktop station, select the station and then select Shut down.
Step 2: Start the Customize Template task
After the system is in console mode and all virtual desktop stations are turned off, you are ready to start customizing the template. Open MultiPoint Manager, go to the Virtual Desktops tab, select the virtual desktop template you want to customize and then select the Customize virtual desktop template task as shown below.
Next, you will see following dialog box.
Clicking OK will start the customization process.
Step 3: Read the Customize Template Information Dialog Box
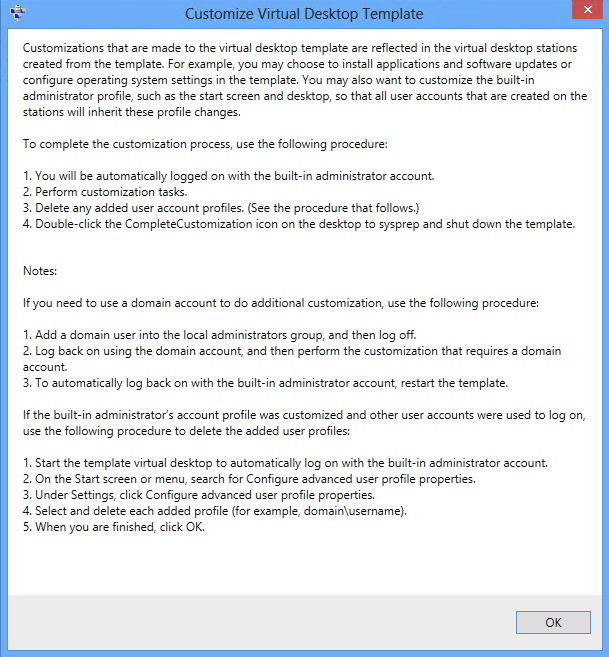
Once the above task is complete will see following information dialog box.
This dialog box explains the process of completing the customization and gives some helpful hints. Here is some important information from the dialog box.
- WMS will start the virtual desktop template in a virtual machine and a Virtual Machine Connection window will be launched.
- The template will be configured to auto logon using the built in administrator account. Optionally, you can add a domain user to the local administrators group and log in as that user to help when accessing domain resources.
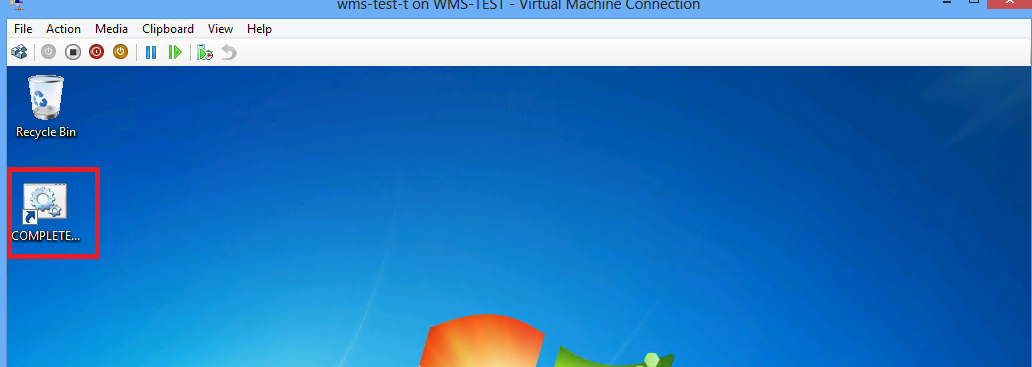
- Once done with customization, the administrator should double click on the CompleteCustomization icon on the desktop. This will “sysprep” & shutdown the virtual machine to create a new template for the virtual desktop stations.
Additionally, if the template was created on a domain joined system, we recommend that you always create a local administer account in the template.
Step 4: Customize the Template
Now you will be connected to the running virtual desktop template using a Virtual Machine Connect window. The administrator can now perform customizations on the template like installing Windows updates, adding software applications, configuring Windows settings, etc. The Template can be restarted during the customization process if a reboot is required. IMPORTANT: The administrator should make sure there are no pending Reboots before going to the next step.
The administrator can shutdown, start or reboot the virtual machine by using Virtual Machine Connection menu (Action -> Turn off, Shutdown, Start, Save etc.)
Step 5: Complete Customization
After the administrator has completed all the desired customizations, click on the CompleteCustomization icon on the desktop to complete the process. Again, make sure there are no pending Reboots before clicking the “CompleteCustomization” icon.
Clicking on the CompleteCustomization icon will start the sysprep process on the template. After sysprep is complete the template will shut down.
Step 6: Re-create Virtual Desktop Stations
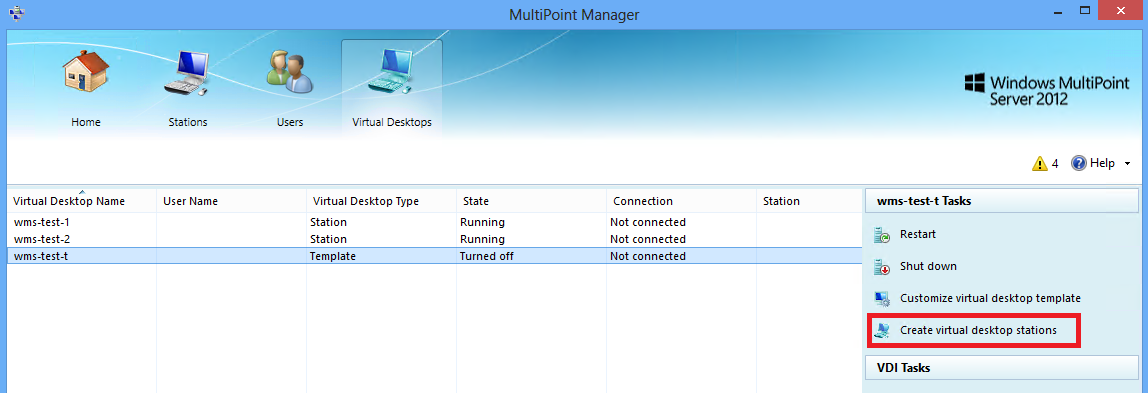
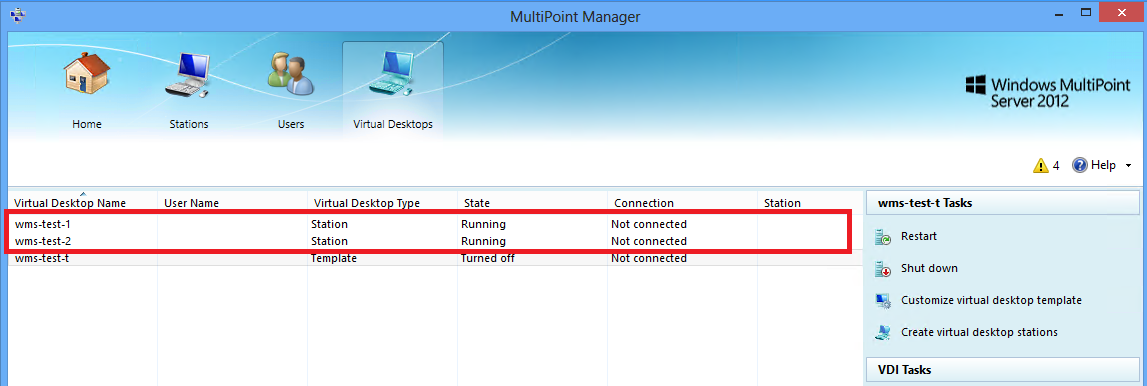
Once the virtual desktop template is customized, the final step is to re-create the virtual desktop stations using the template. Before creating the virtual desktop stations, switch the WMS system to station mode. Once the WMS system has been restarted in station mode, open MultiPoint Manager, go to the Virtual Desktops tab, select the virtual desktop template and click on Create virtual desktop stations.
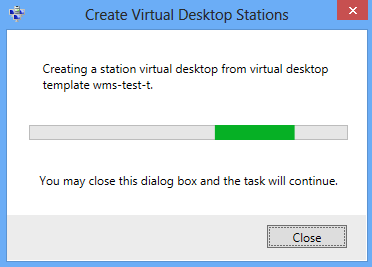
Click Ok on the information dialog box, and you will see the following progress bar dialog.
Each local MultiPoint station will be connected to a virtual desktop based on the virtual desktop template that was customized in the proceeding steps. Users will now have a full, customized Windows client experience at their MultiPoint stations.
In Part 3, we will explain how to distribute a customized master template to other MultiPoint systems.
UR 1 Update - March 27, 2013
Now that Update Rollup 1 is available on the Download Center and via Windows Update we’ve heard from a few customers who missed that if you are using the MultiPoint Connector to manage Windows 7 PCs, Windows 8 PCs or Virtual Desktops running in virtual machines then you need to update the Connector in those clients to the UR1 version.
If you are using WMS 2012 with Virtual Desktop templates (VDI):
1) Install UR1 on the host
2) Import your template to copy it to a new name from the Virtual Desktops tab
3) Customize your template:
uninstall MultiPoint Connector:
Start Screen -> type “add remove” -> find Add or Remove Programs under Settings -> select Windows MultiPoint Server 2012 Connector and click Uninstall.
navigate to the \\<your WMS host PC name>\Connector\ folder and run WmsConnector.exe to install the new connector
(Update April 12, 2013) reboot the template. We explain why this may be important over on the forum: https://social.technet.microsoft.com/Forums/en-US/windowsmultipointserver/thread/35514304-ca37-4e1f-af24-5994cb75efa7
4) complete customization
5) recreate stations from the new template
Update April 2nd, 2013 - Courtesy Clark Nicholson of the WMS Team
Can I connect remote stations (e.g. RDP clients) to VMs on WMS?
The answer is yes! After using MultiPoint Manager to create and customize a template, you’ll need to use Server Manager to create a standard VDI deployment using the template.
Here’s an alternate deployment scenario for RDP thin clients:
1) Create and customize your Virtual Desktop Template using MultiPoint Manager, as described above.
2) Launch Server Manager, run the Add Roles and Features Wizard, select the Remote Desktop Services installation type, accept all the default settings, and select the local host for all role services .
3) Once the role services have been installed, close the wizard.
4) In the Server Manager’s navigation pane select Remote Desktop Services and Collections.
5) Under the COLLECTIONS TASKS drop down list select Create Virtual Desktop Collection.
6) Use the Create Collection wizard to create your virtual desktop collection based on the template that was created and customized using MultiPoint Manager.
7) Once the collection has been created, go back to the Server Manager->Remote Desktop Services->Overview page and select the green “+” labeled RD Licensing and configure the RD Licensing server you want to use for this VDI collection. Make sure to add additional CALs as needed.
That’s it! Now, when you can navigate to https://<WMShostname>/RDWeb you’ll see the newly created VDI collection and you can connect to one of the VMs in the collection.
Can I customize the VM settings like virtual hard disk location for my VM template?
The answer is yes again! After using MultiPoint Manager to create and customize a template, you’ll need to use Hyper-V Manager to change VM settings for your template.
Here is an example of the steps to change the virtual hard disk location for the template.
1) Create and customize your Virtual Desktop Template using MultiPoint Manager, as described above.
2) Open File Explorer and move the template from its default location (C:\Users\Public\Documents\Hyper-V\Virtual hard disks) to the new location.
3) Launch Hyper-V Manager.
4) Right click on the virtual machine template you want to customize and select Settings…
5) Select the Hard Drive under IDE Controller 0 and edit the path under Virtual hard disk: to point to the new location.
6) Select OK.
That’s it! Now the template’s virtual hard disk file is stored in a new location.
Comments
- Anonymous
January 01, 2003
Hi, Kieran. That is correct. There is a helpful VDI licensing FAQ at download.microsoft.com/.../Microsoft%20VDI%20and%20VDA%20FAQ%20v3%200.pdf - Anonymous
January 01, 2003
I need to connect hp t410 AiO to WMS 2012 but I'm unable to create virtual desktop stations. is there a step by step guide to accomplish this? I will appreciate. Wycliff - Anonymous
January 01, 2003
Any guide available to deploy WMS 2012 to hp t410 AiO smart zero clients? I would really appreciate. - Anonymous
March 24, 2013
Hi, I presume you need an entperprise windows 7/8 licence on WMS2012 for each client using a template?


