Microsoft Azure Tutorial: Build your first movie inventory web app with just a few lines of code
Editor’s Note: The following is a guest post from Mustafa Mahmutović, a Microsoft Student Partner who attends the Faculty of Electrical Engineering at the University of Sarajevo where he is a Computer Science Major.
In this tutorial, you will learn how the built-in features of Visual Studio Community 2015 and the .NET framework do a lot of the work for you in when creating a web app. Using very little code, you’ll build a database of a movie collection. So, even if you are new to programming, you can use these tools and services to make something cool.
ASP.NET MVC is a web app framework that gives you a powerful way to build dynamic web apps. You’ll use ASP.NET MVC 5 and Entity Framework 6, which gets deployed on Azure App Service – Web App and Azure SQL Database.
You will need Microsoft Azure, Visual Studio 2015 Community Edition and Microsoft Azure SDK for .NET (VS 2015) - 2.8.2. In addition, you will need to register and verify yourself as a student if you haven't already, which you can do here.
Let's get started!
Using your Microsoft Account, sign into Microsoft Azure. As you can see, there are many options on the Azure portal.
Leave Azure open in your browser, we'll use it later.
Step One: Develop an MVC Web App
Now it's time to develop our MVC Web App on Azure, using EntityFramework with CRUD (create, read, update and delete).
1. Open Visual Studio Community 2015 and log in to your Azure account.
2. Open cloud explorer to see all the projects or apps you have on your Azure account: View->Other windows->Cloud Explorer or View->Cloud Explorer (the second option in my version).
3. If you can’t find ‘Cloud Explorer’ in ‘Other Windows’, check ‘View’ in the list menu. When you have clicked ‘Cloud Explorer’, this is what you’ll see in Visual Studio.
Step Two: Create a New ASP.NET Web Application Project
Now let's create a new ASP.NET web application project.
1. To name a project, go to File->New Project->Web->ASP.NET Web Application. (For the purposes of this tutorial, I have kept the default option).
2. When you click ‘OK’, a new window will pop up. First, choose MVC, then make sure that you are using Azure and that ‘Host in the cloud’ is selected. Then click OK.
Step Three: Create an App Service
The next step will help you create a new app service on Azure. When the 'Configure Microsoft Azure Web App Settings' dialog appears, make sure that you are signed in to Azure.
1. First you will have to give a unique Web App Name (I named mine AppName WebApplicationOOAD). If you want to specify a name for your web app, change the value in the 'Web App Name' The URL of the web app will be {name}.azurewebsites.net, so the name has to be unique in the azurewebsites.net domain. The configuration wizard suggests a unique name by adding a number to the project name "WebApplicationOOAD,“ which is fine for the purposes of this tutorial.
2. In the 'Subscription' box, you'll use your DreamSpark subscription.
3. For 'Resource Group', type the name of your new resource group. You can use one resource group for multiple projects or you can create a new resource group for each project that will be on Azure. I have named mine mvcAppGroup.
4. For 'App Service Plan', double-click on 'new', then choose the nearest region and click 'OK'.
5. When you are done, you should see something like this (except that you will have a DreamSpark subscription):
6. Click ‘create’.
Once your project is created, your first view will be the one shown below.
7. Now let’s test the default generated view on MVC Web App. Click on the start icon and select Microsoft Edge. Before that, you can see that ASP.NET already created Models, Views and Controllers for us. The browser will open your app and you will see this:
Step Four: Add a New Class
Now let’s go back to Visual Studio and add a new class to the project (this class represents a table and the properties represents the colums of that table).
1. Open the folder named ‘Models’, right-click and Add->New Item->Class.
2. Give a name to that class (I called it 'Movie').
3. On the class, create (or copy/paste) the following code:
4. You will get an error message on DbContext. Simply right-click on the error to resolve and add a library to the class: Entity or shortcut CTRL + . (dot) enter, enter. You will end up with something like this:
Step Five: Add a Controller using Scaffold
The next thing we’ll create is a Scaffold Item.
1. Right click on Controllers->Add->New Scaffolded Item
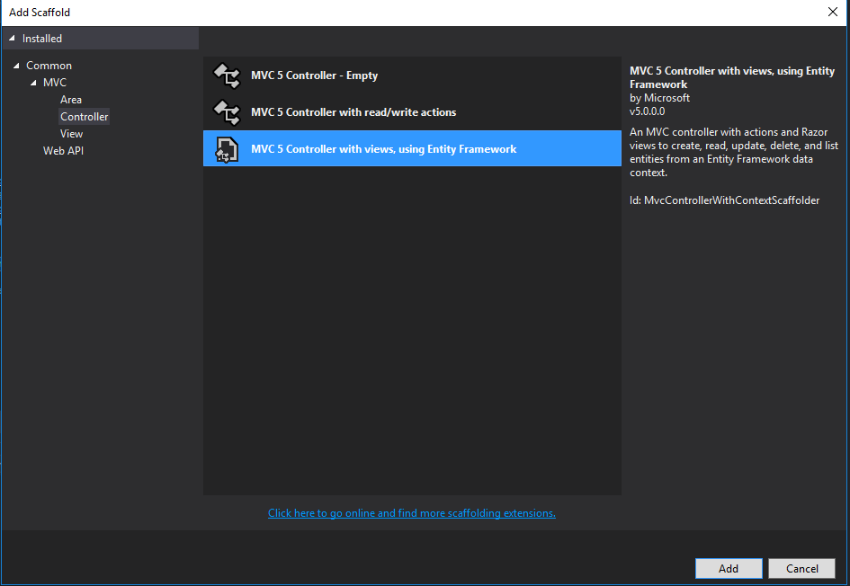
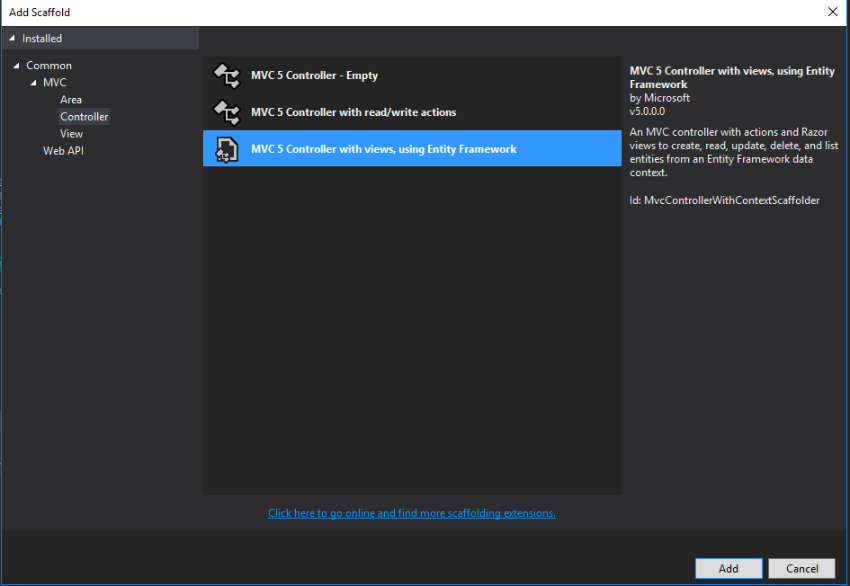
2. Now choose, ‘MVC 5 Controller with views, using Entity Framework’ and click ‘Add’.
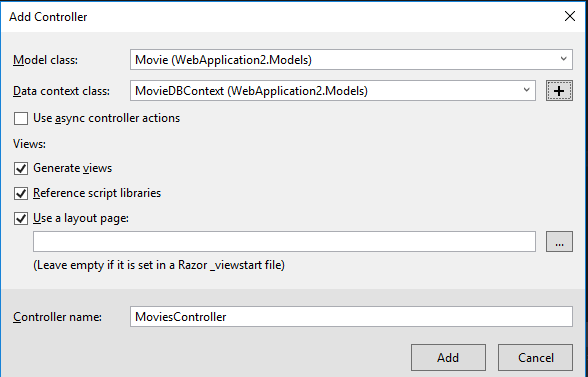
3. Enter your model name in the empty fields.
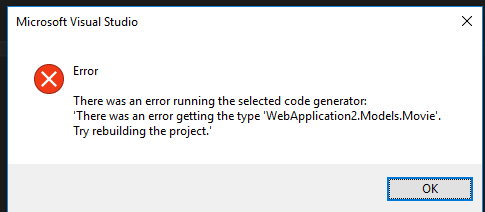
4. If an error pops up like the screenshot below, just rebuild a solution and try to add a Scaffolded item again.
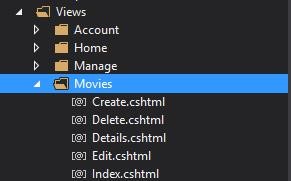
After the code generation process is complete, you will see a new controller and views in your project. The Controller was automatically created with CRUD operations. The Views were automatically created (open 'Views' and you will see a subfolder, 'Movies', and then 'Create,' 'Delete,' 'Details,' 'Edit.')
Step Six: Add Movies to Web App Display
Now we want to add a link to our main page to add or delete a movie.
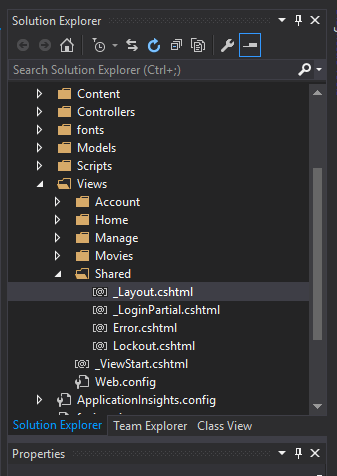
1. Select Views->Shared->_Layout.cshtml
2. Find the code for the navgation bar under <div class = ''navbar-collapse collapse''>. After that line, simply add the following code:
@Html.ActionLink( displayed,view Name,folder name)
3. Now that you have displayed movies, you will be taken to the Movies index page.
Step Seven: Create a Server on Azure
Now we are ready to create a server on Azure.
1. Go to Azure. If you have closed that tab or browser, log in again. Important: Do not close Visual Studio!
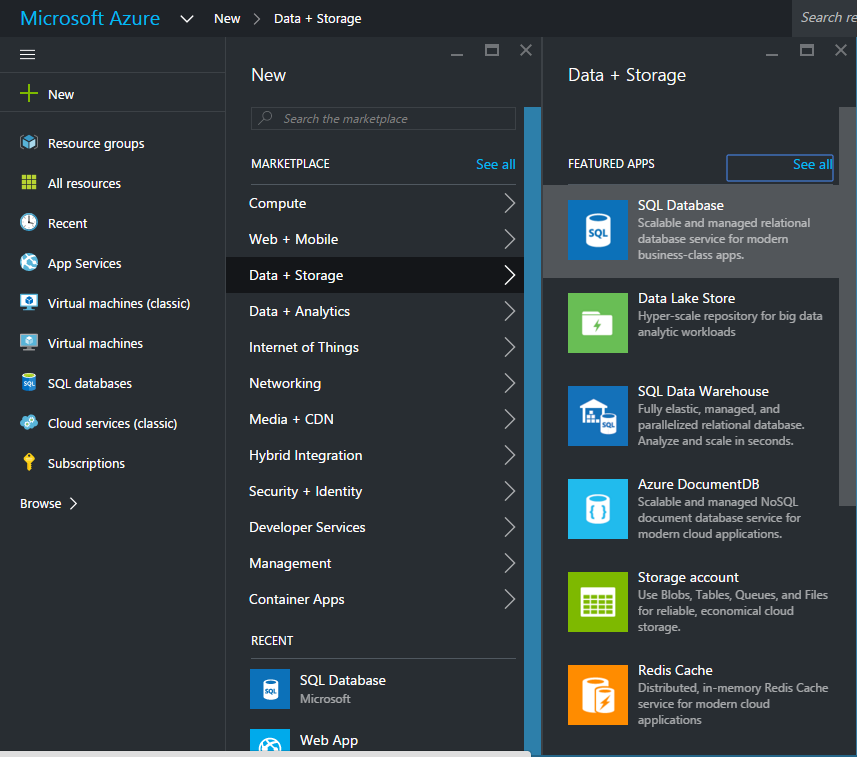
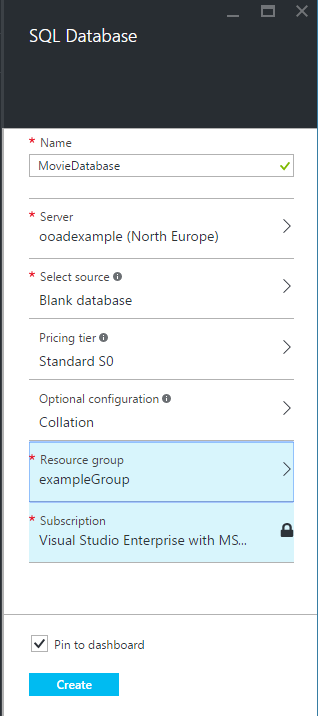
2. Go to New->Data+Storage->SQL Database. Fill in the empty fields.
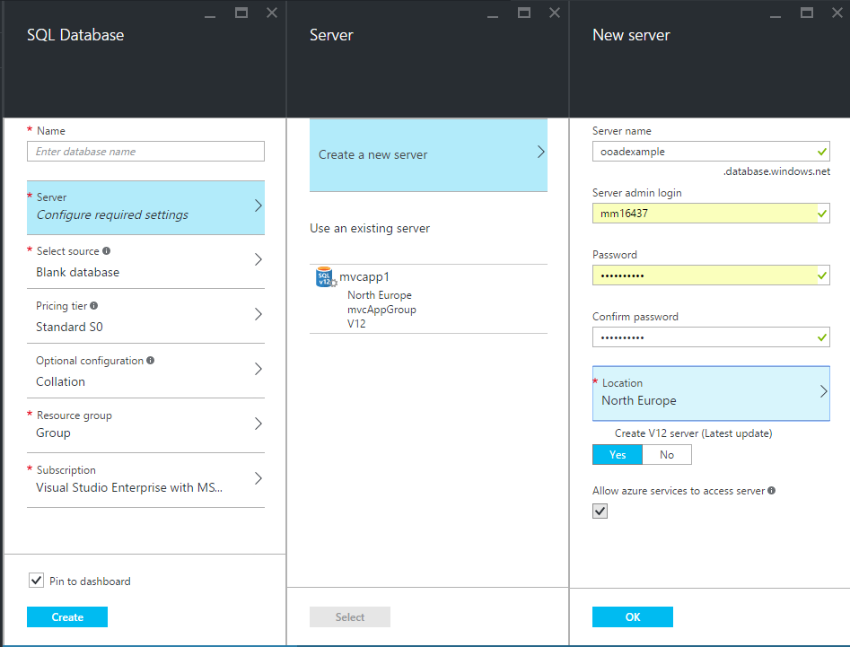
3. Name your database and click on Server->Create a new server. Add server name, admin, password and your location (just like for App Service location).
4. Click ‘OK’.
5. Remember your server name, admin login and password. In my example, it is ooadexample.database.windows.net. Select ‘Create’.
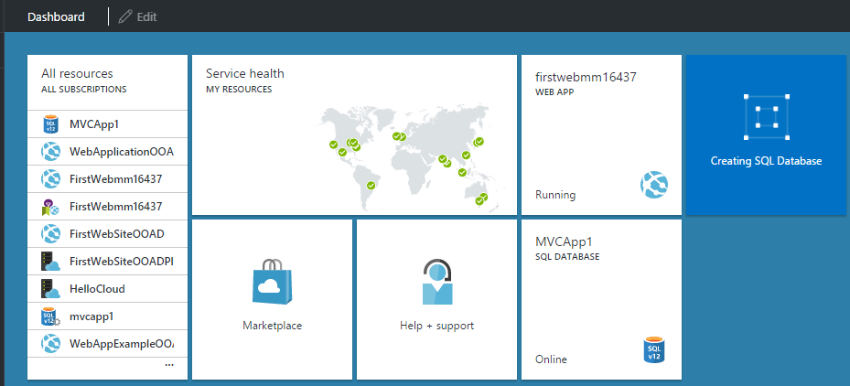
You will see that Azure is creating the database. Wait for it to finish.
Step Eight: Create Connection Strings
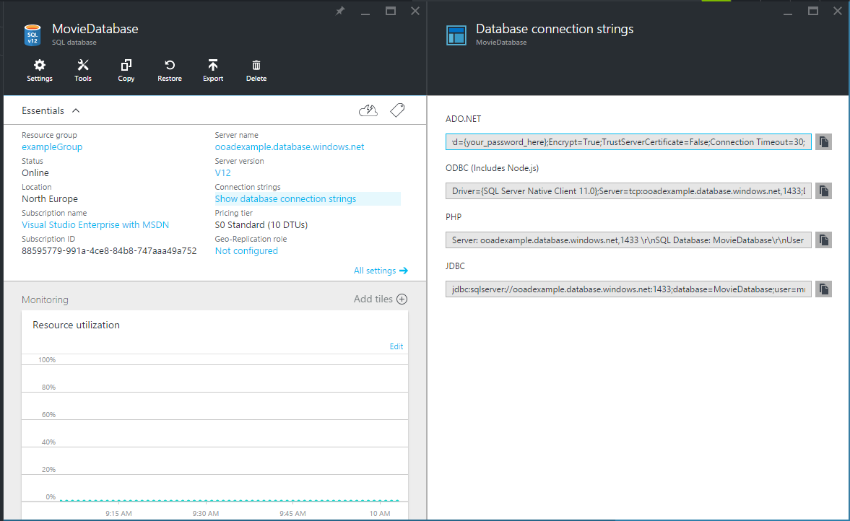
1. Select your database. Under the label ‘Connection Strings’, click on ‘Show database connection strings.’ Select the link in the ADO.NET box and copy it.
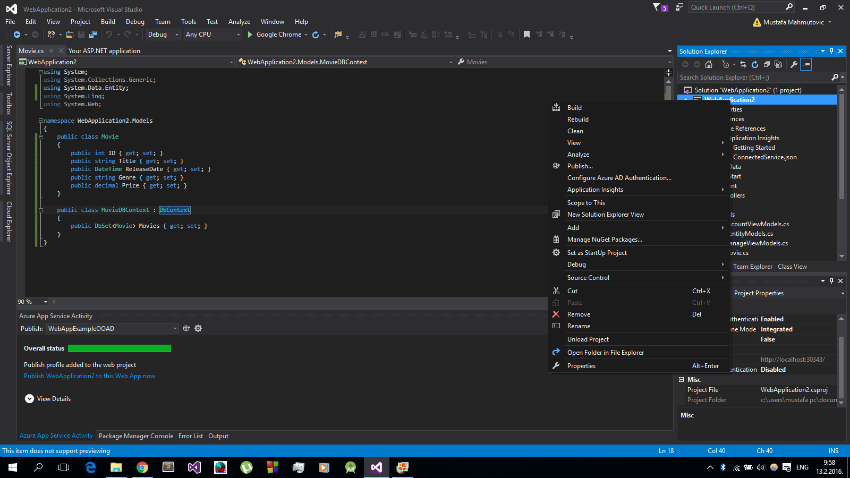
2. Go back to Visual Studio. Right click on ‘Project’ and click ‘Publish.’
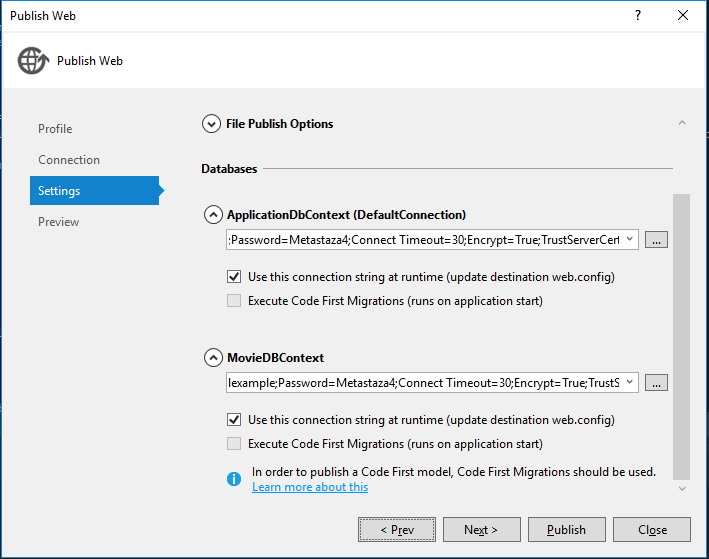
3. This action launches the ‘Publish Web’ window. Paste the previously copied connection string into the ApplicationDbContext and MoviesDbContext fields. Then click on the three dots (…).]
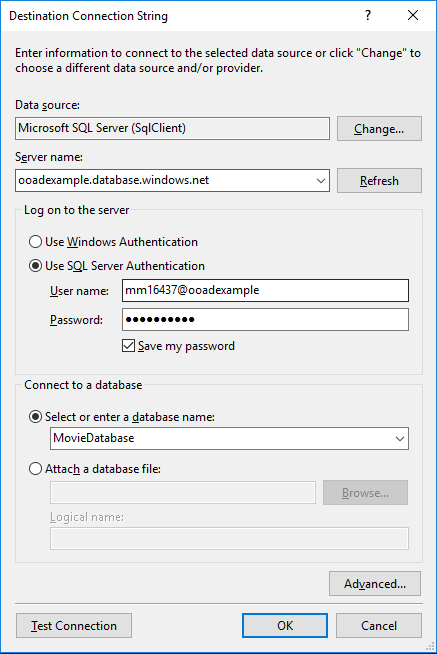
4. The fields should automatically populate the correct information in the Destination Connection String window shown below. If not, enter your server name (in my example: ooadexample.database.windows.net) and password. Check ‘Save my password.’ Important: if password is not filled, enter your password and check “Save my password”.
5. Select ‘OK’.
Step Nine: Test the Published App
Your app will now open in your browser.
1. Click on ‘Movies.’
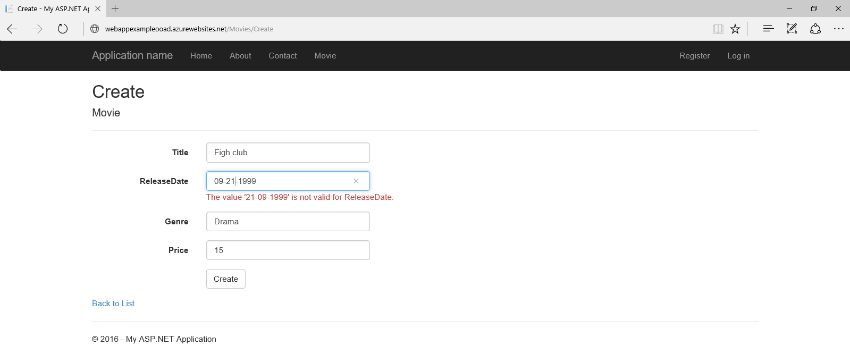
2. Test it by adding a title, release date, genre and price. Enter mm/dd/yyyy (American date time settings).
3. Creating a title here will also add it to your database on Azure. Close the tab and reopen it again to verify.
Step Ten: Verify Data in Azure
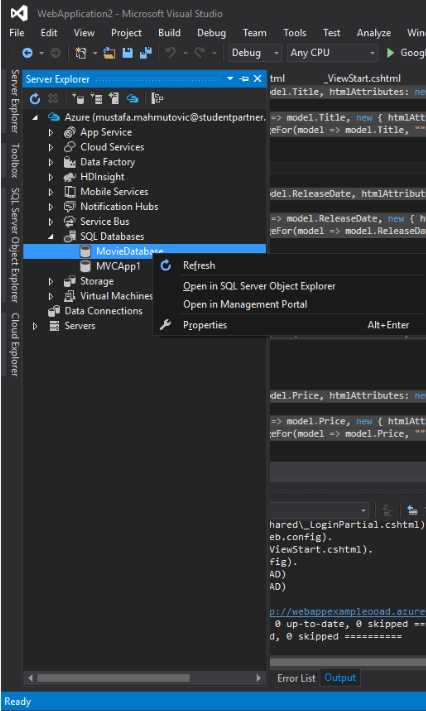
1. To verify that the movie data you entered in Step Nine appears in your Azure database, go to Visual Studio. Under ‘Cloud Explorer’, right-click on your database and click ‘Open in SQL Server Object Explorer’.
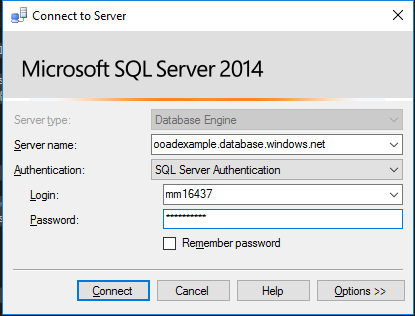
2. Now enter your server name, admin and password. Click ‘Connect’.
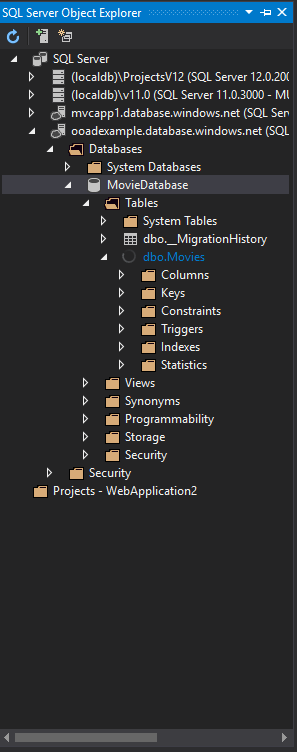
3. Once connected, you will see that the migration has indeed occurred.
Now you know how to upload an MVC web app to Azure using Entity framework and CRUD. I hope you've found it useful!
Microsoft Imagine, anywhere, anytime:
- Follow us on Twitter, Facebook, Instagram and YouTube.
- Subscribe to our blog to meet students just like you who are changing the world with their exciting new tech. Plus, stay on top of all the new products and offerings for students.
- Get inspiration delivered to your inbox via our monthly Microsoft Imagine Newsletter, featuring the latest tech tips, competition news and all kinds of online tutorials.
- Bookmark Microsoft Imagine for all the student developer news, downloads to free student products, online tutorials and contests you could want.


