CI / CD pipeline for VSTS market place extension for k8s
I have a project called Kubernetes extension for VSTS. You can use it on the VSTS Market place.
These days, official Kubernetes Task has been released. So I added advanced feature.
- Separate download and execution of the task
- Helm support
- Istio support
- k8s deployment (not only for ACS and AKS but others)
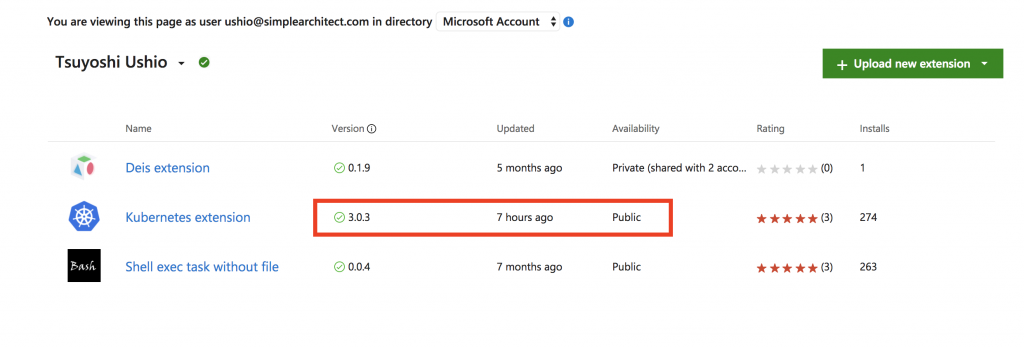
The implementation is very simple, however, I need full attention when I release it. I just start as my hobby project, however, now I have 320 uses. Some may use in production. I did it manually, as a DevOps guy, I wanted to automate it. However, I have some obstacles for that.
- Integration testing with k8s cluster. However, I developed on a Windows machine.
- How can I test the extension installation for a vsts account?
- Long Build Time (13 min) for CI. Release is more than that.
- Over size issue of vsix file
In this blog post, I'd like to share how I solve this problems. If you have better solution, please let me know.
Strategy
I started with coming up with a strategy how to test it. I can publish the VSTS task automatically however, I'd like to test before the publish. Also, After install the extension, I need to test on a k8s cluster. My idea is
- Create a VSTS account
- CI pipeline for build, unit test, archive artifact with zip and push to drop folder (Hosted Agent)
- Release pipeline, uninstall/re-install all tasks (Hosted Agent)
- Release pipeline, Integration testing (Hosted Linux Agent with AKS)
- Approval process
- Release pipeline, Build/Publish to the Marketplace
I'll explain whole process with some tips
1. Create a VSTS account
When I created the pipeline the first time, I create a project for this extension with a VSTS account. However, in this case, it cause a problem. The VSTS account has other projects. It uses VSTS tasks. VSTS extension/tasks deployment is for a VSTS account not for a VSTS project. Which means when I deploy a broken version, it will affect to the projects. I decided to create a new VSTS account only for this purpose.
2. CI pipeline for build, unit test, archive artifact with zip and push to drop folder (Hosted Agent)
I have a several tips for this section. I thought it must be very easy since I did it via command line with manually. It must be just make it pipeline! I was wrong. :) Let's have a look at the pipeline.
 Source Repo: https://github.com/TsuyoshiUshio/KubernetesTask
You can see the whole source code of the Kubernetes Task on the repo. Also, I include some command on the package.json file.
  "scripts": {
 "pretest": "tsc -p .",
 "test": "mocha ./Tests/L0.js ./Tests/L1.js ./Tests/L2.js",
 "report": "tsc -p .& mocha ./Tests/L0.js ./Tests/L1.js ./Test/L2.js --reporter mocha-junit-reporter",
 "deploy": "deploy.bat",
 "build": "tfx extension create --manifest-globs vss-extension.json"
},
This is not good practice. lol. However, when I wrote this, I'm a newbie of node and typescript. However these configuration works. I decided use this time. then I'll refactor it in the future. I'll execute these commands. The point is, VSTS task is node application however, a lot of people using TypeScript. I love TypeScript as well. You need to care something if you use TypeScript for CI / CD pipeline.
2.1. Preparation tasks
Before starting the unit testing, we need to install several tools.
npm install (npm)
Display name: npm install
Command: install
install typescript (npm)
Display name: install typescript
Command: custom
Command and arguments: install typescript@2.1.5 --global-style
NOTE: I try to use --global however, it didn't work. When I tried it, tsc 1.4.0 is enabled. I also try to set the PATH environment variables, however, it should be set on the task feature.
install tfx-cli command (npm)
Display name: install tfx-cli command
Command: custom
Command and arguments: install tfx-cli@v0.4.11 --global
2.2. Unit Test and Refresh node_modules
When I created the CI pipeline for the first time, one of the biggest issue was, the size of the artifact. It was very big. When I release it, I caught this error.
##vso[task.logissue type=error;]error: Failed Request: Bad Request(400) - The extension package size '69988355 bytes' exceeds the maximum package size '20971520 bytes'
Why! I try to experiment which part matters. I clone the repo on my Mac, I realized it.
 $ du -h node_modules/
         :
 22M node_modules//typescript
         :
 39M node_modules//typings
         :
 65M node_modules/
We need to remove typings and typescript package for the production. However, we need to compile ts files to js files. Ideally, if I can install tsc command with --global option, I can do it but it doesn't work. tsc 1.4.0 is already installed and it becomes valid. Also, I'd like to remove development dependency like mocha and chai, I decided to remove node_modules after the test, then re-install the npm packages. It might be best practice. If you know better idea, please let me know.
FYI: If I dont' install TypeScript and development dependencies, the effect is obvious.
 $ du -h node_modules/
       :
1.1M node_modules/
npm report (npm)
Display name: npm report
Command: custom
Command and arguments: run report
NOTE: this command compile ts file , unit testing, and reporting.
Delete files (npm)
Display name: Delete files from
Contents: node_modules
npm custom (npm)
Display name: npm custom
Command: custom
Command and arguments: install --production
NOTE: Install only production dependencies.
Publish Test Results and test-results.xml (Publish Test Results)
Display name: Publish Test Results and test-results.xml
Test result format: JUnit
Test results files: test-results.xml
Search folder: $(System.DefaultWorkingDirectory)
npm run deploy(npm)
Display name: npm run deploy
Command: custom
Command and arguments: run deploy
NOTE: This extension has 6 tasks. I need to copy js file and node_modules to each task directories.
2.3. Archive it!
At the first time, the CI build took 13+ min. Because of a big sized, and a lot of files. I archive it before the upload. then build time becomes 3 min. It is massive improvement. It also take a lot of time for release pipeline. Now, it is 2.3 min even if I enabled debugging option.
Archive files (Archive Files)
Display name: Archive files
Root folder(or file) to archive: $(System.DefaultWorkingDirectory)
Prefix root folder name to archive paths: true
Archive type: zip
Archive file to create: $(Build.ArtifactStagingDirectory)/$(Build.BuildId).zip
Replace existing archive: true
Publish Artifact: drop(Publish Build Artifacts)
Display name: Publish Artifact: drop
Path to publish: $(Build.ArtifactStagingDirectory)
Artifact name: drop
Artifact publish location : Visual Studio Team Services/TFS
2.4. Continuous Integration and Badge
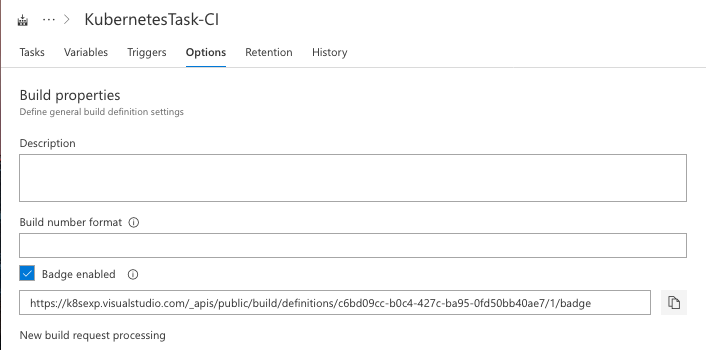
I checkout the source from GitHub. I wanted to have a badge for CI status. for enable it, you can refer this section.
Just add the URL on your README.md
3. Release pipeline, uninstall/re-install all tasks (Hosted Agent)
Now you are ready for Integration testing. I add one private Git repository on VSTS. It includes yaml file for testing kubernetes tasks.
3.1. Install
If you publish the extension, it will be valid for the all uses. I need to delete/install whole tasks only on this VSTS account. Simply I delete / add whole tasks. I use Hosted agent. (windows)
Extract files(Extract Files)
Display name: Extract files
Archive file patterns: *.zip
Destination folder: .
npm custom(npm)
Display name: npm custom
Command: custom
Working folder with package.json: s
Command and arguments: tfx-cli@v0.4.11 --global
NOTE: If you use Archive files task, it will be extracted "s" folder.
Delete apply task(Command Line)
Display name: Delete apply task
Tool: tfx
Arguments: build tasks delete -t YOUR_PERSONAL_ACCESS_TOKEN_HERE -u https://k8sexp.visualstudio.com/DefaultCollection --task-id 9bf07640-ed9b-11e6-8ac1-6b0636b1490f
NOTE: If you create an presonal access token, Please choose "All accessible accounts" for Account. The default value is only valid for the vsts account. Which means you can't right to deploy it into market place. 
Upload apply task(Command Line)
Display name: Upload apply task
Tool: tfx
Arguments: build tasks upload -t YOUR_PERSONAL_ACCESS_TOKEN_HERE -u https://k8sexp.visualstudio.com/DefaultCollection --task-path apply --overwrite
: continue the same settings.
3.2. Test
I use "Hosted Linux Preview". These tasks are only for Linux preview.
Then, you need to configure the connection string for AKS cluster, then you can any integration test you want using the tasks.
When you need any file for testing, you can include the private repo of VSTS.
3.3. Deploy
Extract files (Extract Files)
Display name: Extract files
Archive file patterns: *.zip
Destination folder: .
Install tfx-cli(npm)
Display name: Install tfx-cli
Command: custom
Command and arguments: install tfx-cli@v0.4.11 --global
Build vsix file(npm)
Display name: Build vsix file
Command: custom
Working folder with package.json: $(System.DefaultWorkingDirectory)/s
Command and arguments: run build
Publish VSTS Extension: $(System.DefaultWorkingDirectory)/s/*.vsix(Publish VSTS Extension)
Display name: Publish VSTS Extension: $(System.DefaultWorkingDirectory)/s/*.vsix
VSIX path: $(System.DefaultWorkingDirectory)/s/*.vsix
Service Endpoint: YOU_NEED_CONFIGURE_YOUR_ENDPOINT
Install Tfx-cli: true
Tfx Location: $(Agent.WorkFolder)\Tools
If you've got this error, please check the PAT is the "All accessible account"
##vso[task.logissue type=error;]error: Received response 401 (Not Authorized). Check that your personal access token is correct and hasn't expired.
Conclusion
Now it works. Next step is refactoring this CI/CD pipeline, also I'd like to enable Release note automation on GitHub.
Updated.


