31 Days of Servers in the Cloud – Creating Azure Virtual Machines with App Controller (Part 13 of 31)
As you know, if you’ve been following our series, “31 Days of Servers in the Cloud”, Windows Azure can become an extension of your datacenter, and allow you to run your servers in the cloud.
“We get it, Kevin.”
And you’ve seen excellent articles in this series already, describing how to use the Windows Azure portal to create your virtual machines, how to upload your own VM hard disks into the cloud and use them to build machines, and more. In today’s installment, I’m going to show you how easy it is to connect App Controller (a component of System Center 2012) to your Windows Azure account, and then how to use App Controller to create virtual machines in your Windows Azure cloud.
To do this, we need to have a few preliminaries in place:
- You have a Windows Azure subscription, and have requested the ability to preview the use of Windows Azure virtual machines. (If you don’t have an account, you can start a free 90-day trial HERE.)
- You have System Center 2012 App Controller installed. (Download the System Center 2012 Private Cloud evaluation software HERE.)
NOTE: You will need System Center 2012 SP1 App Controller, which at the time of this writing is available to TechNet and MSDN subscribers and volume license customers only; but will very soon be generally available. I will update this blog post as soon as that happens.
So, with nothing more assumed then just those basics, let’s walk through the following steps:
- Connect App Controller to your Windows Azure subscription (READ THIS POST for the instructions on how to do this.)
- Create a Storage Account in Windows Azure
- Use App Controller to create a new Virtual Machine
Assuming you’ve done part 1, and have your connection to your Windows Azure subscription set up in App Controller, let’s move on.
Create a Storage Account in Windows Azure
There are many ways to create a new storage account:
- I could use the Windows Azure administrative portal
- I could use PowerShell for Windows Azure and the New-AzureStorageAccount cmdlet
- Or I could do it using App Controller.
For our purposes, let’s use App Controller.
Open App Controller and login as your administrative account. On the left, select Library.
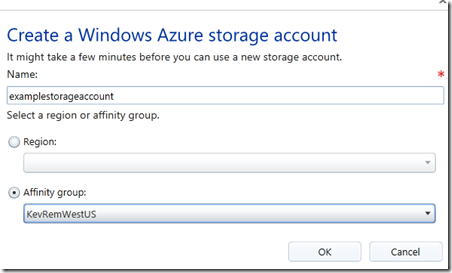
Click Create Storage Account. Give your storage account a name, and choose a region or an affinity group.
Click OK. You should see something that looks like this at the bottom-right of the browser window:
After a few minutes, a refresh of the Library page should show you that you now have your new storage account available.
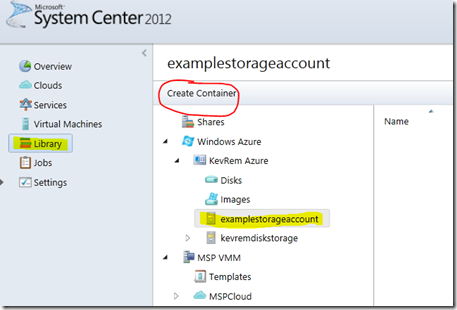
Now we need to create a container to hold our machine disk(s). With your new storage account selected, Click Create Container.
Give your container a name and click OK.
In a very short while, you’ll see your new container.
Now we’re ready to create virtual machines.
Use App Controller to create a new Virtual Machine
Open App Controller and login as your administrative account.
On the left, select Virtual Machines. This is where we can see, manage, and create new virtual machine and service deployments. (If you’re doing this for the first time, you won’t see items in your list here just yet.)
Click Deploy. The New Deployment window opens up.
Under Cloud, click Configure…, then select your Windows Azure connection as the cloud into which you’re going to deploy your new virtual machine.
(Note: In my App Controller, I’ve also connected to a local VMM Server, which is why I see this other cloud in my list.)
Click OK.
Now you will see this:
Click Select an Item… under Deployment Type. Now you’ll see a screen that looks something like this:
This is where you can choose to build a new machine or service based on existing, provided images, or images or disks you’ve uploaded into your own Windows Azure storage. In this example, I’m going to select Images on the left, and choose to build a new Windows Server 2012 machine using the provided image.
Once I click OK, I now see this:
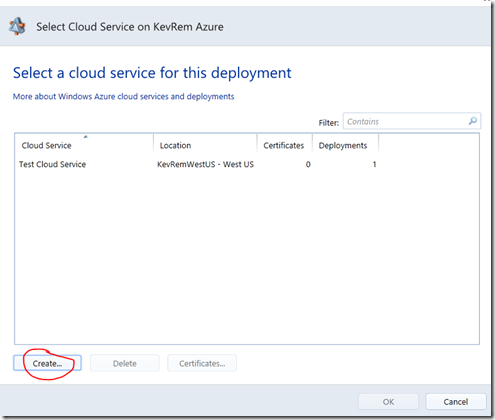
So the next thing I need to do is click Configure… under Cloud Service. Virtual machines and services all run in the context of cloud services. For our example, we’re going to assume that you haven’t created any machines or other items that requires a service, so your list is going to be empty. You’ll use this screen to create and then select your new service.
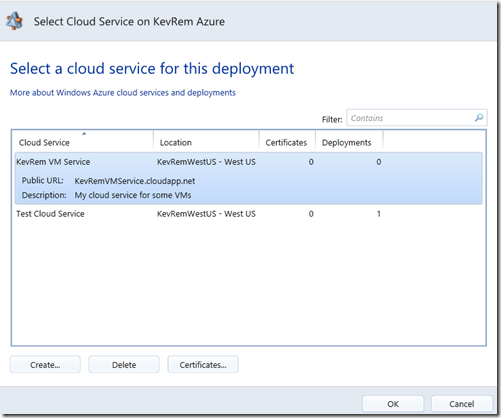
Click Create… and then fill in cloud service details (Name, Description) and the cloud service location (a unique public URL, plus a geographic region or affinity group).
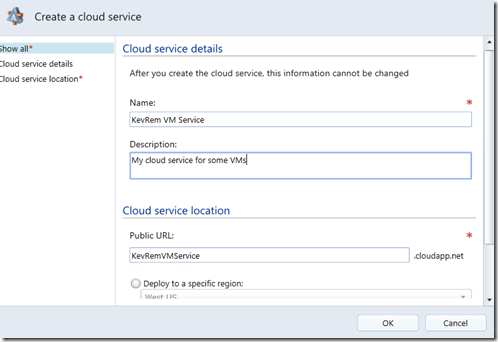 Click OK, and then select your new service and click OK again.
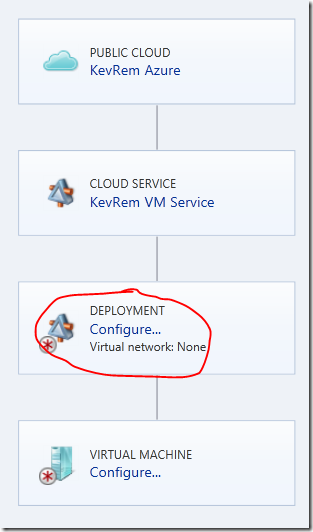
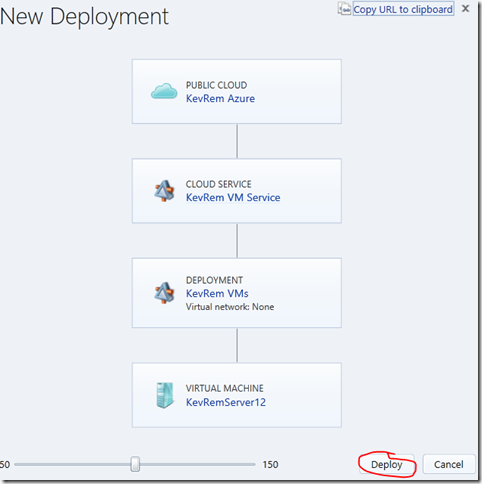
Next we need to configure the deployment:
Click Configure… under Deployment. Now you’ll see this:
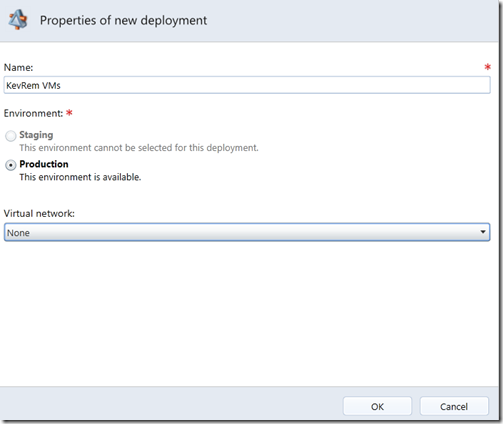
Enter a deployment name, and optionally associate your machine with a virtual network if you have one. (If you don’t have, or don’t select a network, you will be creating the machine and service to handle networking within the service automatically.) Click OK.
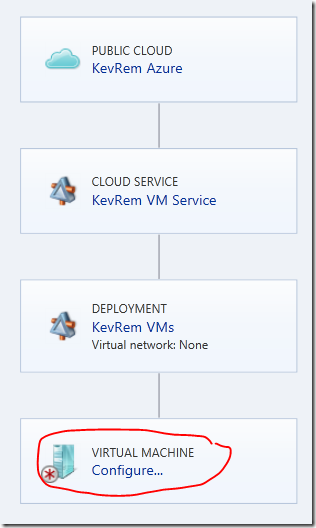
Now it’s time to configure the virtual machine itself.
Click Configure… under Virtual Machine.
Now we set the general properties…
Note: an Availability Set is not required, but a new one can be created or an existing one selected from here.
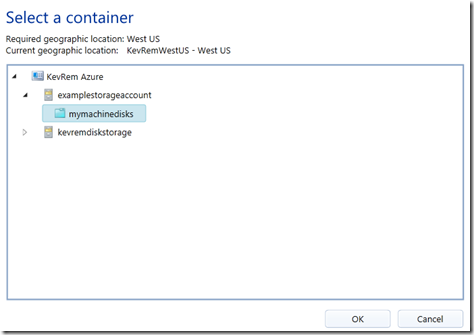
Set the Disks…
When I click Browse… , I’m given the ability to choose the location for my disks in Windows Azure storage, as well as to add (or create) additional data disks for this machine. For our example let’s use the storage account and container we created earlier. I won’t be adding any data disks.
For the Network…
…I’ll just leave the default. I could use this opportunity to define additional endpoints for connections to services on this machine, or I could do it later.
For Administrator password…
…enter a password for the local administrator account. (It also looks like you can use this to assign the computer to a domain if you happen to have a domain controller in the same network or service. I haven’t yet tried, this, so I can’t comment further.)
Click OK.
And now click Deploy.
You’ll see a notification towards the bottom right that should look something like this:
And after several minutes, looking in the Virtual Machines area of App Controller, you will see your new machine appear. Its status will change to “provisioning”, and eventually “running”.
Notice also that if you select your new machine, you also have the option now to connect to it via Remote Desktop! (Cool!) Log in as the Administrator with the administrator password you assigned, and you’re in!
Naturally, you can very easily use App Controller to delete your machines, disks, storage containers, and storage accounts, too. (Remember to do that when you’re done. Even if a machine isn’t running, you’re still being billed for it and for the storage being used!)
---
Useful stuff? I hope so. Let me know in the comments if you have any questions or… comments. ![]()
And if you missed any of the other parts of our series, you can find the entire list HERE.
Comments
Anonymous
April 12, 2013
Is one also able to add disks when using an on premise private cloud...I seem to be missing that option. Is there perhaps a workaround?Anonymous
April 12, 2013
Hmm.. good question, CypherBit. I don't see that, either. I'm wondering if the assumption is that, because there are other options (VMM or Hyper-V Manager) to do this locally that aren't available for cloud based servers, that we didn't bother putting it into App Controller. But honestly, I'm with you. I think it should be there, too.

