How To: Azure WebJob calling a Web Page using Powershell
Overview
Just a quicky post to get you started on how to use CRON expressions and Powershell to call a web page from a WebJob. There are many different ways to use Azure WebJobs and this is using a Powershell script to call an endpoint and scheduling this using CRON.
Steps
Create a Powershell script file that does what you want and test it locally
Start by using the Powershell ISE to develop your script. It is easier to debug and you can be assured of the results of running your script. Ref: Introducing the Windows PowerShell ISE
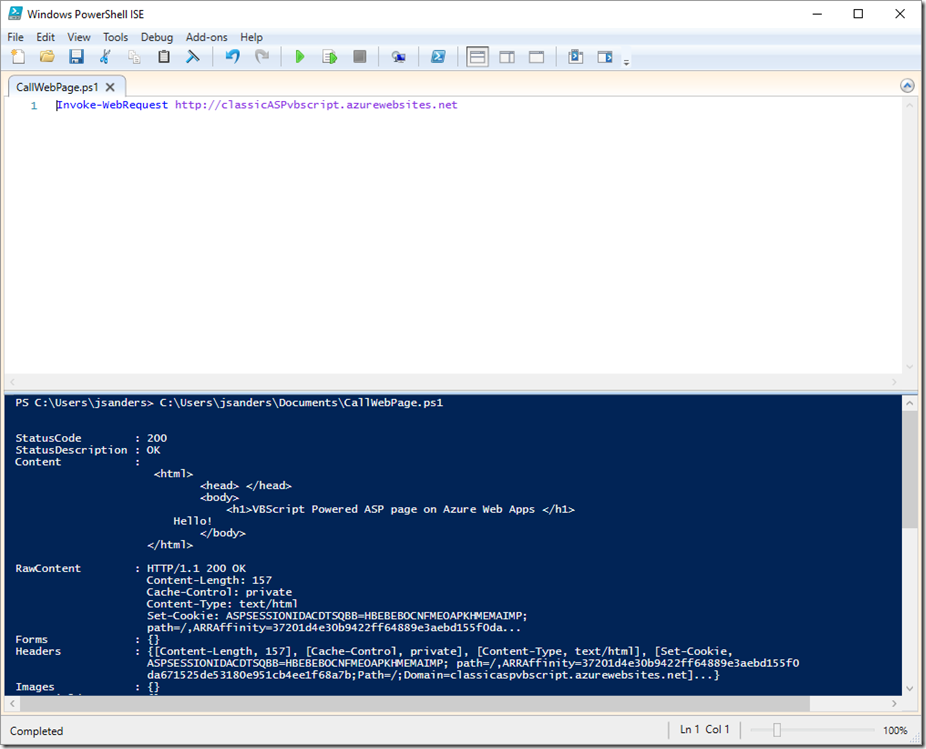
Here is a super simple script that simply calls an HTTP endpoint. This endpoint in turn will do some processing for me. I don’t care about the return value, just if it is successfully called or not (which the WebJob logs will show) but you could extend this to get a return value and do something else with that return value. In general, WebJobs are designed to just execute and either succeed or fail so this works well. In this case you can see the call returned the HTTP Status 200 indicating success:
You can see that I tested it here in the ISE. I saved the file in my Documents directory with the name: CallWebPage.ps1
More info: You can do more powerful things with Invoke-WebRequest and this documentation will help you out: Invoke-WebRequest . Here is a more complete sample:
$ProgressPreference="SilentlyContinue"
try {
$Res = Invoke-WebRequest https://classicASPvbscript.azurewebsites.net -UseBasicParsing
$Res.StatusCode
}
catch {
$ErrorMessage = $_.Exception.Message
$ErrorMessage
Exit 1
}
Upload the working file as a WebJob using the Azure Portal
Now that I verified this file does what I want, I can create a WebJob to host it! You do not want to call the target site in a WebJob hosted on that same site (for various reasons) unless this is not called frequently and no other calls are coming to the target site. This is not efficient (just put the code in the WebJob by golly) and could create more traffic to the target site. I am creating an Azure Web App just to call the WebJob and putting it in a basic plan so I can enable Always On. I enable Always On (Set in App Settings) because I want to use a CRON expression and this is a requirement (see https://blog.amitapple.com/post/2015/06/scheduling-azure-webjobs/ ).
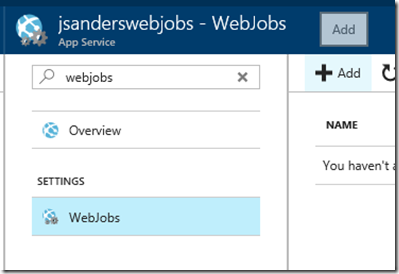
Next, go to the app in the portal and create a WebJob by choosing Add:
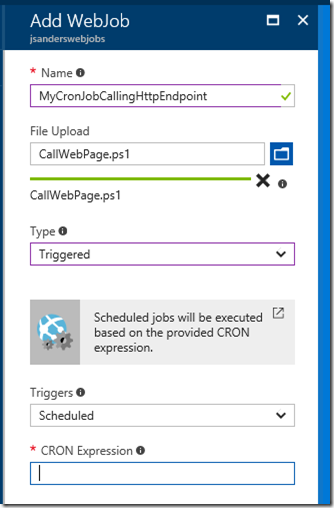
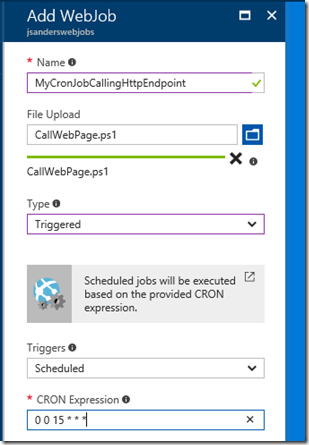
Give it a name, upload you powershell script file, change the type to Triggered and set the Triggers to Scheduled:
Finally, define the CRON expression to kick off this job when ever you want this to execute. CRON expressions trip everyone up. First CRON is based on the Server Time Zone which is UTC and so if you want to run at 10:50 AM My time zone, you may get confused. Second, although standard, many of us mere mortals don’t know how to translate them.
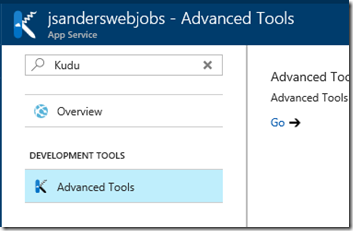
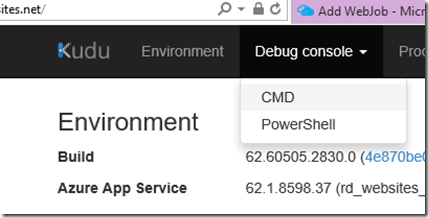
First: UTC issue. I find it easiest to go to the Kudo console of the app and see what time it is now (which by default is UTC). To go to Kudu you can find this in the portal it is in Advanced Tools and hit the go link (I just type Kudu in search):
Then go to the Debug console, CMD menu and select it:
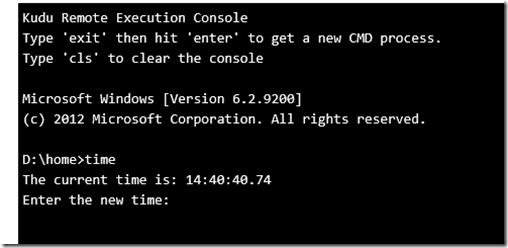
Then type: time in the command window. Since I am testing this I will set my CRON expression to 15:00 just a few minutes from now.
Second: The Expression issue. The simplest CRON expression is based on a 6 position pattern of sec min hour * * * which will kick off the job at the specified time each day. Here are a couple of references to help you with: https://blog.amitapple.com/post/2015/06/scheduling-azure-webjobs/ (See CRON Expressions). You can find some more cron expression samples here but note that they have 5 fields, to use them you should add a 0 as the first field (for the seconds).
Looking back at the reference the syntax will be: 0 0 15 * * *
Once I hit OK it takes some time for the Job to show up in the Portal. Give it about 30 seconds and hit the Refresh Icon to see the Job:
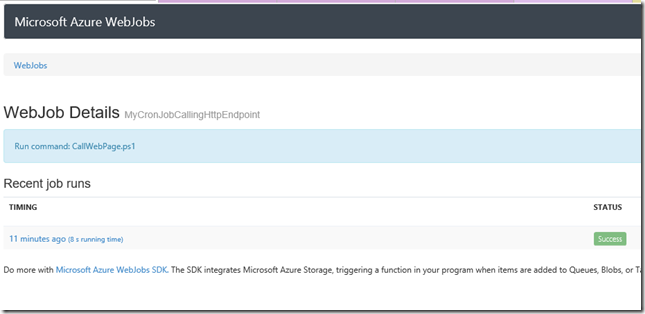
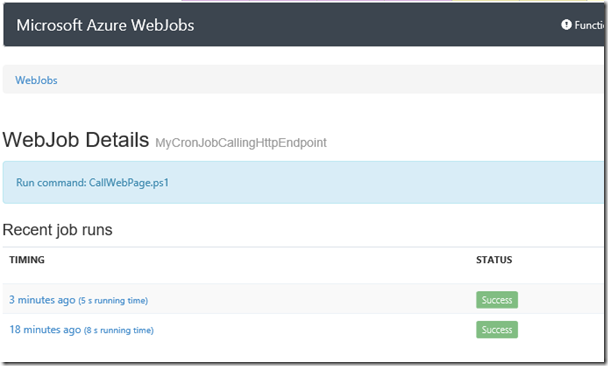
Finally hit the Logs icon and wait for the Job to succeed:
Modify the CRON expression (optional)
If you wish to change the CRON expression you can delete and recreate the WebJob. I found a better way to do this is to edit the Settings File using the App Service Editor however.
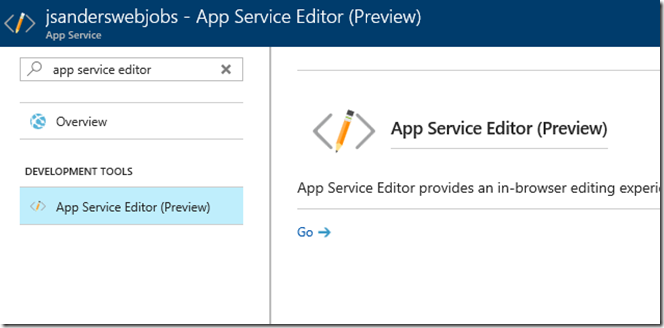
Bring up the App Service Editor from the portal (hit the Go link):
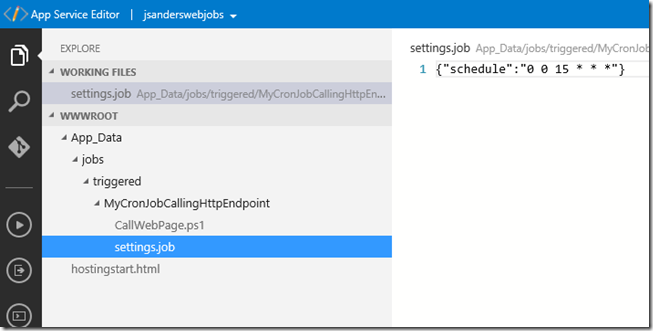
Navigate to your triggered web job (will be WWWROOT\App_Data\jobs\triggered\<Name of your WebJob here> ) and clicking on the settings.job file:
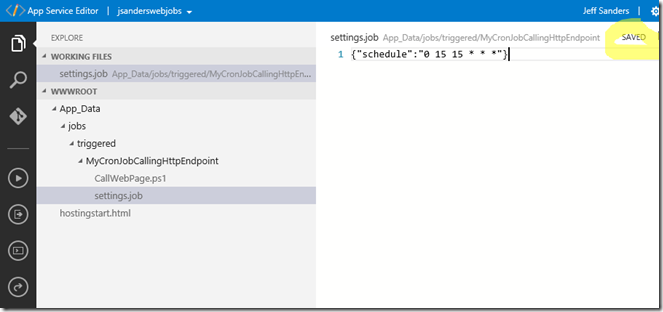
Edit the CRON expression in the schedule item of the json text. In this case I am changing it to quarter past 3PM UTC):
The change will be automatically saved and will run at that time:
Conclusion
This is just a quick start for you to follow. Obviously you can do much more with Scheduled jobs and other options are Triggered WebJobs and Function Apps.
If you did find this helpful, please drop me a note!
References
https://blog.amitapple.com/post/74215124623/deploy-azure-webjobs/
https://blog.amitapple.com/post/2015/06/scheduling-azure-webjobs/
https://docs.microsoft.com/en-us/azure/app-service-web/web-sites-create-web-jobs
