Tip/Trick: Embedding ActiveX in WPF with WindowsFormsHost (Video Demo)
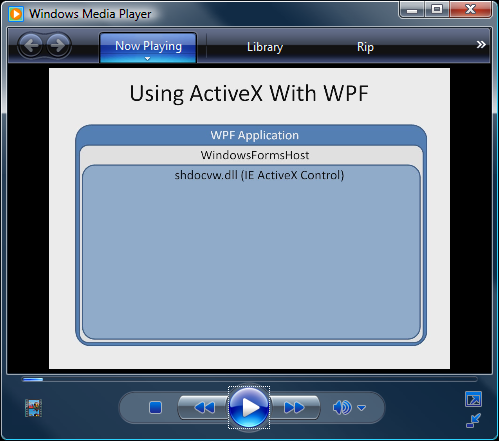
I was looking for instructions on how to embed ActiveX in a WPF application and didn’t find a ton of stuff out there. After getting my demo working, I decided to record it and post it here for anyone else trying to make this work. In my example, I created a WPF “Browser” that embeds the IE control (shdocvw.dll) and uses WPF for the outer control. I will be using this sample application in my next video.
The basic instructions for getting this working are as follows:
1. Create a WPF application shell (I used Visual Studio “Orcas” Beta 1)
2. Create a Windows Forms Control assembly with the ActiveX content
3. Use the WindowsFormsHost class to embed the Windows Forms Control into the WPF application
The code is pretty straightforward for this. The following is the XAML for the application:
<Window x:Class="WPFApplication5.Window1"
xmlns="https://schemas.microsoft.com/winfx/2006/xaml/presentation"
xmlns:x="https://schemas.microsoft.com/winfx/2006/xaml"
Title="Window1" Height="300" Width="800">
<Grid x:Name="_Grid">
<Canvas Height="32" Name="_ControlCanvas" VerticalAlignment="Top" >
<TextBlock HorizontalAlignment="Left" Margin="20,8,0,0" VerticalAlignment="Top" Width="25" Height="20" Text="url:" TextWrapping="Wrap"/>
<TextBox Height="20" x:Name="_UrlTextBox" VerticalAlignment="Top" Width="580" Canvas.Left="78" Canvas.Top="8" />
<Button Height="20" HorizontalAlignment="Right" x:Name="_GoButton" VerticalAlignment="Top" Width="28" Content="go!" Canvas.Left="684" Canvas.Top="8">
</Button>
</Canvas>
</Grid>
</Window>
This markup creates a Canvas for the URL text box and Go button at the top of the application. It leaves room for the browser portion to be added later. The next step is to create the Windows Forms Control. This control is super easy to create, just drag a WebBrowser control wrapper onto the form itself. In my sample I’ve added one new public method to allow the URL to be set. The entire code for the control then winds up as follows:
namespace BrowserControl
{
public partial class UserControl1 : UserControl
{
public UserControl1()
{
InitializeComponent();
}
public void SetUrl(string url)
{
this.webBrowser1.Url = new Uri(url);
}
}
}
The final step is to create add the WindowsFormsHost control into the WPF element tree. The code then adds a Click handler for the “Go!” button so that we can set the URL of the browser control to the text value the user has typed into the address text box. The entire code for the WPF application then winds up as follows:
using System;
using System.Collections;
using System.Collections.Generic;
using System.Linq;
using System.Text;
using System.Windows;
using System.Windows.Controls;
using System.Windows.Data;
using System.Windows.Documents;
using System.Windows.Input;
using System.Windows.Shapes;
using System.Windows.Media;
using System.Windows.Media.Imaging;
using System.Windows.Navigation;
using System.Windows.Forms.Integration;
namespace WPFApplication5
{
public partial class Window1 : Window
{
BrowserControl.UserControl1 _Browser;
public Window1()
{
InitializeComponent();
WindowsFormsHost host = new WindowsFormsHost();
_Browser = new BrowserControl.UserControl1();
host.Child = _Browser;
host.Margin = new Thickness(0, 35, 0, 0);
this._Grid.Children.Add(host);
this._GoButton.Click += new RoutedEventHandler(_GoButton_Click);
}
void _GoButton_Click(object sender, RoutedEventArgs e)
{
_Browser.SetUrl(this._UrlTextBox.Text);
}
}
}
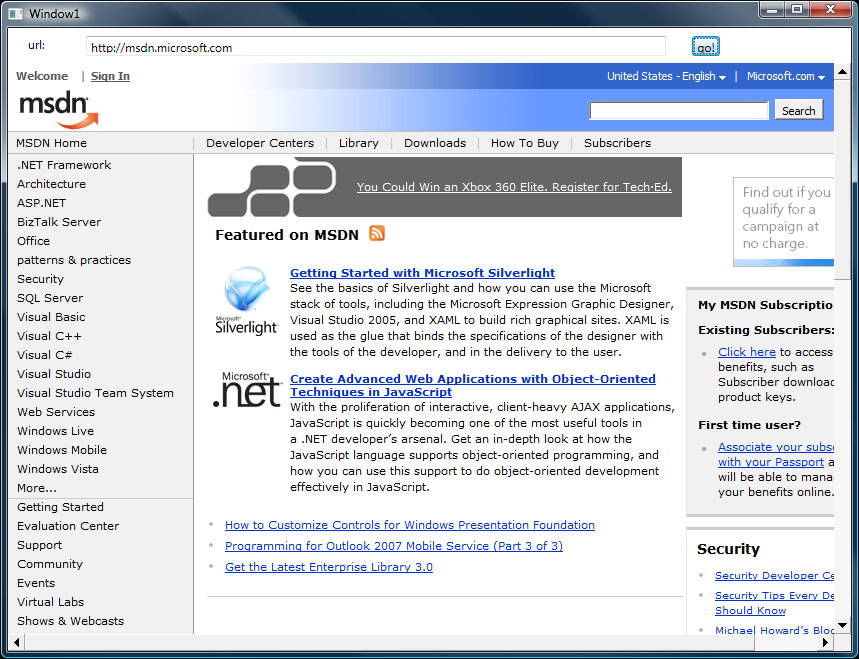
Now when you run the application, you get the following:

That’s all there is to it! I hope you find this sample useful. Next up I'm going to use the sample to talk about CLR versions now that we have Silverlight available.
Comments
Anonymous
May 07, 2007
PingBack from http://testsubdomain.netmoviehost.com/tiptrick-embedding-activex-in-wpf-with-windowsformshost-video-demo/Anonymous
May 08, 2007
Jason Zander's WebLog : Tip/Trick: Embed...Anonymous
May 10, 2007
When we started working on managed code for Silverlight one scenario I wanted to see working was theAnonymous
May 11, 2007
Simon Munzio and team just published http://www.windowsclient.net which is full of great information on how to write client code. Included in this is a lot of tutorials around WPF/WinForms interop (http://windowsclient.net/learn/integration.aspx).
