Determining Caller Identity within a WCF Web Service
This post is the second in a series of upcoming MSDN articles. It builds on the web service that was built in Getting Started Building a WCF Web Service, which shows how to create a very simple web service using Windows Communications Foundation (WCF) and host it using Internet Information Services (IIS). To follow the procedure in this post, you must first complete the procedures in that post.
This blog is inactive.
New blog: EricWhite.com/blog
Blog TOCThe subject of the series is creating a claims-aware web service and consuming it from SharePoint Business Connectivity Services (BCS).
In this article, I’m going to add some Windows Identity Framework (WIF) capabilities to the web service that we built, so that the web service can report on the identity of the caller of the web service.
Shows how to create a very simple web service using WCF. Shows how to host this web service using IIS. |
|
Determining Caller Identity within a WCF Web Service (This post) |
Enhances the example so that the Web service can authoritatively report on the identity of its caller. |
Establishing Trust between a WCF Web Service and the SharePoint 2010 Security Token Service |
Configures the example developed in the previous article so that it uses a self-signed certificate to support a secure connection. |
Consuming a Claims-Enabled WCF Web Service as an SharePoint 2010 External Content Type |
Walks through the procedure for consuming a claims-enabled web service as a SharePoint 2010 External Content Type. |
These articles were written by Saji Varkey, and Bin Zhang, and me. They will be published on MSDN sometime in the near future. After they are published, I will update these posts to point to the MSDN articles. Juan Balmori Labra was the program manager behind these articles.
Building the Example
1. The first step is to download and install Windows Identity Foundation. Install WIF on the same computer where you built the WCF Web service.
2. To build the Web service, open the project that you created in the first article in the series, Getting Started Building a WCF Web Service.
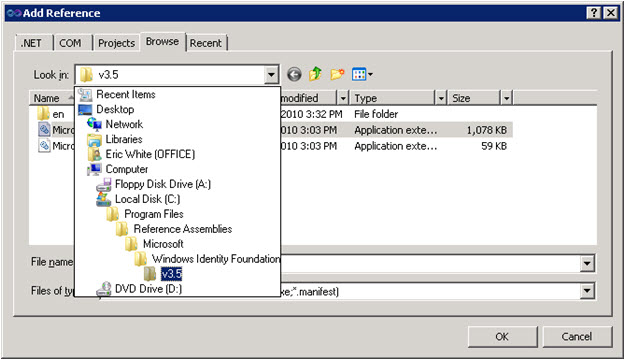
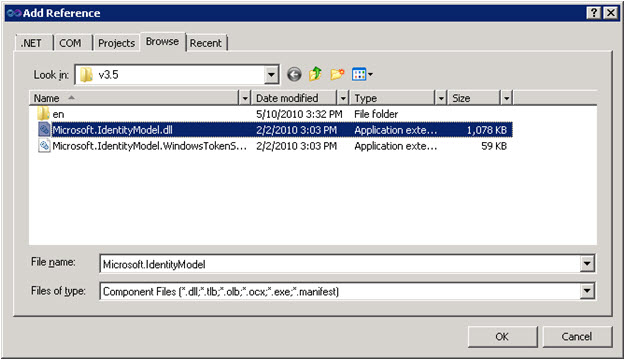
3. Add a reference to the Microsoft.IdentityModel assembly. In Visual Studio, click Project => Add Reference. Click the Browse tab. Browse to:
%ProgramFiles%\Reference Assemblies\Microsoft\Windows Identity Foundation\v3.5

4. Select Microsoft.IdentityModel.dll, and click OK.

5. Replace the contents of Customers.svc.cs with the following code.
using System;
using System.Collections.Generic;
using System.IO;
using System.Linq;
using Microsoft.IdentityModel.Claims;
namespace CustomersService
{
public class Customers : ICustomers
{
private const string IdentityClaimType = @"https://schemas.microsoft.com/sharepoint/2009/08/claims/userid";
private string GetIdentity()
{
string identityName = String.Empty;
IClaimsIdentity claimsIdentity = System.Threading.Thread.CurrentPrincipal.Identity as IClaimsIdentity;
if (claimsIdentity != null)
{
// claim
foreach (Claim claim in claimsIdentity.Claims)
{
if (String.Equals(IdentityClaimType, claim.ClaimType, StringComparison.OrdinalIgnoreCase))
{
identityName = claim.Value;
break;
}
}
}
else
{
identityName = System.Threading.Thread.CurrentPrincipal.Identity.Name;
}
return identityName;
}
// Finder
public List<Customer> GetAllCustomers()
{
string id = GetIdentity();
File.AppendAllText(@"C:\MyWebService\log.txt", string.Format("GetAllCustomers: Identity: {0}", id) + Environment.NewLine);
return new List<Customer>()
{
new Customer
{
CustomerID = 1,
CustomerName = "Bob",
},
new Customer
{
CustomerID = 2,
CustomerName = "Bill",
},
new Customer
{
CustomerID = 3,
CustomerName = "Cheryl",
},
};
}
// Specific finder
public Customer GetCustomerByID(int CustomerID)
{
string id = GetIdentity();
File.AppendAllText(@"C:\MyWebService\log.txt", string.Format("GetCustomerByID: Identity: {0}", id) + Environment.NewLine);
return GetAllCustomers().FirstOrDefault(c => c.CustomerID == CustomerID);
}
}
}
6. Rebuild the application. Because it is hosted using IIS, we don’t need to do anything for the rebuilt service to be active.
7. Use wcftestclient to exercise the web service.
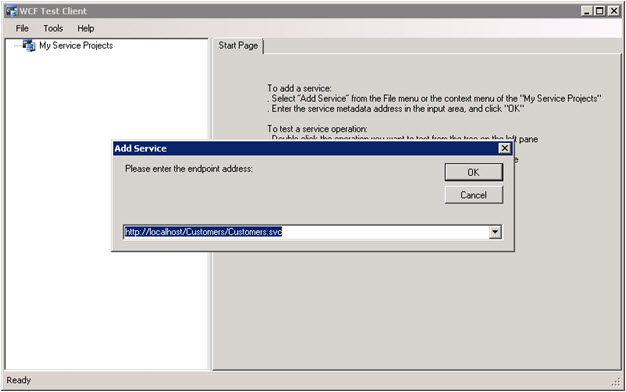
Start a Visual Studio command prompt. Enter wcftestclient to run the WCF test client. Click File => Add Service. Enter https://localhost/Customers/Customers.svc as the endpoint address, and click OK.

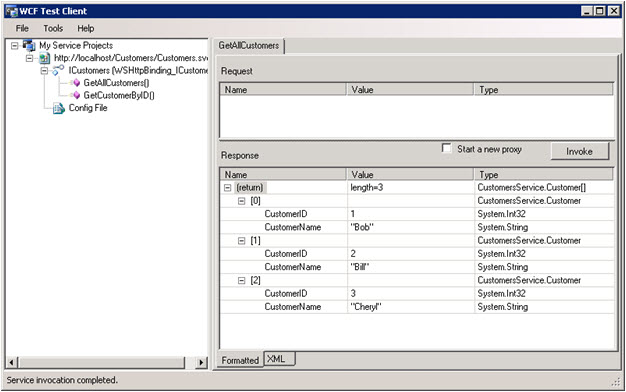
If the service was added successfully, you will see the methods that the service exposes.

Double-click on GetAllCustomers. This opens a window that allows you to configure the request and invoke the request. Click on Invoke to cause GetAllCustomers to be invoked.

After invoking the Web service, browse to C:\MyWebService, and examine log.txt. The log file will look something like this:
GetAllCustomers: Identity: CONTOSO\ericwhite
In the next article in the series, we will use Business Connectivity Services (BCS) to connect to and consume this web service.
Comments
Anonymous
June 06, 2010
Hi, I have a question, Can I host this service with SharePoint 2010 's web application under _vti_bin? thanksAnonymous
June 18, 2010
Hi Pathik, I believe that this is possible, but I've never done it. -Eric