HowTo Get the Raw LDAP Query from SharePoint’s User Profile Import
**WARNING: This article discusses modifications to default settings for your SharePoint installation. Please understand completely the steps you are taking and the risks to your farm before proceeding. MIISClient can be a useful tool for monitoring user profile synchronization, but it is unsupported to make changes using the tool. See Support for modifications to the user profile configuration settings via the FIM Client (MIISClient.exe) that ships with SharePoint. WARNING**
An issue came up the other day with one of our customer’s where we felt like we needed to compare the LDAP query being executed from two different SharePoint farms in order to troubleshoot a User Profile Import challenge. There are a variety of methods of troubleshooting User Profile Import, but there appears to be no way to actually get the raw LDAP query. So of course we reach for our nearest and most familiar network tracing tool.
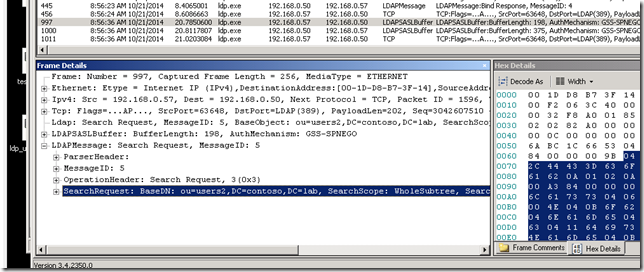
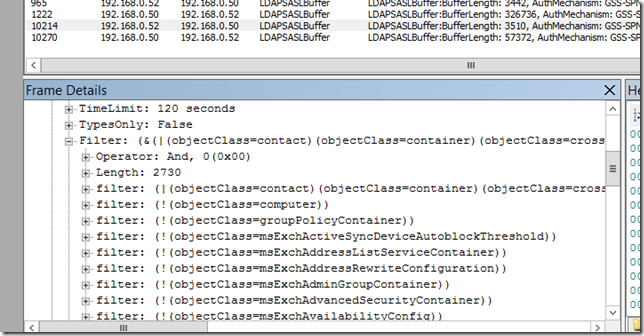
In my case, that is Network Monitor… (other options include, but are not limited to Message Analyzer and Wireshark). I will not go into detail about how to capture a network trace in this blog, but if anyone wants a step-by-step on this we could make that a new post or we can refer you to other, existing content. However, after setting up the tool and capturing the User Profile Import we noticed that the LDAP traffic appears to be encrypted as seen here:
For comparison I’ve included what an unencrypted trace from LDP.exe would look like as well:
So what you see in the screenshot of the User Profile Import is encryption provided by Active Directory called LDAPSASL. This is all enabled by default through AD and the Forefront Synchronization Service Manager – which, of course, SharePoint uses for these types of User Profile Imports.
There are a couple of steps to unencrypt this traffic. First you must open the FIM Client, Miisclient.exe, which by default lives here: "C:\Program Files\Microsoft Office Servers\14.0\Synchronization Service\UIShell\miisclient.exe". I normally perform a runas using my synchronization account in order to make sure that I have the appropriate rights.
Click on the ‘Management Agents’ tab.
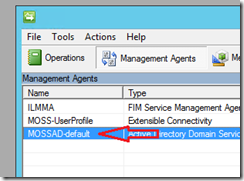
Double-click on the Management Agent that represents your sync connection. In my case, it’s named ‘MOSSAD-default’ because my sync connection is named ‘default’.
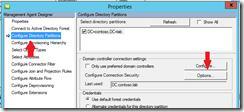
Click on Connect to Active Directory Forest, then click on the Options button.
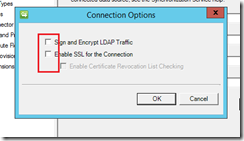
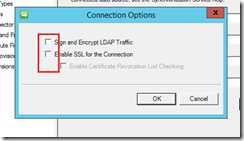
Click to deselect the ‘Sign and Encrypt LDAP Traffic’ and verify that ‘Enable SSL for the Connection’ is also deselected, then click OK.
At this point you will need to provide AD credentials so enter credentials for a Domain Admin here. Now click on ‘Configure Directory Partitions’ and click the Options button next to ‘Configure Connection Security’.
Deselect both ‘Sign and Encrypt LDAP Traffic’ and ‘Enable SSL for the Connection’ and click OK.
Click OK to exit and Management Agent Properties dialog.
At this point, the next Import should be unencrypted; however, that’s not all there is to getting a good clean trace of the LDAP query. From here I’ll focus on Network Monitor, but my assumption is that any decent network capturing tool will have similar functionality. So capture a network trace of the next import and save it … you can manually run an import either directly through the FIM client by running the DS_FULLIMPORT stage of the Management Agent, or by starting a User Profile Import through Central Administration.
Now that you have the trace, open the saved file in Network Monitor – this is important as you will not get the necessary options if you attempt to do this on a live trace window. Set a display filter for ‘tcp.port==389’. This is the default non-SSL port for LDAP. You will noticed that it looks a bit different from the encrypted sample above.
If you click around on the different frames you will notice that some of the LDAP information has now been parsed and viewable in the ‘Frame Details’ window. However there are a lot of TCP frames that were not parsed as LDAP. These are continuations of previous frames and need to be re-assembled with the rest of the request/response frames.
Click the Frames menu and click ‘Reassemble all frames’.
This will open a new window with the frames of the trace reassembled. In this new window, create a display filter like this:
PayloadHeader.LowerProtocol.TCPProperties.DestinationPort == 389 or PayloadHeader.LowerProtocol.TCPProperties.SourcePort == 389
Now the number of frames should be drastically reduced, but you should be able to see the entire LDAP request/response in the ‘Frame Details’ window.
As with most of my posts, I don’t very often find this information in a vacuum. Two of my peers have been instrumental with their assistance:
Chad Ray – Chad is a fellow SharePoint PFE who actually found the Miisclient settings to disable encryption.
Lex Thomas – Lex is a long time Microsoft employee and huge advocate of doing what’s right for customers. He loves reading and analyzing network traces and it was he that showed me the functions of re-assembling the frames to get the LDAP goodness out of them.

