How to deploy an ASP.NET Core 1.1 application to an Azure App Services Web App using Visual Studio 2017
If you received a 404 after deploying your ASP.NET Core 1.1 application, see the end of this article in section “404 when accessing ASP.NET Core 1.1” do find out a solution and the reason.
The deployment of an ASP.NET Core 1.1 Web API or Web Application is achievable following these steps:
- Create the Solution / Projects
- Click the publish button
- Install Cloud Explorer and/or configure your Azure Subscriptions
- Create the Azure App Service
- Deploy to the Azure App Service
- 404 when accessing ASP.NET Core 1.1
Nothing overly complex with this one, let’s get started.
Create the Solution / Projects
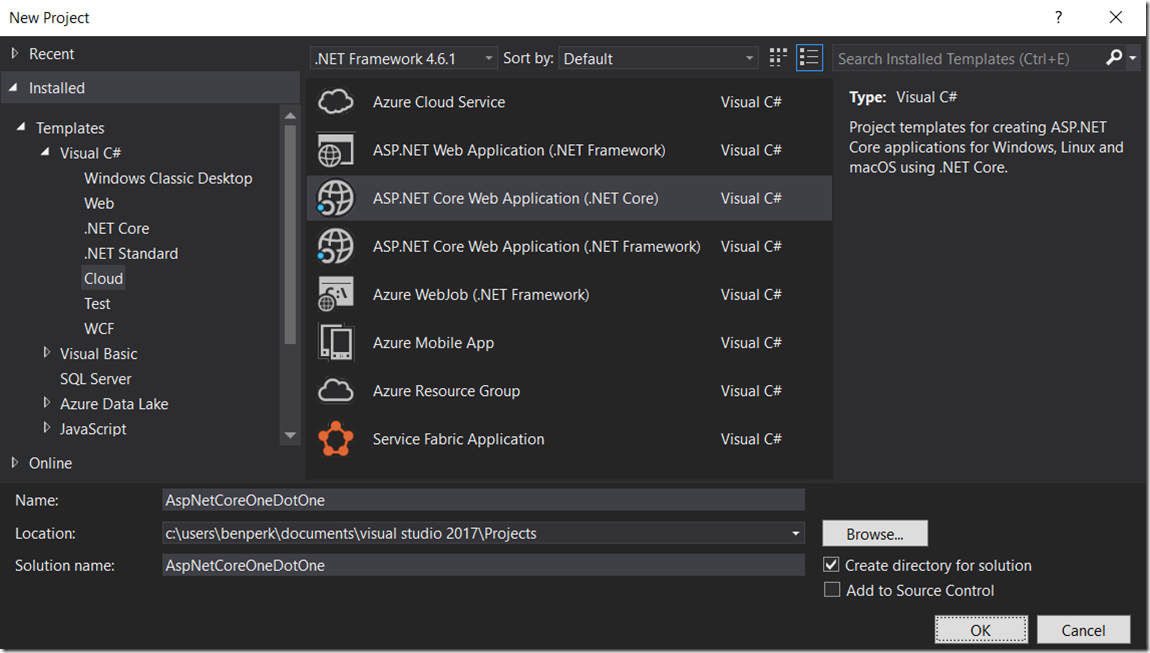
Open Visual Studio 2017, I am using Community, and select the ASP.NET Core Web Application (.NET Core) from the Visual C# Cloud templates, as shown in Figure 1.
Figure 1, Deploy an ASP.NET Core 1.1 web api web application to the cloud
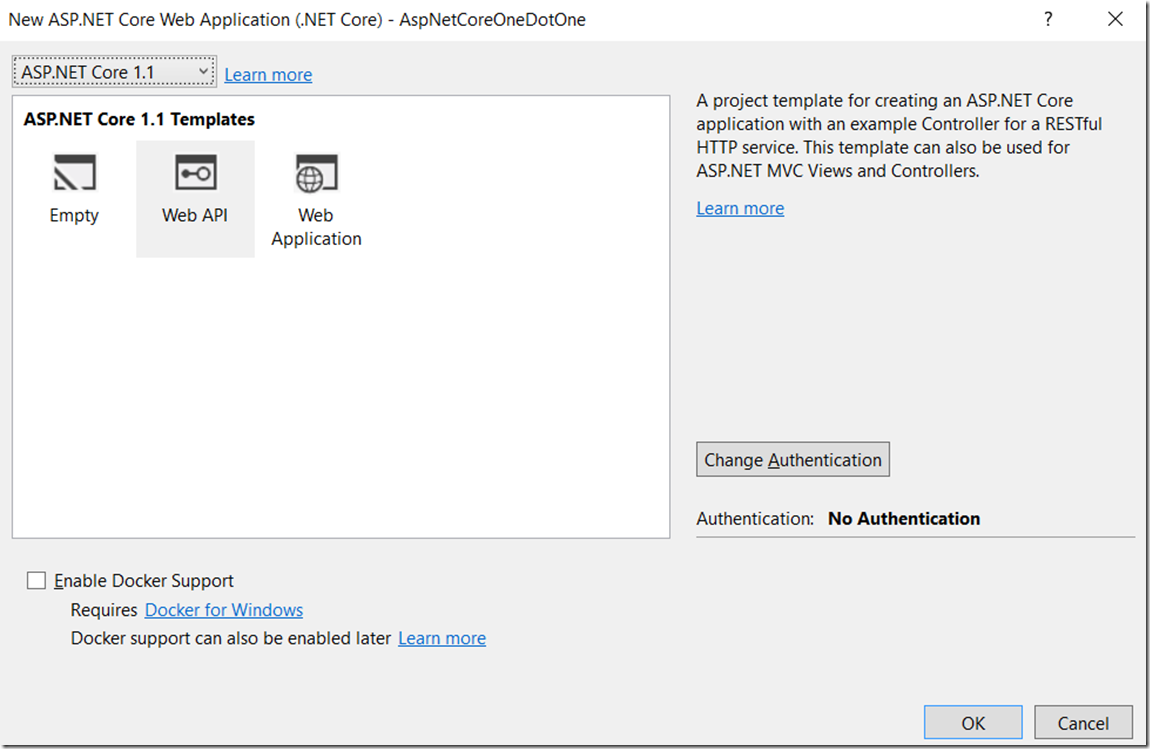
Select either Web API or Web Application as shown in Figure 2 and 3. Also make sure to select ASP.NET Core 1.1 from the drop down.
Figure 2, create and deploy an ASP.NET Core 1.1 Web API to Azure 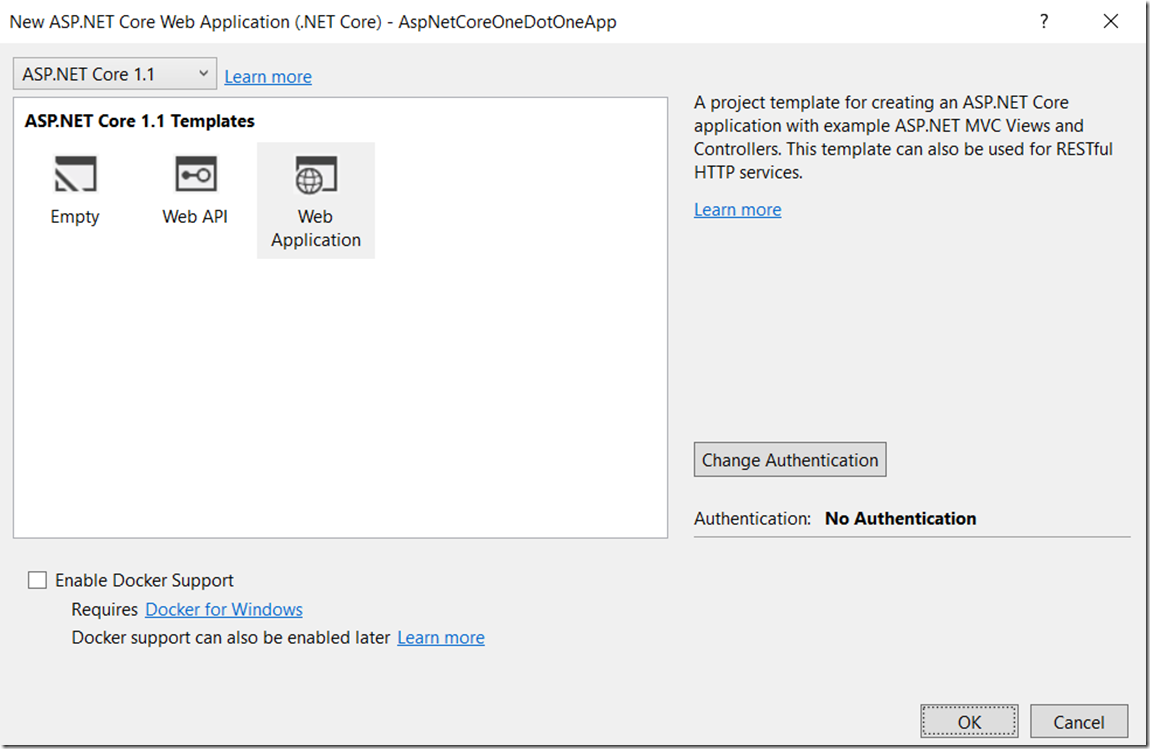
Figure 3, create and deploy an ASP.NET Core 1.1 Web Application to Azure
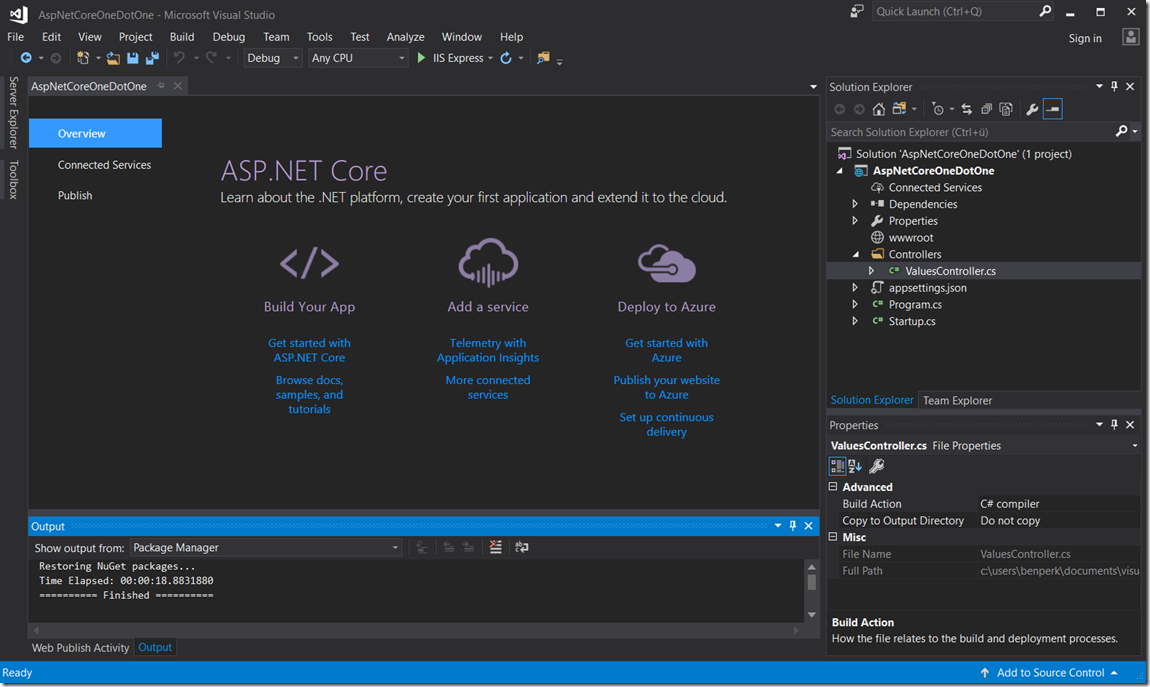
Once created you will see the Solution, similar to that in Figure 4.
Figure 4, create and deploy an ASP.NET Core 1.1 solution
Click the publish button
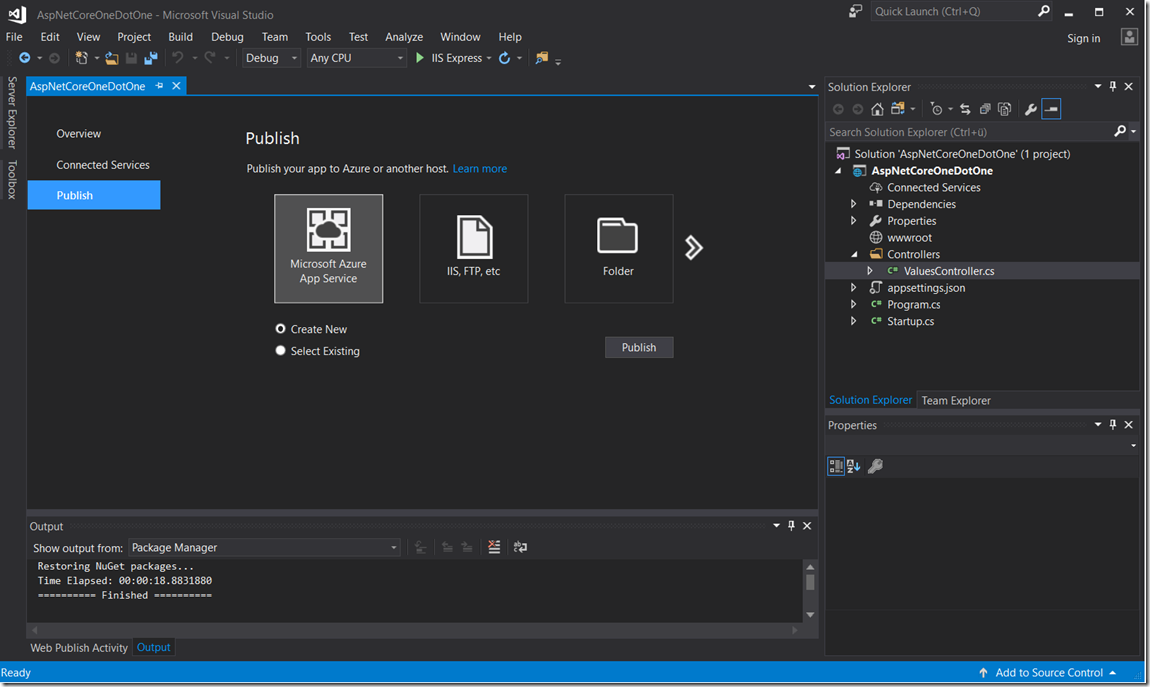
Click on the Publish tab as shown in Figure 5, select Microsoft Azure App Service then the Create New radio button, or if you already have one, give the Select Existing radio button focus and press the Publish button.
Figure 5, deploy publish an ASP.NET Core 1.1 solution to an Azure App Service Web App
Install Cloud Explorer and/or configure your Azure Subscriptions
If you have not already enabled or configured your Azure Subscription then you will need to walk through that. I installed Cloud Explorer from the Tools –> Extensions and Updates menu item to do that. Then I added my subscriptions within Cloud Explorer, as shown in Figure 6.
Figure 6, install Cloud Explorer in Visual Studio 2017
Create the Azure App Service
Choose a name, the subscription, the Resource Group and the App Service Plan to deploy the ASP.NET Core 1.1 Web API or Web Application to. As seen in Figure 7 and 8, one for the ASP.NET Core 1.1 Web API and another for the ASP.NET Core 1.1 Web Application.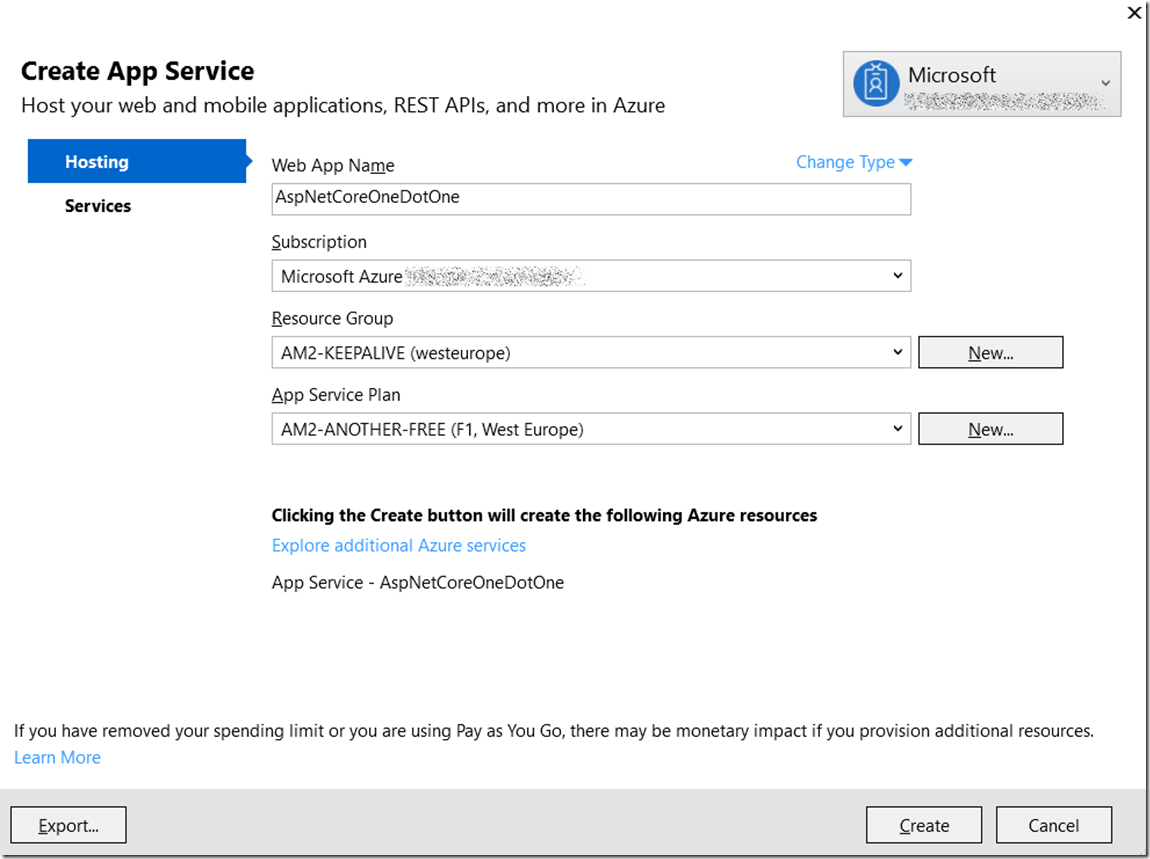
Figure 7, deploy an ASP.NET Core 1.1 Web API to an Azure App Service Web App 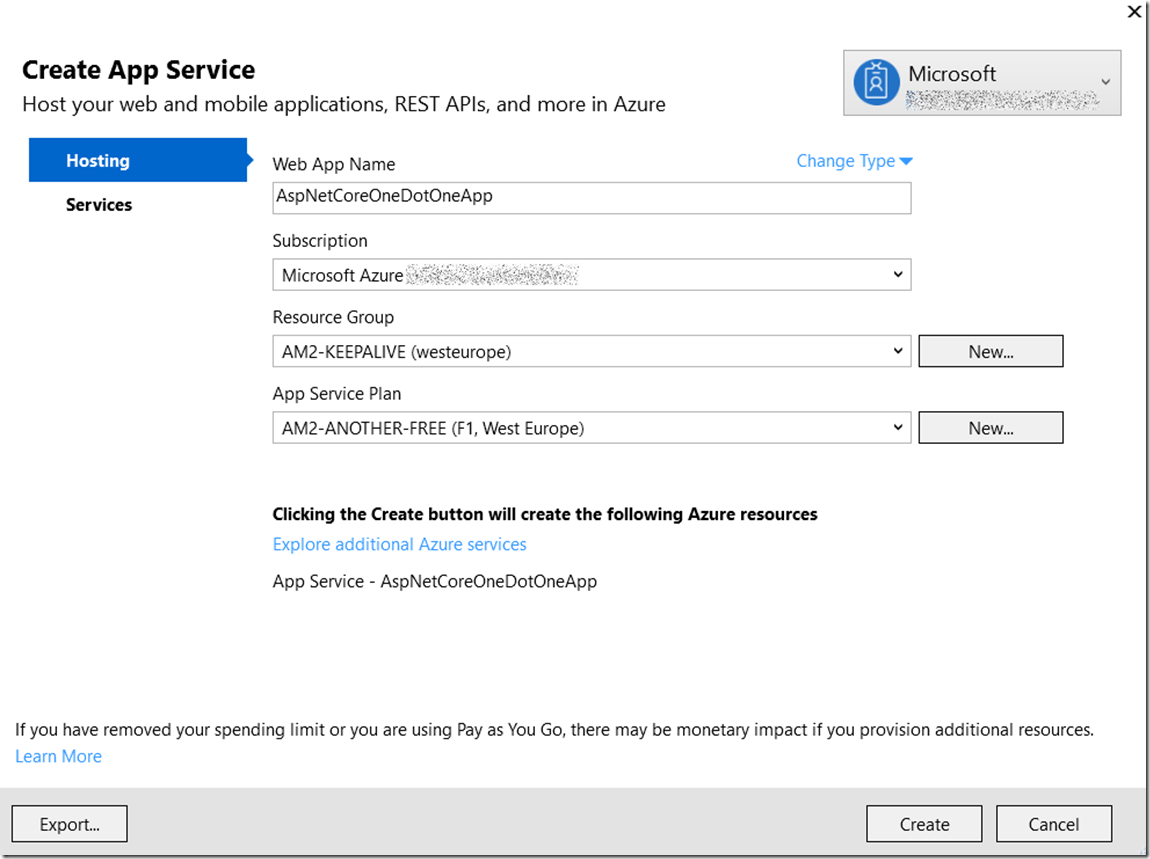
Figure 8, deploy an ASP.NET Core 1.1 Web Application to an Azure App Service Web App
Deploy to the Azure App Service
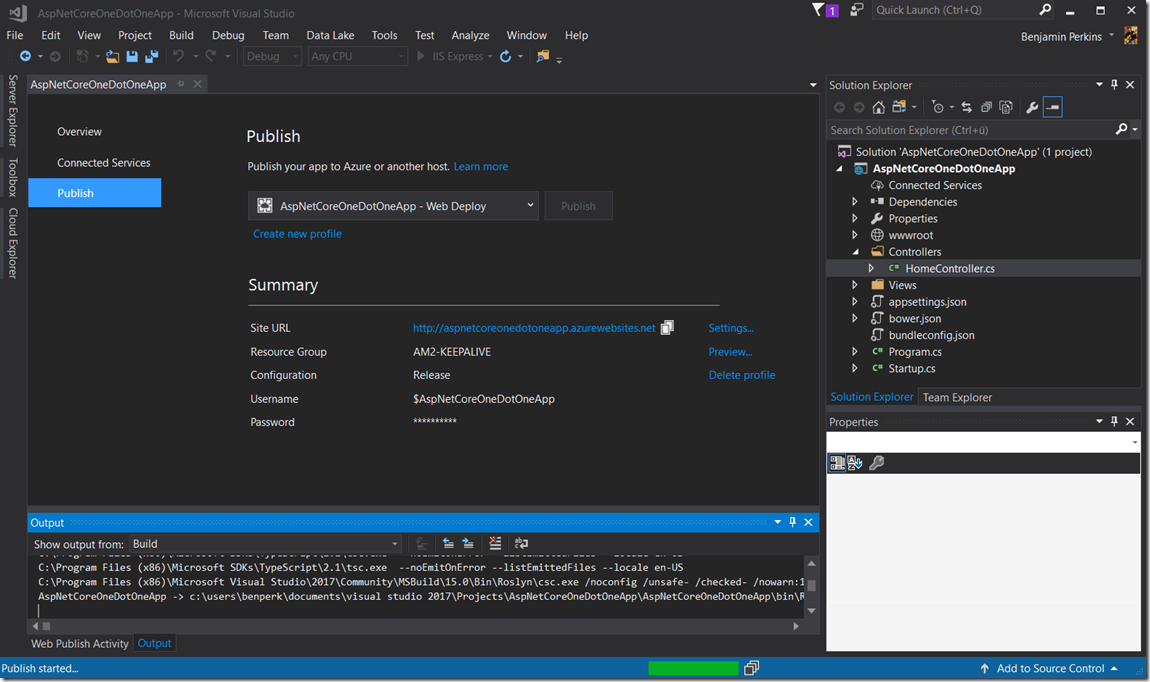
Once you press the Create button seen in Figure 7 or Figure 8, the Azure App Service will get published. As shown in Figure 9 and Figure 10, the ASP.NET Core 1.1 Web Application is deployed and then is opened in your default browser.
Figure 9, publishing an ASP.NET Core 1.1 Web Application to an Azure App Service Web App 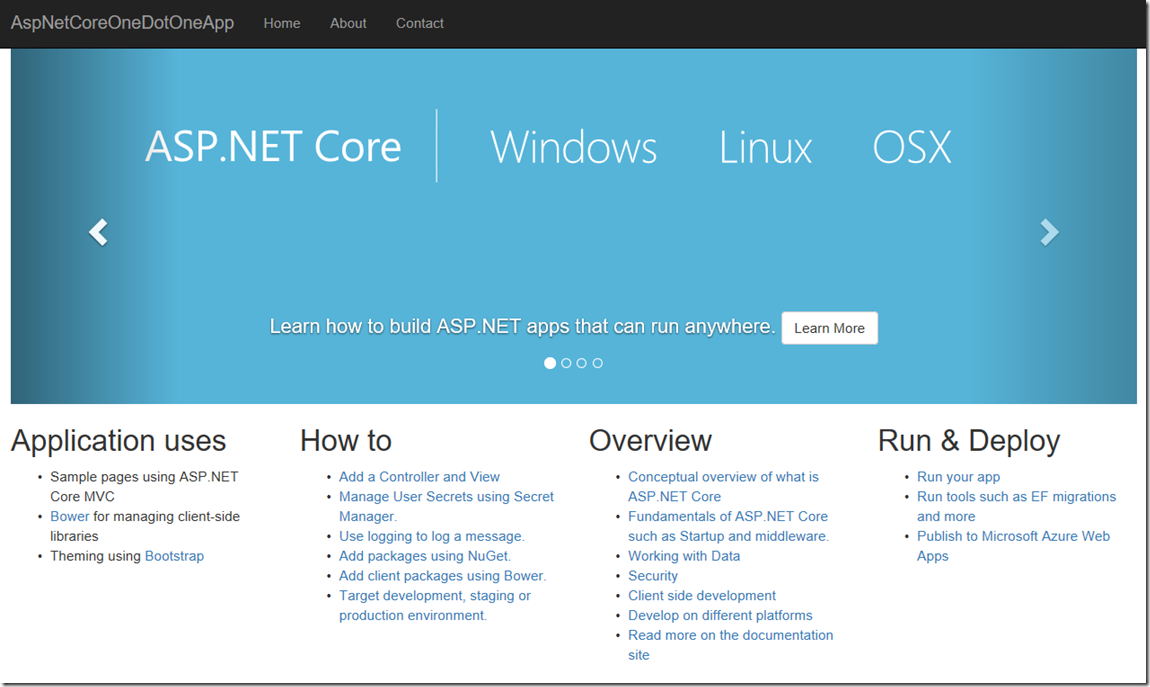
Figure 10, published an ASP.NET Core 1.1 Web Application to an Azure App Service Web App
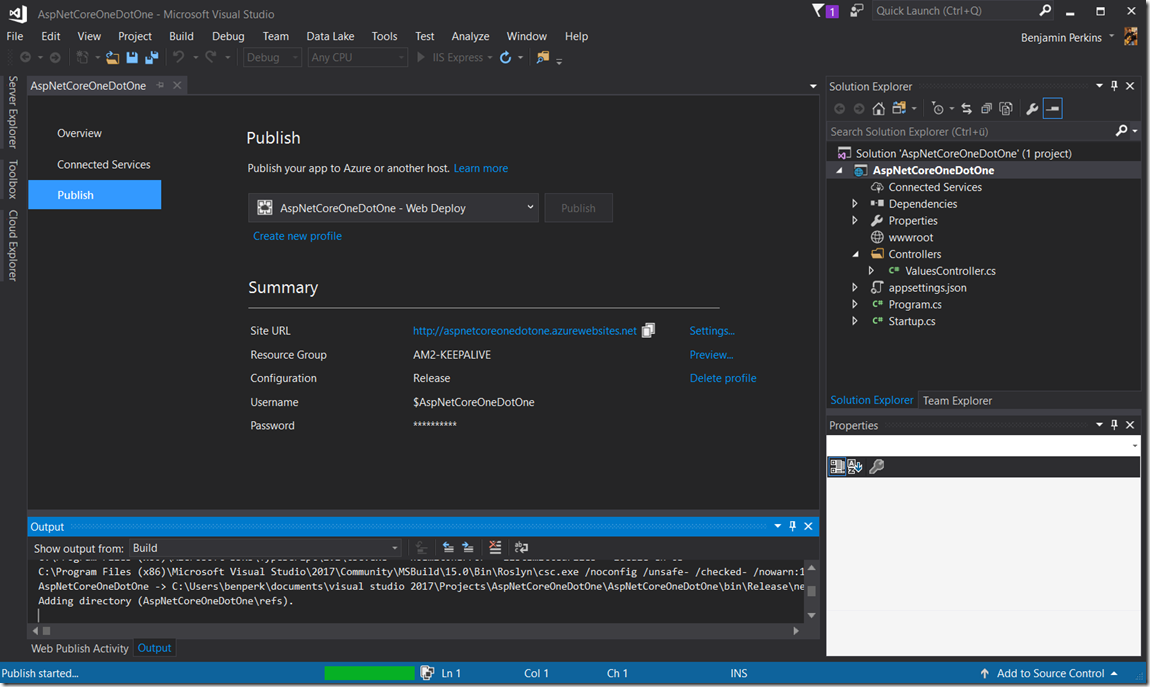
The same can be seen in Figure 11, that after pressing the Create button, the deployment begins. Once completed the default root site of the ASP.NET Core 1.1 Web API is opened and results in a 404 as seen in Figure 12.
Figure 11, publishing an ASP.NET Core 1.1 Web API to an Azure App Service Web App, 404
404 when accessing ASP.NET Core 1.1
This is because there is no default document provided with a default ASP.NET Core 1.1 (or any Web API that I am aware of). Therefore, when you attempt to request a default file, it will not be found as it is not there and the Web Service (commonly IIS) will return a 404. Similar to that shown in Figure 12.
Figure 14, Accessing an ASP.NET Core 1.1 Web API results in a 404
To resolve the 404 when accessing an ASP.NET Core 1.1 Web API you need to append the URL with /api/values (if deploying a simple template) or instead of values add the name of the method, see figure 15.
Figure 15, How to fix 404 when accessing an ASP.NET Core 1.1 Web API results in a 404
NOTE: on a totally different topic, 404.0 is a Not Found HTTP status code, note the 0 as the HTTP sub status. 404s have a lot of sub-status codes, so if this one does not fix it, the next step is to look at the HTTP sub-status code and make sure it is 0 or something else and then proceed to troubleshoot that specific error.
