Adding users to an Azure Active Directory domain
I am going to do a self study to learn how to implement authentications and authorization into my ASP.NET application using Azure Active Directory. Pretty much this, but with out using the AUX (OLD) portal (if now possible). Although it has already been done, I like to do it myself and I like to document it so that the word gets out more and maybe I will discover something along the way worth sharing.
The first thing I needed was an Azure Active Directory domain. You get one of these when you create an O365 or an Azure subscription, it is formed something like *.onmicrosoft.com where * is the unique identifier you chose when creating the subscription. You can also create one within the portal as well, if you want additional ones.
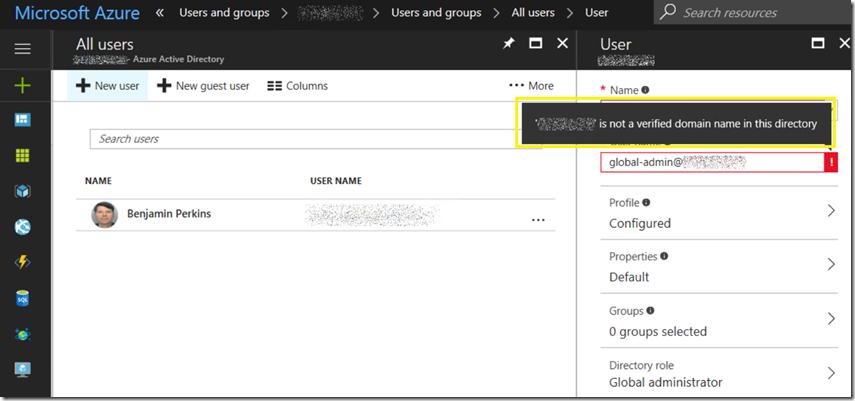
After I created my Azure Active Directory domain I wanted to then add some users to it so that they could be authenticated and then authorized for accessing specific features and data within an application I will link to from here once built. It was a no brainer to navigate to the Azure Active Directory blade, then select Add User, but then I got this error, once I tried to add a user, I wanted to use a custom domain instead of the *.onmicrosoft.com domain, also shown in Figure 1.
‘domain’ Is not a valid domain name in this directory
Figure 1, how to add users to a custom Azure Active Directory domain
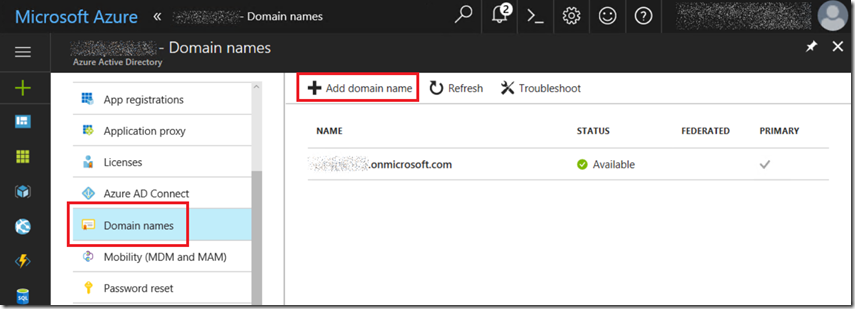
Turned out to be pretty easy, just click on the Domain names item in the navigation bar which opens the Domain names blade, as seen in Figure 2. The select the + Add domain name button.
Figure 2, how to add configure a custom domain with your Azure Active Directory domain
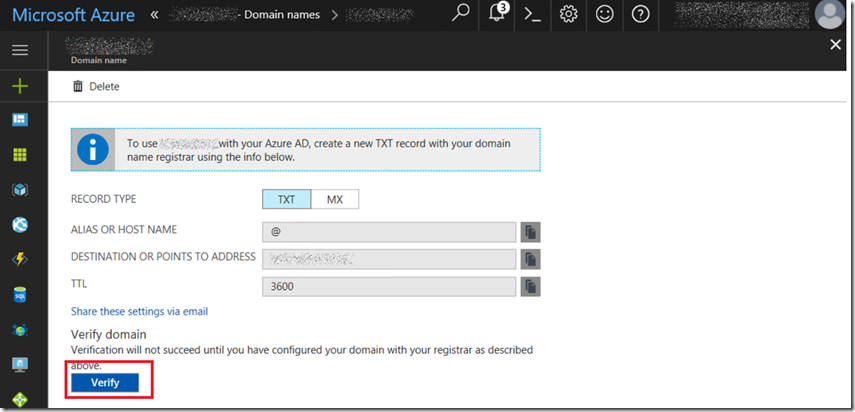
Then you need to add a TXT record with the value stored in the DESTINATION OR POINTS TO ADDRESS via your DNS hosting providers interface, as seen in Figure 3.
Figure 3, how to verify configure a custom domain with your Azure Active Directory domain
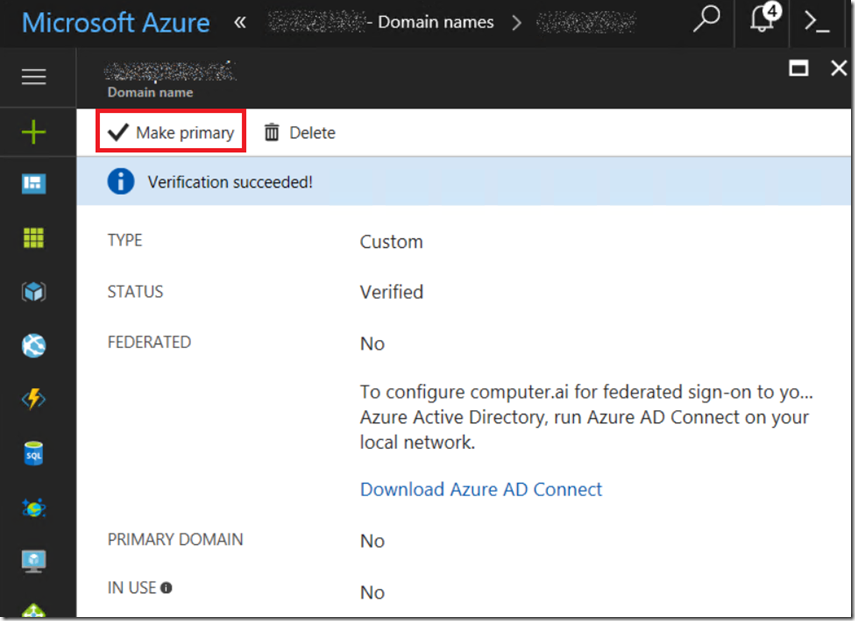
Once verified, I made the custom domain the primary one by clicking the Make primary button shown in Figure 4.
Figure 4, how to use a custom domain with your Azure Active Directory domain
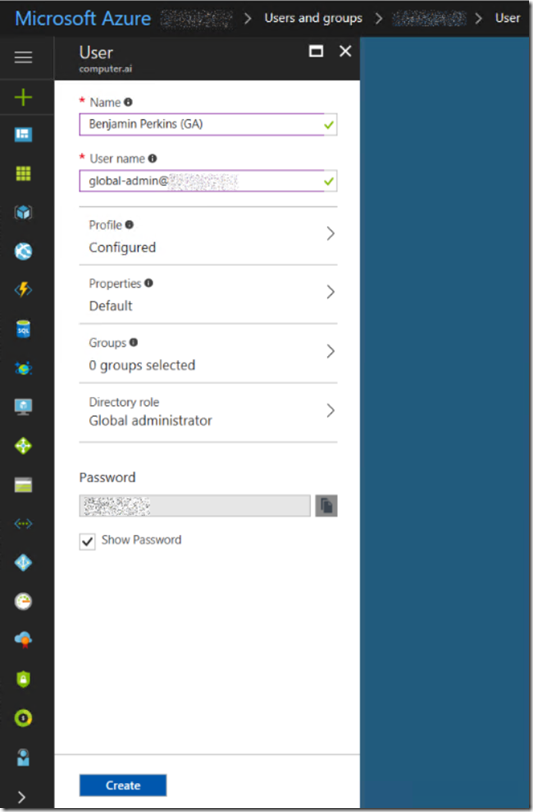
Then I was able to add users to my custom Azure Active Directory domain using a user name that included the custom domain name, Figure 5.
Figure 5, how to use a custom domain with your Azure Active Directory domain
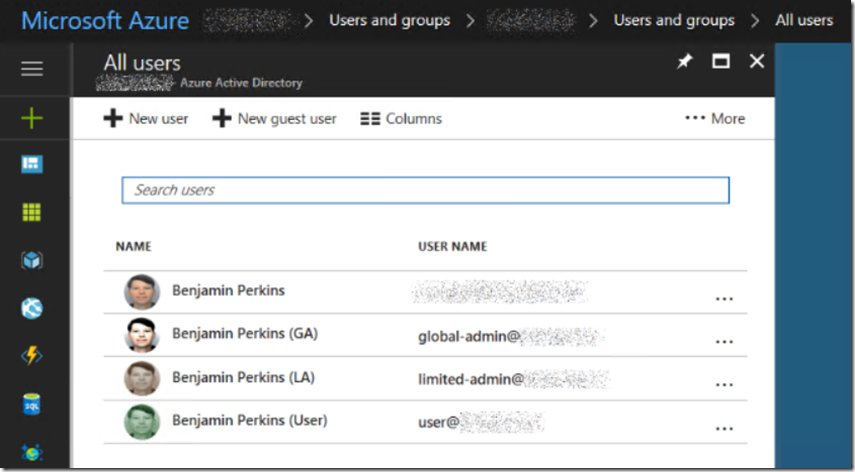
I added a few users as you can see in Figure 6. There were 3 directory roles, User, Global administrator and Limited Administrator and I created a user for each of those role types. A full explanation is provided here. Don’t get these roles confused with the authorization groups / roles I will manually create/access from within the application itself. In contrast, these roles here allow those users to perform certain actions within the Azure Portal and NOT within an application running on the Azure platform, you or a developer must design, develop, test and implement that yourself.
Figure 6, how to use a custom domain with your Azure Active Directory domain
Now let’s create a few groups here. These groups will allow different levels of access to a specific feature within the application built here.
