Azure SQL DB in 1. 2. 3.
Platform as a Service (PaaS) solutions in Azure provide significant benefits that allow our customers to focus their efforts on providing a solution to their business rather than spending a significant effort patching, securing, and evergreening their traditional infrastructure. Azure SQL Database, for example, provides a database as a service. With Azure SQL Database, a DBA no longer needs to upgrade SQL, patch SQL, or maintain a SQL cluster, as all of this will be managed by Microsoft. In addition to these benefits, you’ll also be guaranteed a 99.99% SLA, your backups will be built-in as part of the solution, and you’ll gain access to new capabilities that you didn’t have in your traditional SQL environment, such as threat and anomaly detection, self-tuning, geo-replication, and zero downtime performance scaling whether you need more power or you need to scale down during low activity periods.
Shifting from a traditional SQL Server environment to Azure SQL Database (PaaS) has many benefits as already stated, but this shift does require some planning to understand what on-premises databases will be supported and the performance those databases require once they are running in the platform. Fortunately, Microsoft has provided a number of tools to help with this transition, and we’ll be reviewing those tools and processes here in three steps.
Step 1 – Use the DTU Calculator to estimate the service tier and performance level needed in Azure SQL Database (PaaS).
The first step on the journey to Azure SQL Database begins with understanding how your SQL performance profile maps to the various DTU choices available to you in Azure. Wait, what is a DTU? A Database Transaction Unit is a measure of performance that Microsoft Azure uses to calculate the performance capabilities of a DB using a blended measure of CPU, memory, and I/O (data and transaction log I/O). You can read all about it here.
To begin assessing your SQL Server instance, you’ll need to collect the following metrics over a period of time that represents what would be typical for your workload. Once these metrics are captured, you’ll simply upload the results to get an estimated requirement of DTUs.
- Processor - % Processor Time
- Logical Disk - Disk Reads/sec
- Logical Disk - Disk Writes/sec
- Database - Log Bytes Flushed/sec
Fortunately, we’ve provided a very simple script to gather these specific metrics for an hour. You can find all the details of the script, the process, and where to upload the results at Azure SQL Database DTU Calculator. You can also adjust how long the script gathers performance data by modifying the -MaxSamples parameter from 3600 seconds (1 hour) to the number of seconds you prefer.
Get-Counter -Counter $counters -SampleInterval 1 -MaxSamples 3600 | Export-Counter -FileFormat csv -Path "C:\sql-perfmon-log.csv" -Force
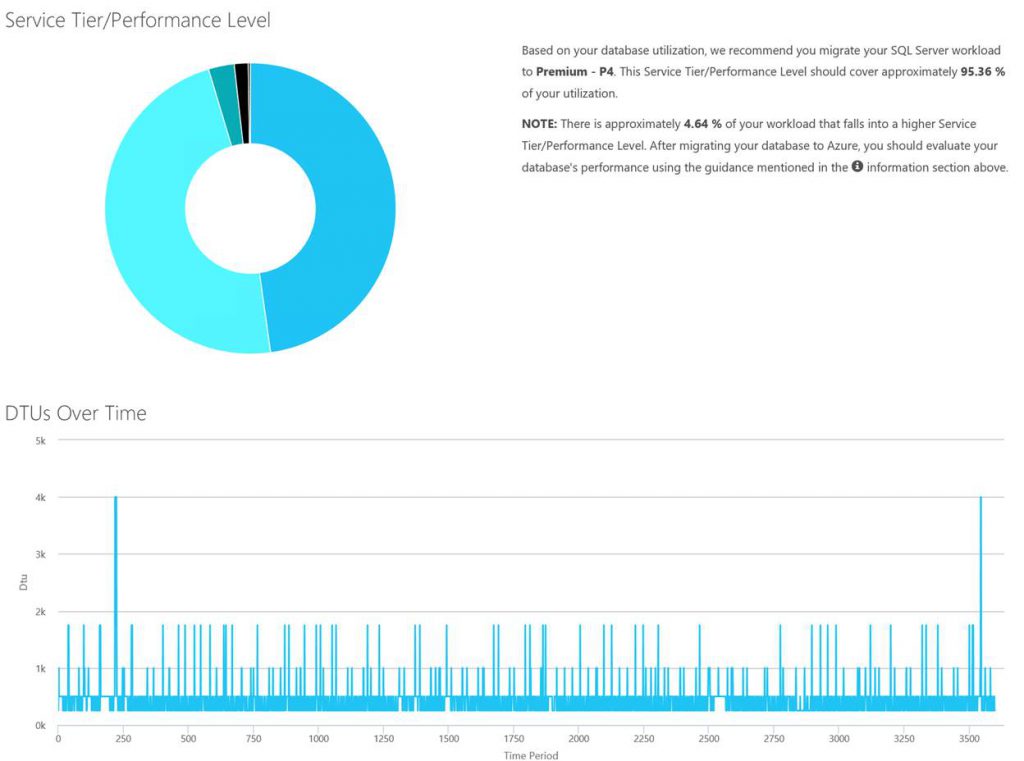
Once the script has finished gathering data, you’ll simply specify the number of cores for the server SQL Server is running on and upload the resulting CSV file to get output very similar to the example below. The output shows the recommend service tier, and the percentage of the utilization that would fit into this tier. In addition, there is a link to view more details that includes additional information that can be used to determine if the number of DTUs required is being driven by CPU, IOPS or logging.
Additional information on the DTU calculator and how to interpret the results of the DTU calculator can be found here:
Introducing the Azure SQL Database DTU Calculator Introducing the Azure SQL Database DTU Calculator: Part 2 Analyzing the Azure SQL Database DTU Calculator Results
Note: The DTU Calculator also references Elastic Databases. You can think of Elastic Databases as simply groups of databases that you may upload to Azure and provide a DTU for them collectively, this is known as an eDTU (Elastic Database Transaction Unit). The benefit of an Elastic Database Pool is that you can manage all databases in a pool using a single measurement of performance, and then you can configure the pool to guarantee both an individual and collective performance setting. Read more here.
Step 1 or 3 Complete! Now that you have valuable performance insights about your SQL Databases, it’s time to learn more about compatibility.
Step 2 – Use the Database Migration Assistant (DMA) to review any features of your database that may block migration to Azure SQL Database before you migrate, to suggest methods for mitigating issues, and then migrate those databases!
There are some SQL features that aren’t currently offered in Azure SQL Database, so as a second step, you’ll want to investigate those features as you plan your migration. The Database Migration Assistant (DMA) is a free download that you can use to scan your SQL Databases and get a nice report of any items you’ll need to address.
Note: A newly announced service known as “Azure SQL Managed Instance“, currently in preview, offers nearly 100% of the features available in a traditional SQL Server, so if you find your database has features that aren’t supported and cannot easily be adapted to Azure SQL Database, this will be the offering you’ll want to learn more about. This service will include features like SQL CLR, SQL Server Agent and cross-database querying to name a few.
To get started, you’ll want to get your hands on a copy of the DMA, which you can download here, and then follow these step-by-step instructions to assess your server.
Be sure to choose the option for ‘Assessment’ as depicted below, provide a project name, and then choose SQL Server as source, and Azure SQL Database as target. Click create.
Next, leave the defaults for report type and click next in the lower right corner.
Provide a SQL Server Name, choose the appropriate authentication and connection properties, and then click Connect.
A list of discovered databases will be presented. Select either the server name to select all, or choose the individual databases that you want to scan, then click add.
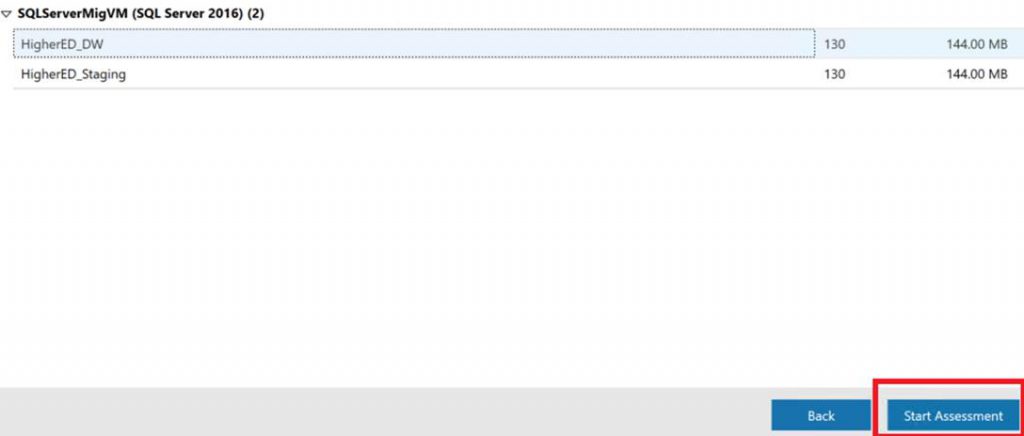
The selected databases will now be reflected and you can click ‘Start Assessment’.
The assessment time will vary based on the number of databases and their sizes. Ultimately, the assessment will finish and you’ll be presented with the results, as depicted below. Simply click on the findings to get issue details and impacted objects.
Reviewing the assessment results for a small number of databases can be accomplished using the DMA. The DMA can export assessment results to a file in either .json or .csv format. The assessment results export file can then be imported into Power BI to make it easier to understand the results when assessments are run on a large number of databases. Dustin Ryan, a Data Platform and AI Technical Solutions Professional working on the US Education STU, has published a blog post and Power BI template for working with DMA assessment results export files that can be found here. Dustin’s DMA Assessment Power BI report can help you quickly identify databases and servers based on their level of compatibility allowing you to quickly decide which databases are good candidates for migration. .
How do I migrate?
Once you’ve determined that a database can be migrated to Azure SQL Database, how do you actually get it there? This depends on whether you can afford downtime during a copy, or whether you need to replicate your data to Azure SQL Database to reduce any outage windows. In both cases, you’ll find all the details here.
An additional option, the Azure Database Migration Service PREVIEW was added on November 15th, 2017. The Azure Database Migration Service provides a single comprehensive service based approach to moving on-premises SQL Server databases to Azure SQL Database.
Hopefully you were able to both assess your database(s) and also migrate to Azure SQL Database. That’s it, Step 2 is complete!
Step 3 – Use built-in features for monitoring and improving performance for the databases that have been migrated to Azure SQL Database. Azure SQL Database DTUs can be scaled up or down based on the results.
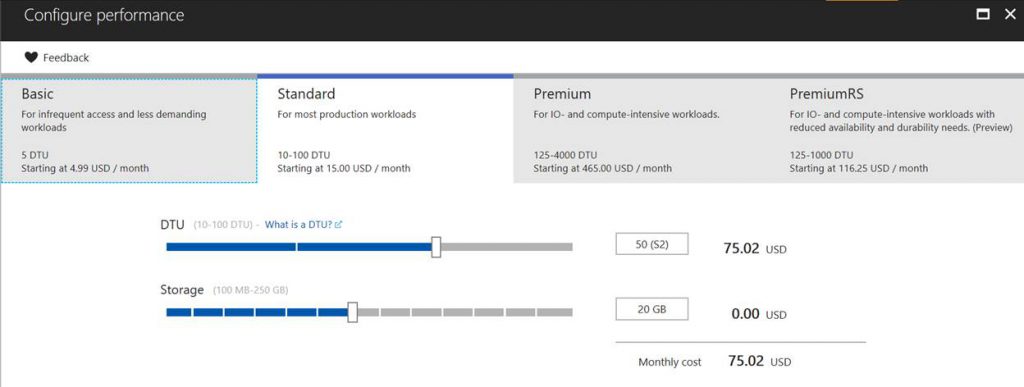
At this point you’ve successfully migrated a database or many databases to Azure SQL Database and you want to better understand the performance of those databases for the DTU choices you’ve made based on recommendations from the DTU Calculator. Now it is time to take advantage of the built-in features of Azure SQL Database for monitoring and improving performance. One key feature is Query Performance Insight, which provides deeper insight into the performance of your databases over time including: DTU consumption, Top Queries by CPU/Duration/Execution count, the ability to drill down into details of queries and the ability to review performance tuning actions performed by the SQL Azure Database Advisor. Based on the feedback from Query Performance Insights and/or changes in storage requirements, the service tier for each database can be scaled up or down through the Azure Portal, PowerShell, Azure CLI or T-SQL.
That’s It! Migrating to Azure SQL DB in 1. 2. 3.
If you have additional questions about this post or have follow-up questions, please post them below.


