Step 3: Set Your Form Properties
Note
This article applies to Visual Studio 2015. If you're looking for the latest Visual Studio documentation, see Visual Studio documentation. We recommend upgrading to the latest version of Visual Studio. Download it here
Next, you use the Properties window to change the way your form looks.
 For a video version of this topic, see Tutorial 1: Create a Picture Viewer in Visual Basic - Video 1 or Tutorial 1: Create a Picture Viewer in C# - Video 1. These videos use an earlier version of Visual Studio, so there are slight differences in some menu commands and other user interface elements. However, the concepts and procedures work similarly in the current version of Visual Studio.
To set your form properties
Be sure you're looking at Windows Forms Designer. In the Visual Studio integrated development environment (IDE), choose the Form1.cs [Design] tab (or the Form1.vb [Design] tab in Visual Basic).
Choose anywhere inside the form Form1 to select it. Look at the Properties window, which should now be showing the properties for the form. Forms have various properties. For example, you can set the foreground and background color, title text that appears at the top of the form, size of the form, and other properties.
Note
If the Properties window doesn't appear, stop your program by choosing the square Stop Debugging button on the toolbar, or just close the window. If the program is stopped and you still don't see the Properties window, on the menu bar, choose View, Properties Window.
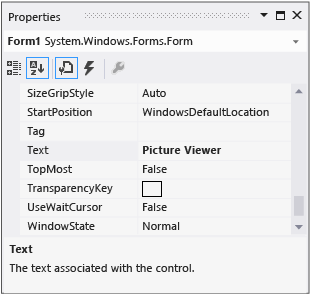
After the form is selected, find the Text property in the Properties window. Depending on how the list is sorted, you might need to scroll down. Choose Text, type Picture Viewer, and then choose ENTER. Your form should now have the text Picture Viewer in its title bar, and the Properties window should look similar to the following picture.
 Properties window
Note
Properties can be ordered by a Categorized or Alphabetical view. You can switch between these two views by using the buttons on the Properties window. In this tutorial, it's easier to find properties through the Alphabetical view.
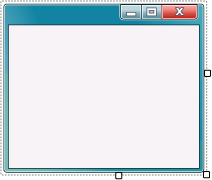
Go back to Windows Forms Designer. Choose the form's lower-right drag handle, which is the small white square in the lower-right of the form and appears as follows.
 Drag handle
Drag the handle to resize the form so the form is wider and a bit taller.
Look at the Properties window, and notice that the Size property has changed. The Size property changes each time you resize the form. Try dragging the form's handle to resize it to a form size of approximately 550, 350 (no need to be exact), which should work well for this project. As an alternative, you can enter the values directly in the Size property and then choose the ENTER key.
Run your program again. Remember, you can use any of the following methods to run your program.
Choose the F5 key.
On the menu bar, choose Debug, Start Debugging.
On the toolbar, choose the Start Debugging button, which appears as follows.
 Start Debugging toolbar button
Just like before, the IDE builds and runs your program, and a window appears.
Before going to the next step, stop your program, because the IDE won't let you change your program while it's running. Remember, you can use any of the following methods to stop your program.
On the toolbar, choose the Stop Debugging button.
On the menu bar, choose Debug, Stop Debugging.
Choose the X button in the upper corner of the Form1 window.
To continue or review
To go to the next tutorial step, see Step 4: Lay Out Your Form with a TableLayoutPanel Control.
To return to the previous tutorial step, see Step 2: Run Your Program.