Creating an A4SWIFT Send Port
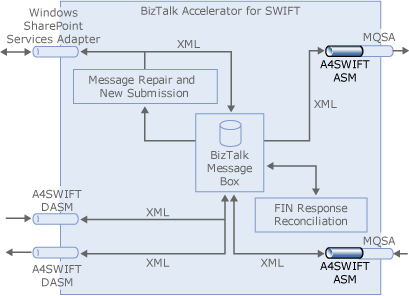
You must create a send port to enable A4SWIFT to send a message to the SWIFT network, as shown in the following figure. This send port will send flat file messages to an outbound file folder. This send port is designed to work with the Message Repair and New Submission feature.

Summary
Create and start a static one-way send port with the following properties and components:
| Property/Component | Setting |
|---|---|
| Send port | Static one-way port |
| Transport type | FILE |
| Destination folder (Address URI) | Name of the folder that you want to send messages from |
| File Name (Address URI) | %MessageID%.txt |
| Filters | As described in the table below |
To add the sent port
In the BizTalk Server Administration Console, right-click Send Ports, point to New, and then click Static One-way Send Port.
In the Send Port Properties dialog box, in the Name box, type a name for the send port.
In the Transport section, for the Type box, click the drop-down list, and then select FILE.
Click the Configure button to the right of the Type drop-down list.
In the FILE Transport Properties dialog box, click Browse.
In the Browse For Folder dialog box, move to the folder that you want to send messages from. Click OK.
Note
If this folder does not exist, you can create it using the Make New Folder command.
In the File name box, type %MessageID%.txt, and then click OK.
In the Send Port Properties dialog box, click the drop-down list for the Send pipeline box, and then select your custom send pipeline.
In the left pane, click Filters, and then do the following:
Use this To do this Property Select BTS.Operation. Operator Select ==. Value Type A4SWIFT_MRSRCompleted. Group Select Or. Property Select BTS.Operation. Operator Select ==. Value Type A4SWIFT_MRSRFailed. Group Select Or. Property Select Microsoft.Solutions.A4SWIFT.Property.A4SWIFT_Failed. Operator Select ==. Value Type True. Click Apply, and then click OK.
In the Send Ports pane, right-click the send port, and then click Start.