Overview
Your healthcare agent service instance includes localization tools that allow you to easily offer your bot in multiple languages. By localizing your scenarios, your bot instance can serve an international audience.
The healthcare agent service allows you to localize your custom scenarios and extend the localizations for the built-in scenarios already included in your bot instance.
Important
The Public preview of the generative AI features are currently only supported in English. Some generative AI features may provide answers in other languages, but these have not been tested and validated by our team.

With the healthcare agent service localization feature, you define localized strings at design time and the conversation text is displayed in the correct language at runtime (based on a locale variable passed to your bot).
Getting started with the localization manager
Localized strings are created and managed in the localization manager. A localized string is a dynamic string that has a unique string ID and a set of one or more associated string values (one for each language). A localized string must include an en-US (English US) value to be valid.
To open the localization manager navigate to Language > Localization in the management portal

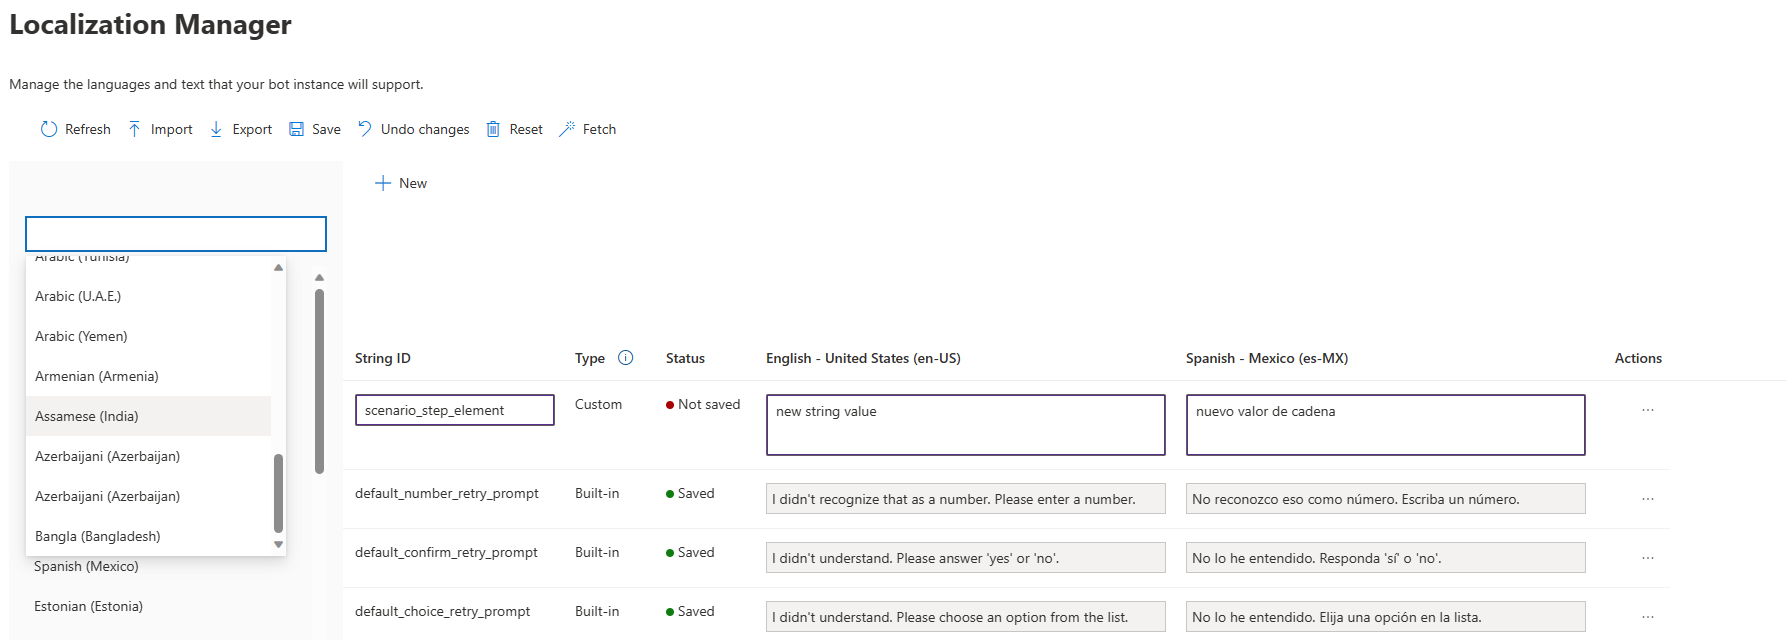
There are different tools available in the panel to help you create and manage your localized strings. Let's review the different controls:
- Refresh: Reloads the page to reflect the last version of the string table saved in the localization manager (unsaved changes are lost).
- Import: Import a valid localization file. All changes are staged in the localization manager and you can review the impact of the import before you save the changes.
- Export: All the strings in the localization manager are exported as an Excel file. There will be a column for the string ID and another column for each of the languages. The exported strings are based on the localization context and the search filters applied to the string table.
- Save: When you add or modify localized strings in the localization manager they're staged (and highlighted in purple) in the localization manager before they're committed to memory. This allows you to review the changes before you save them.
- Undo Changes: Discard the saved changes and revert to the currently saved version of the string table
- Reset: Deletes all the strings in the string tables, except the default strings used in built-in scenarios (in the system localization table). Make sure to export the string tables if you would like to keep a copy.
- Fetch: Fetch is a helpful tool that automatically imports all strings from the statement or prompt step defined in your custom scenarios. Strings are generated with a suggested ID, but you can modify or discard specific strings before saving them in the string table.

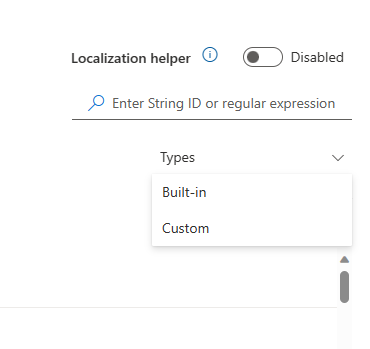
- Localization helper tool: For backwards compatibility healthcare agent service supports the previous method of localization with the "Localization helper tool". When enabled this converts text fields to a picklist in the scenario visual authoring tool. The tool helps you search for strings from the localization manager and maps them to scenario steps. We don't recommend this method for custom scenarios, however for mapping your own localized strings to built-in scenario configurations, this method is still required.
- Search localization table: Use a regular expression or text to filter the strings IDs in the table. This is useful when you use a meaningful naming convention for your string IDs. This filter is applied to the exported file.
- Filter on localization Type: Set either the "System" or "Custom" localization context to display the respective string tables. The system context is for default strings in the built-in scenarios and the custom context if for strings in your custom scenarios.

The localization tables provide a convenient UI for adding and editing the localized strings:
- Add locale: Select a language from the list of supported valid locales and add it the localization table
- Add new string (+ New): Add new strings in the currently selected language. You can also edit an existing string by selecting the relevant text field and saving the changes.
Using localized strings
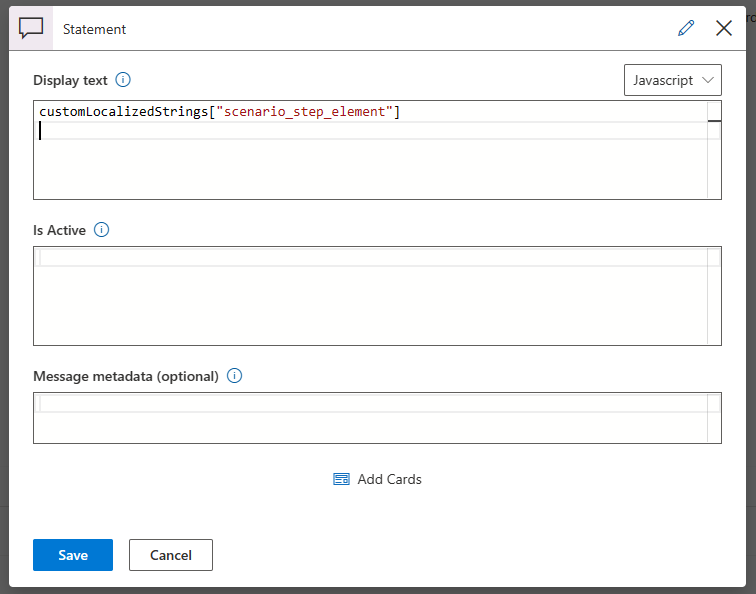
You can easily use localized strings in your custom scenarios by using the following function in any field that accepts string expressions. For example, use the function in statements, prompts and action steps:

There's a function for each localization context (system and custom):
customLocalizedStrings[stringID:string]
systemLocalizedStrings[stringID:string]
You should pass the string ID to dynamically display that string in your scenario based on the locale passed to the bot at runtime. Use the Keyboard shortcut CTRL + SPACE to display autocomplete for your string IDs and their en-US value.
We also support a legacy function for displaying localized strings:
session.getCustomLocalizedString(stringID:string, fallbackToEnglish?:boolean = true)
session.getSystemLocalizedString(stringID:string, fallbackToEnglish?:boolean = true)
You can also pass an optional Boolean parameter fallbackToEnglish. This impacts the return value in cases the string value doesn't exist at runtime. When using the new localization object syntax passes this argument as false
| Scenario | fallbackToEnglish = true |
fallbackToEnglish = false |
|---|---|---|
| String ID doesn't exist | Returns undefined | Returns undefined |
| Language doesn't exist | Returns English String Value | Returns NULL |
Note
The customLocalizedStrings function can only be used in the scenario authoring tool. To use localized strings in the healthcare agent service configuration pages you should use the Localization Helper Tool.
Built-in scenario localization
healthcare agent service includes built-in scenarios that can be used out of the box without configuration. These scenarios can be modified in the management portal configuration pages.
The default strings for built-in scenarios are localized out of the box*. The default strings are available in nine supported system languages. The system languages include:
- en-US (English United States)
- en-UK (English United Kingdom)
- fr-FR (French France)
- fr-CA (French Canada)
- es-ES (Spanish Spain)
- es-MX (Spanish Mexico)
- zh-CN (Chinese Simplified)
- it-IT (Italian Italy)
- de-DE (German Germany)
The localized default strings and their translations are hardcoded (read-only). To use your own localized strings in the built-in scenarios you should extend the system string table with other string IDs and other languages.
To map built-in scenario configurations to your own string IDs you should use the "Localization Helper Tool".

With the tool enabled you can navigate to the healthcare agent service configuration pages and search for localized strings from the localization manager based on their en-US string value. For example, if you wanted to modify built-in greeting scenario, you could create a localized system string "Hi in English" and start typing the configuration field to see the autocomplete suggestions in the field.

Custom scenario localization
Custom scenarios are localized using the localization tools available in the management portal. Custom scenarios can be translated into any of the supported languages. View the full list of supported locales

Creating localized strings
There are several methods for creating and adding localized strings to the localization manager.
- Add strings in the localization manager UI: This method allows you to quickly add a new string or locale. Simply edit the string directly in the text fields and then save your changes. You can also add new strings or new locales in any of the supported locales
- Import localization file: Multiple strings and multiple languages can be added in bulk. Export a localization file to easily send strings to external translators and then import their translations back into the localization manager.
- Fetch the strings from your custom scenarios: This method allows you to initially author your scenarios in English (en-US). When you decide that you would like to localize you can automatically fetch all the strings from your scenarios. All the strings in the statement and prompt steps are imported into the localization manager with generated strings IDs and add the localized strings values for other languages.
Localization file import and export
A localization file (Excel) is a table of translated strings that can be imported or exported from the localization manager. If you have a large number of strings or updates this is the recommended method of managing your localized strings.
When importing a localization file into the localization manager, the changes are staged (highlighted in purple) so that you can review the impact before saving the changes. You need to use the save button to commit the changes to the string table. The strings from the imported file are merged with the existing strings in the localization table:
- Existing string IDs: The strings in localization table are overwritten with the strings from the external file.
- New string IDs The strings from the external file are appended to the localization table.
Before saving you have an opportunity to edit strings or discard specific rows that you prefer not to include.
The localization file is merged with the currently selected localization context. For example, to import strings into the system localization table, you must select the "System" toggle before import.
Import conflicts
A valid localization file has a column for the string IDs and a column for each of the languages you wish to provide. A valid localized string must have a string ID and an English value (en-US).

In some cases, the localization file import will not be successful due to conflicts in the localization file. Not all conflicts prevent import, however, sometimes the behavior may not be expected
Base language The base language for healthcare agent service is en-US (English - United States). All dynamic strings must include a value for en-US.

Strings without an en-US value prevent the localization file from importing.
Duplicate locales Duplicate locales will prevent the import from being successful. You must remove one of the duplicate locales to import the file

Duplicate string IDs won't cause the import to fail. Both strings are displayed in the localization manager, however, you will not be able to complete the save operation without changing one of the string IDs

Invalid locales Columns with an invalid locale code format will prevent successful import. The locale code should use an IETF language code and should be from the list of supported locales
Default Strings for Built-in scenarios
Default strings for built-in scenarios are read-only. It's not possible to overwrite default string and this will create a merge conflict on import. Default string IDs typically follow the naming convention built-in/<configuration_value> or <scenario_name>/<configuration_value>

If you would like to extend the localization of default strings in built-in scenarios, you can create a new dynamic string (with a different string ID) or add a new locale.

String IDs and Regex search
To create a new localized string, a unique string ID is required. You can provide the string ID explicitly or one will be generated on Import (or Fetch). We recommend using a naming convention for string IDs so that you can easily filter the string table using the Regex search bar.
Localized JavaScript Expressions
Typically a localized string contains one or more primitive string values (for each of the languages). Advanced users can also assign a JavaScript expression to the localized string. The string will first be localized and then evaluated based on where in your scenario you have are calling the string.
For example, you can have a localized string value that contains an array of responses. If you use that string as the set of answers for a multi-choice prompt, the answers displayed will use the array in the correct language based on the locale set at run time.
Setting the bot locale at runtime
Once you have built a bot that supports multiple languages you'll need to test and deploy the bot to run in one or more of the languages.
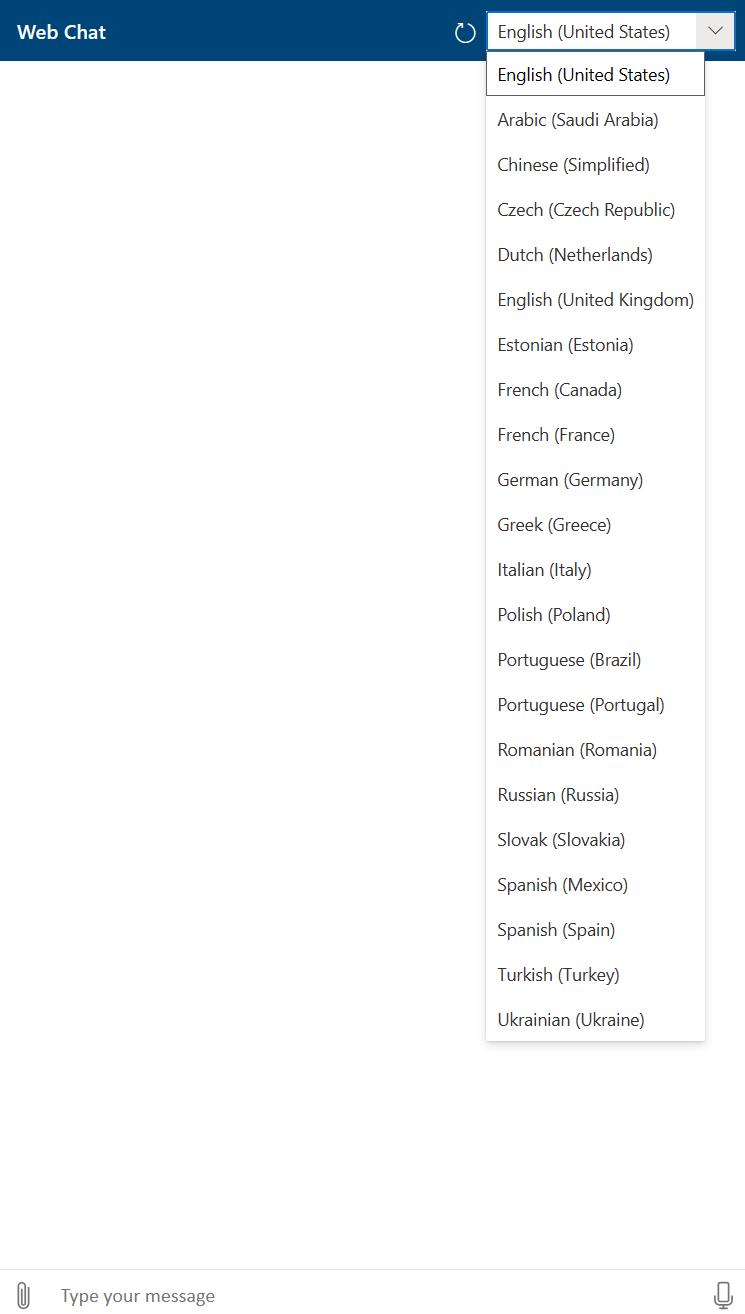
Testing locales in the Management portal You can easily test your localized bot in the management portal. Navigate to web chat icon in the primary navigation bar or open the webchat in the visual editor. Both web chats will include a list of the supported locales (locales that contain at least one string in the localization manager).
Select the locale and start testing the bot in that language.

Setting locales in the webchat container sample To set the locale using the webchat you can pass the locale variable when using the webchat container sample code
On the webpage that displays the container sample pass the locale as a URL parameter. For example: https://<your_website_name>.azurewebsites.net?locale=es-es will set the webchat to work in Spanish.
Other channels can work differently. The channel you use will determine how to pass the locale variable to the bot at runtime.
** Accessing the runtime Locale variable in your scenarios In some cases, the logic of your conversation can depend on the end users locale. For example, you can want to present Spanish speaking doctors and clinics, if the end-user is interacting with the bot in Spanish.
The locale currently in use is exposed via a session variable in the scenario editor. Use conversation.locale as the variable in a flow control step to branch based on the end-users locale.