Visual Studio Code: criando um projeto MVC 6
The purpose of this article is to present the Visual Studio Code, a new cross - platform code editor available from Microsoft, offering an alternative to the development of .NET solutions in environments such as Mac OSX and Linux (or even from Windows itself ).
Introduction
Announced at the end of April / 2015 and still in its Preview version, Visual Studio Code can be defined as a text editor, but with additional capabilities when compared to tools like Sublime and Brackets . In addition to the C # language, Visual Studio Code has features that make it easier to edit code files based on technologies such as TypeScript, JavaScript, HTML, CSS, Less, Sass, and JSON.
Among the features offered by this new application and which differentiate it from a conventional editor are:
- The ability to use IntelliSense;
- Shortcuts for running a .NET application;
- A debugging mechanism.
In the following sections it will be shown how the Visual Studio Code can be used in the implementation of a new MVC 6 / ASP.NET 5 application, in order to present more details of some of the existing functionalities.
Configuring the development environment
Before you can deploy a project from Visual Studio Code, you will need to install this tool and perform a series of configuration adjustments.
Firstly, you should access the following link in order to download the setup file (there are versions for Windows, Mac OSX and Linux; for the example described here, a Windows virtual machine was used):
https: // code.visualstudio.com/
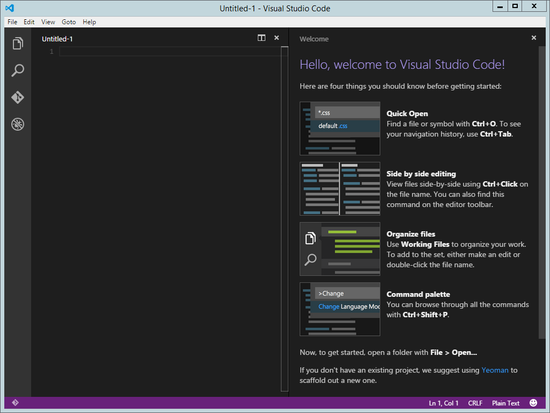
In the next figure you can see the initial screen of the Visual Code, just after the installation:
As a first step will be configured to use the .NET SDK Manager (DNVM), a manager responsible for installing and updating the runtime used in running applications (accessible from a command known as "DNX").
Type the following command line in the PowerShell utility on Windows:
& {$ Branch = 'dev'; iex ((new-object net.webclient) .DownloadString ('https://raw.githubusercontent.com/aspnet/Home/dev/dnvminstall.ps1'))}
The result of this action can be observed in the following image, with the location of the DNVM tool having been registered in the PATH variable of the machine (following as default path "% USERPROFILE% \ dnx \ bin" in Windows): DNVM installation presents differences in systems Linux and OS X, with more details can be found through the links: https://github.com/aspnet/home#os-x https://github.com/aspnet/home#linux

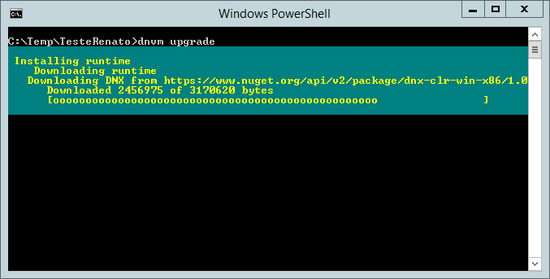
O próximo passo será a execução de um comando atualizando o DNVM (ainda no Windows PowerShell), de forma a habilitar o uso do utilitário DNX com aplicações ASP.NET:
dnvm upgrade
Este processo de atualização pode ser observado na seguinte imagem:
Também será necessária a instalação do runtime Node.js, para que se possibilite com isto o uso das seguintes ferramentas:
- npm: utilitário de linha de comando que integra o Node.js, sendo empregado em conjunto com as soluções Bower e Grunt no gerenciamento de pacotes client-side (scripts, folhas de estilo CSS);
- Bower: gerenciador empregado na instalação e restauração de pacotes client-side (arquivos CSS e de scripts);
- Grunt: ferramenta utilizada na automação de tarefas envolvendo a manipulação de scripts e CSS;
- Yeoman: gerador que faz uso de templates para a criação de novos projetos (é a partir deste utilitário que se montará o projeto de testes).
O arquivo de setup do Node.js pode ser obtido acessando o link:
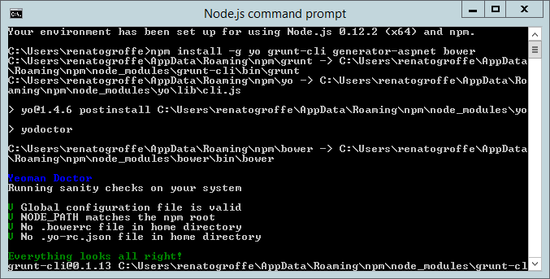
Com o Node.js devidamente instalado, executar a partir do “Node.js command prompt” a seguinte linha de comando (a finalidade com isto é tornar possível o uso dos utilitários Bower, Grunt e Yeoman na geração do projeto de testes):
npm install -g yo grunt-cli generator-aspnet bower
O resultado deste comando pode ser observado na próxima figura:
Implementando a aplicação
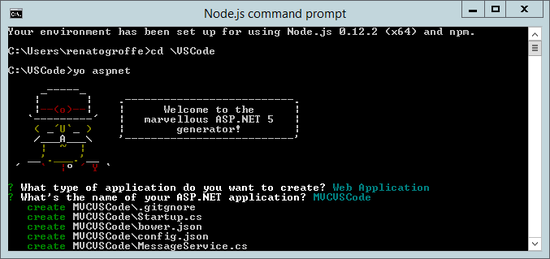
Although it allows the creation of new files linked to an application, Visual Studio Code does not have the means to generate a project from scratch. In the example shown here, this task will be done through the Yeoman utility, by executing the following command line in the "Node.js command prompt":
yo aspnet
Then select the "Web Application" option, setting the " MVCVSCode "(the project in question will be generated in the" C: \ VSCode \ "directory): As a result of this procedure a new project will be created in" C: \ VSCode \ ": The NuGet packages on which the application depends must be restored , by simply using the command line: dnu restore
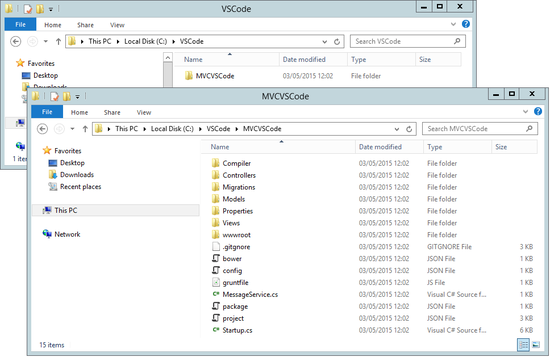
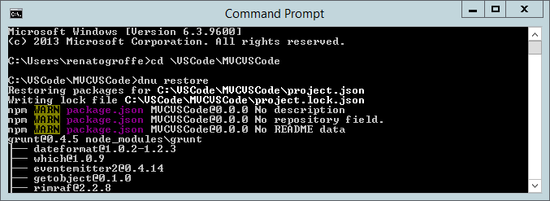
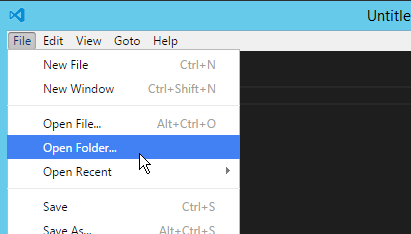
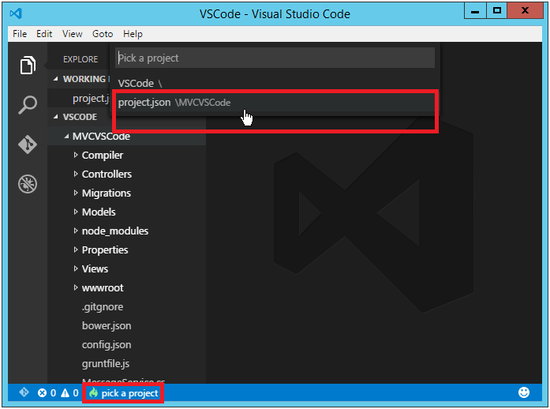
In the next image you can see the restoration of the packages required by the project: Visual Studio Code does not work with the concept of solutions, but rather directories. You will then need to select the "C: \ VSCode" folder from the "File" menu, item "Open Folder ...": Activate the "pick a project" option and then the project.json file of the MVCVSCode project : Settings will now be made in the HomeController.cs file, as you can see in the following figure (where the use of the IntelliSense feature is observed): In the next listing is the source code of the already modified HomeController class:
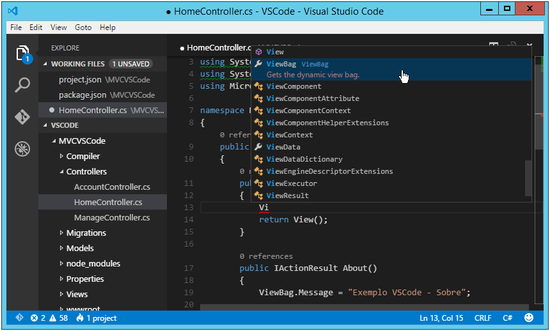
using System;
using System.Collections.Generic;
using System.Linq;
using System.Threading.Tasks;
using Microsoft.AspNet.Mvc;

namespace MVCVSCode.Controllers
{
    public class  HomeController : Controller
    {
        public IActionResult Index()
        {
            ViewBag.TesteVSCode = "Projeto editado a partir do Visual Studio Code";
            return View();
        }

        public IActionResult About()
        {
            ViewBag.Message = "Exemplo VSCode - Sobre";

            return View();
        }

        public IActionResult Contact()
        {
            ViewBag.Message = "Exemplo VSCode - Contato";

            return View();
        }

        public IActionResult Error()
        {
            return View("~/Views/Shared/Error.cshtml");
        }
    }
}
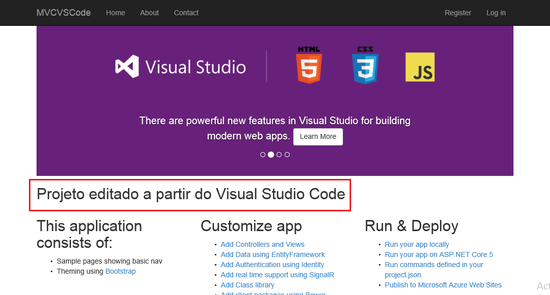
View Index.cshtml will also undergo changes, and the following statement (consuming the value associated with the ViewBag object in HomeController) is included in it:
<h2>@ViewBag.TesteVSCode</h2>
Tests
The Visual Studio Code has a shortcut for executing commands that would normally be triggered from the prompt: this is the Ctrl + Shift + P key combination .
To start running the MVCVSC application, activate the sequence Ctrl + Shift + P , then select the "kestrel" command:

At this point a window will appear, indicating that the process corresponding to the MVCVSCode application is already active:

Access via Internet Explorer the following URL:
http: // localhost: 5001 /
The application start screen will be displayed, the message resulting from the previous adjustment being highlighted:
Conclusion
This article sought to outline, in general terms, the different steps for implementing an ASP.NET 5 application with the Visual Studio Code. Although the details discussed here are based on a Windows environment, most of the procedures presented also apply to machines running Mac OSX and Linux systems.
References
Building ASP.NET 5 Applications with Visual Studio Code
https://code.visualstudio.com/Docs/ASPnet5
The Basics of Visual Studio Code
https://code.visualstudio.com/Docs/codebasics
Using Windows PowerShell
https://technet.microsoft.com/en-us/library/dn425048.aspx
Creating Scripts with Windows PowerShell
https://technet.microsoft. com / en / library / bb978526.aspx