Web Part Page and Metadata Navigation
Managed Metadata Navigation is a wonderful feature available in Share Point 2010. By using this feature users can be provide a very intuitive and easy way of filtering data in list view web parts. MetaData Navigation Panel generally sits at left side on screen. It appears when user see any view of library.
More information on this feature can be found here. Once metadata navigation has been set up, you will see filters and Navigation links in left panel.
While working on a project, I had a requirement to use Metadata Navigation on a web part page. I enabled the Managed Metadata Navigation for a document library and added a list view web part on the page. I was expecting the panel to appear on left side. But it did not. It always worked fine whenever I visited any view for the library. So what mistake did I commit? However library views also use list view web part. Everything appeared all right. After digging a bit more into it I found what I was missing and a solution.
If you visit any view, you will observe that all the views have one thing in common. They all are residing under the path “Library/<library Name>/Forms/<viewname>”. This can be viewed in SP Designer as well.
Open SharePoint designer and navigated to library by clicking “All Files”
You will see all the views are listed inside Forms folder. This is the key for navigation links and filters to appear. You need to create the web part page under the folder Forms.
Before you create the page you need to create a view which matches requirements of list view web part which is to be added to the web part page.
After creating view, go back to SP Designer and find the view under forms. Open the view and edit in advance mode. In the editor you will see lots of markup including web part zone for XSLT List view web part. Copy the entire markup.
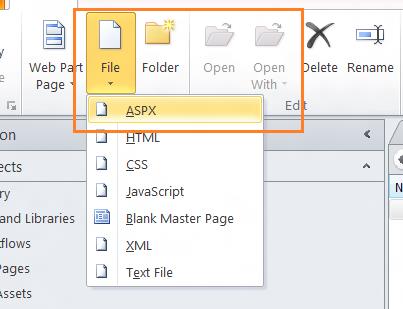
Now let’s come to the web part page. Web part pages typically consists of web part zones where one can add different web parts. Since the page has to reside under Forms folder of library, create an aspx page.

Name the page appropriately and edit in advance mode. Once the page is opened in editor, you will observer that the entire markup is editable.
Delete this markup and paste the markup you have already copied from View. Pasted markup will also be editable. Pasted markup contains only one web part zone i.e. for list view web part.
Further modify the markup and add web part zones based on your requirements. Newly added web part zones will contain place holders for other web parts on the page. Save the page and view
in browser. Now by editing page on browser you can add other web parts.

